Windows 11 is the best operating system for computers after Windows 10. Since I have upgraded to Windows 11 from Windows 10, the features of Windows 11, and other improvements are stunning. Therefore, Microsoft brought lots of changes to Windows 11 since Windows 10 was quite similar to Windows 8 or Windows 8.1. However, through this article, I will guide you step-by-step on how to install Windows 11 on Hpyer-V on Windows PC. Again thanks to the world of virtualization technology that allows us to test several operating systems on one single PC at the same time.
There are many virtualization technology software including VirtualBox, VMware Workstation, VMware Player, and Hyper-V. So, each virtual machines have its features, but VirtualBox, VMware, & Hyper-V is the best for testing operating systems. As we have tested Windows 11 on VirtualBox & VMware on Windows PC. You can check the below down-links.
- How to Install Windows 11 on VirtualBox on Windows PC?
- How to Install Windows 11 on VMware Workstation Pro 17?
- How to Install Windows 10 on Hyper-V?
Windows 11 was officially announced to people on October 2, 2021, in the updates section. Therefore, Windows 11 is the first Microsoft operating system that required the TMP 2.0 which should be enabled in the BIOS window. TPM 2.0 is the first requirement for the installation of Windows 11 on a PC. As the latest generation of computers contains the TMP 2.0, but the old generation of computers doesn’t have the TMP 2.0 chip inside. Mostly the people directly upgraded their PCs to Windows 11, without any issues. But most of the people upgraded with illegal ways like bypassing the TMP 2.0. There are ways to bypass the TMP 2.0 for installing Windows 11 on their PCs. But that should be not saved for installing Windows 11 on their PCs.
Related: How to Create Windows 11 ISO Image File (Free)
What is Hyper-V?
Hyper-V is a virtualization technology developed by Microsoft for running multiple operating systems on a single physical machine. It allows you to create and manage virtual machines (VMs) that can run different operating systems, such as Windows, Linux, or even other versions of Windows. With Hyper-V, you can consolidate workloads onto a single physical server, improve hardware utilization, and reduce costs by reducing the need for additional hardware. Hyper-V is included with some versions of Windows, such as Windows 10 Pro and Windows Server, and can also be downloaded as a standalone product.
How to Install Windows 11 on Hyper-V on Windows PC?
As the hyper-v is not a pre-installed tool on Windows operating systems, to use hyper-v on Windows PC. So, you have to enable Hyper-v on your Windows PC. The method is pretty straightforward with a few clicks you can enable it.
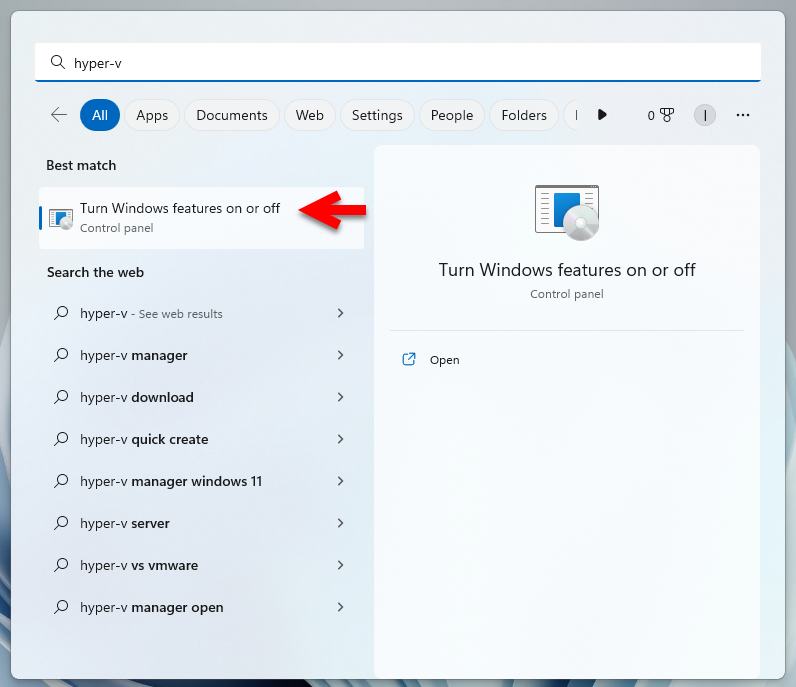
Simply, head over to your Windows start menu then type there Hyper-V or type Windows features.
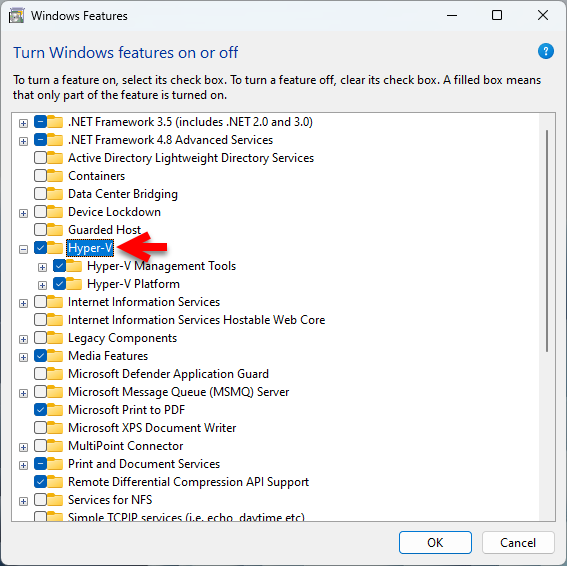
When the Windows Features is opened, simply check the box of Hyper-V and click OK.
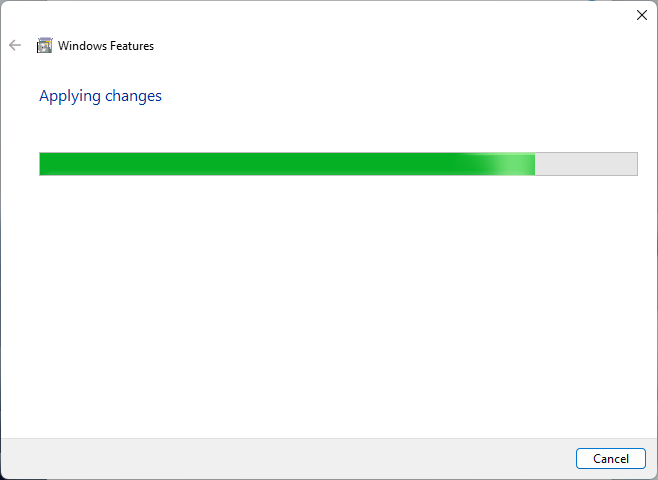
Now it makes the changes to install or enable the Hyper-V on your Windows PC. So, it may take some time, wait for it until it should be completed.
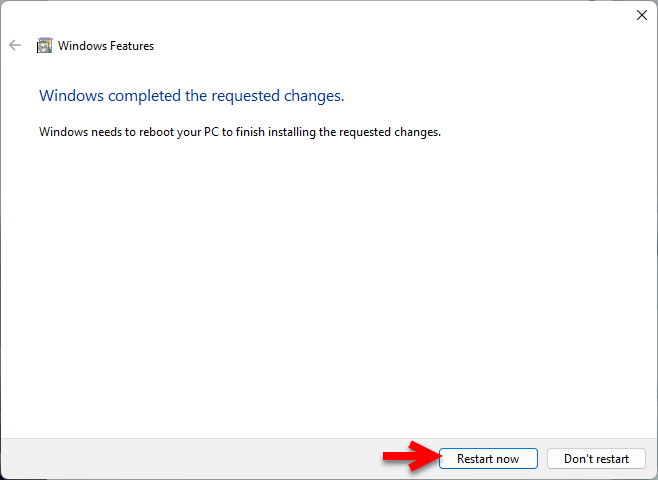
When the Hyper-V is successfully installed on your Windows simply click on restart now.
Create a New Virtual Machine For Windows 11 on Hyper-V
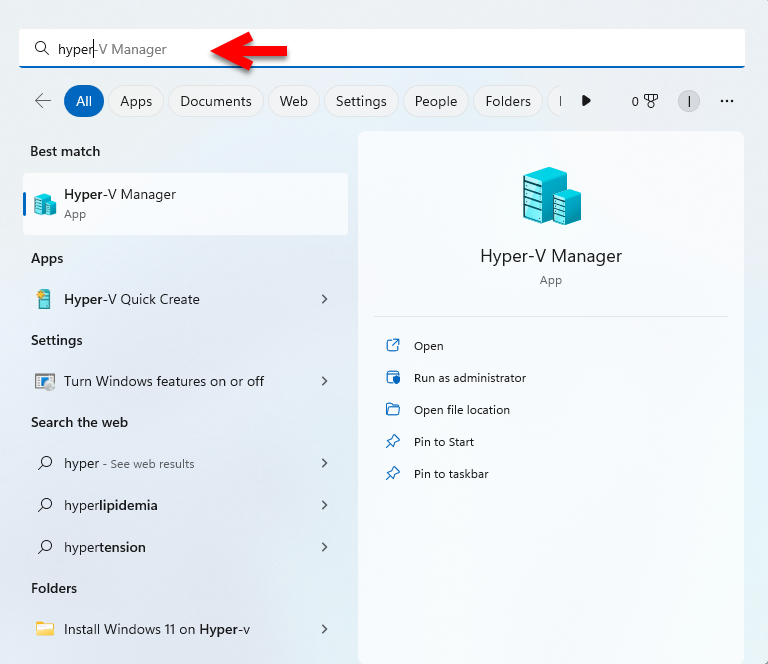
When your computer is successfully restarted, again coming back to Windows navigate to the Windows start menu then type there Hyper-V and open it.
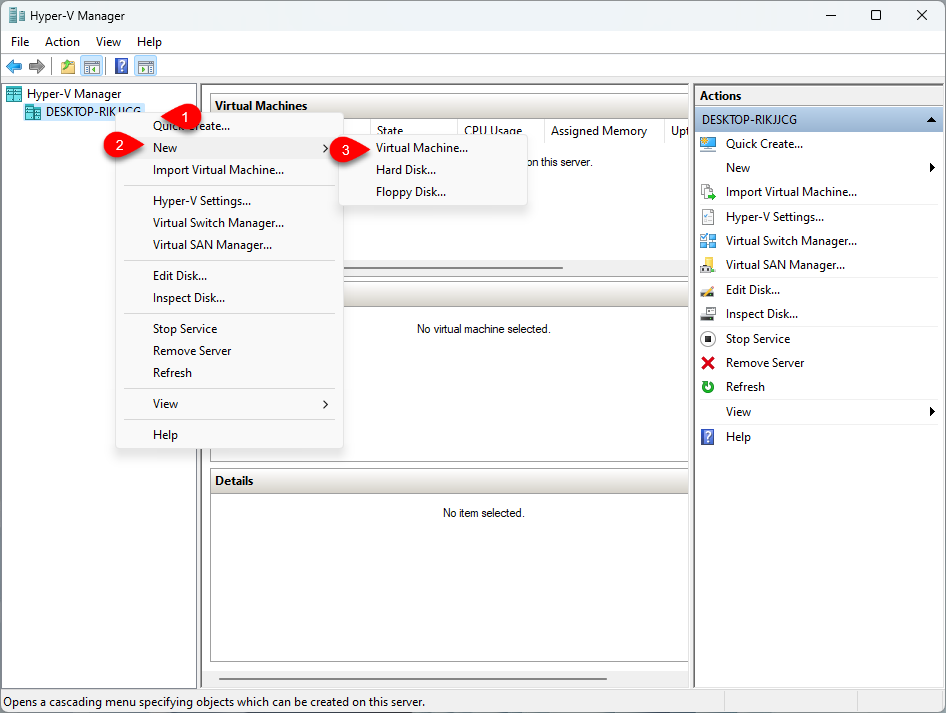
When the Hyper-V opened on the left-handed window side right-click on Desktop Rik UCG>New>Virtual Machine.
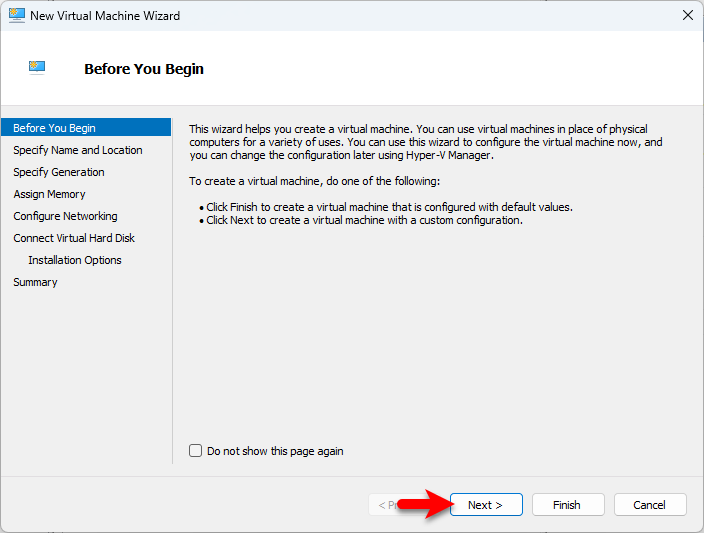
On the first window simply click next.
Specify the name and location of Windows 11 on Hyper-V and click next.
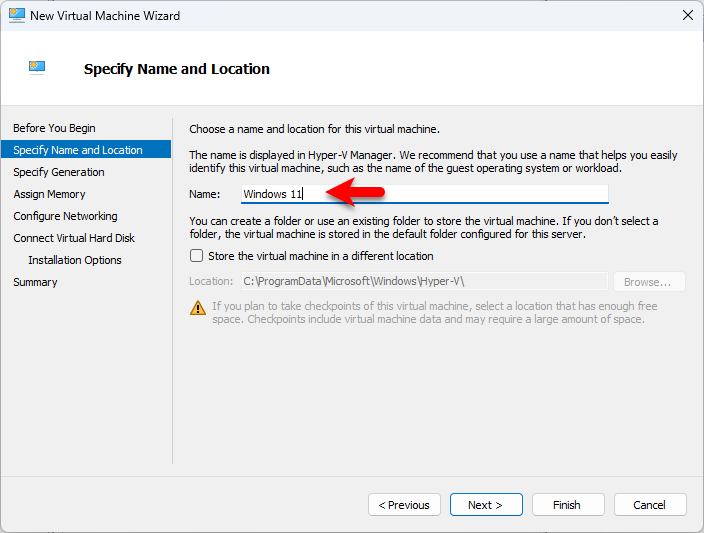
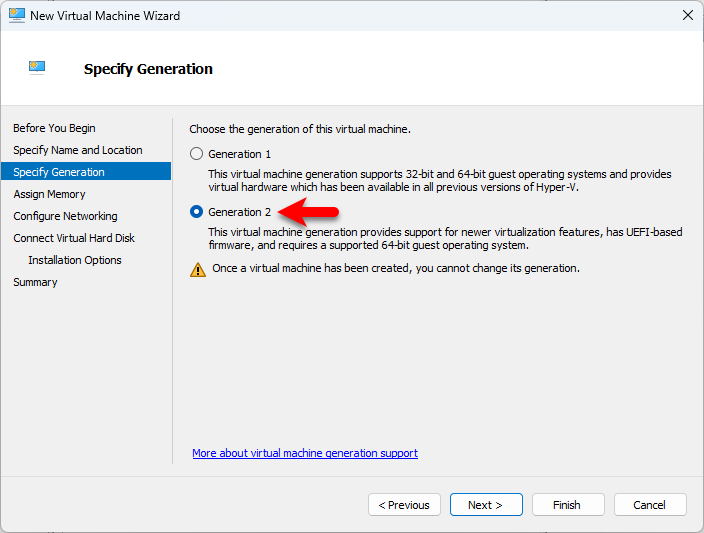
Specify the generation, so I recommend you select Generation 2 for Windows 11 and click next.
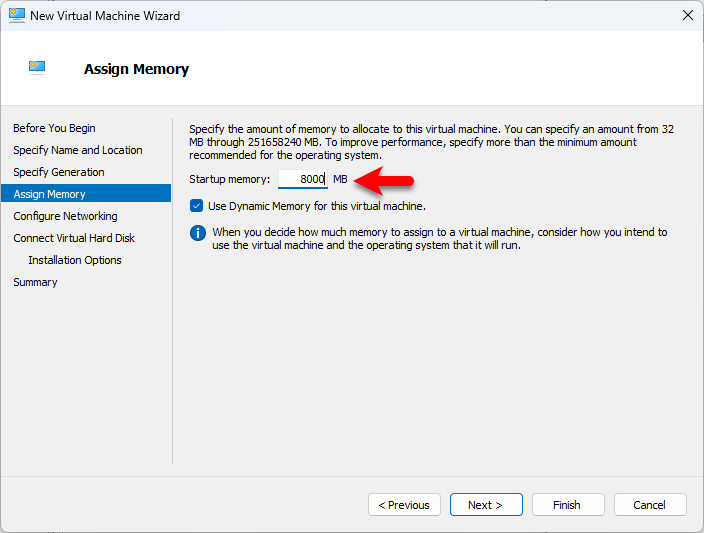
Assing the Memory for Windows 11, so select the memory size according to your computer memory size and click next.
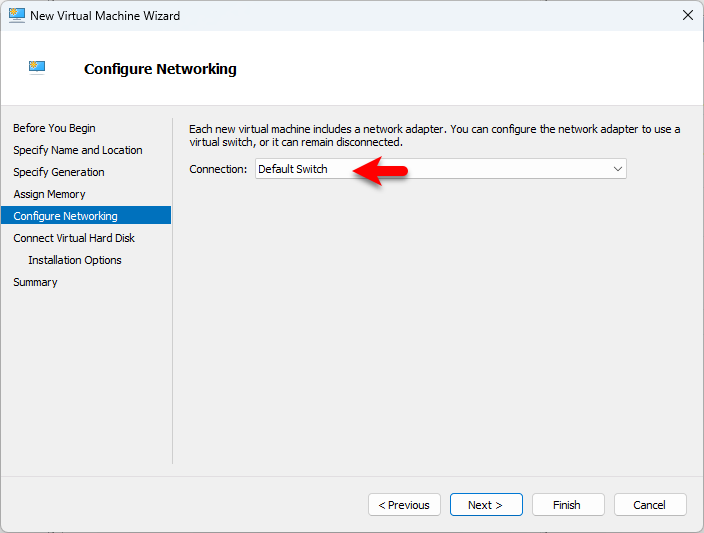
Now configure the network, so select the default switch and click next.
On the connect virtual hard disk window, select create a virtual hard disk, specify the name, location, and size for Windows 11 installation, then click next.
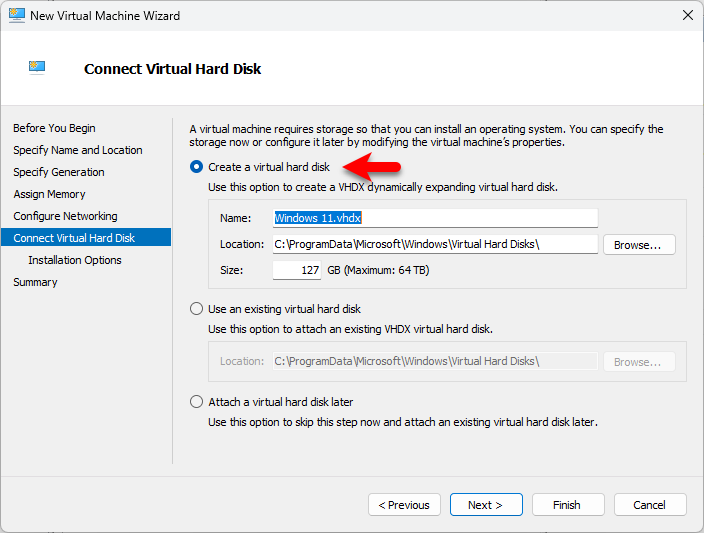
On the installation options, you have to insert the Windows 11 ISO Image file installer. Select the Install an operating system from a bootable image file, then click on the browse option.
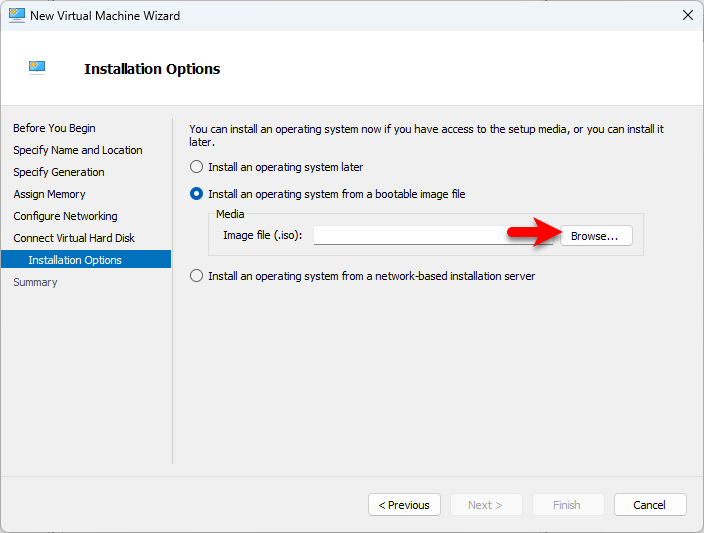
Now go to the place where you saved Windows 11 ISO image file, select the ISO file, and click open.
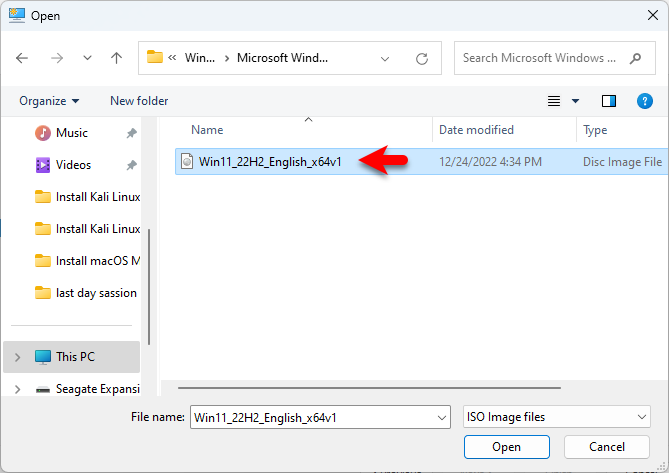
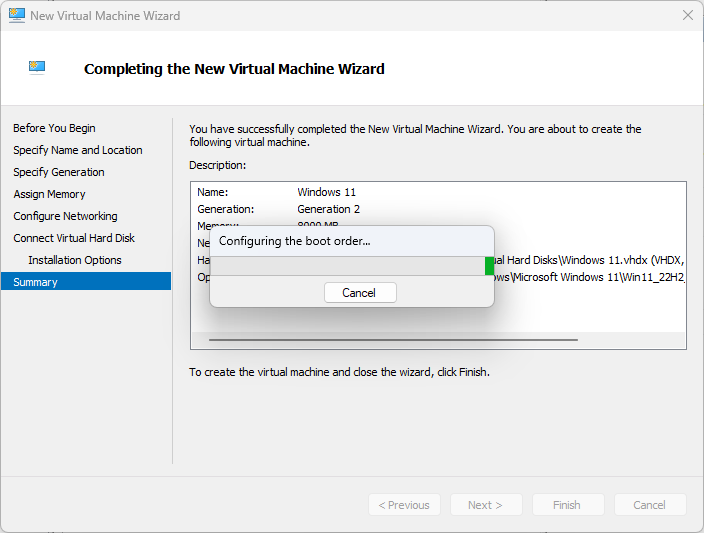
On the summary window, check everything about the virtual machine settings, and click on the Finish option to create the virtual machine of Windows 11 on Hyper-V.
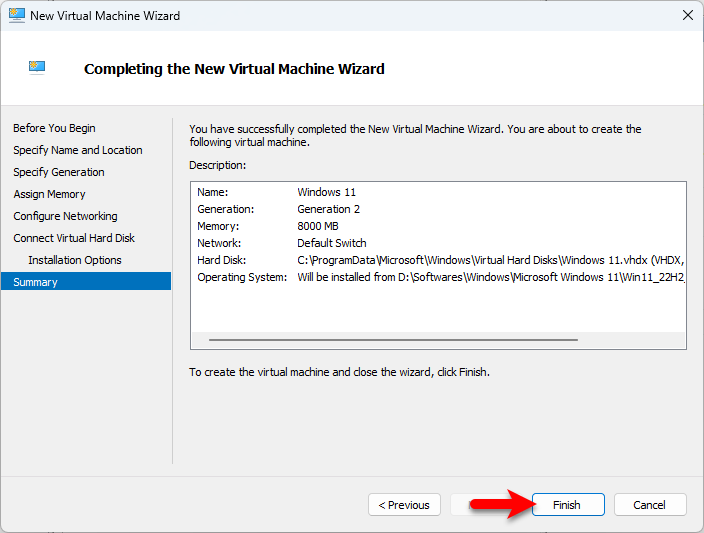
And now it will create the Windows 11 virtual machine on Hyper-V.
Edit Virtual Machine Settings
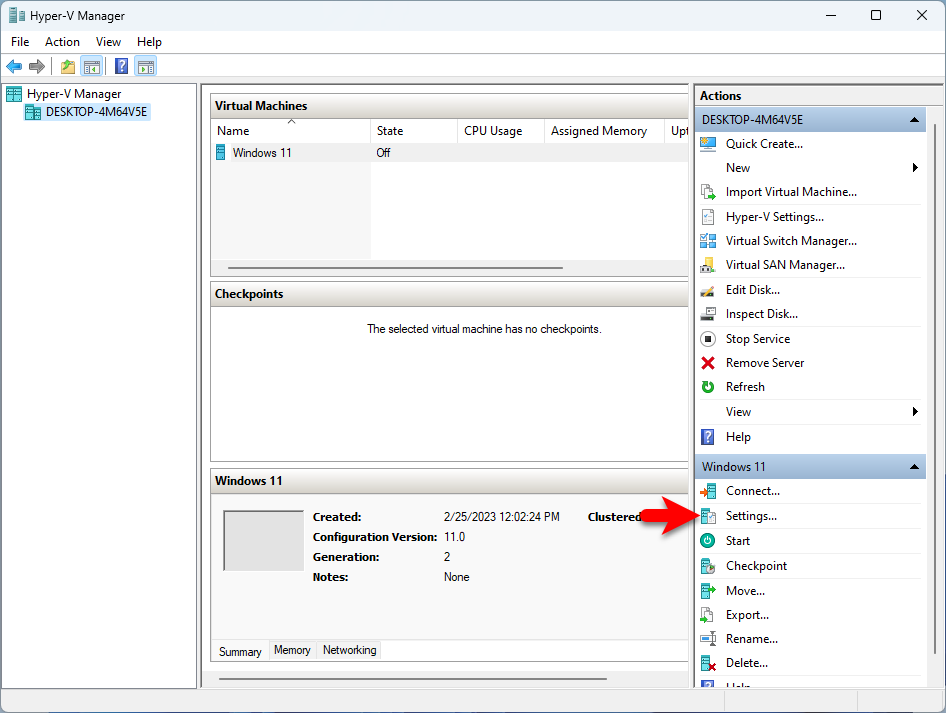
When the Virtual machine of Windows 11 is successfully created on Hyper-V, So have to edit a few settings. Simply at the bottom side of the Hyper-V window click on the settings option.
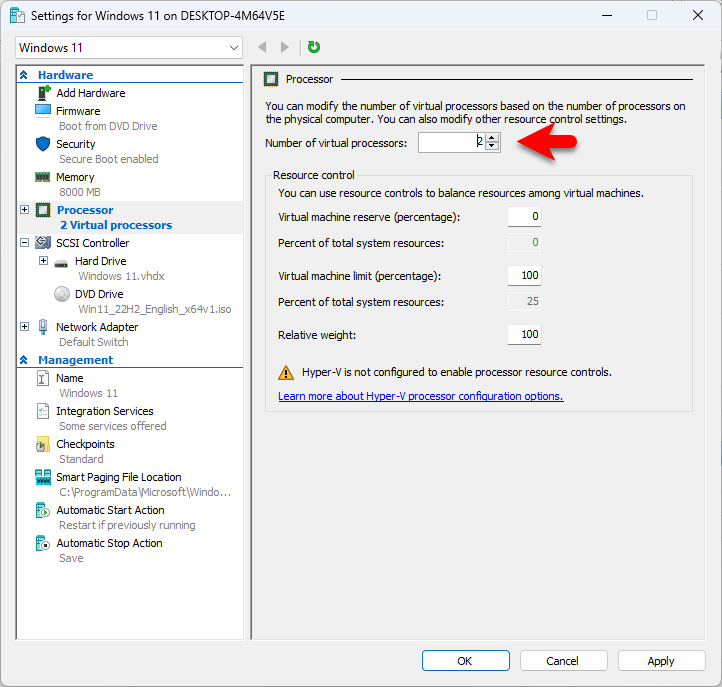
When the settings window opened, select the processor tab, and increase the number of virtual processors.
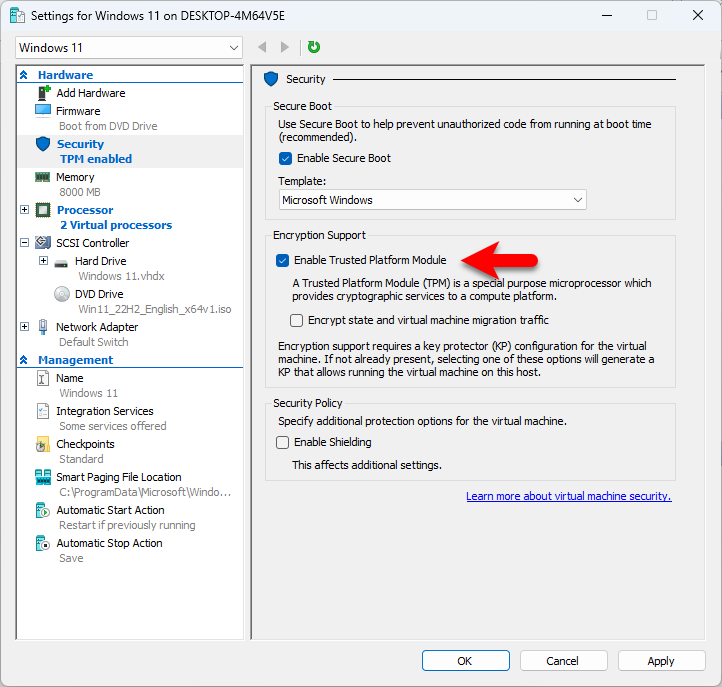
Navigate to the security tab, then check the box “enable trusted platform module”. Also, be sure that the secure boot is enabled. Once the changes are made click on Apply to save the changes.
Perform a Clean Installation of Windows 11 on Hyper-V
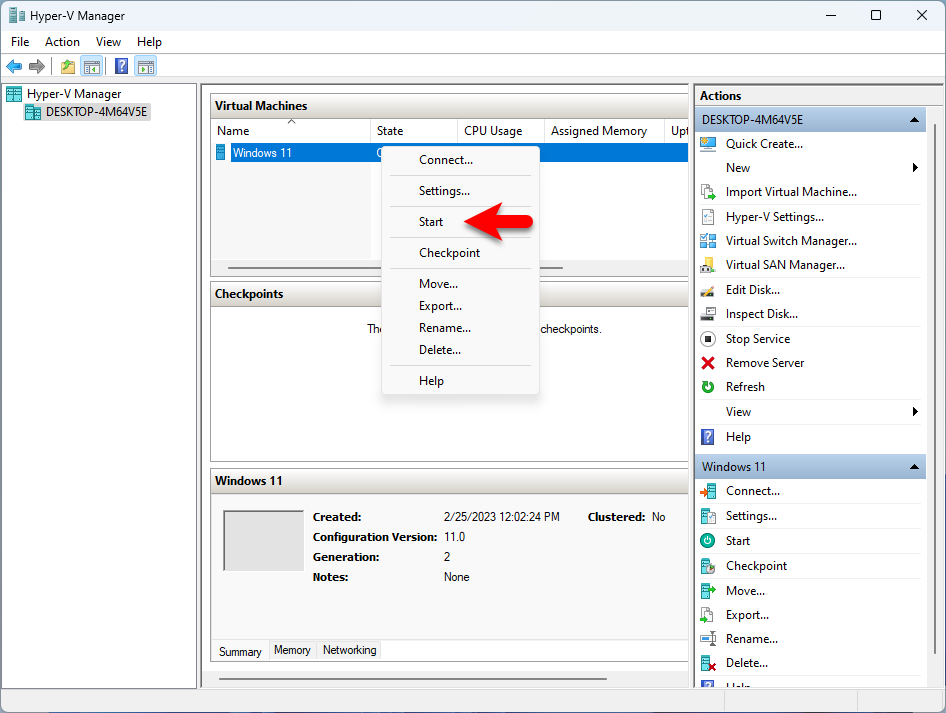
When the virtual machine is successfully created for Windows 11, and the settings are done simply right-click on the virtual machine and click start to start installing Windows 11 on Hyper-V.
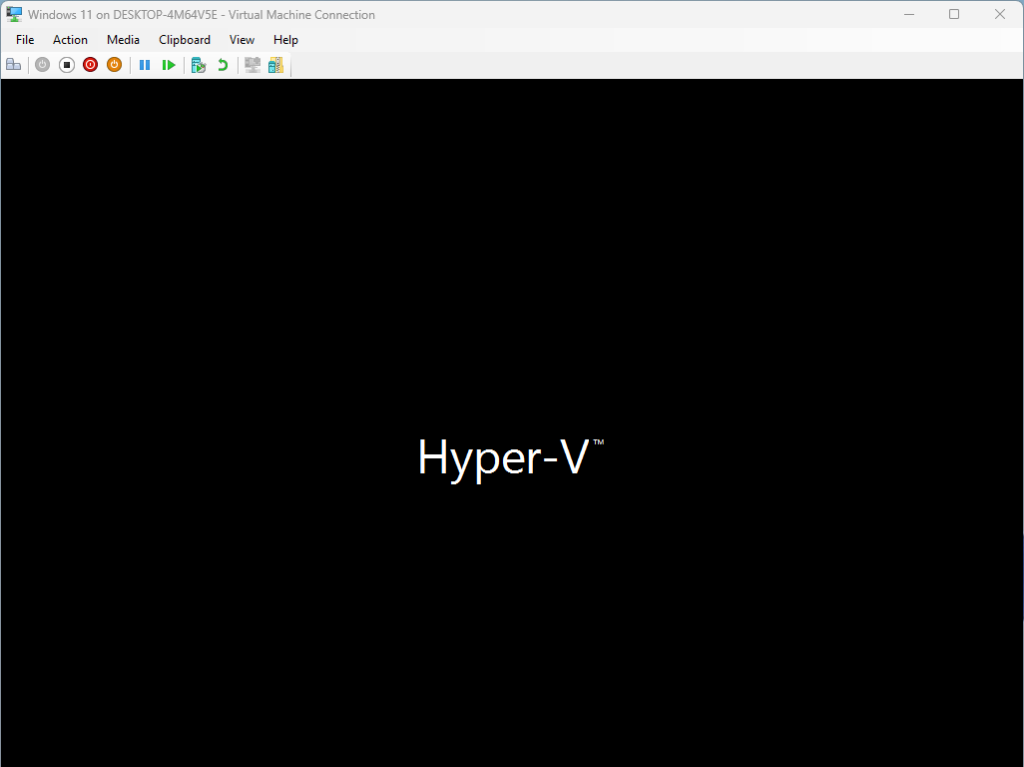
When the installation launched quickly press any key to boot into Windows 11.
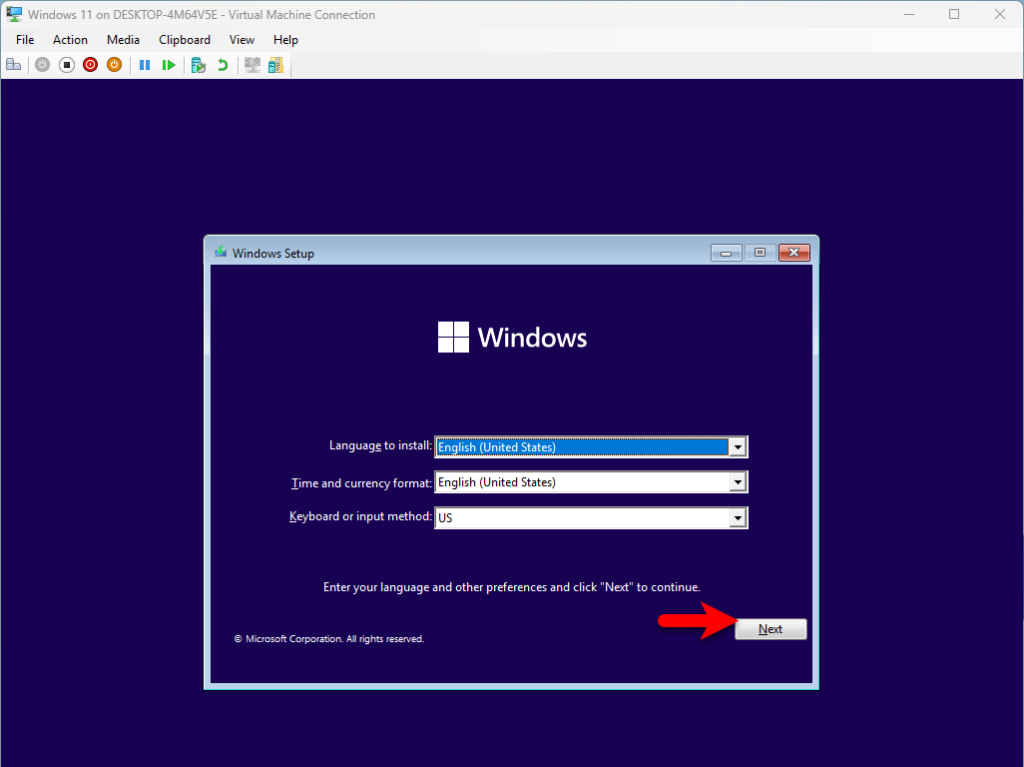
On the first window select your language, time and currency format, keyboard, and input method, then click on next.
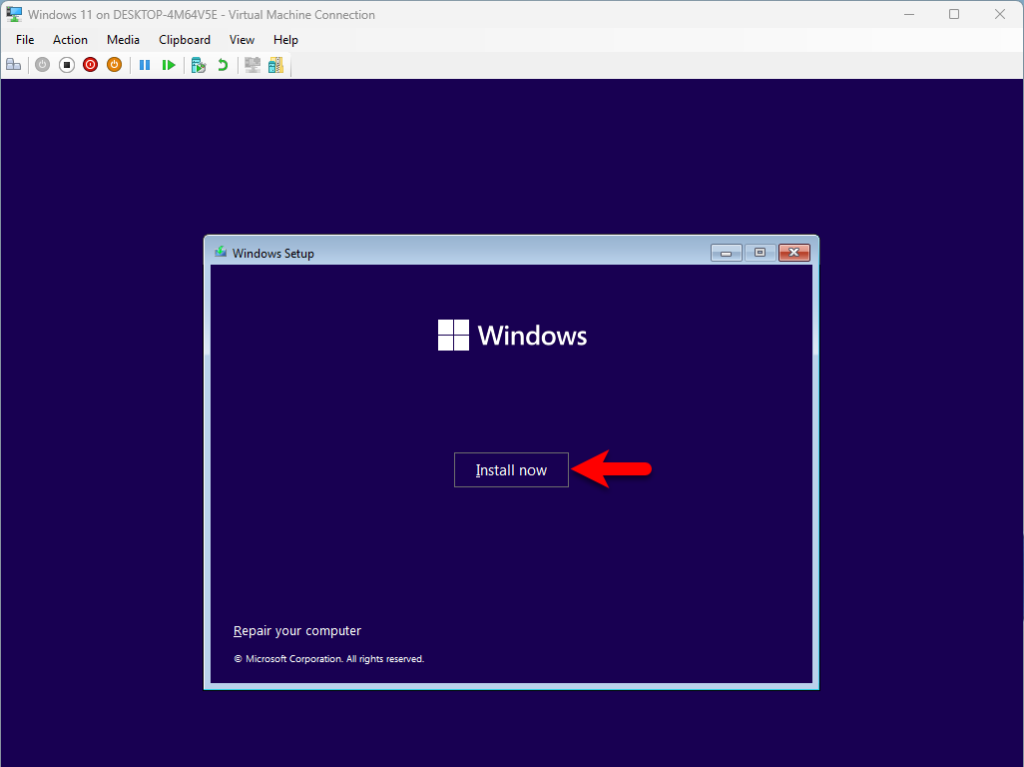
Now on this window simply click on install.
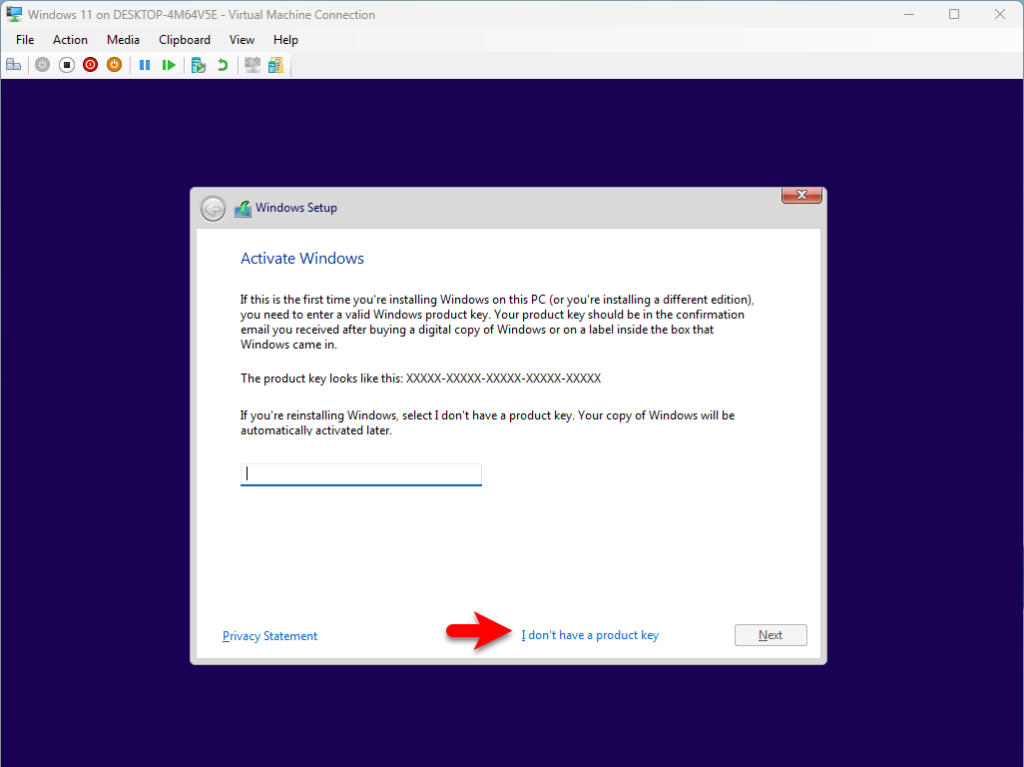
Click on I don’t have the product key.
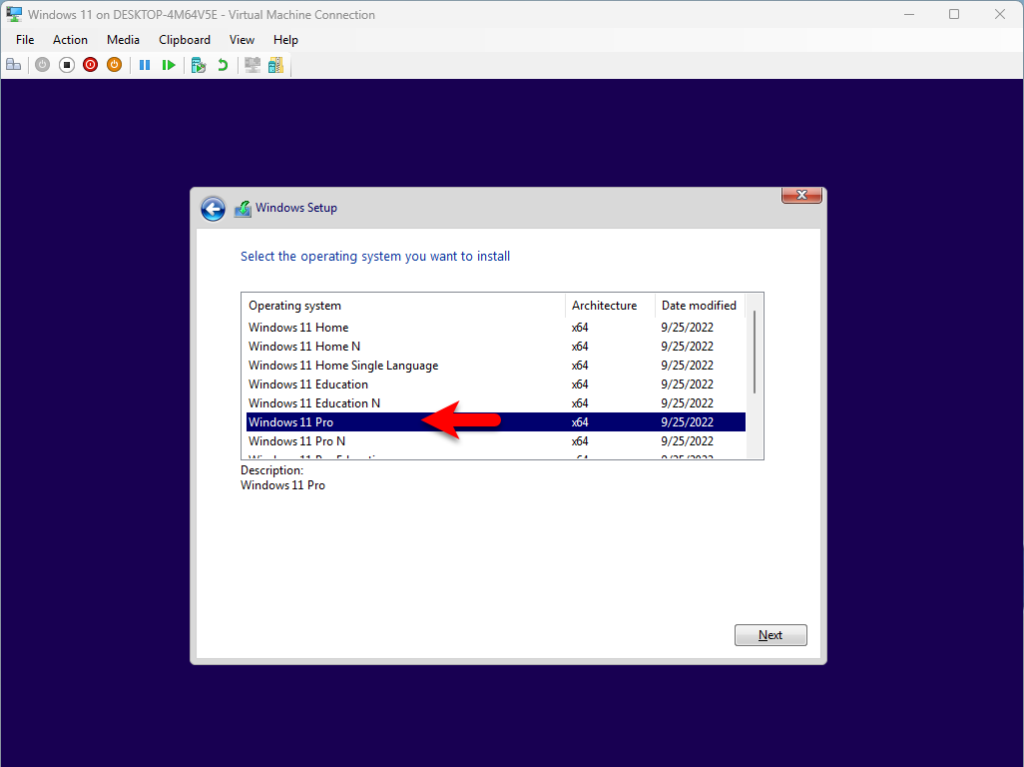
Select the version of Windows 11 and click next.
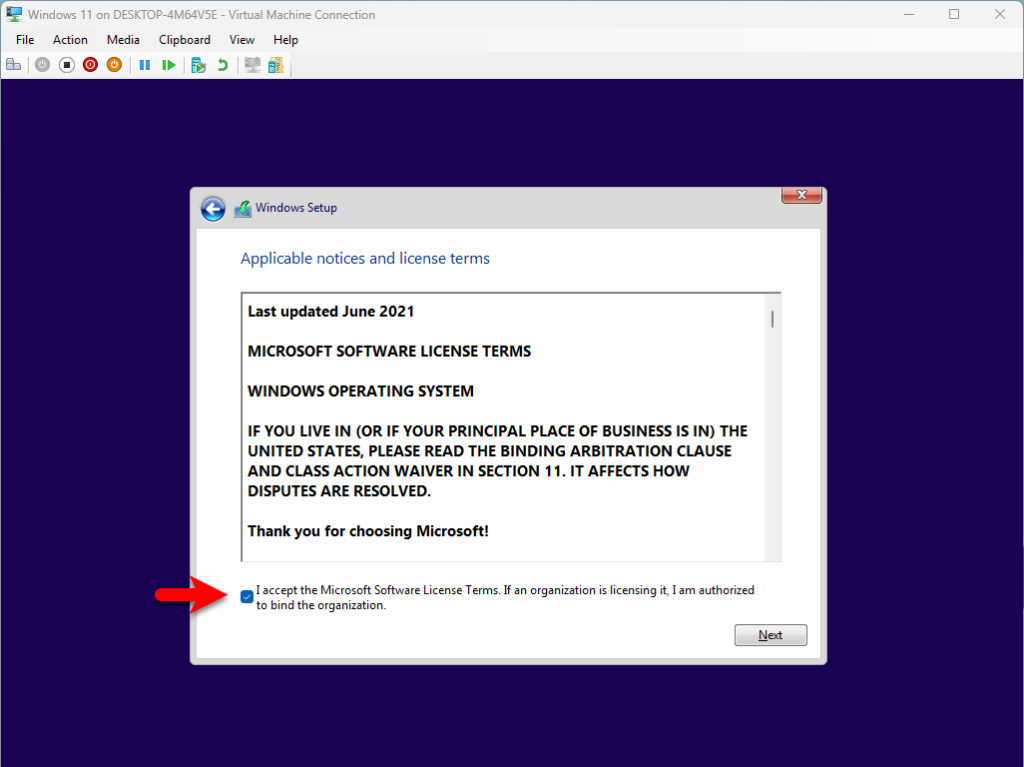
Check the box I accept the Microsoft Software license terms. If an organization is licensing it, I am authorized to bind the organization and click next.
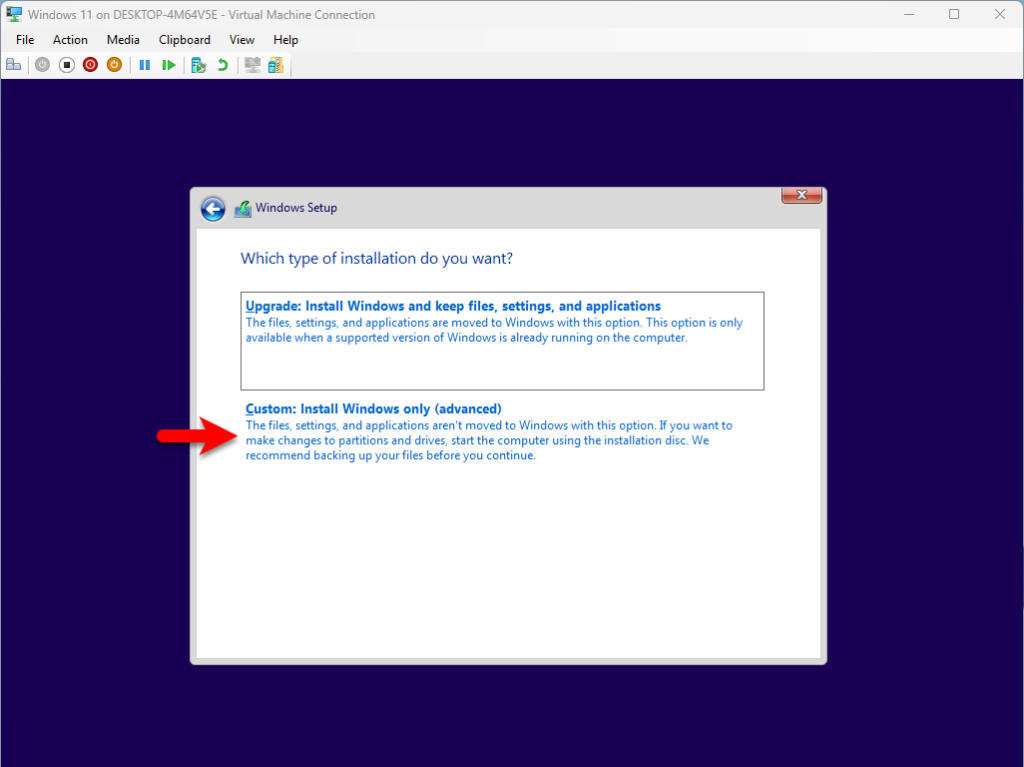
Now click on the Install custom Install Windows only (Advanced) option to proceed to installation.
Here you don’t need to create any disk for Windows 11, simply click on the next option to proceed to the installation window.
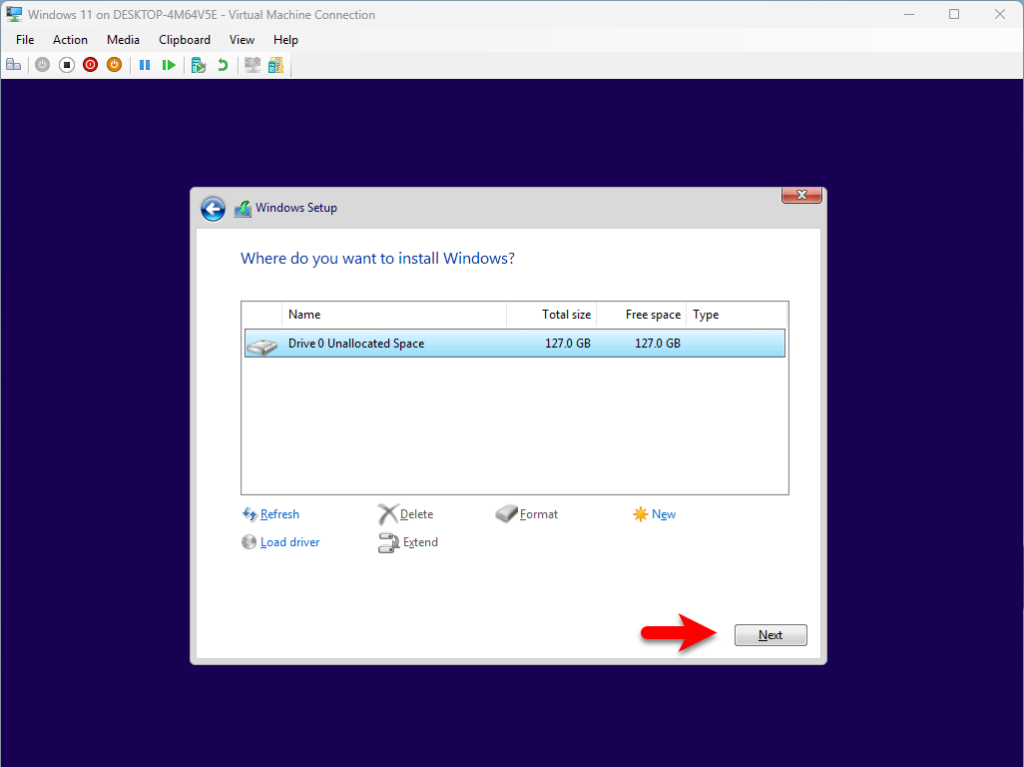
And now it will start installing Windows 11 on the Hyper-V machine, so the installation will take a few minutes to wait for it until the installation should be completed.
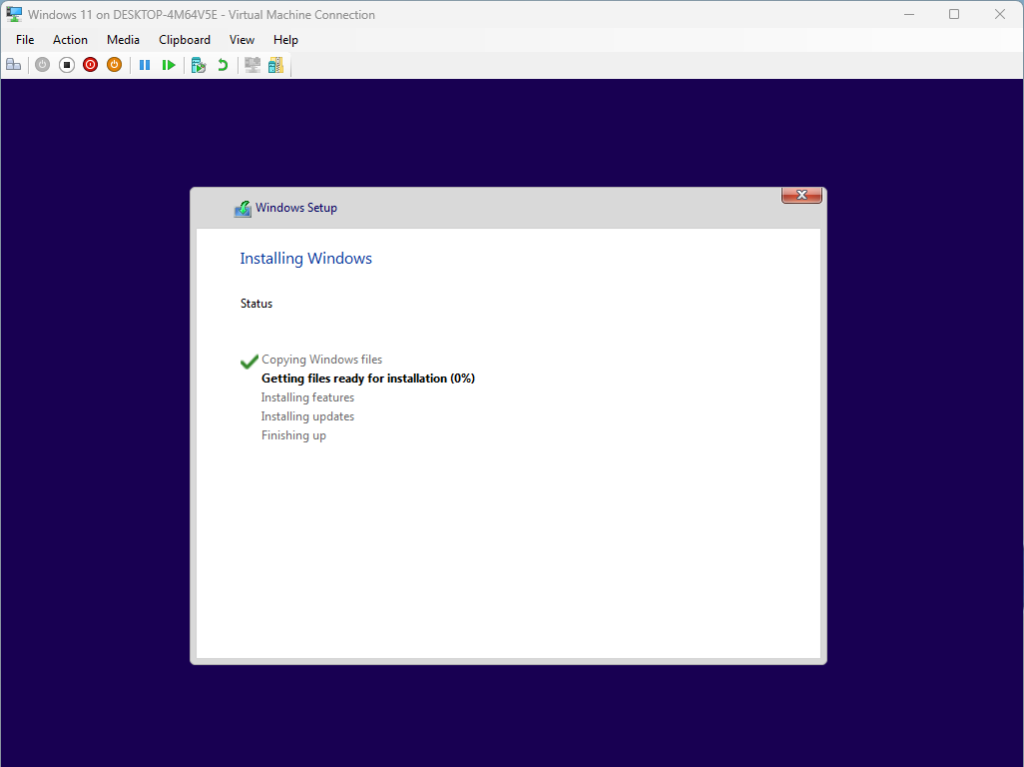
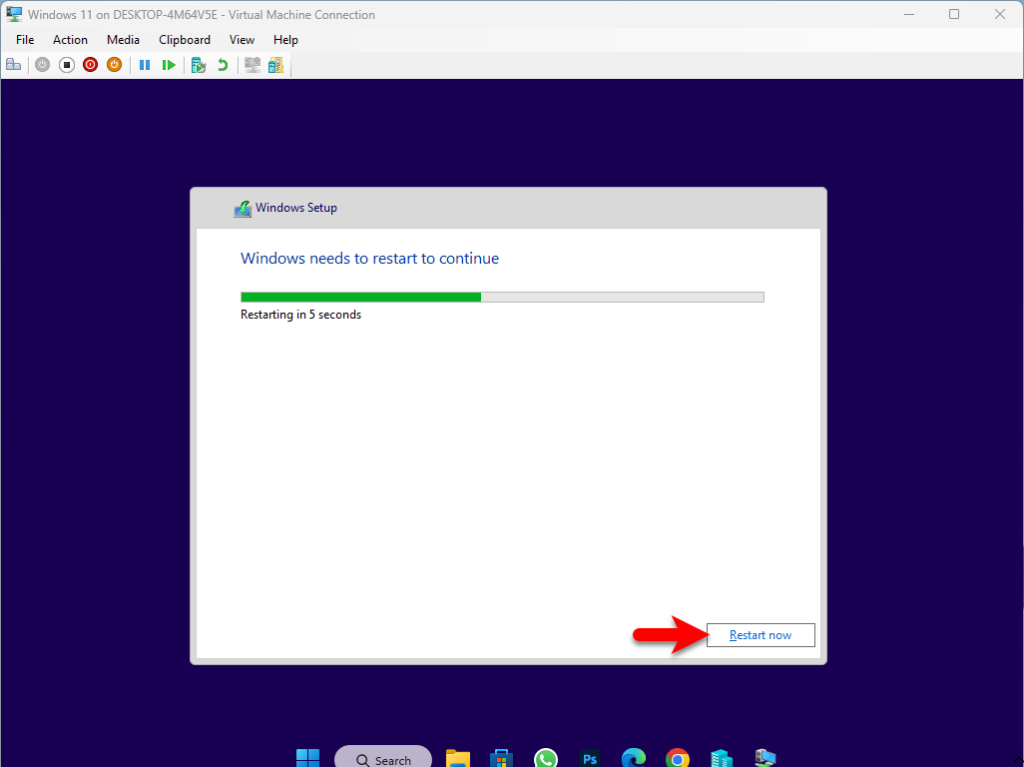
When the installation is successfully completed simply restart the virtual machine.
Complete the Basic Settings of Windows 11 on Hyper-V
Once the installation of Windows 11 is successfully completed on Hpyer-V, then you have to complete a few basic settings.
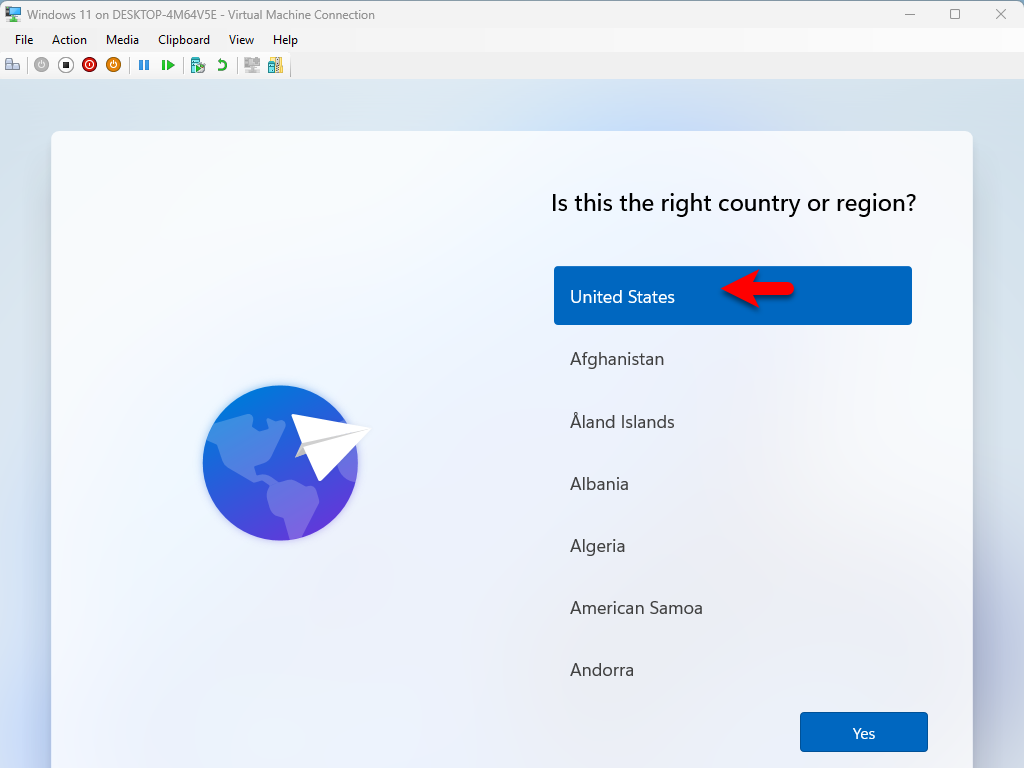
- On the first window select your country and click Yes.
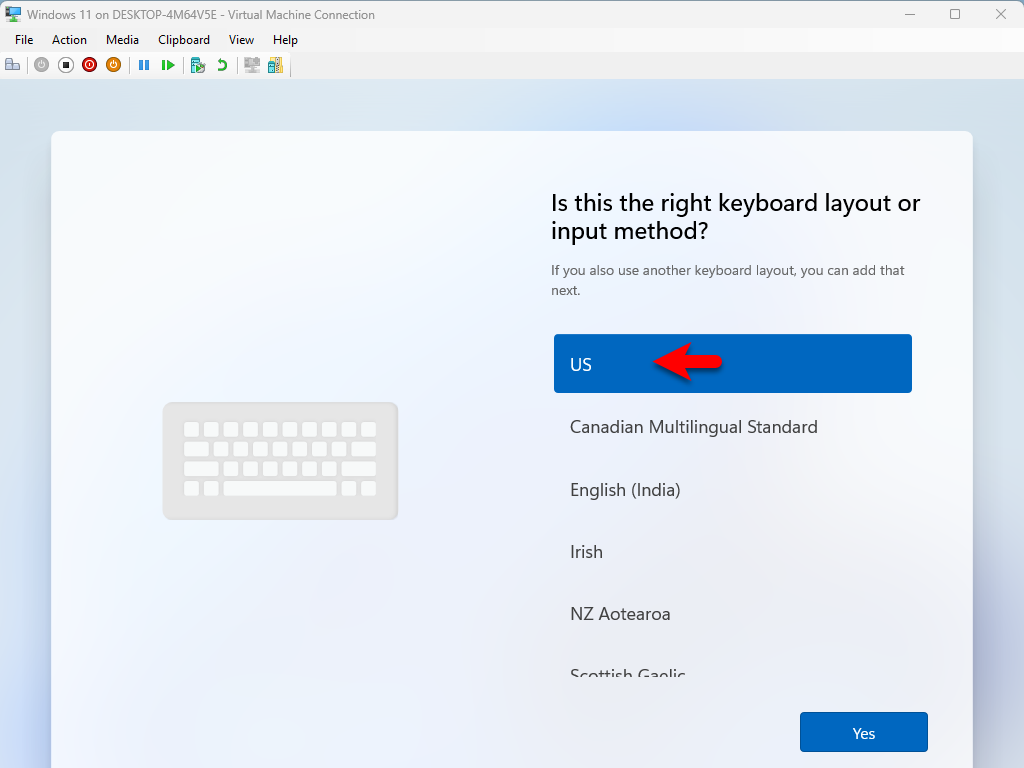
- Select your keyboard and method layout and click Yes.
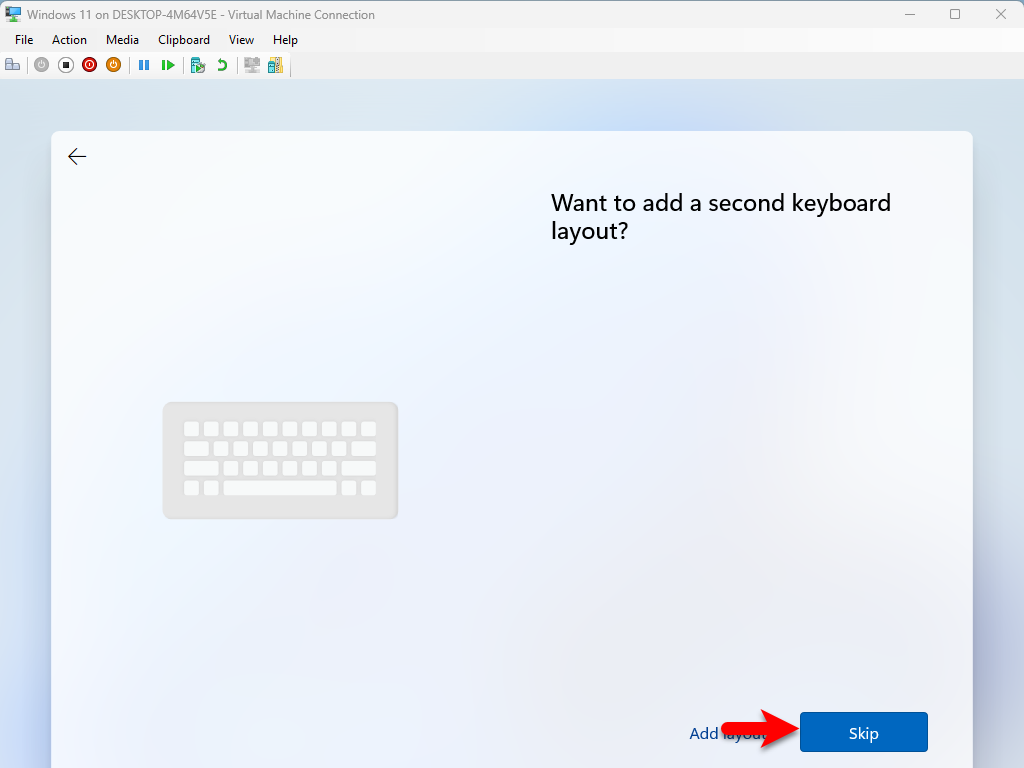
- If you want to add any keyboard layout simply click on add option, if not then click on Skip.
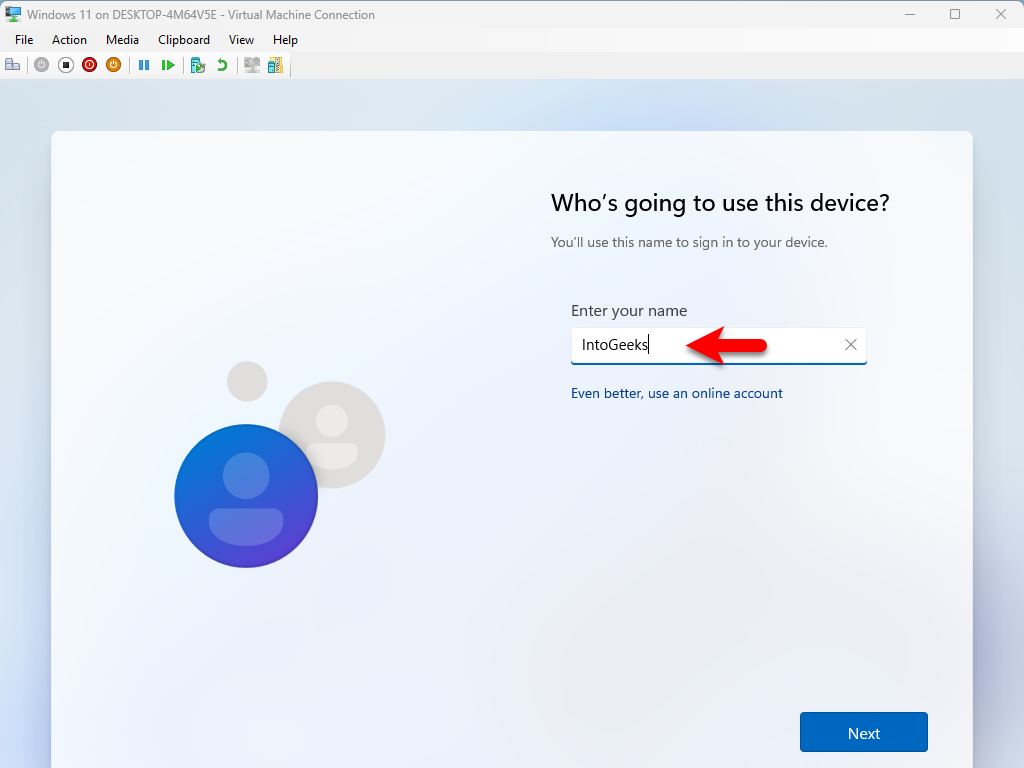
- Type your username and click Next.
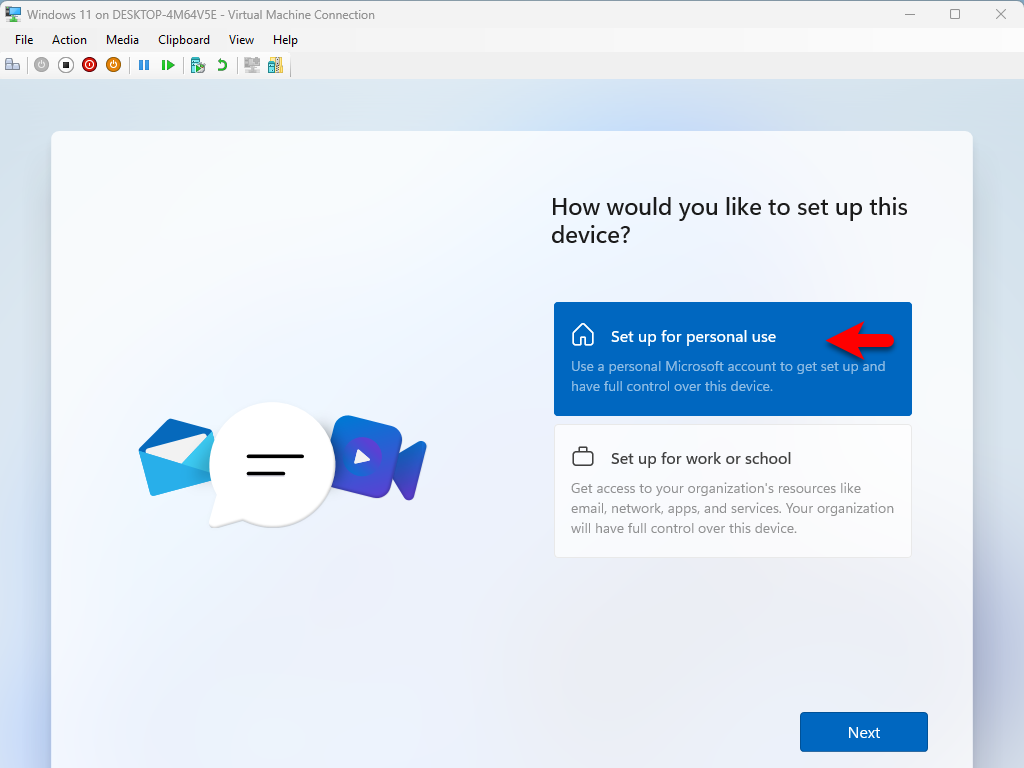
- Now set up the computer for personal use, then click Next.
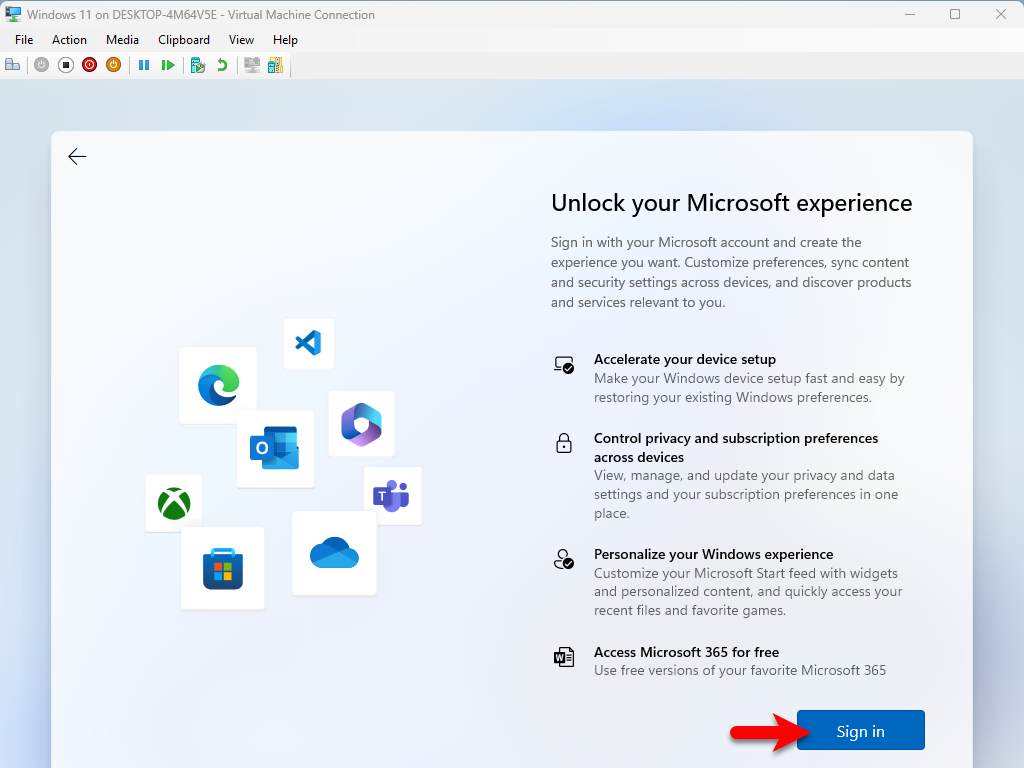
- Click on the Sign in option to Sign in with your Microsoft account.
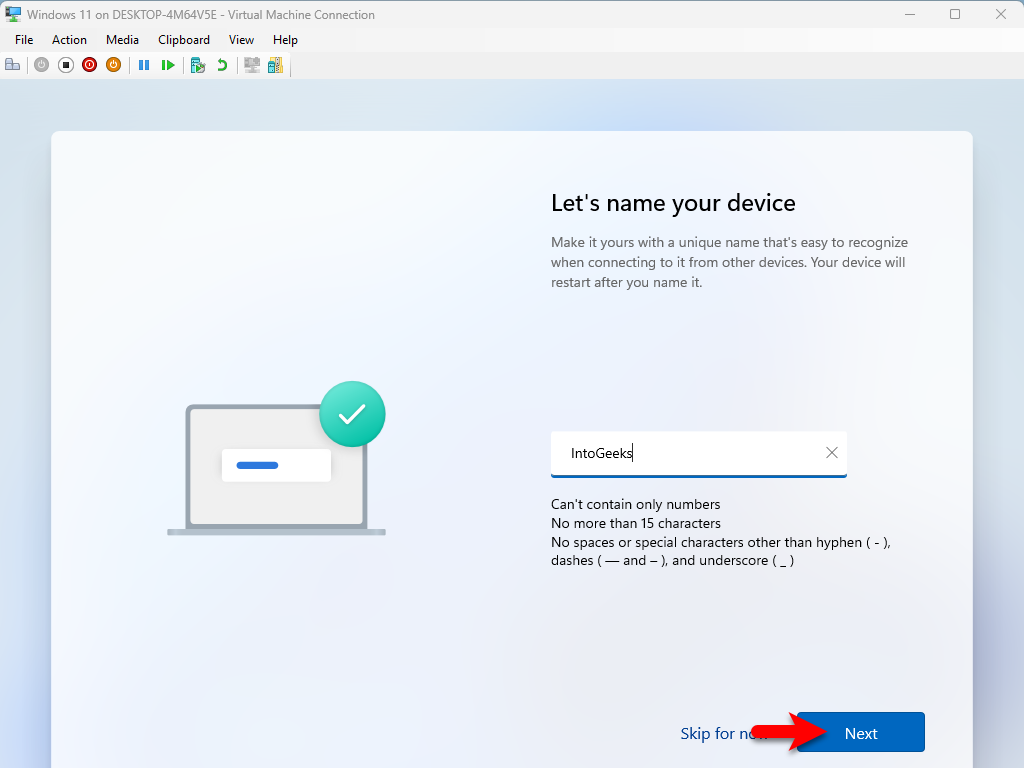
- Enter the name of the device and click Next.
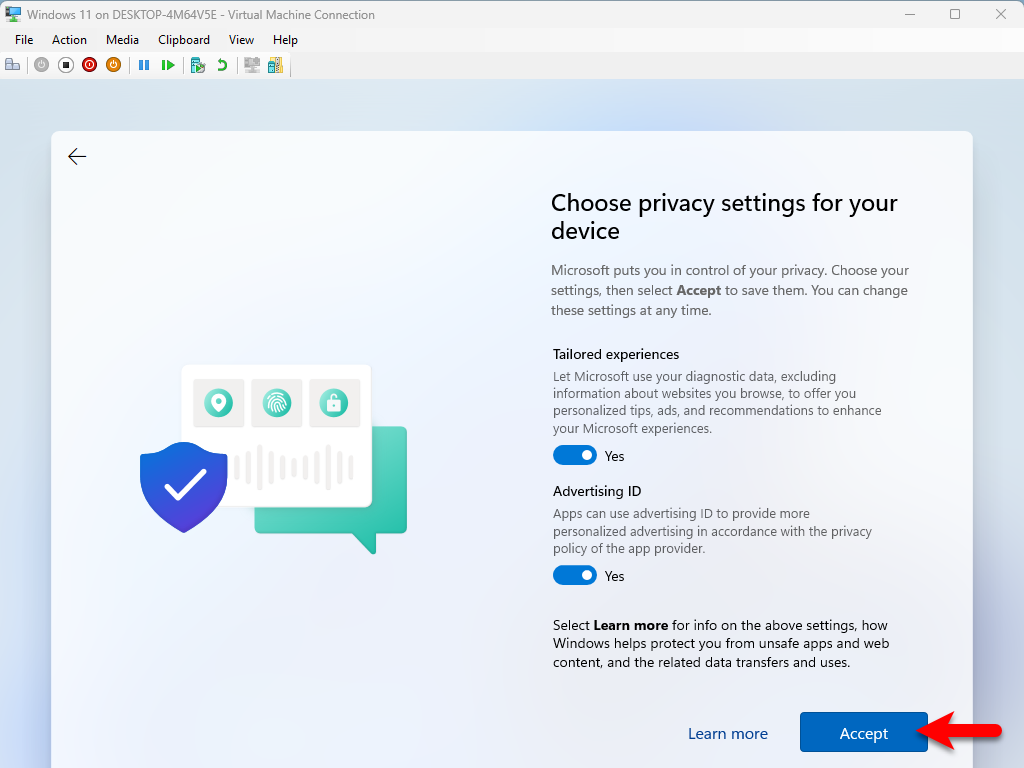
- Three times press Accept option to accept the terms and conditions of Windows 11.
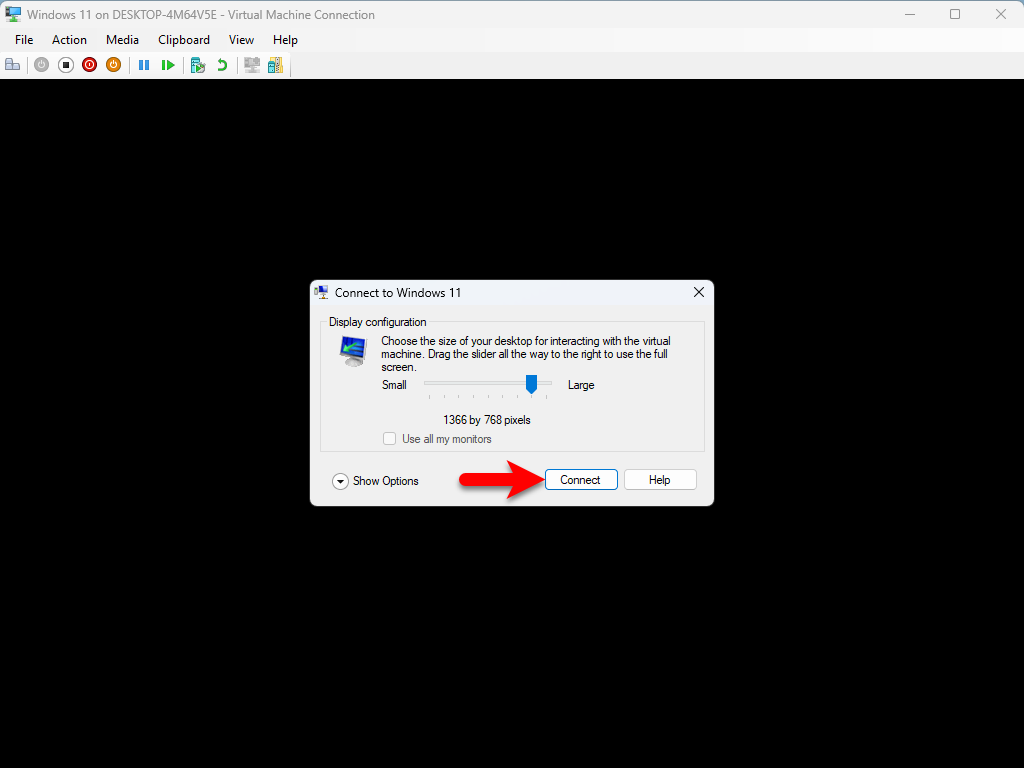
- Choose the size screen for Windows 11, and click connect.
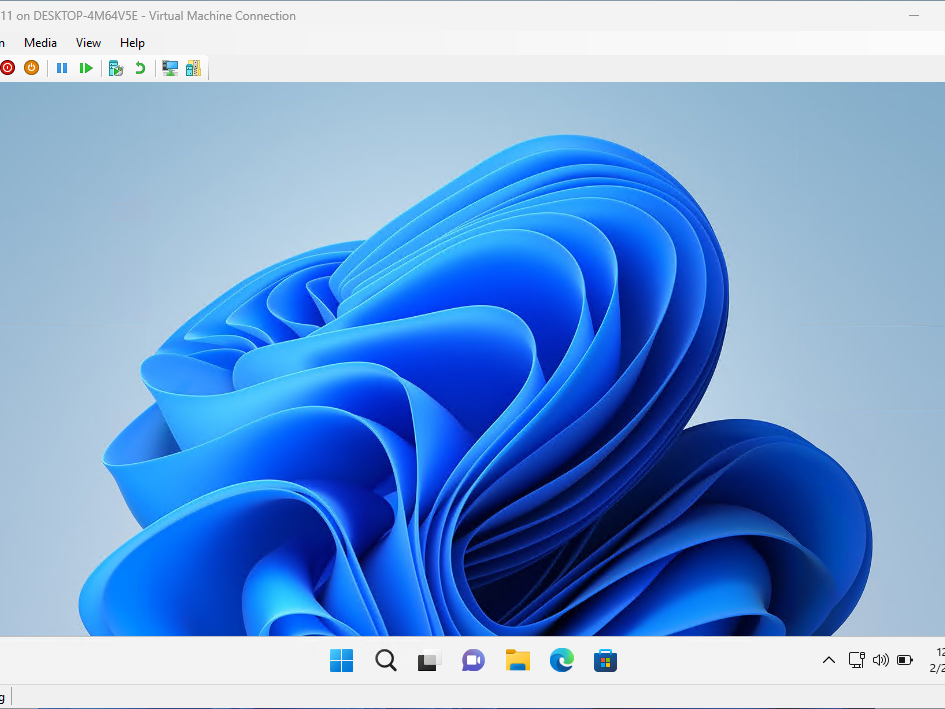
- And Finally, Windows 11 is successfully installed on Hyper-V on Windows PC.
Related:
Conclusion
Now Windows 11 is successfully installed on Hyper-V on Windows PC. With the same process, you can install Windows 10 on Hyper-V, on Windows PC. Also, the installation process is much easy, you can install it on VirtualBox or VMware on Windows PC.



4 Comments