Thanks to the world of Hyper-V virtualization machines, we can test and install the Windows operating system with a single physical device on the same computer. There are several virtual machine software such as VirtualBox & VMware. But Hypver-V is an open-source virtualization built-in software on Windows operating systems that allow the users to install the Windows operating system on it. Using VirtualBox or VMware on Windows PC allow you to install different operating systems, but Hyper-V is completely for those who want to test Windows operating systems on it. For example, if you are using Windows 10, then you want to install Windows 11 on it, simply by enabling the Hyper-V software on your Windows PC, you will be able to install another Windows on your machine.
Before building the VirtualBox or VMware, the Hyper-V software is the first hypervisor software that allows users to install two Windows operating systems on the same machine. The process of installing the Windows operating system is much easy on Hyper-V machines. Firstly you need to enable the Hyper-V on your Windows PC. Then secondly you need to create a virtual machine on Hyper-V and then run the installation of Windows.
We have tested Windows 11 on VirtualBox & VMware, but testing on Hyper-V is more easy and more comfortable than other virtual machines. Whenever you are installing the Windows operating system on Hyper-V then there is no need for any extensions to be installed on the behave of Hyper-V. But if you should continue installing Windows on Hyper-V then you need the configuration, and the extension files to be installed beside the Virtual Machine software to not get stuck with the mouse and keyboard or full-screen resolution.
What is Hyper-V
Hyper-V is a virtualization technology developed by Microsoft for the Windows operating system. It allows multiple operating systems to run on a single physical machine by creating virtual machines (VMs) that can be isolated from each other and run independently. Hyper-V provides a virtualization layer between the physical hardware and the guest operating system, allowing multiple VMs to share a single physical machine’s resources like CPU, memory, and storage.
Hyper-V is included with Windows Server and Windows 10 Pro and Enterprise editions. It supports a wide range of operating systems, including Windows, Linux, and other guest operating systems. Hyper-V also provides features such as dynamic memory allocation, live migration, and virtual machine checkpoints, making it a powerful virtualization platform for organizations and individuals who need to run multiple operating systems on a single machine.
How to Install Windows 10 on Hyper-V?
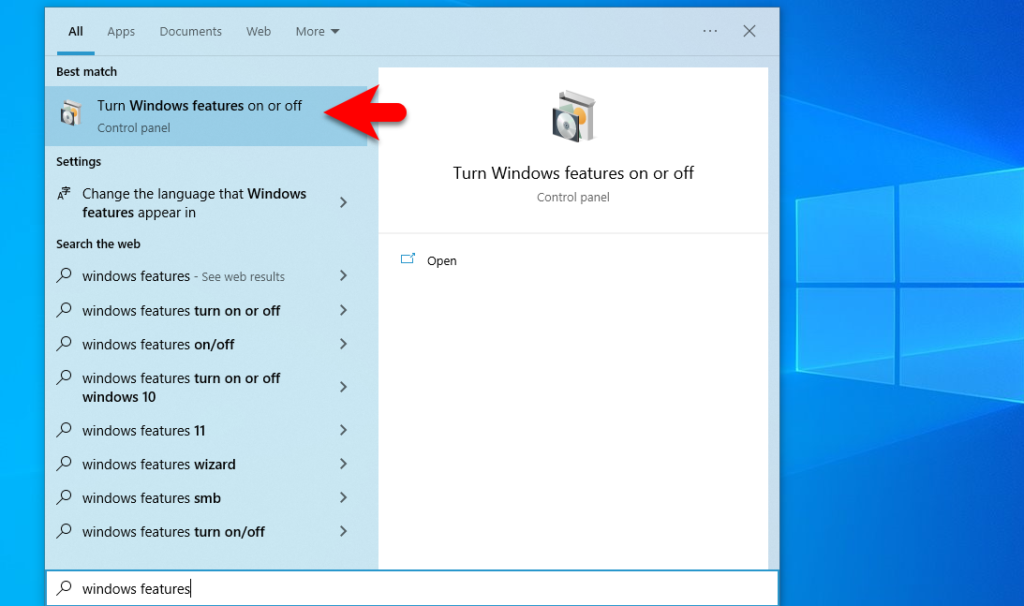
To install Windows 10 on Hyper-V firstly you need to enable the Hyper-V on your Windows PC. To enable the Hyper-V to navigate to the Windows start menu type their Windows Features, once it appeared hit enter.
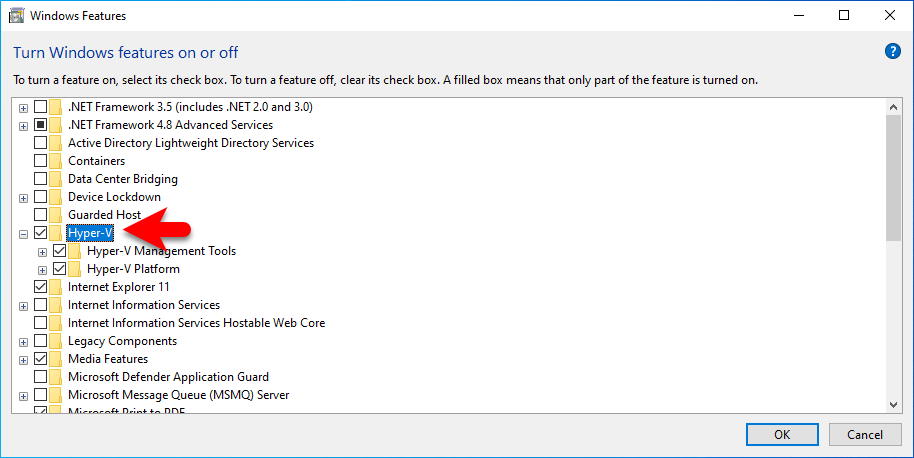
When the Windows Features window opened, enable the Hyper-V box and click OK.
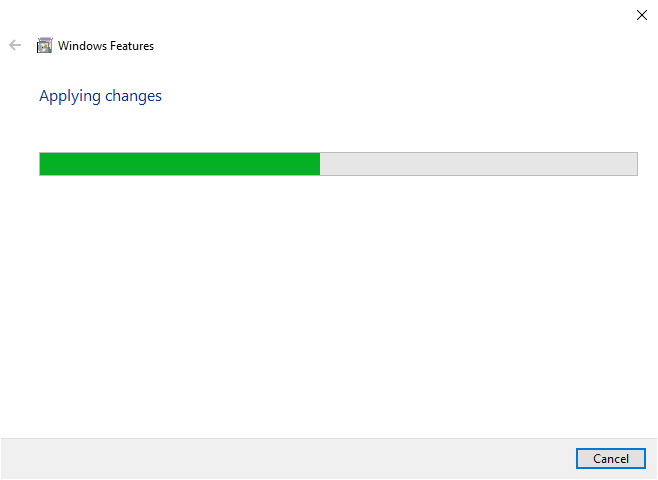
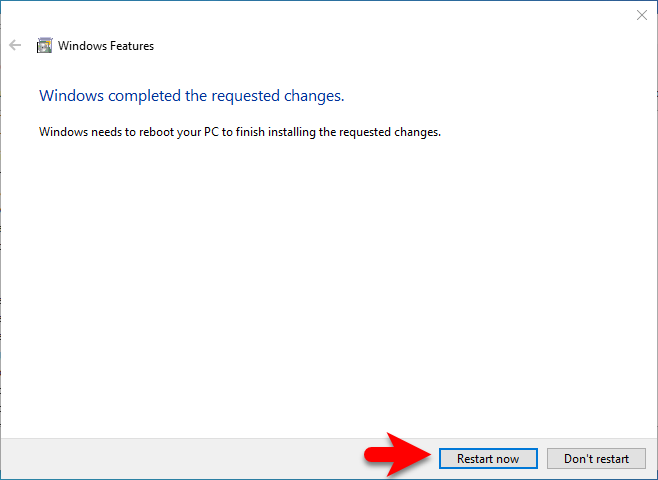
Wait for it until the Hyper-V required files should be downloaded.
Once the required features are successfully downloaded, click on the restart option.
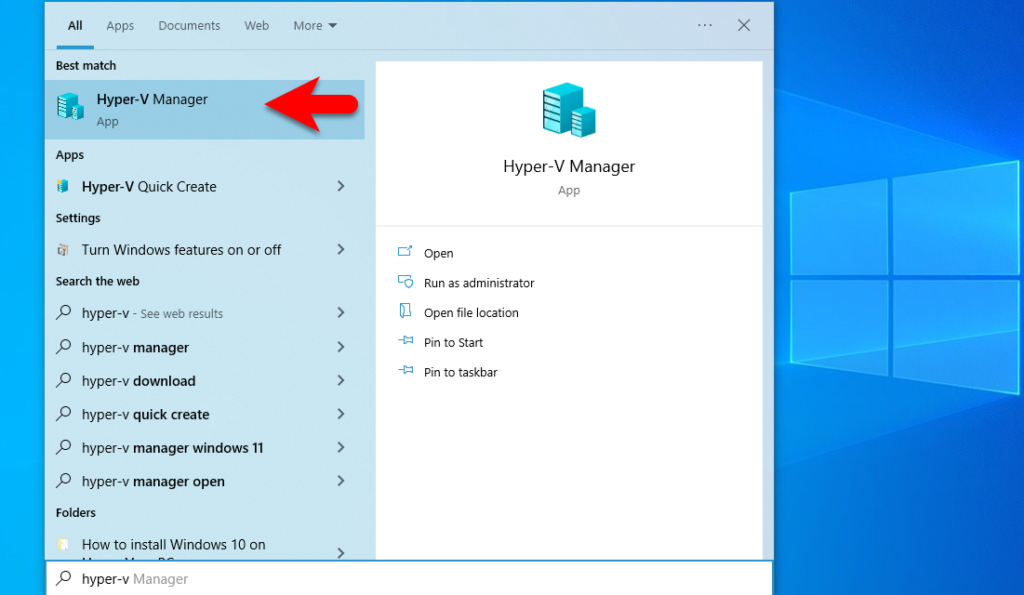
Once your system is successfully restarted come to Windows, navigate to the Windows start menu and type there (Hyper-V), and hit enter to open it.
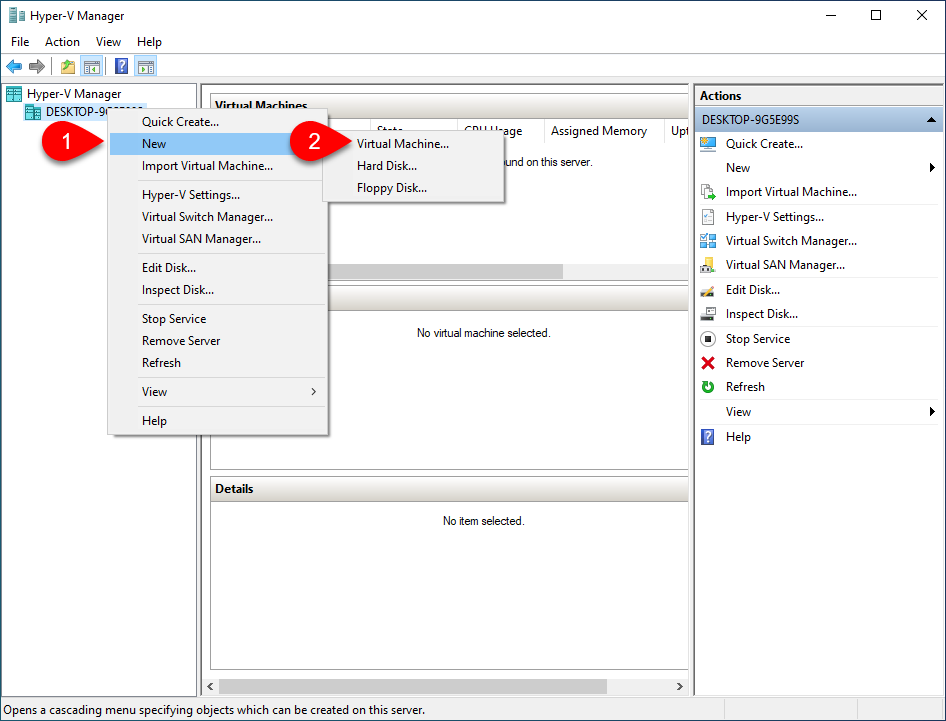
While the Hyper-V is opened, right-click on and click on New>Virtual Machine.
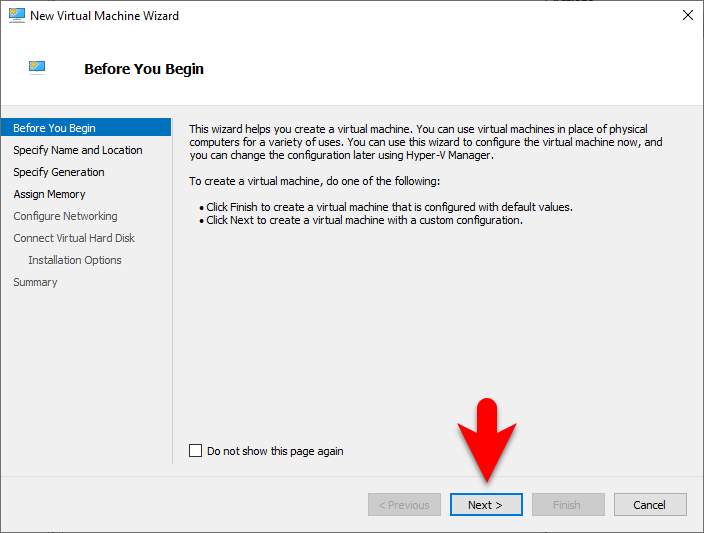
On the first window click on Next.
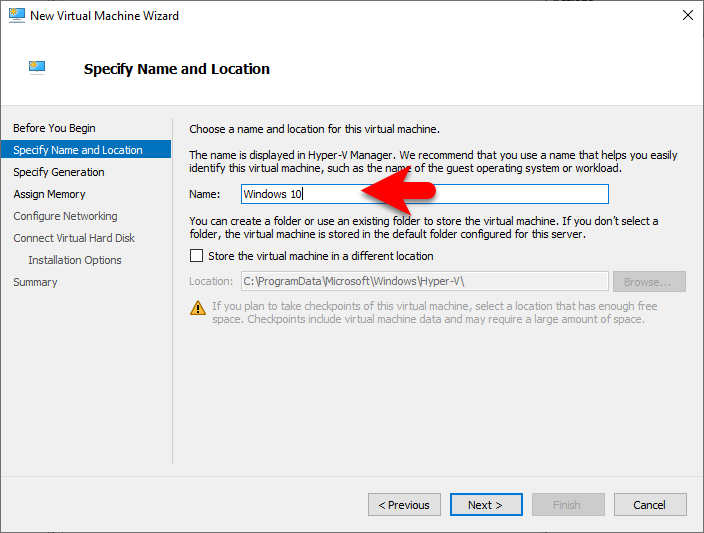
Specify the name and location of Windows and click next.
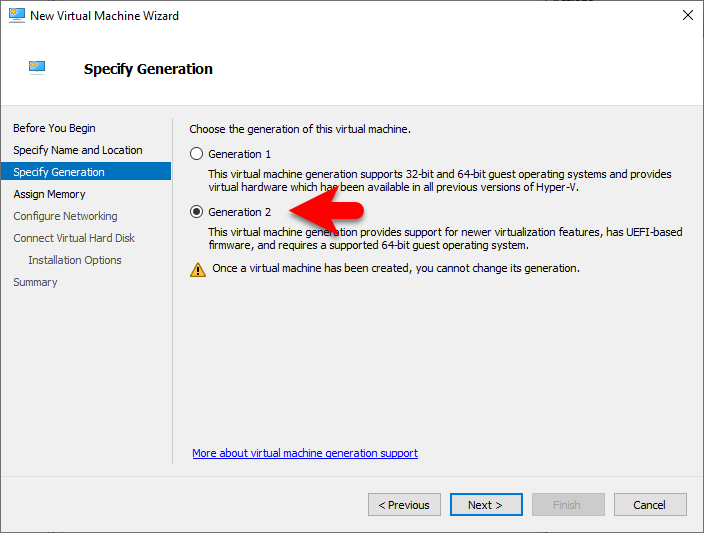
Specify the generation of Windows, so select the 2nd generation and click next.
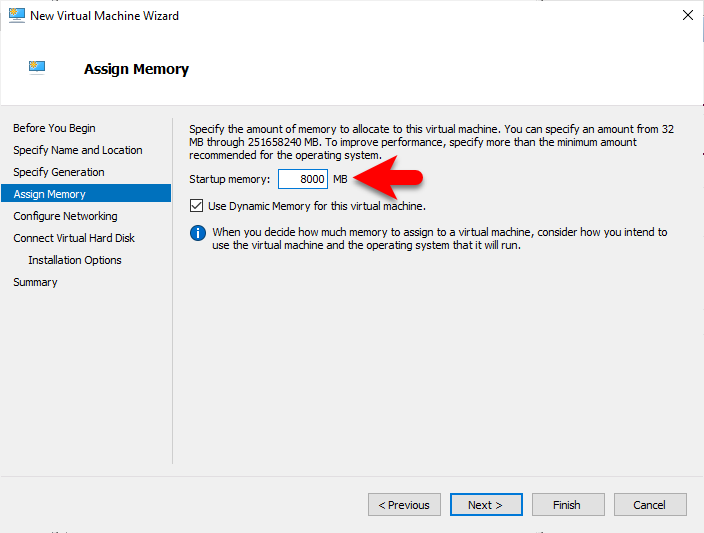
Assign the memory for Windows and click next.
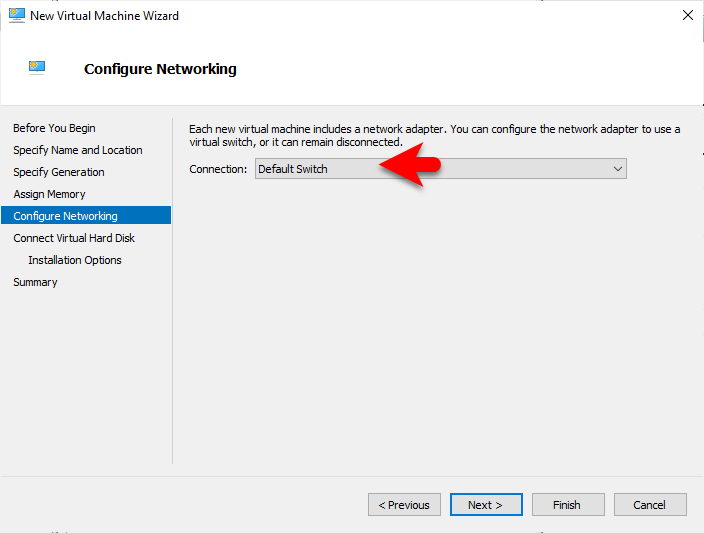
Configure the network for Windows 10 PC, select the default network, and click next.
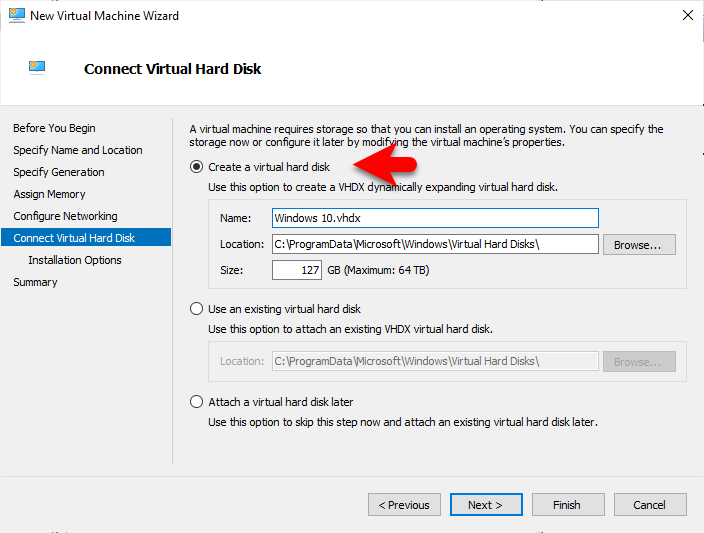
On connect virtual hard disk window, click on Create a virtual hard disk specify the location and click next.
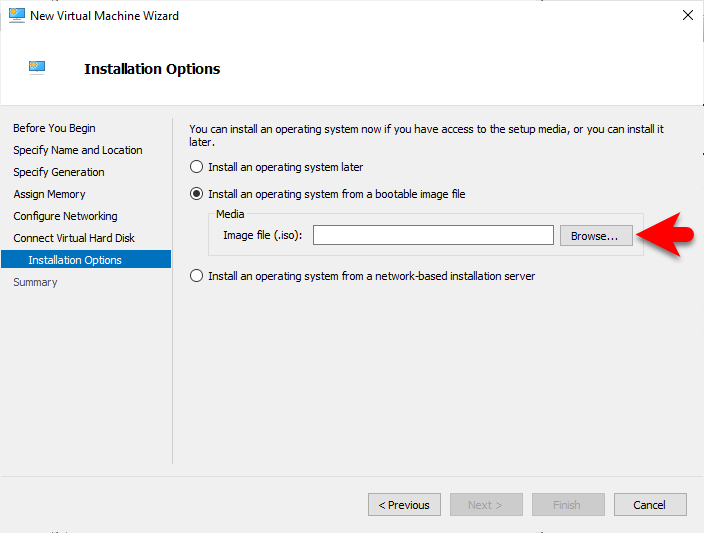
On the installation options click on (Install an operating system from a bootable USB image file), then click on Browse.
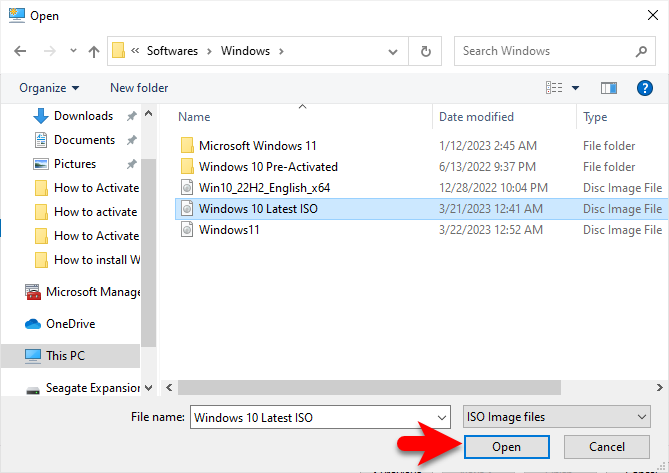
Select the Windows 10 ISO image file, and click on open.
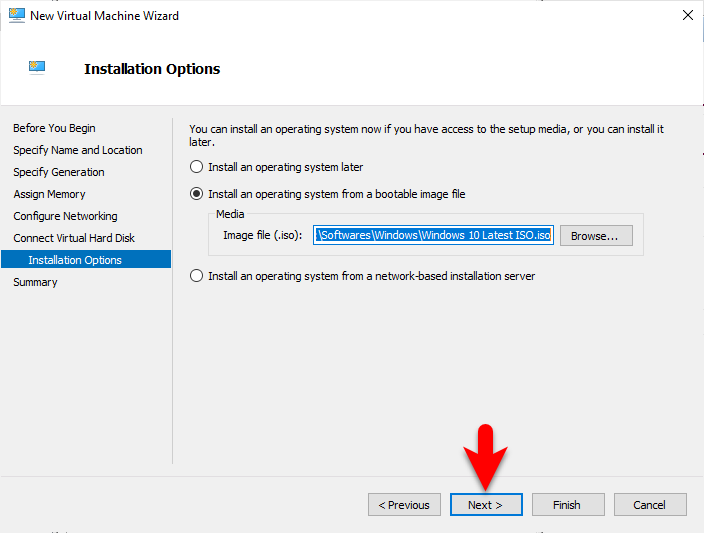
Once the Windows 10 ISO image file is inserted click on next.
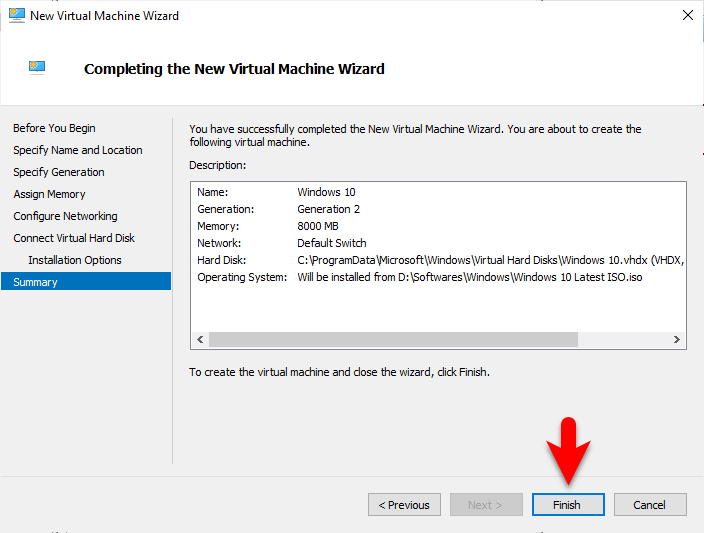
Once the Windows 10 ISO Image file is successfully inserted click on Finish to create the virtual machine.
Edit Virtual Machine Settings For Better Performance
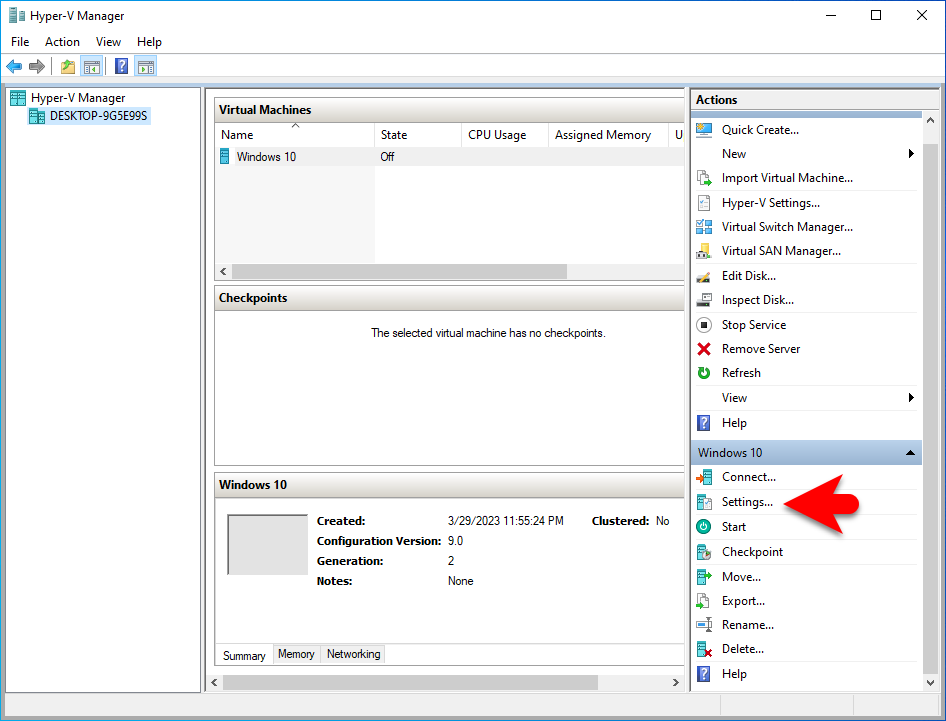
While the Windows 10 virtual machine is created for Windows 10 on Hyper-V, on the right-handed bottom window side click on the settings option to edit some settings for better performance.
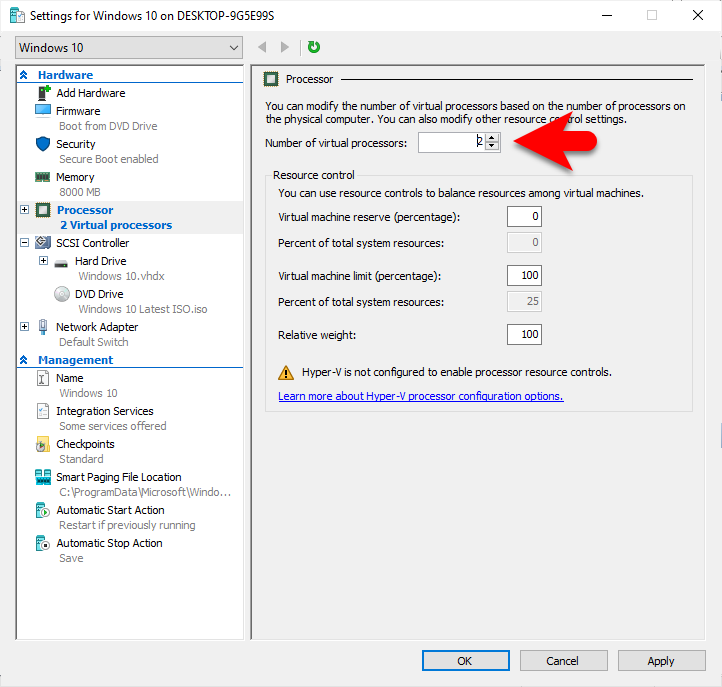
Once the Virtual machine settings window opened click on the processor tab, and increase the number of processors.
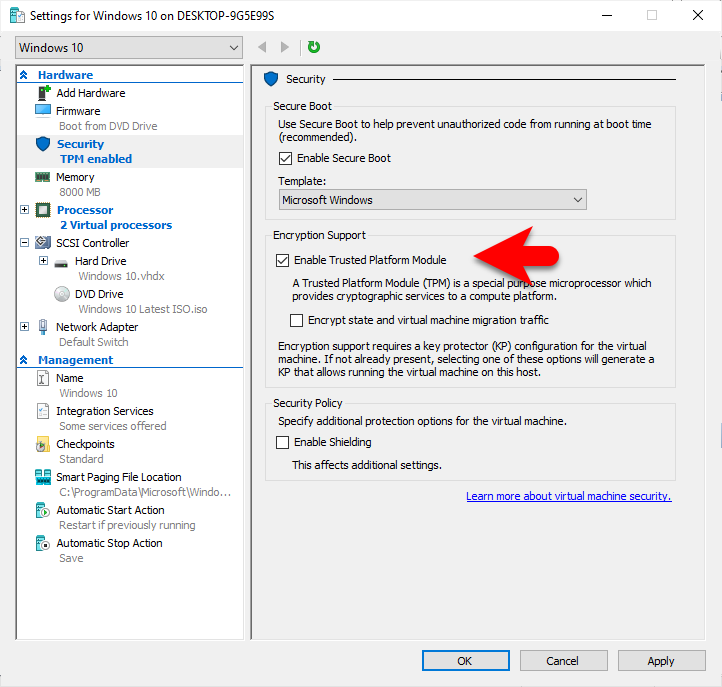
Select the Security TPM option, enable the secure boot, and enable the trusted platform module then click on OK to save changes.
Install Windows 10 on Hyper-V
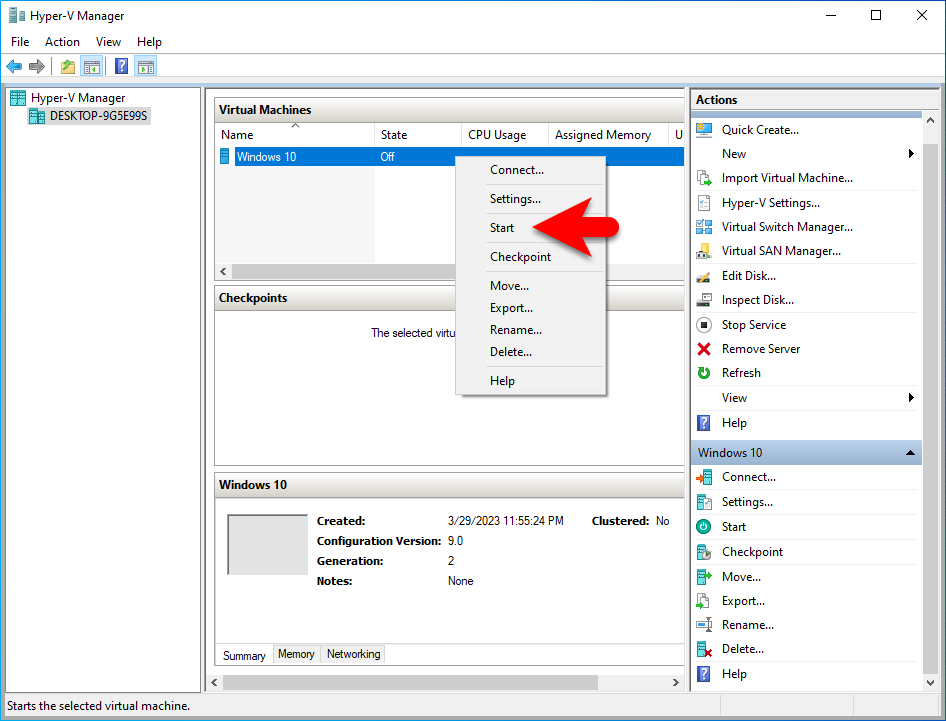
When the virtual machine of Windows 10 is successfully created on Hyper-V, now it’s time to install Windows on Hyper-V on Windows PC. Simply right-click on the virtual machine and click on start.
On the first window select your language, select your keyboard input method, and click next.

- Now click on install now option
- Click on I don’t have any product key
- Select the version of the Windows 10 operating system and click next.
- Check the box, accept the terms and license, and click next.
- Click on Custom: Install Windows only (advanced) option.
- Now there is no need to create any drive, simply click on next to proceed to the installation process.
- Now wait for the installation to be completed.
- When the installation is completed, the virtual machine will restart automatically.


Once the installation is completed you need to complete a few basic settings of Windows 10 on Hyper-V.
- On the first window select your language and click Yes.
- Select your input keyboard method and click Yes.
- Now you can add an extra keyboard layout if you don’t want to add another keyboard layout simply click on Skip.
- Click on Set up for personal use and click next.
- Click on the offline account option.
- In this window click on the limited experience option.
- Type your username then click next.
- Enter your username and password and click next.
- Accept with terms and services of Windows 10.
- Click on the Skip option
- On the Cartona window click accept.
- And finally, Windows 10 is successfully installed on Hyper-V.


Conclusion
Once Windows 10 is successfully installed on Hyper-V on Windows PC, you can enable the full-screen resolution on Hyper-V. Also, you can enable the drag-and-drop features on Windows 10 on Hyper-V.
One Comment