
Virtualization technology is one of the best sources to test and install various operating systems on a single physical drive. As there might be bunches of virtualization technology software, but the two best and most advanced virtual machine software is VirtualBox and VMware Workstation/Player. Both virtualization technology software allows you to test multiple operating systems such as Windows, macOS, Linux, Ubuntu, and Android on your actual machine. Through this guide step-by-step I will guide you on how to install macOS Ventura 13 on VMware on Windows PC.
Apple just announced macOS Ventura the latest macOS operating system at their latest event WWDC “Worldwide developer conference” alongside other Mac applications and products. As every year Apple is announcing and releases the latest technology including MacBooks, iPhones, Airpods, Airbuds, iOS, and macOS. macOS Ventura 13 is the nineteenth major release of the Apple operating system for MacBooks and computers. And macOS Ventura is nominated for the major successful release of macOS Monterey, which is the 12th major release of Apple after macOS Big Sur.
Related:
- How to Install macOS Big Sur Final on VirtualBox on Windows PC?
- How to Install macOS Big Sur Final on VMware on Windows PC?
- How to Install macOS Monterey Final on VMware on Windows PC?
- How to Install macOS Monterey Final on VirtualBox on Windows PC?
- How to Update macOS Ventura on VMware (Latest Version)
- How to Install macOS Ventura 13 on VirtualBox on Windows PC?
However, macOS Ventura 13 is one of the most attractive operating systems with bunches and bundles of new features after macOS Monterey. You can directly use the iOS application now right now on your macOS Ventura operating systems on your MacBooks. If you should install macOS Ventura even on your Windows PC, then you will be able to have access to its all features. The latest features of macOS Ventura are Weather updates, Mail, Freeform, Clock, Spotlight search, Safari, Messages, Facetime, Photos, iCloud, Font, Maps, Siri, Apple Music, Performance, and Security.
Also, macOS Ventura supports Macs with Apple Silicon and Intel’s 7th generation Kaby Lake chips or later. Below down are the Macs models that can be supported by macOS Ventura.
- iMac (2017 or later)
- iMac Pro (2017)
- MacBook (2017)
- MacBook Air (2018 or later)
- MacBook Pro (2017 or later)
- Mac Mini (2018 or later)
- Mac Pro (2019)
- Mac Studio (2022)
Install macOS Sonoma on VirtualBox & VMware
macOS Sonoma is the new Apple operating system that launched on June 5 2023 at the recent Apple event WWDC23 Worldwide Developer Conference. And right now it’s in beta mode, you can check the ways of installing it on VirtualBox and VMware.
- How to Install macOS Sonoma on VirtualBox on Windows PC?
- How to Install macOS Sonoma on VMware on Windows PC?
How to Install macOS Ventura 13 on VMware on Windows PC?
To install macOS Ventura on VMware on Windows PC, firstly you need to download the macOS Ventura ISO Image file. Then the second thing is you have to download and install the latest version of VMware Workstation which is VMware 17 Pro your Windows PC.
What is VMware Workstation? VMware Workstation is a giant technology virtualization tool or software developed by VMware.Inc. So, VMware Workstation can be legally licensed and purchased from its official website for $99. But if you can’t effort the amount to purchase it, then easily you can use the VMware Player. Also, while installing the VMware Workstation on your Windows PC, the VMware Player, comes with it there is no need to download it separately. Also, the VMware Workstation Pro 17 is working for only one month, after one month you will be asked to purchase it. In our case, you can use the VMware Player also for installing macOS Ventura 13 on it. You can check the below down-link to install VMware Workstation Pro 17 on your Windows PC.
Steps to Install macOS Ventura on VMware on Windows PC
- Enable Virtualization technology on the BIOS of your computer.
- Download the macOS Ventura ISO image file + VMDK.
- Download & Install VMware Workstation Pro 17 on your Windows PC (VMware Unlocker is not needed in VMware Workstation Pro 17).
- Create a new virtual machine for macOS Ventura on VMware.
- Edit the Virtual machine settings of macOS Ventura.
- Apply the VMX commands to configure the virtual machine.
- Perform a clean installation of macOS Ventura on VMware.
Here is the guide on how to convert a macOS ISO image file to a vmdk file on Windows PC.
- 4GB of RAM (8GB recommended)
- 50GB disk space (100GB recommended)
- SSD Recommended
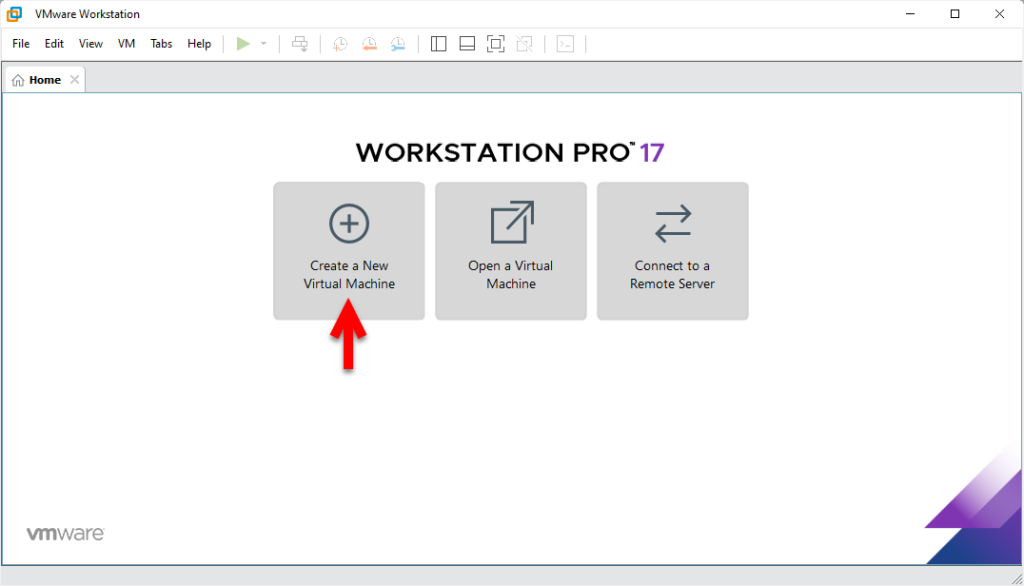
Create a New Virtual Machine for macOS Ventura on VMware
To create macOS Ventura virtual machine you have to open up the VMware Workstation or VMware Player. Once it opened on the first window simply click on Create a new virtual machine.
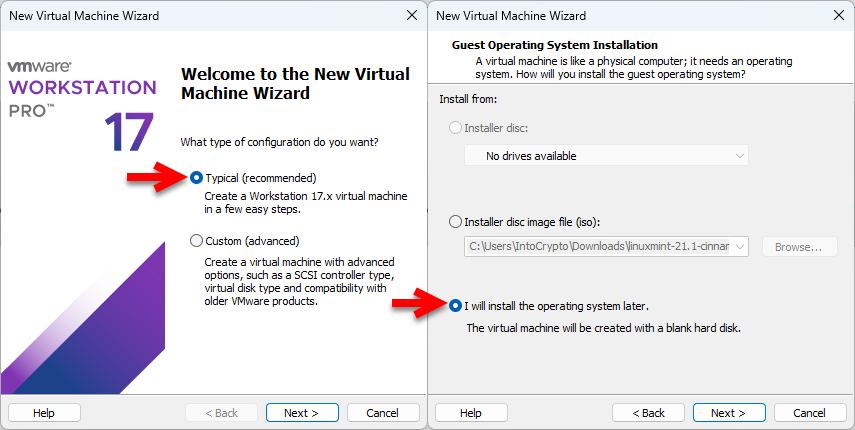
Once the next window opened, select the typical recommended and click next. On the next window select the option “I will install the operating system later” and click next.
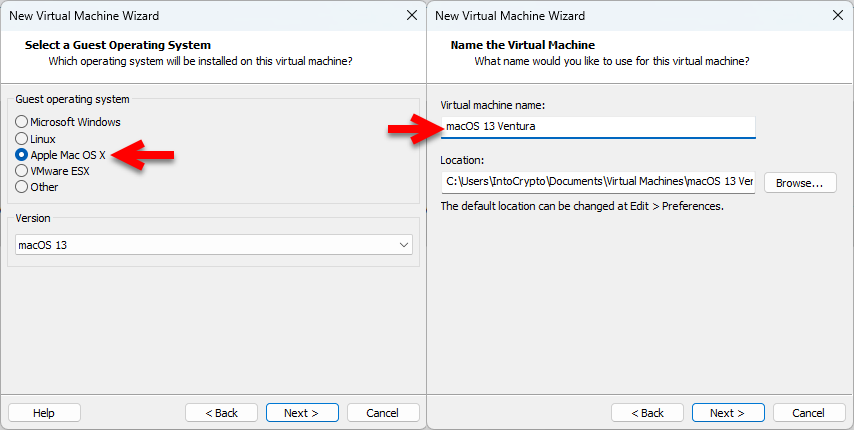
Select the guest operating system “Apple Mac OS X”, then select the version macOS 13 and click next. Enter the name of the virtual machine, specify the location where you want to install the macOS Ventura and click next.
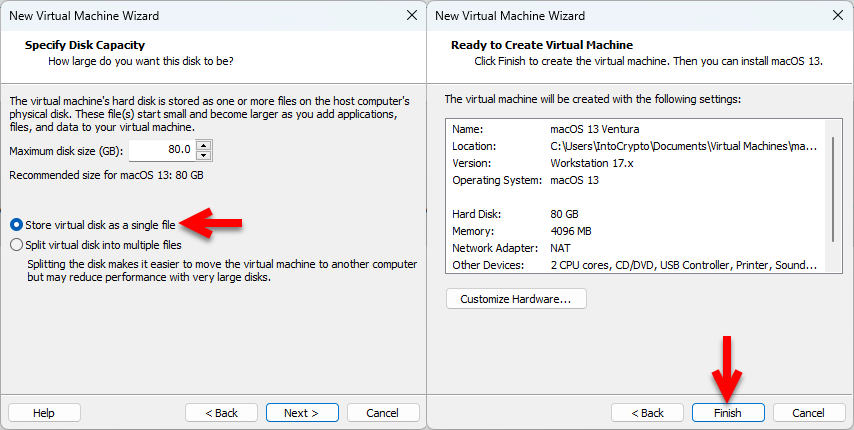
Select the option Soter virtual disk as a single file, then select the maximum size of disk for macOS Ventura and click next. Now click on finish to create the virtual machine.
Edit the Virtual Machine Settings of macOS Ventura For Better Performance
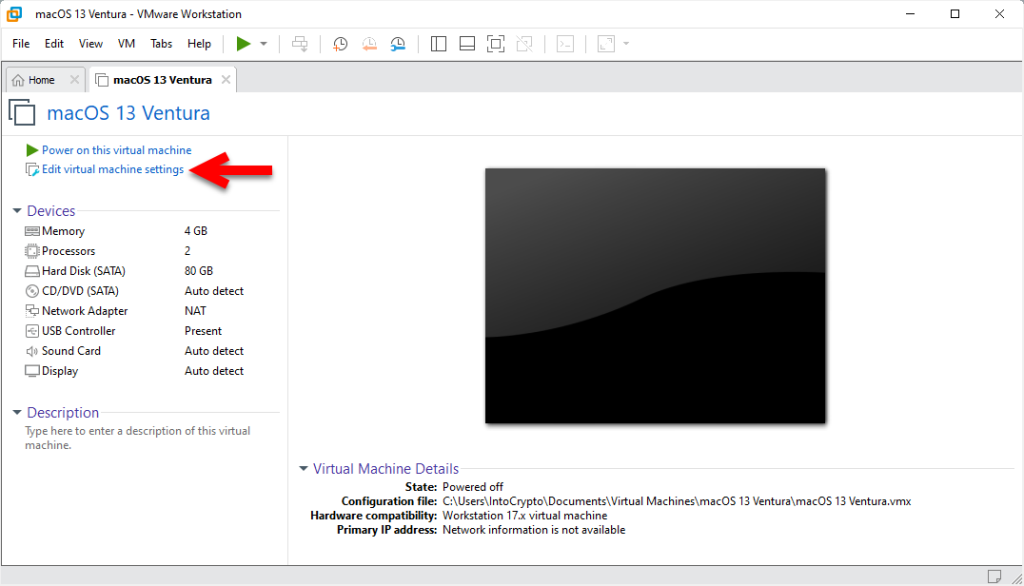
While the virtual machine is successfully created for macOS Ventura on VMware on Windows PC. So, for better performance, you need to edit a few settings. So, simply select the macOS Ventura virtual machine and click on edit settings.
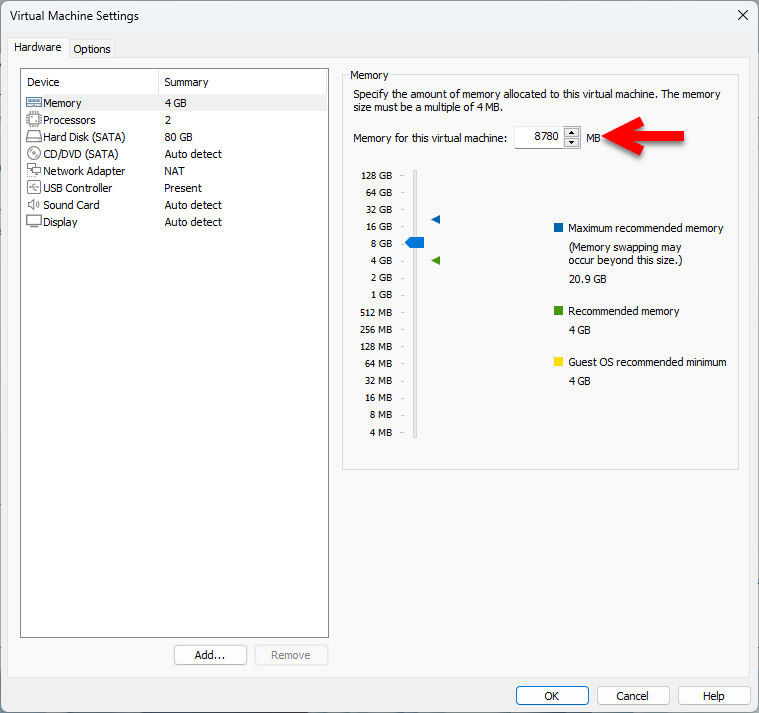
When the settings window opened, from the left-handed window side select the memory tab, then increase the memory.
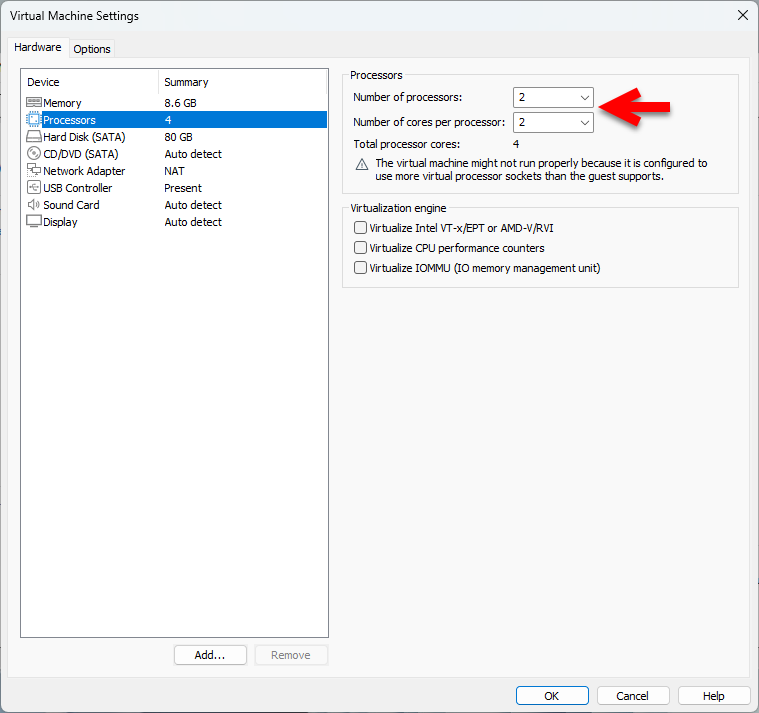
Now select the processor tab, and increase the number of processors.
Select the CD/DVD SATA tab, click on use an ISO image file, and click on the browse option to insert the macOS Ventura ISO image file.
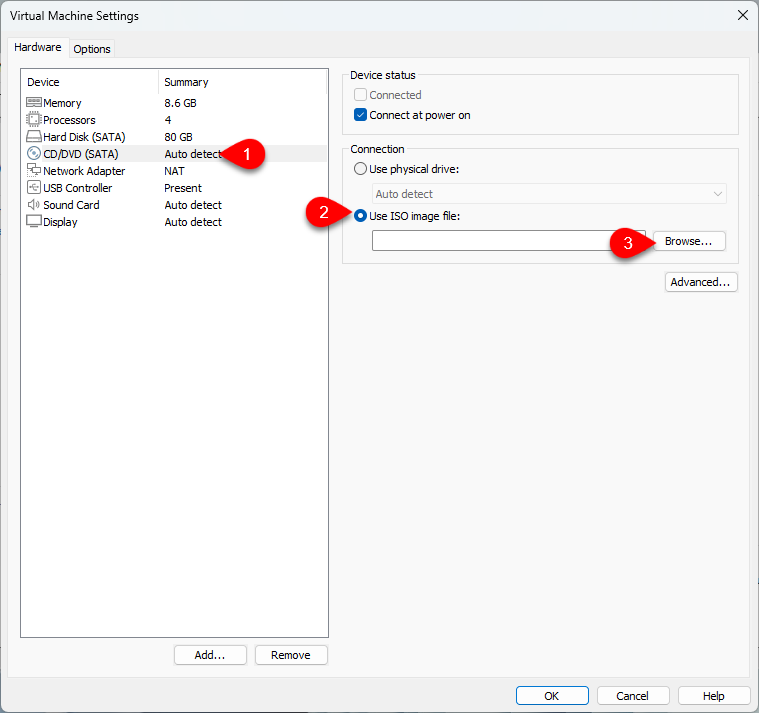
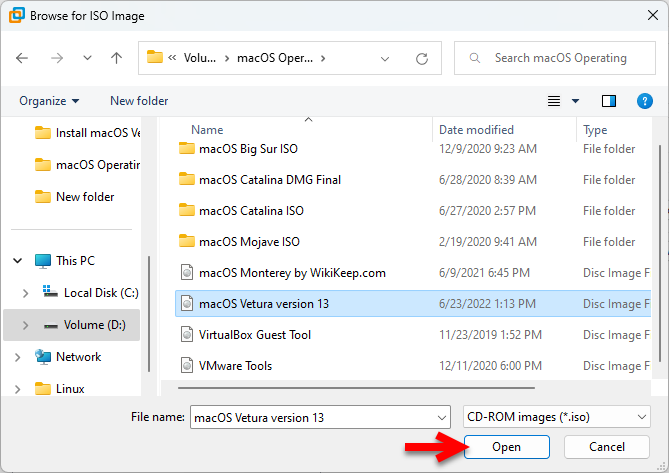
Now go to the place where you saved the macOS Ventura ISO image file and click on open.
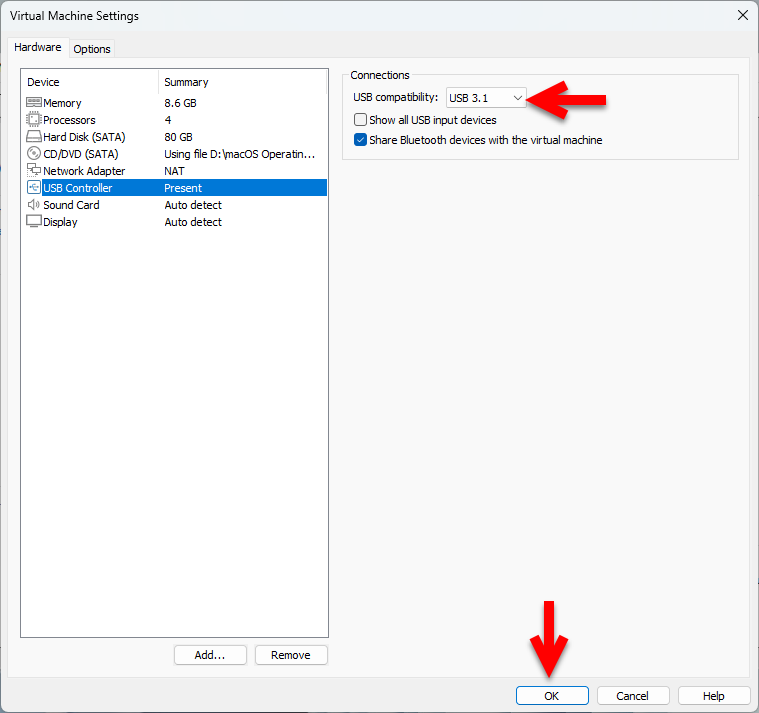
And now go to the USB Controller tab, select USB 3.1 from the drop-down menu, then click on OK to save the changes.
Edit the VMX file of macOS Ventura
So, now the virtual machine is successfully created, also, the macOS Ventura virtual machine settings are performing very well. And it’s time to edit some small commands on the vmx file of macOS Venutra. This small command is the source of the configuration of macOS Ventura 13 on VMware Workstation on a Windows PC. If you don’t apply these commands then you won’t be able to install the macOS Ventura on VMware on Windows PC.
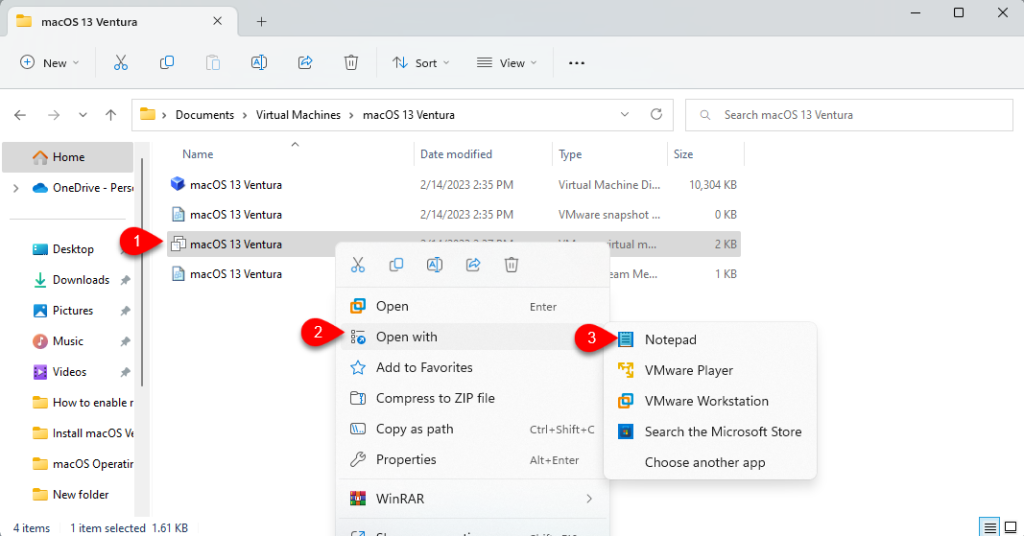
To edit the macOS Ventura 13 vmx file simply close the VMware Workstation from the background.

When the VMware is closed go to the Virtual Machines folder, and find the macOS Ventura virtual machine. Then right-click on the vmx file of macOS Ventura>open with>notepad.
Once the vmx file is opened with notepad, scroll down to the bottom of the window and apply the below-down codes. When the code is applied simply press Ctrl+S to save the changes.
Smc.version = "0"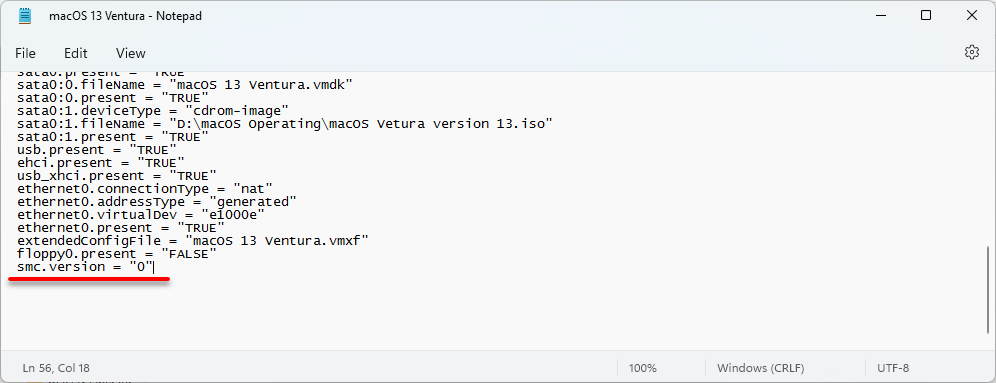
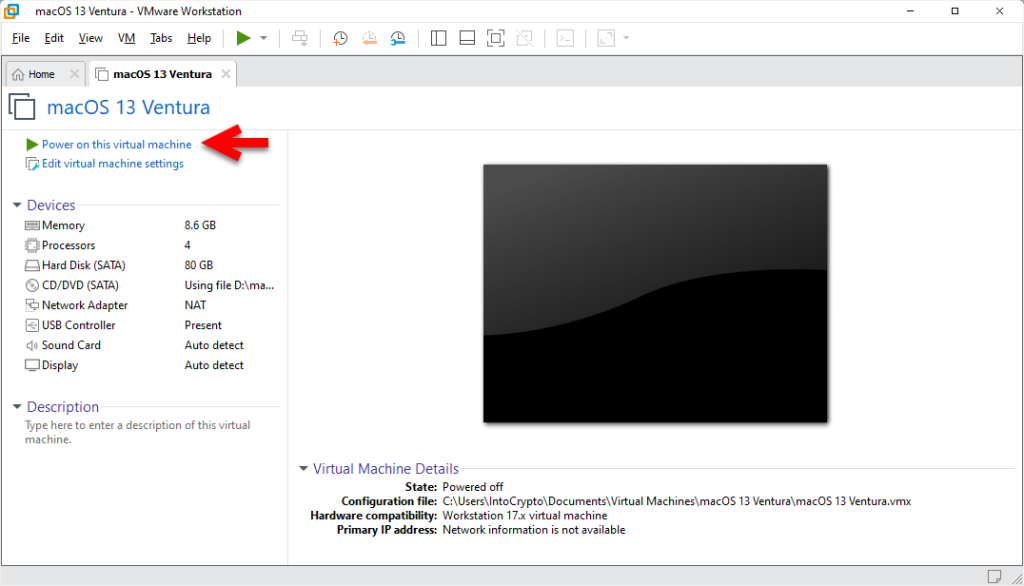
Perform a Clean Installation of macOS Ventura on VMware on Windows PC
When the virtual machine of macOS Ventura is created on VMware Workstation on Windows PC. Also, the macOS Ventura vmx file is configured so it’s time to install macOS Ventura on VMware on Windows PC. Now again navigate to the start menu and open up the VMware Workstation. While the VMware opened, select the macOS Ventura virtual machine and click on power on this virtual machine to start the installation.
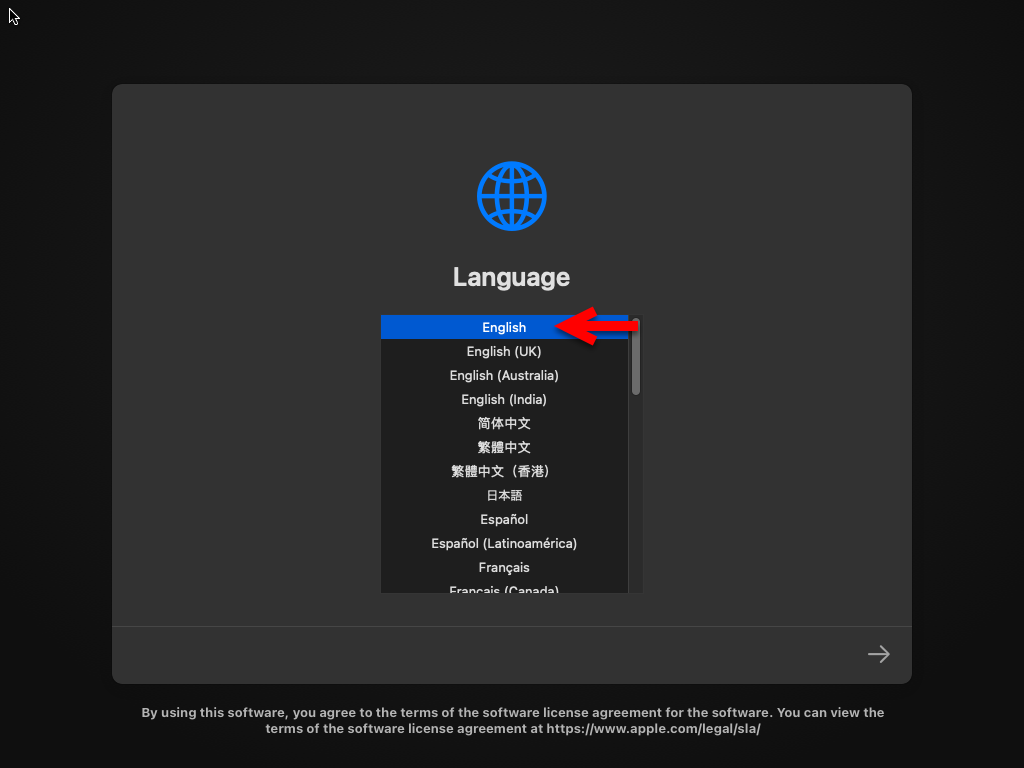
Once the macOS Ventura installation is launched on the first screen select your language and click continue.
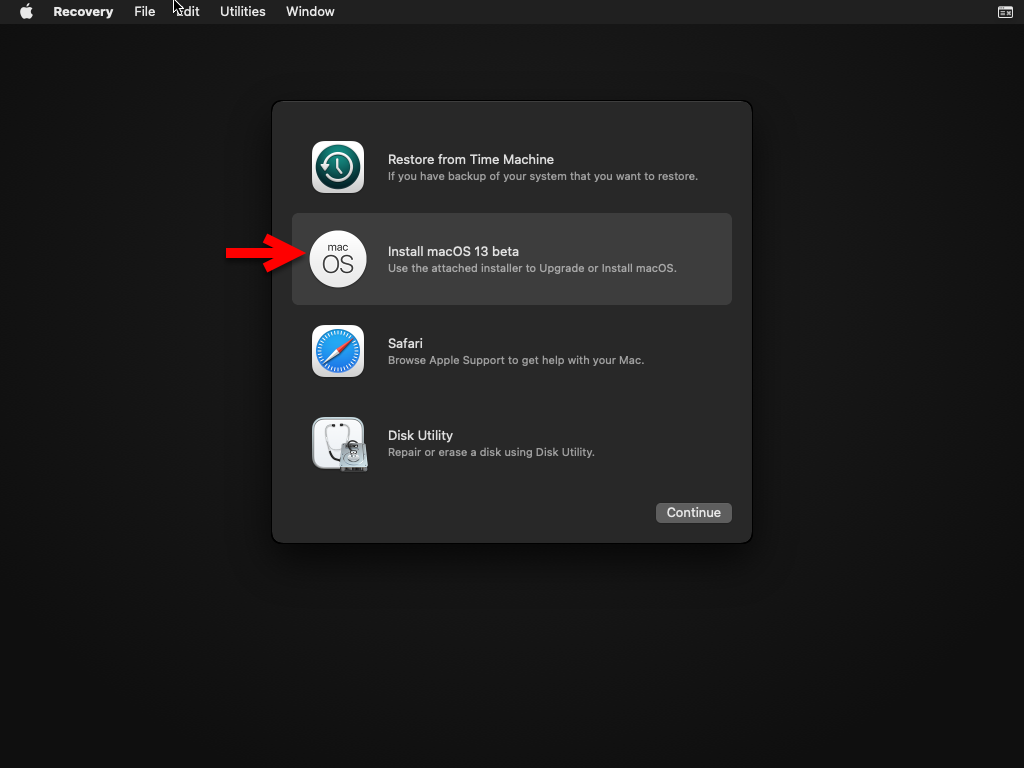
On the recovery window, select the disk utility option, and click continue.
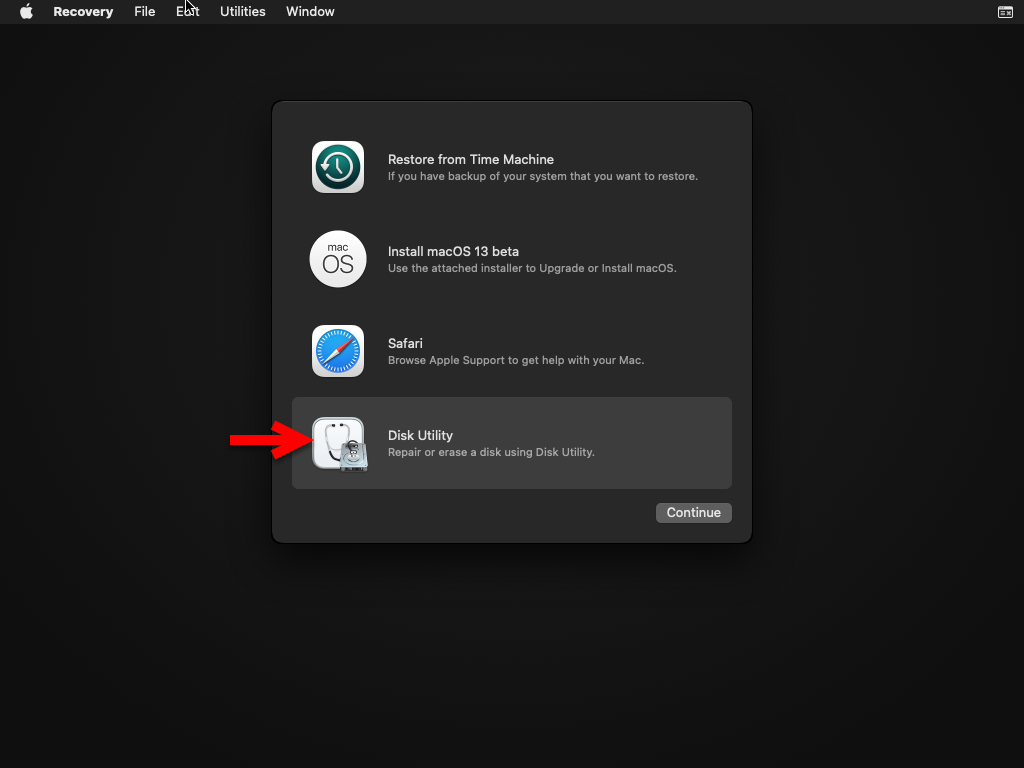
From the left-handed window, the side selects the “VMware Virtual SATA hard disk”, and clicks on Erase. If you click on the erase option the disk will format for macOS Ventura to install it. So, you have to format the disk according to the below down settings.
- Name (Optional)
- Format (Mac OS X Extended Journaled)
- Scheme (GUID Partition Map)
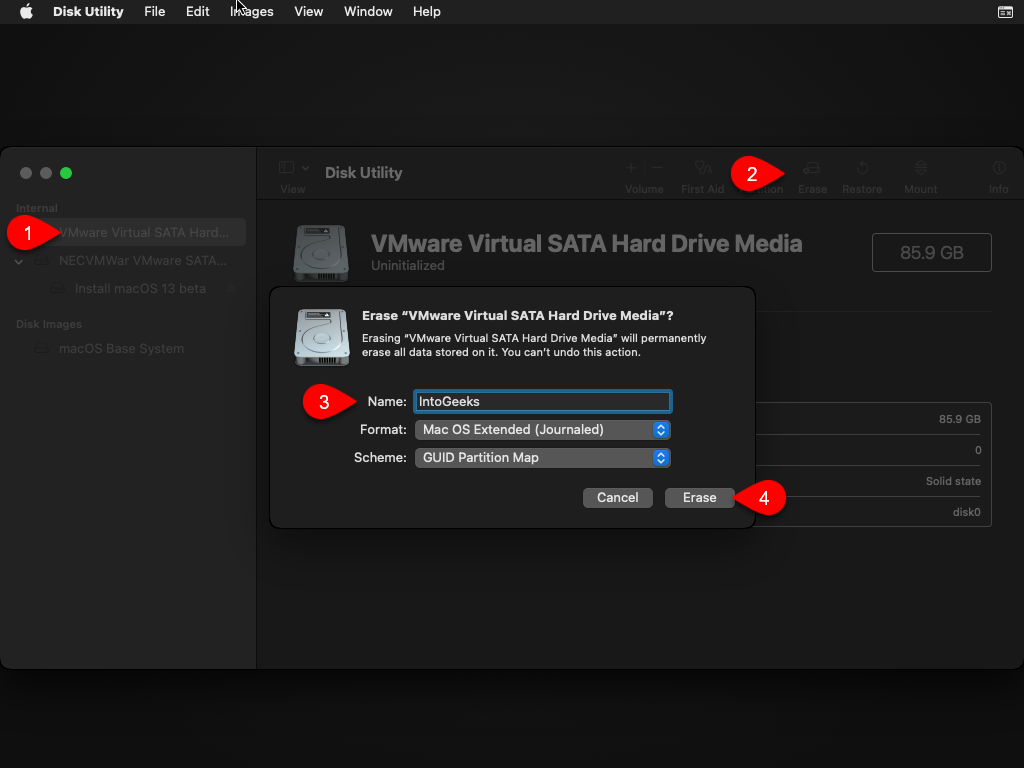
Once the disk is formatted click on the done option.
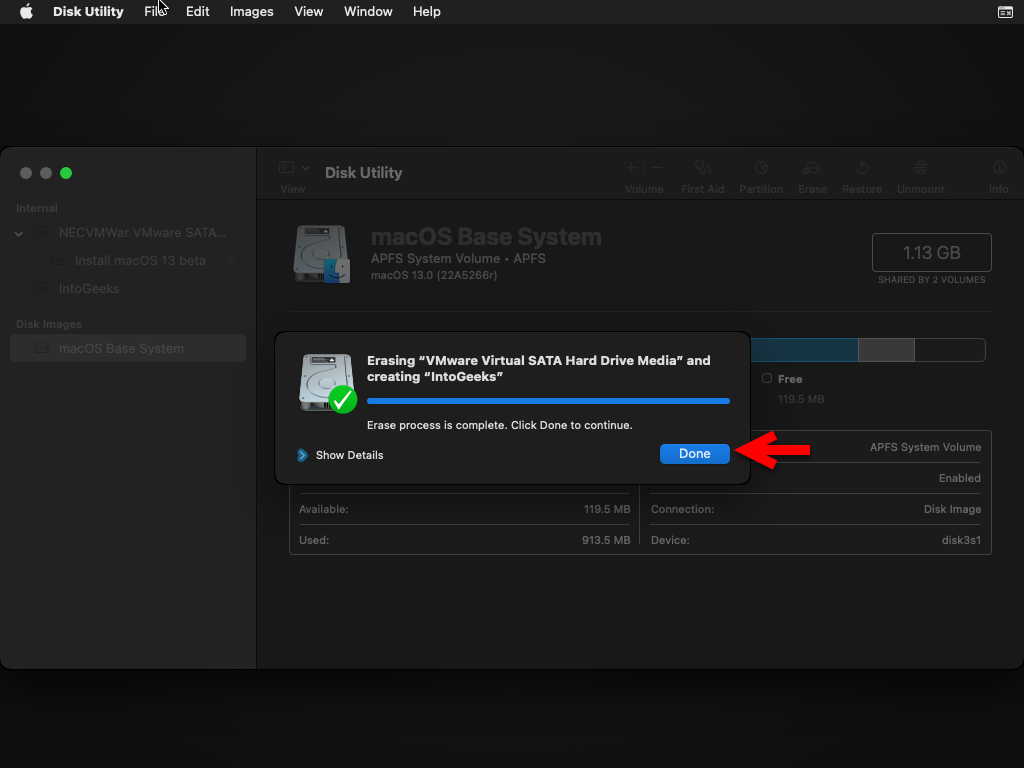
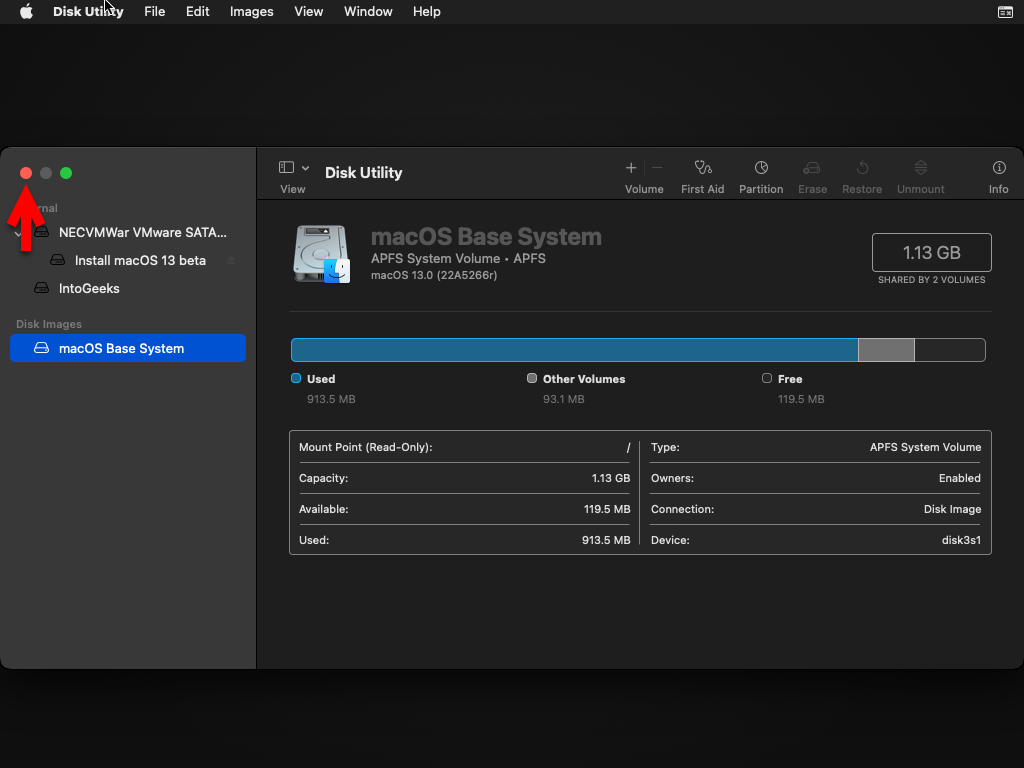
Once the disk is formatted successfully close the recovery window.
Select “Install macOS Ventura 13” and click continue, to proceed with the installation process.
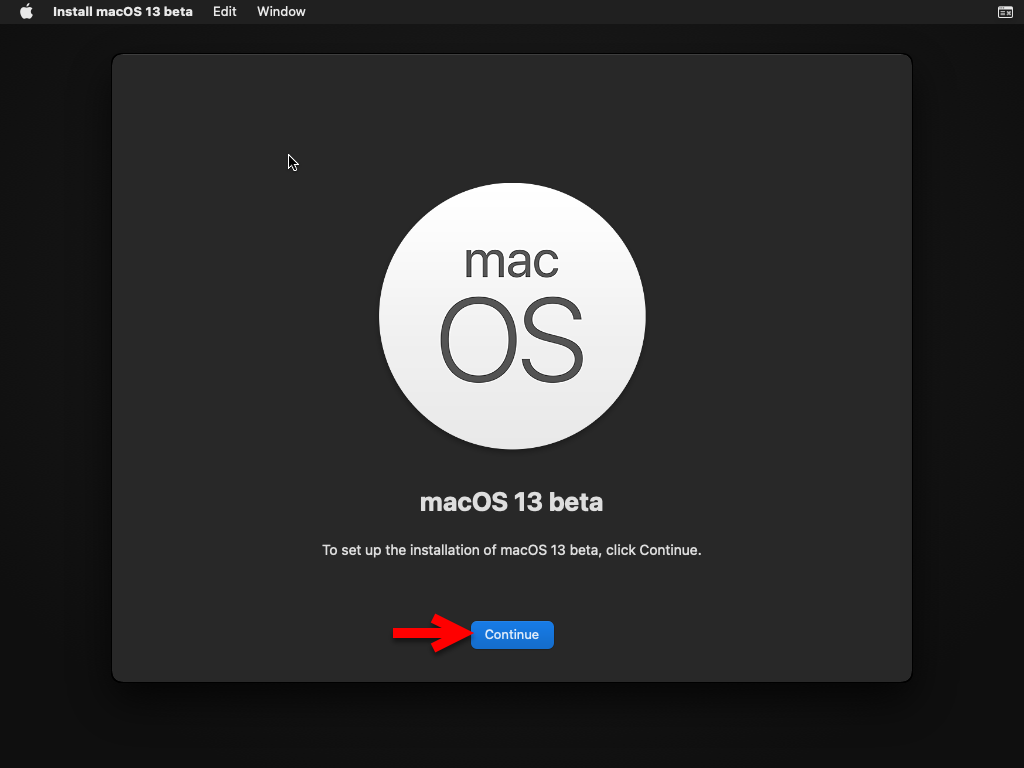
To set up the installation of macOS Ventura 13 on VMware click on continue.
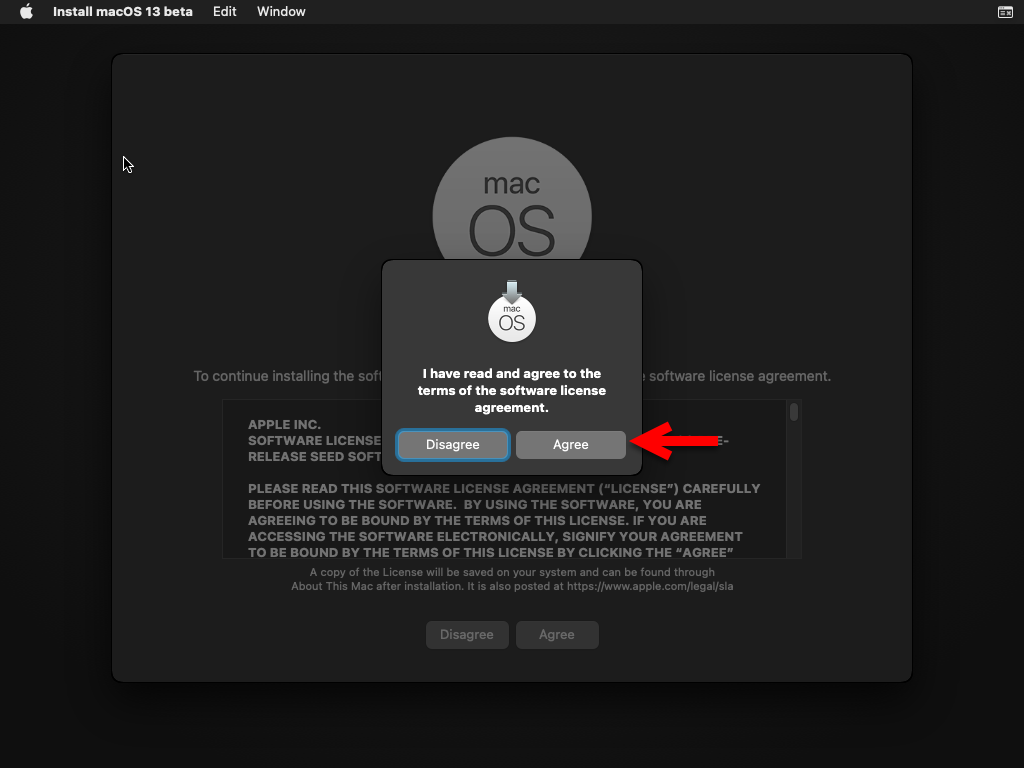
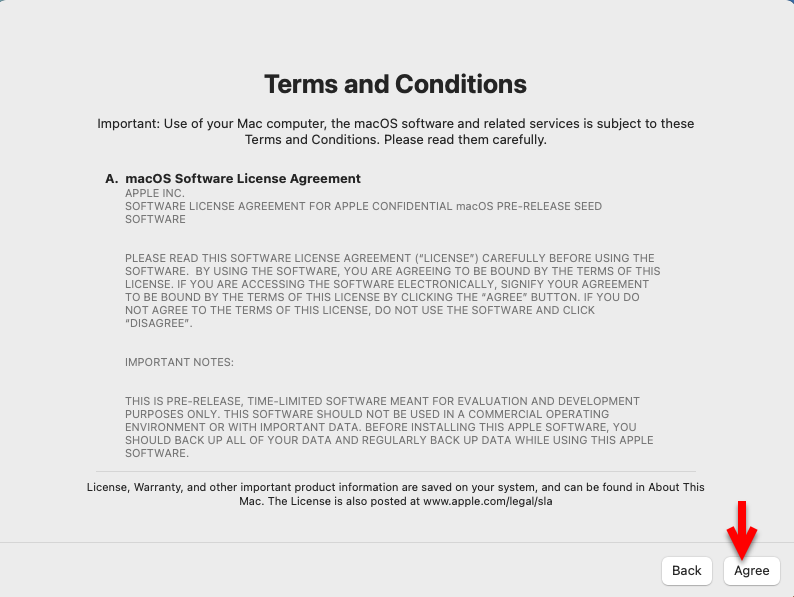
Agree with the terms and conditions of macOS Ventura.
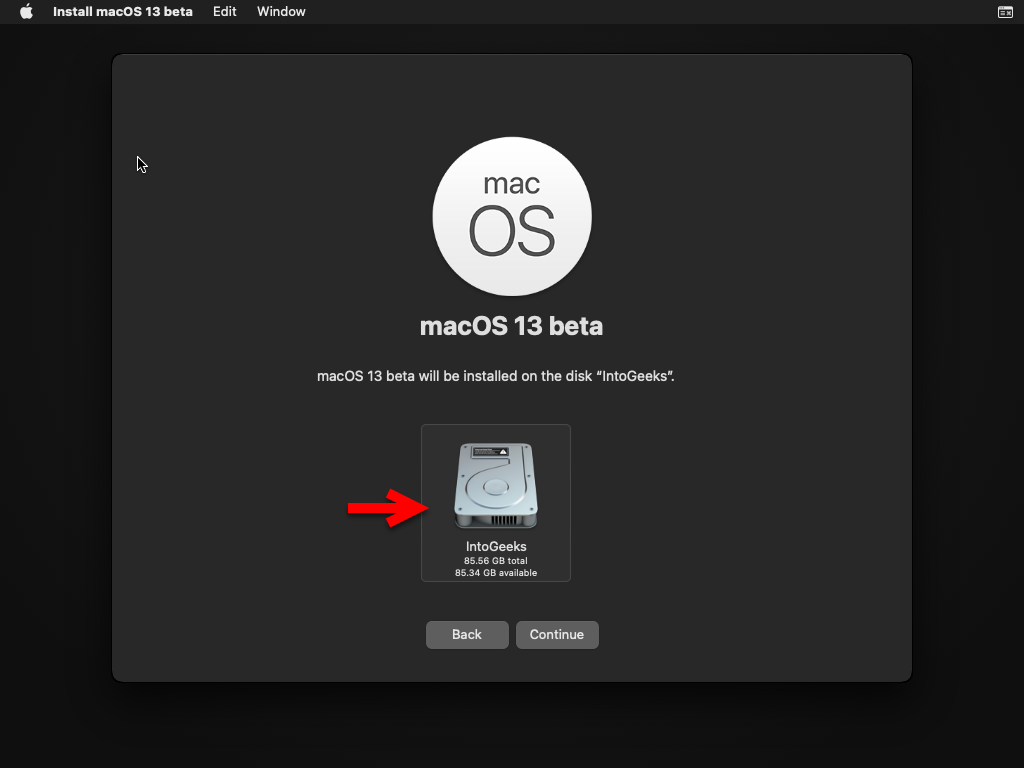
Now select the disk which has been formatted in the recovery window for macOS Ventura, then click continue.
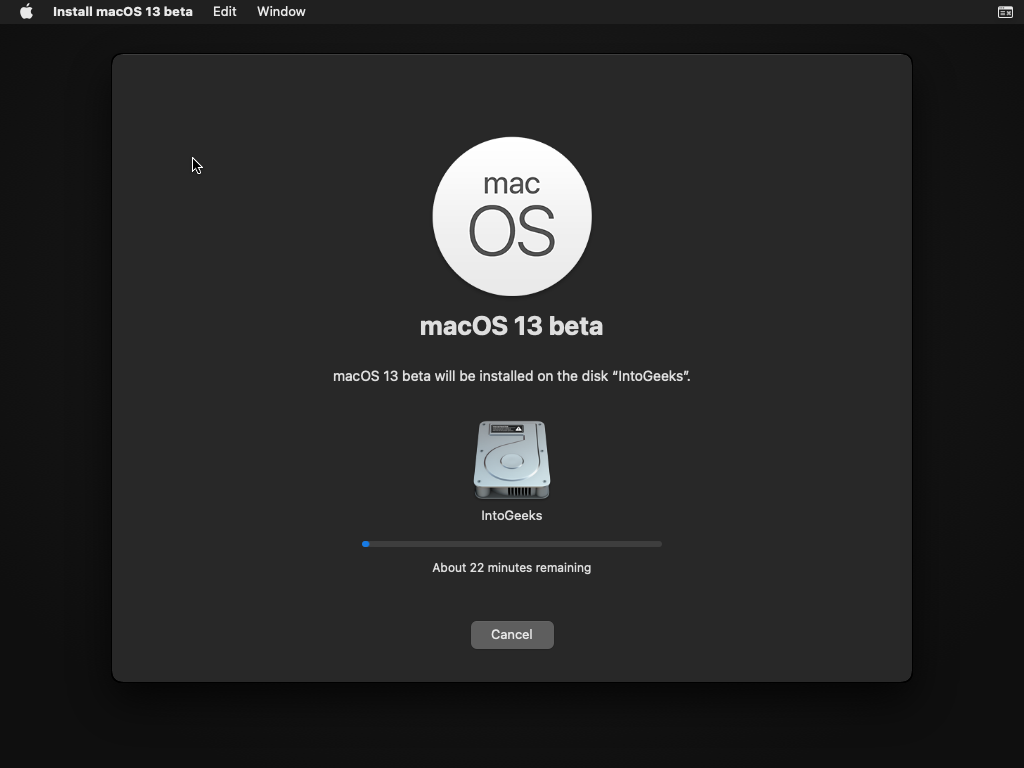
Now the macOS Ventura starts installing it on VMware on Windows PC, so the installation may take lots of time. And also, the virtual machine might restart several times during the installation. In this case, you don’t need to do anything while installing macOS Ventura on VMware on Windows PC.
Complete the Basic Settings of macOS Ventura on VMware
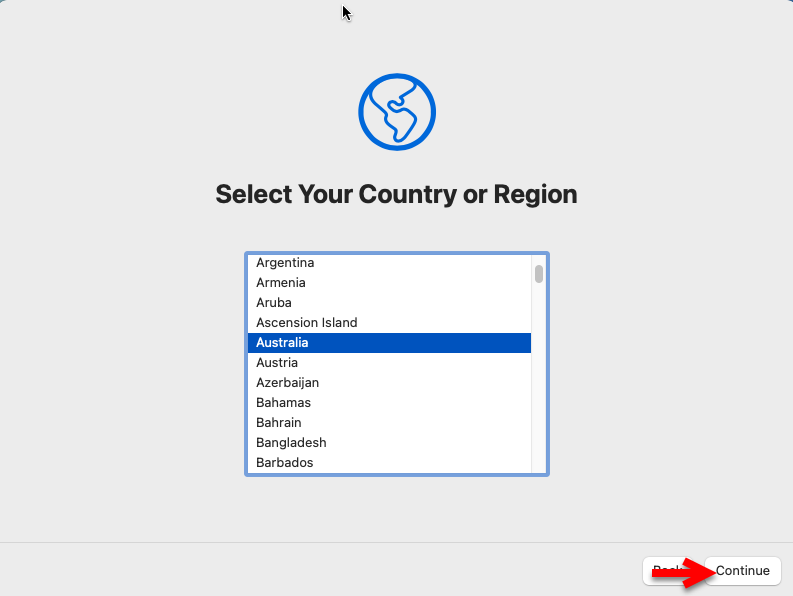
When the installation of macOS Ventura is completed on VMware on Windows PC. So, the virtual machine will restart, then you will be asked to complete a few settings for the first use. On the first window select your county and click next.
Now you can choose your written and spoken language for macOS Ventura. If you don’t want to add any other language simply click on continue.

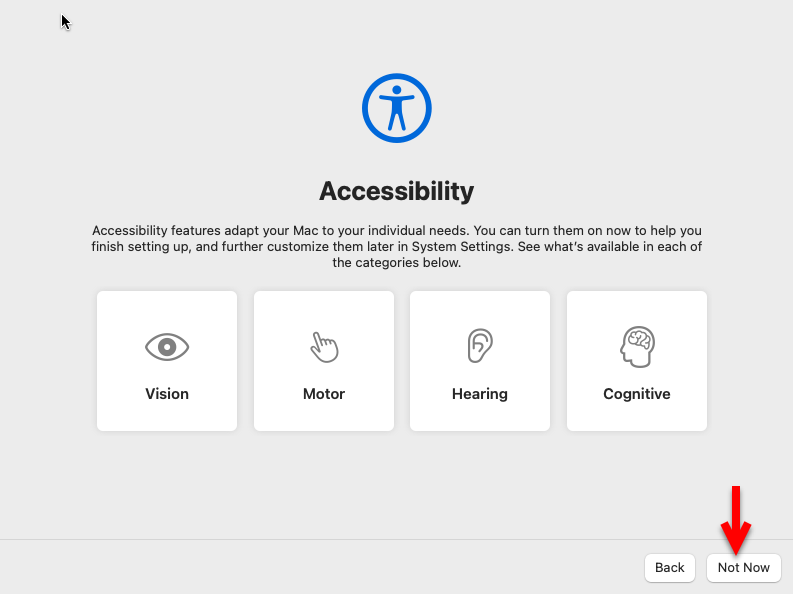
Accessibility features adapt your Mac to your individual needs. You can turn them on now to help you finish setting up and further customize them later in system settings. See what’s available in each of the categories below. So, in this step, you don’t need to do anything simply click continue.
Select the option “My computer doesn’t connect to the internet” and click continue.

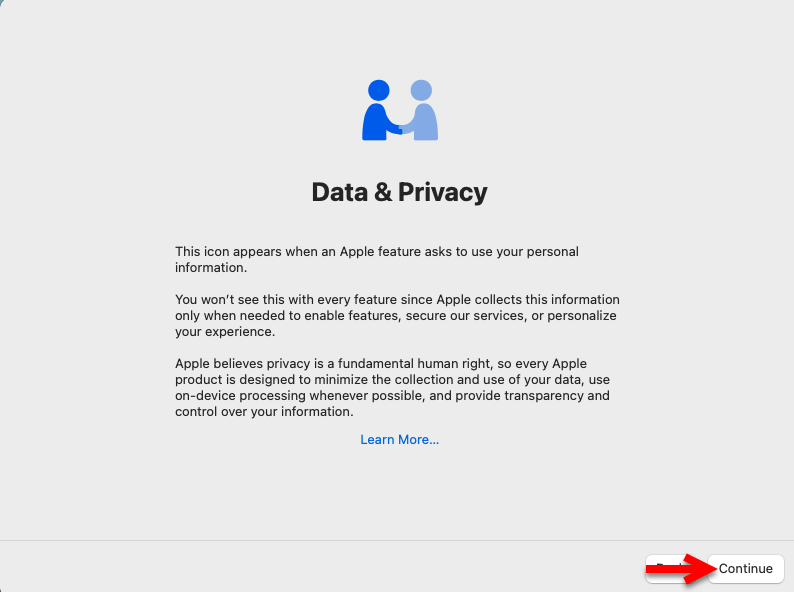
On the Data & Privacy window simply click on continue, without any further do.
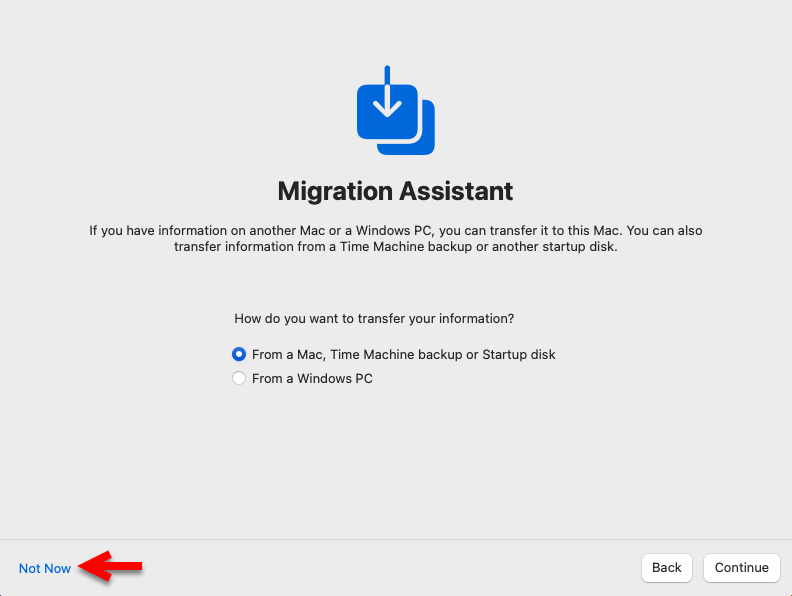
If you have information on another Mac or a Windows PC, you can transfer it to this Mac. You can also transfer information from a Time machine backup or another startup disk. Again here you don’t need to do anything simply click on the not now option.
Agree with the terms and conditions of macOS Ventura by clicking two times on Agree button.
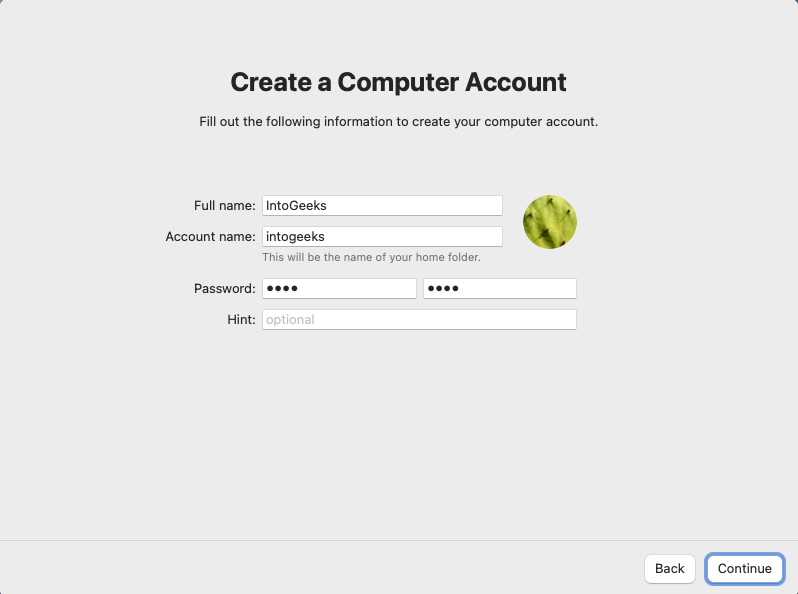
Now create your account on macOS Ventura by entering your full name, account name, and password, and click on the continue option to proceed.
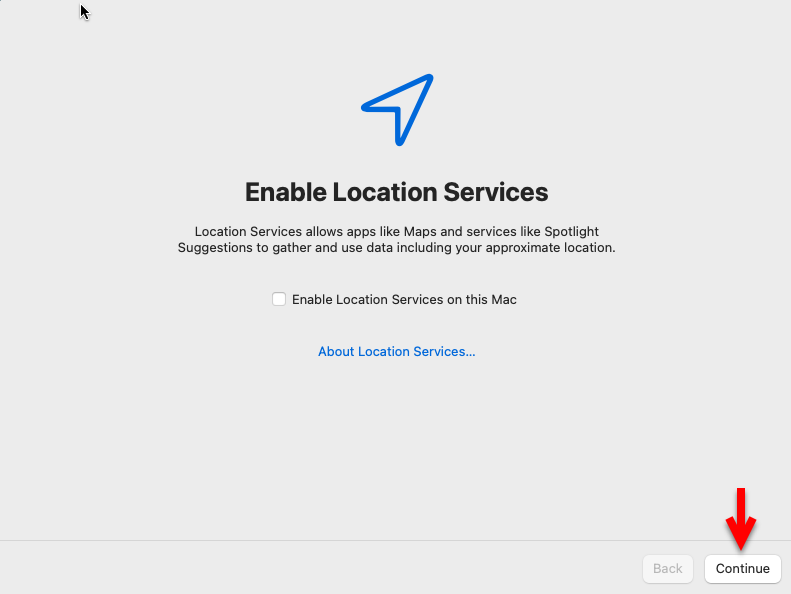
Location services allow apps like maps and services like spotlight suggestions to gather and use data including your approximate location. You can enable the location services on macOS Ventura, by checking the box of location, if you don’t want simply click on continue.
Select the time zone where you live, and click continue.

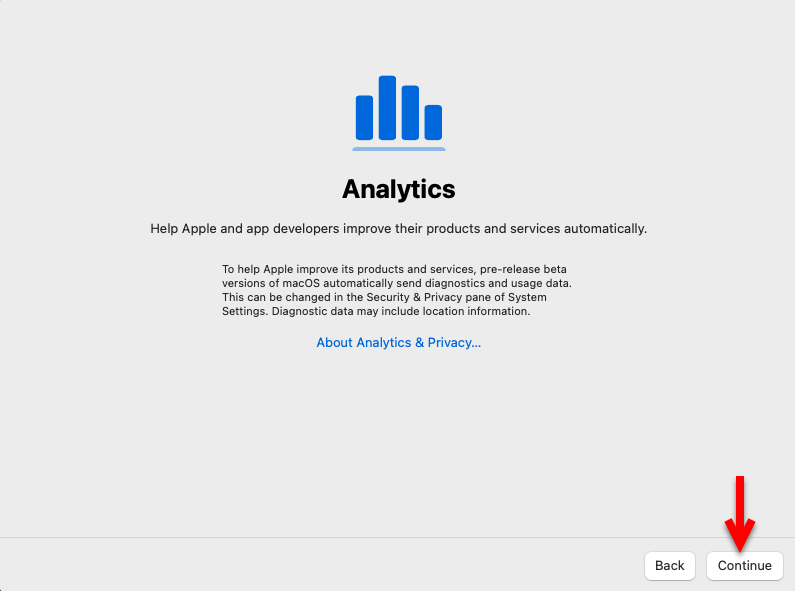
On the analytics window simply, click on the continue option to proceed.
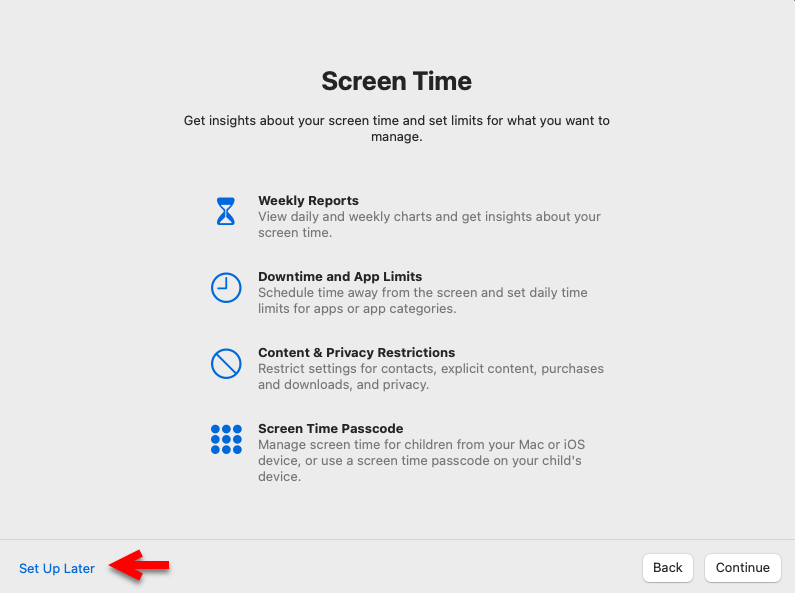
You can configure the screen time of macOS Ventura on VMware, there are options for the configuration of time zone. So, if you don’t want to use the screen time simply click on set up later.
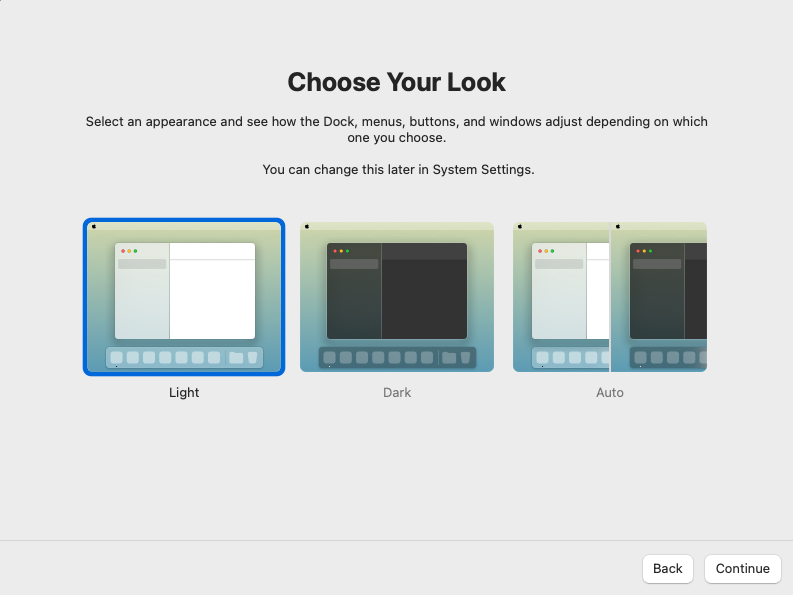
Choose your look for macOS Ventura 13 on VMware. There is the light mode, dark mode, or auto mode for macOS Ventura. Now it depends on you which one suits better for you.
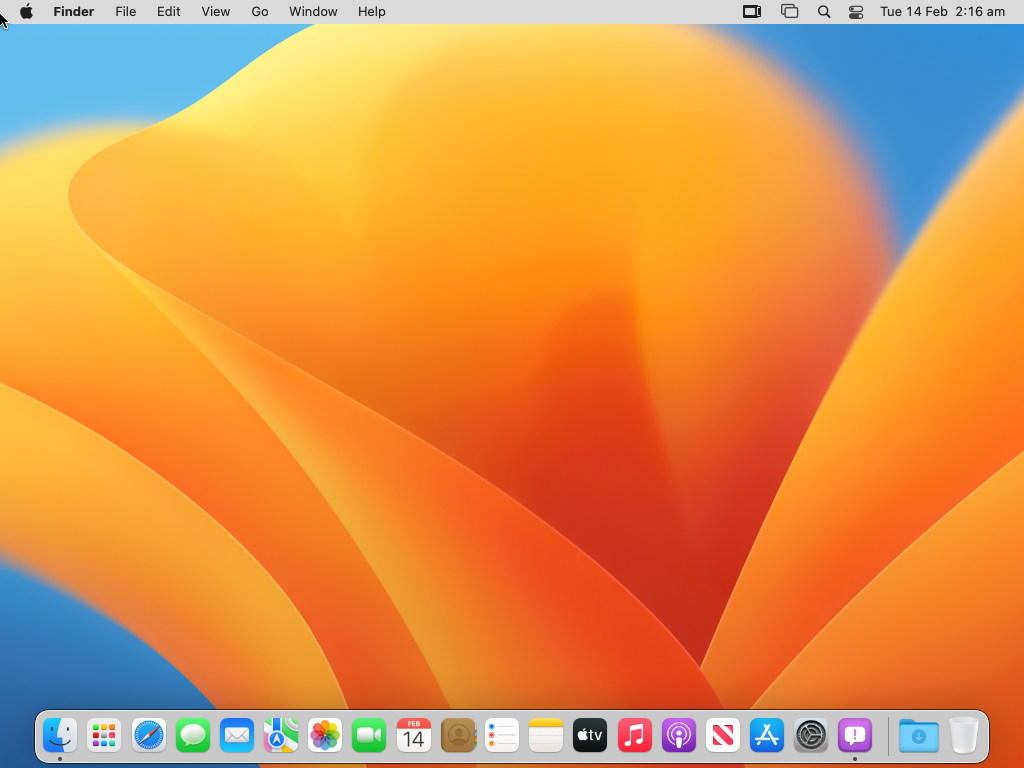
And finally, macOS Ventura successfully installed on VMware on Windows PC. Now go ahead and enjoy using macOS Ventura 13 version on VMware on Windows PC.
Conclusion
In addition, macOS Ventura version 13 is installed on VMware on Windows PC. Now you can enjoy using it on your Windows PC, as a second operating system. It works as the actual Mac PC, there is no need to use another Mac machine alongside your Windows PC. The only thing just remained is to enter macOS Ventura 13 full-screen mode on VMware on Windows PC.


17 Comments