
Apple unveiled macOS Sonoma at the most prominent event WWDC23 Worldwide Developer Conference on 6 June 2023 with the replacement of macOS Ventura. Apple brought some exciting changes to macOS Sonoma and much better feature enhancements, now the users can replace the widgets directly on the desktop screen and enhancement for Safari supports multiple background applications. The lock screen has been changed to have a clock similar to iOS and iPadOS. Gaming Mode in macOS Sonoma boosts up the gamer’s performance while playing a game, with CPU and GPU.
As of right now, macOS Sonoma is in beta mode, and most people want to experience the new features and new wallpaper of macOS Sonoma on their computers. So, there are no worries because we will cover the installation of macOS Sonoma on a Virtual machine. You can use the virtualization software tool to install multiple operating systems at the same time on a single physical machine.
Through this article, you will learn a step-by-step guide on how to install macOS Sonoma on VMware on Windows PC. There are several ways of installing macOS Sonoma on a Windows PC, but using the VMware Workstation is pretty much an easy way to install it on Windows PC. However, to continue installing macOS Sonoma on VMware on Windows PC, firstly you need to download or create a macOS Sonoma ISO Image file or its vmdk file. All the required files will be available in the below links, download the required files from the below down.
macOS Sonoma is compatible with the below-down machines.
- iMac (2019 or later)
- iMac Pro
- MacBook Air (2018 or later)
- MacBook Pro (2018 or later)
- Mac Mini (2018 or later)
- Mac Pro (2019 or later)
- Mac Studio (all models)
How to Install macOS Sonoma on VMware on Windows PC?
To continue installing macOS Sonoma on VMware on Windows PC, firstly you need to download and install all the required files. The very first thing is you need to download and install the VMware Workstation latest version, the next one is you need to download the macOS Sonoma ISO image file or VMDK File. You can get all the required files from the below downlinks.
How to Create macOS Sonoma ISO Image File
- Download macOS Sonoma ISO Image file
- Download macOS Sonoma VMDK file
- Download VMware Workstation Pro 17
Create a New Virtual Machine for macOS Sonoma on VMware
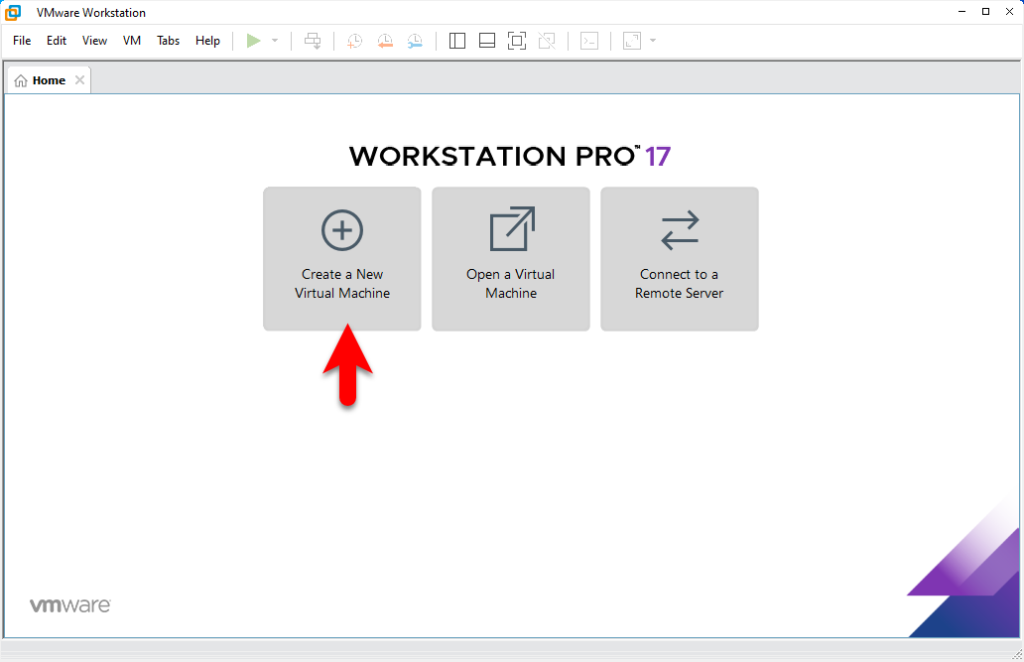
After that, you have successfully installed the VMware Workstation on your Windows PC. The next step is you need to create a new fresh virtual machine for macOS Sonoma on VMware. Head over to the start menu then open up the VMware Workstation, on the first window click on “Create a New Virtual Machine”.
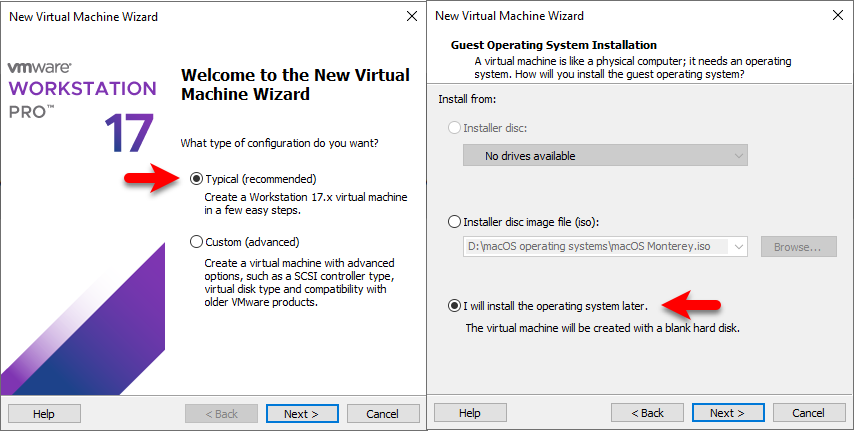
Select typical recommended then click next, select the option I will install the operating system later, and click next.
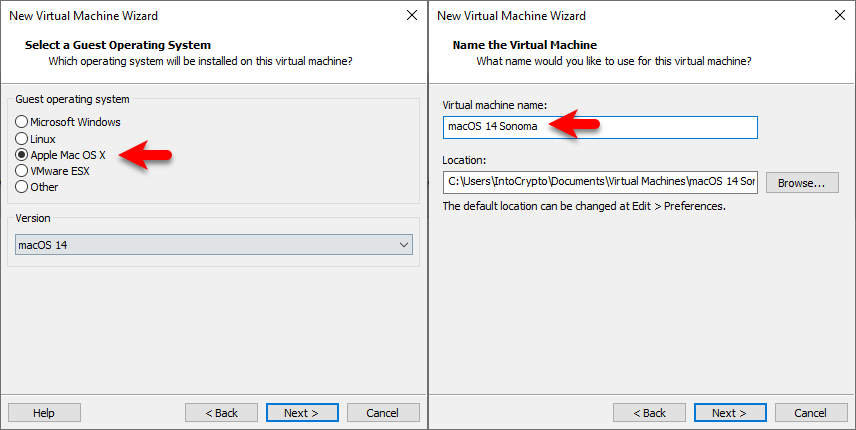
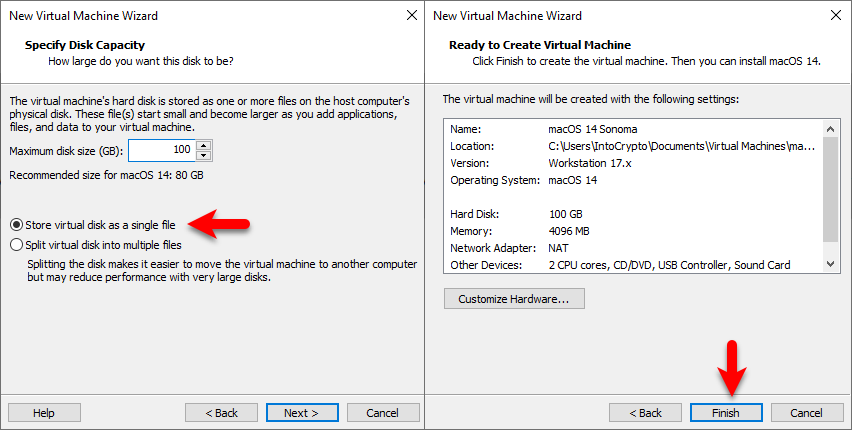
Select the guest operating system Apple Mac OS X, version “14” then click next, type the name of the virtual machine, then specify the location and click next.
Select the option “Store virtual disk as a single file” then specify the maximum disk size then click next, and click on finish to create the virtual machine.
Edit the Virtual Machine Settings for Better Performance
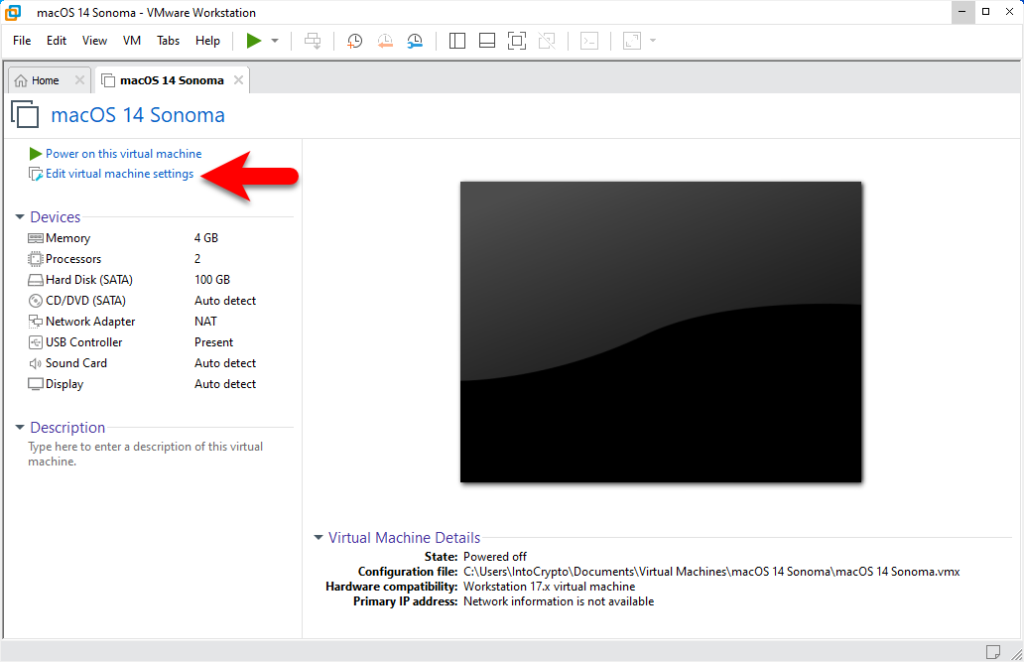
When the virtual machine is successfully created for macOS Sonoma, so now you need to edit the virtual machine for better performance. Simply, select the macOS Sonoma virtual machine then click on the option “Edit the virtual machine settings”.
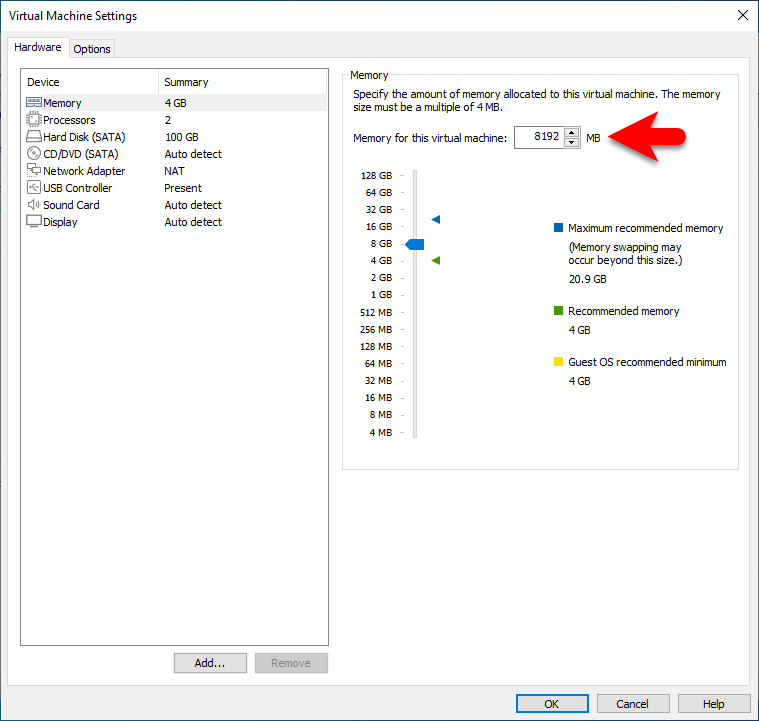
When the virtual machine settings window opened, from the left-handed window side select the memory tab, and increase the memory size.
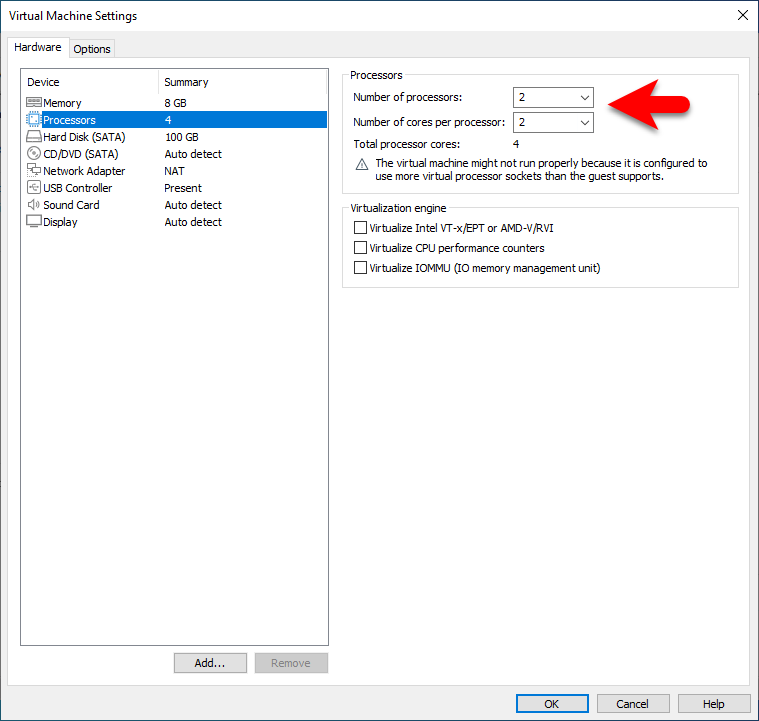
Select the processor tab, and increase the number of processors.
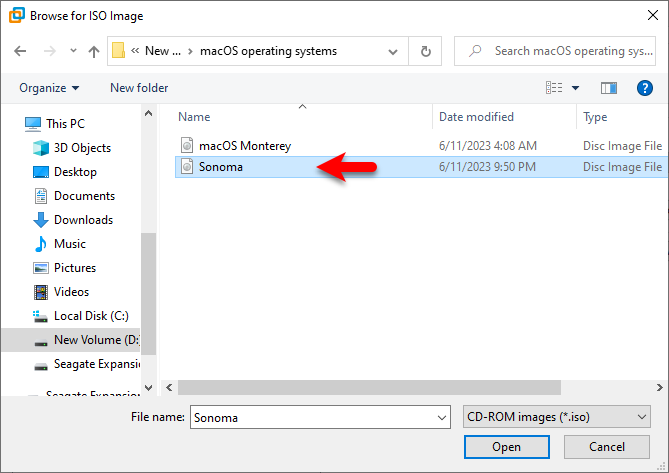
Select CD/DVD Sata, then click on Use ISO Image file and click on the browse option.
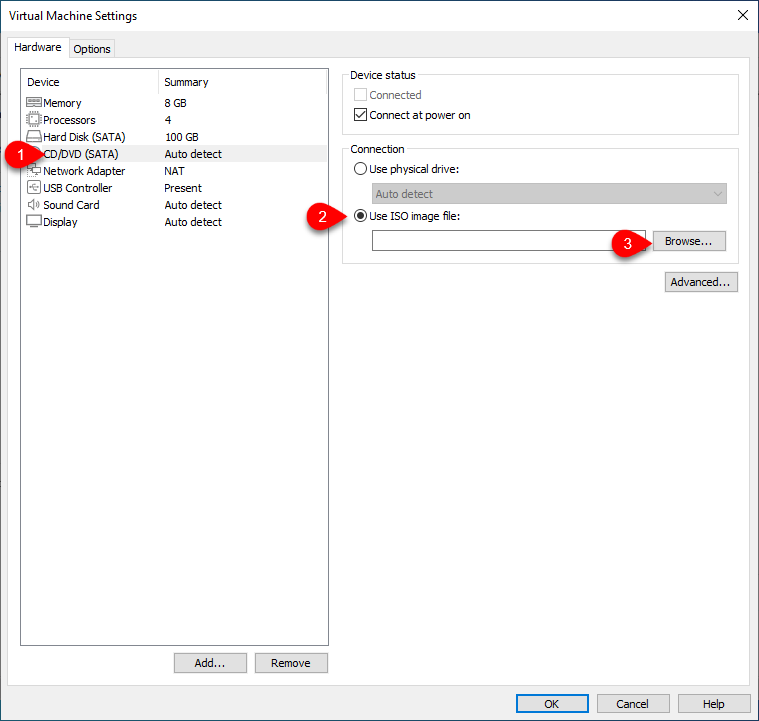
Select the macOS Sonoma ISO Image file and click open.
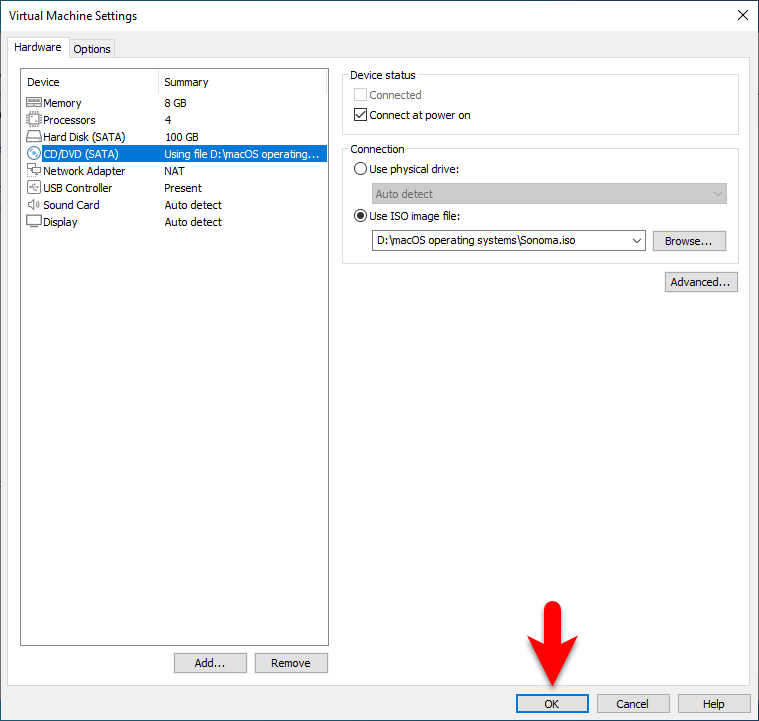
Once the macOS Sonoma ISO Image file is successfully inserted click on OK to save the changes.
Edit macOS Sonoma VMX File
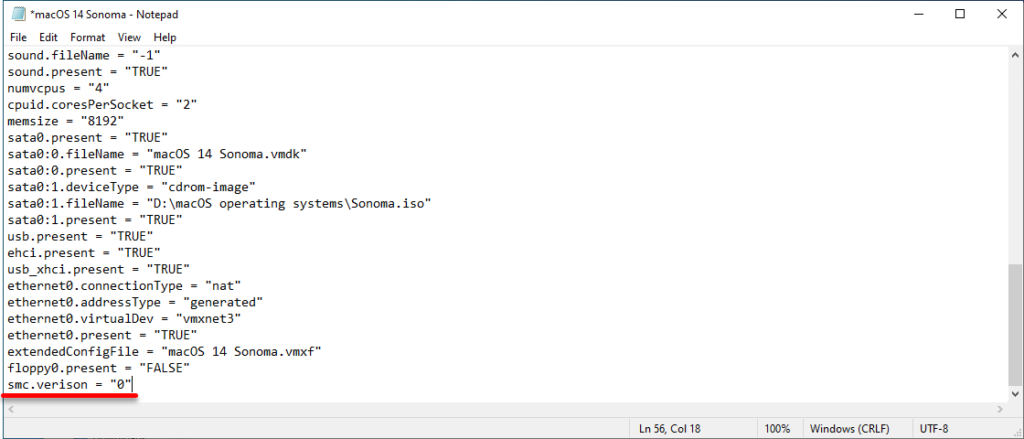
Once the virtual machine of macOS Sonoma is successfully created, therefore, you need to configure the virtual machine of macOS Sonoma on VMware. So, every macOS operating system will require the SMC “System Management Controller”, in case, if you won’t configure the SMC file you will face issues. Without modifying the macOS Sonoma SMC file you won’t be able to proceed with the macOS Sonoma installation in a single step.
Before editing the “vmx” file of macOS Sonoma make sure to close the VMware Workstation completely.
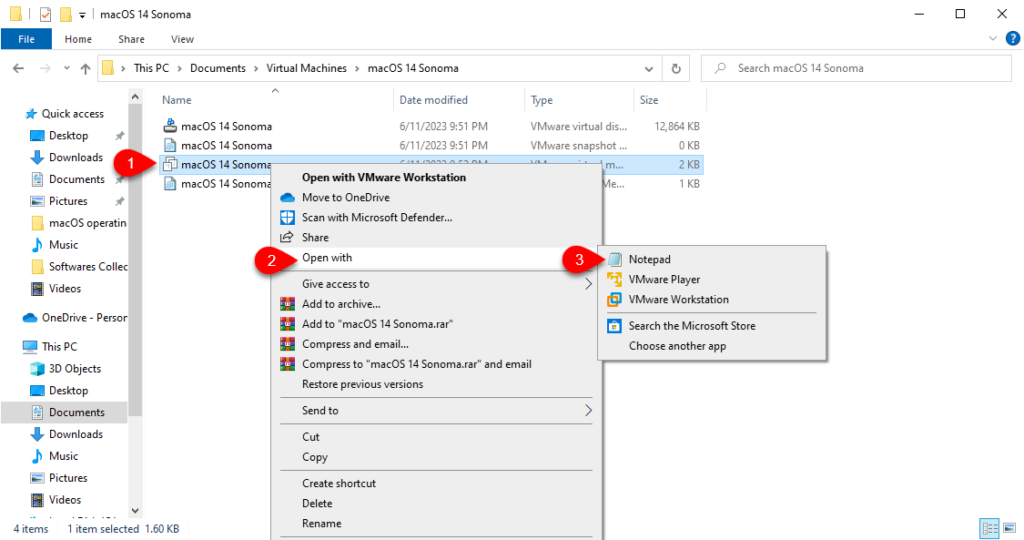
To modify the SMC file of macOS Sonoma on VMware, head over to the Virtual Machine folder, find out the macOS Sonoma “VMX” file right-click, and open it with Notepad.
When the vmx file is opened, scroll down and type the following commands (Smc.version = “0”), then press Ctrl+s to save the changes.
Install macOS Sonoma on VMware
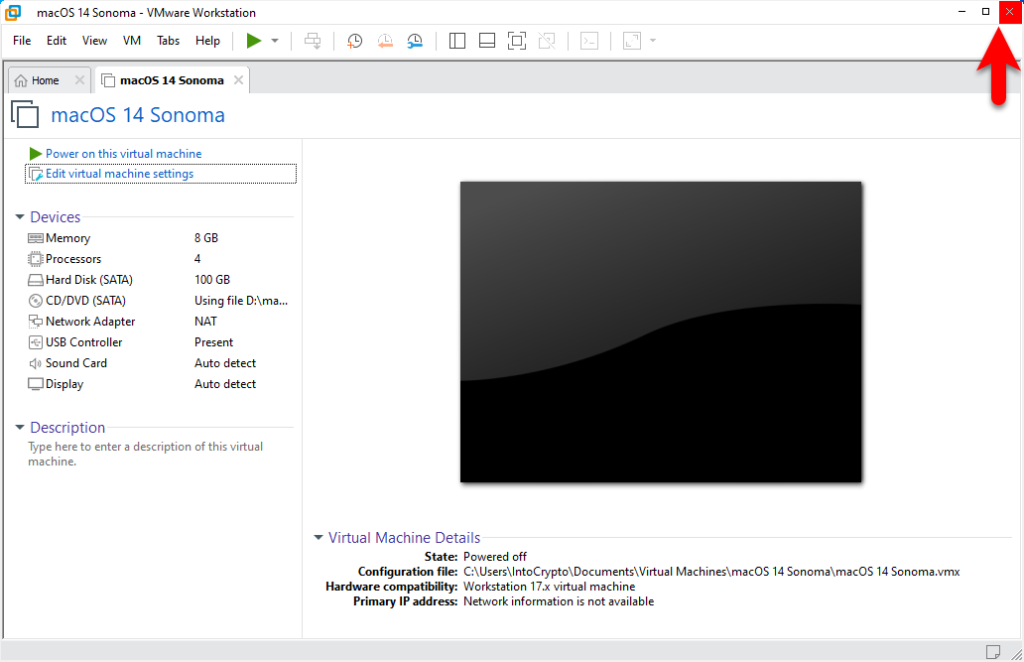
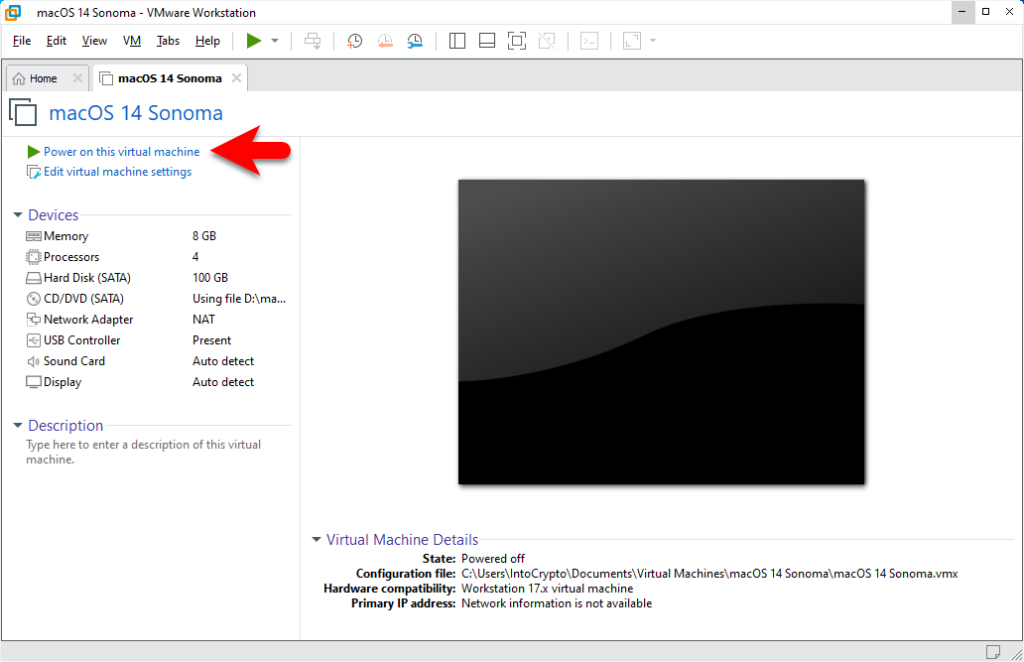
When the virtual machine of macOS Sonoma is successfully created, and the vmx file is configured. Now it’s time to perform a clean installation of macOS Sonoma on VMware on a Windows PC. For that simply open up the VMware Workstation, then select the macOS Sonoma virtual machine then click on “Power on this virtual machine”.
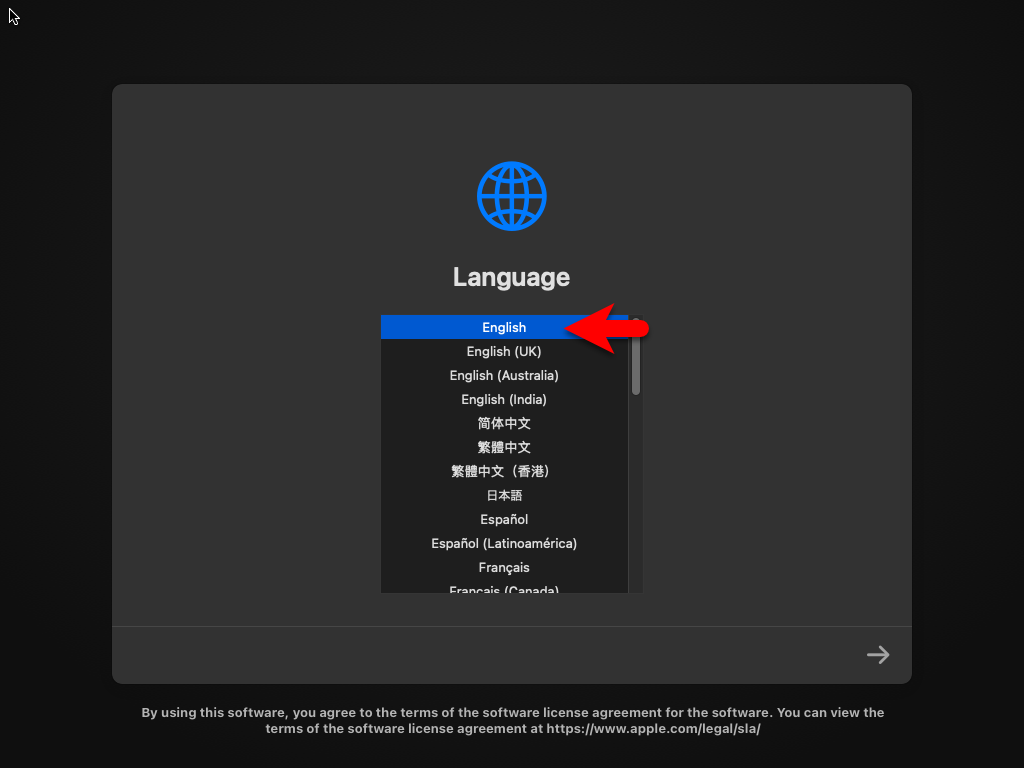
When the installation of macOS Sonoma launched on the first window, select your language and click continue.
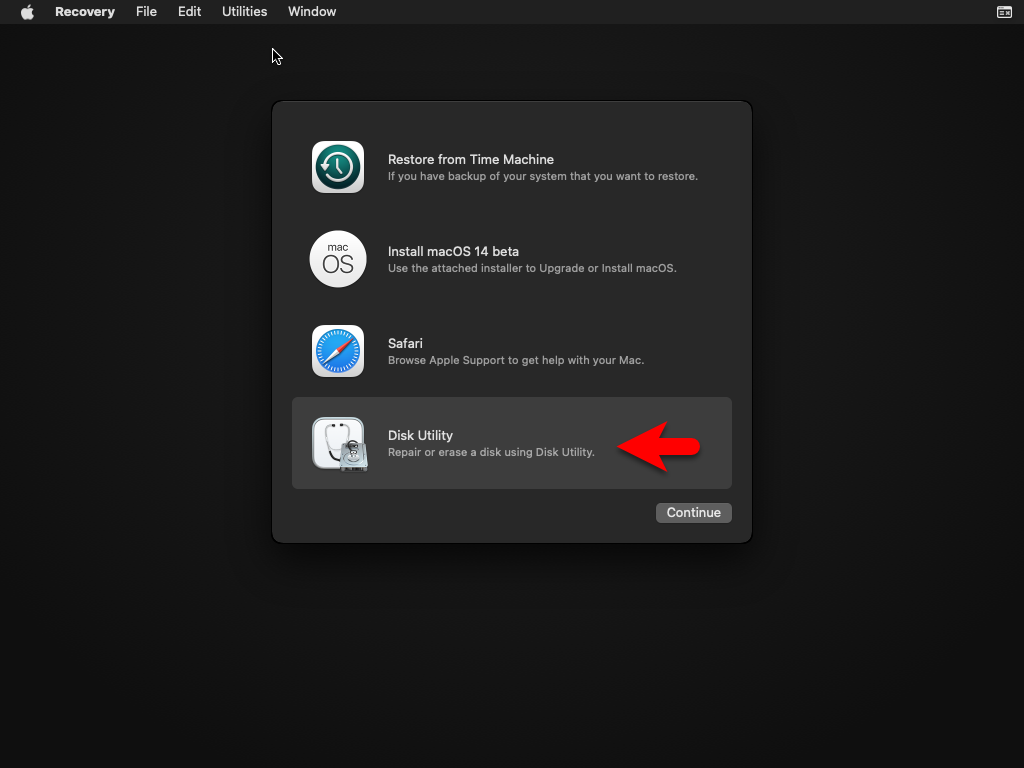
On the recovery window select the disk utility, then click continue.
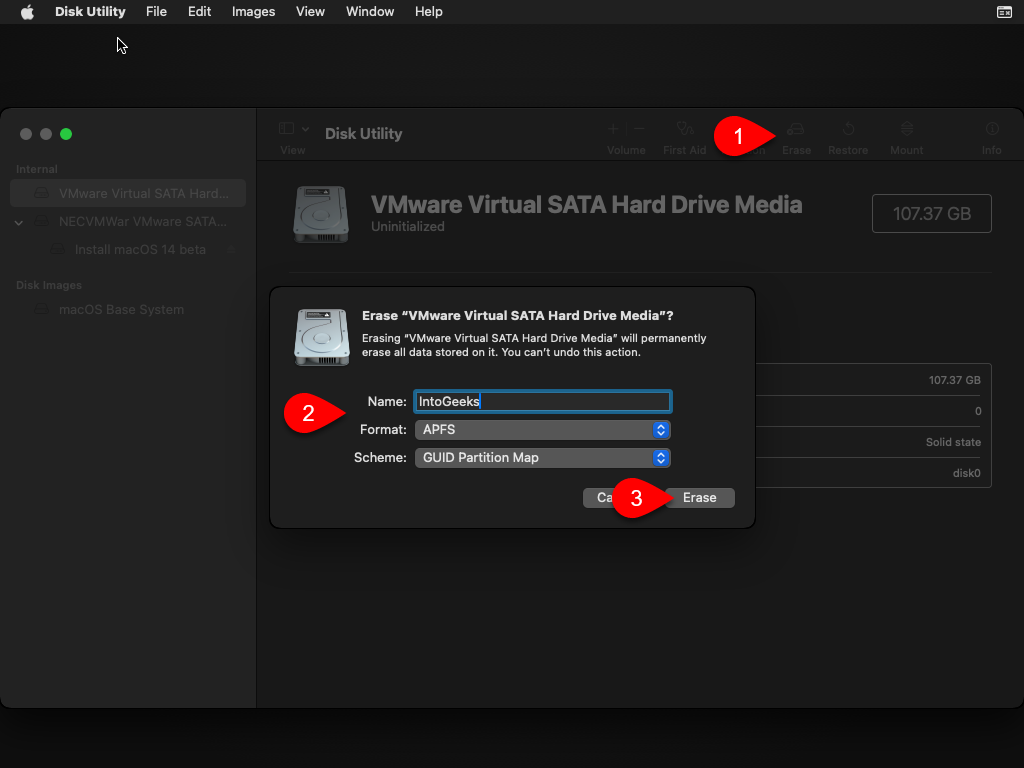
On the disk utility window, from the left-handed window side select the “VMware Virtual SATA Hard Disk”, then click on Erase option, and format the disk according to the below down parameter.
- Name: Optional
- Format: APFS
- Scheme: GUID Partition Map
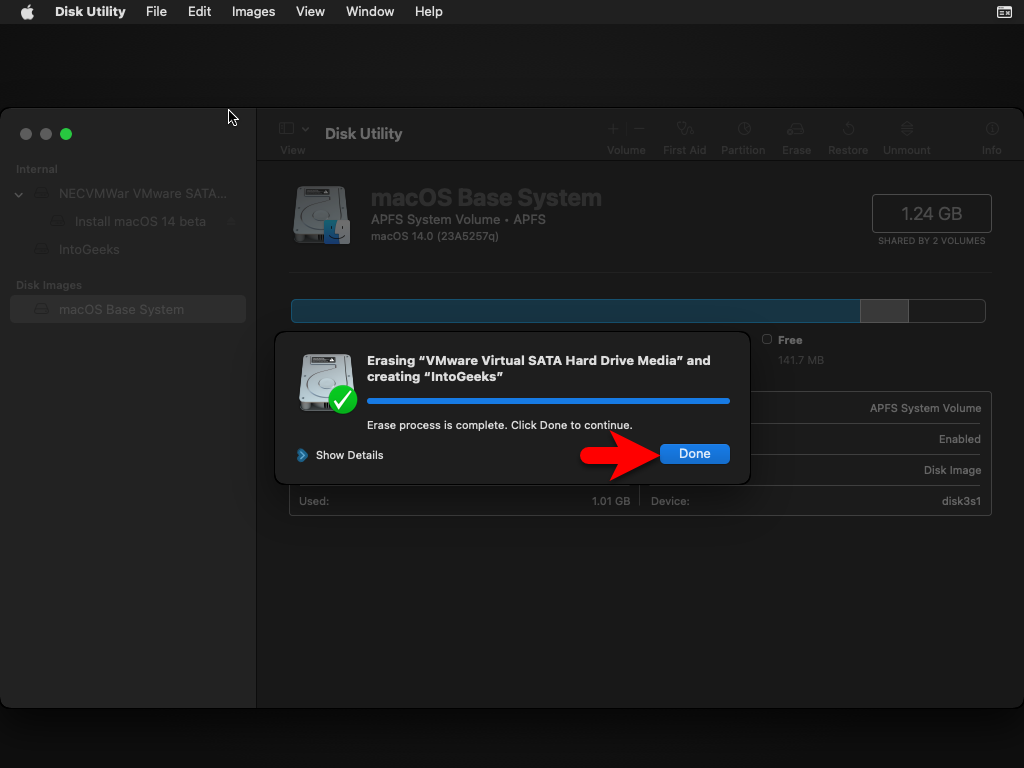
Once the disk is erased click on the done option, then close the disk utility window.
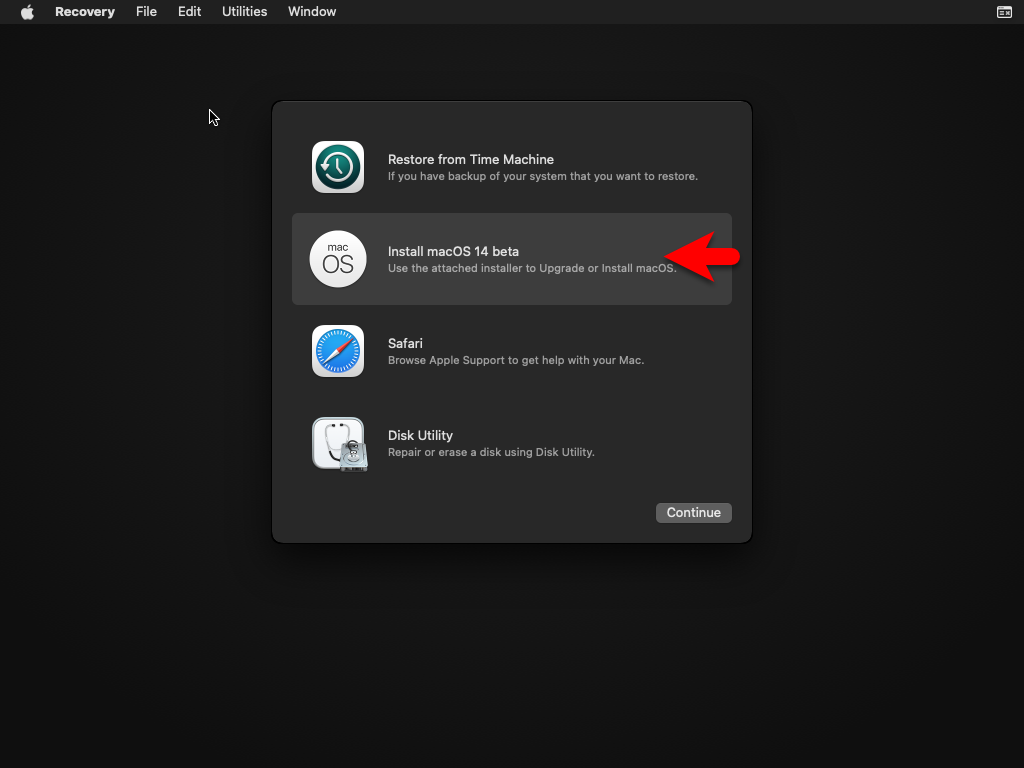
Again on the recovery window select “Install macOS Sonoma” and click continue.
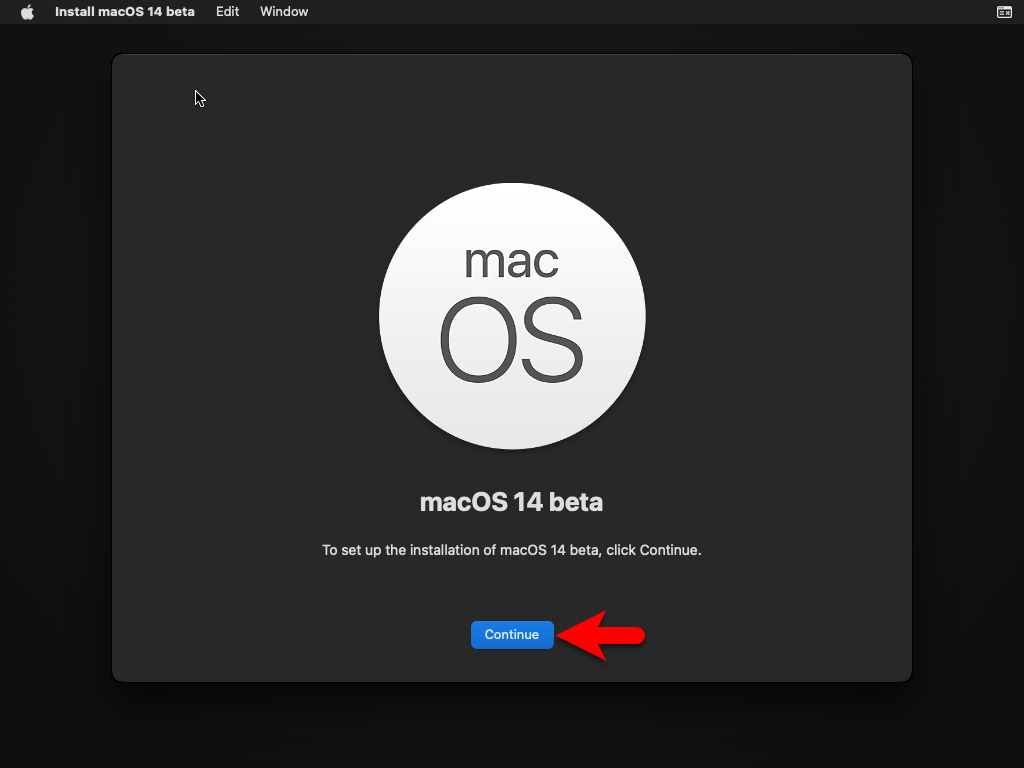
To set up the installation of macOS Sonoma click continue.
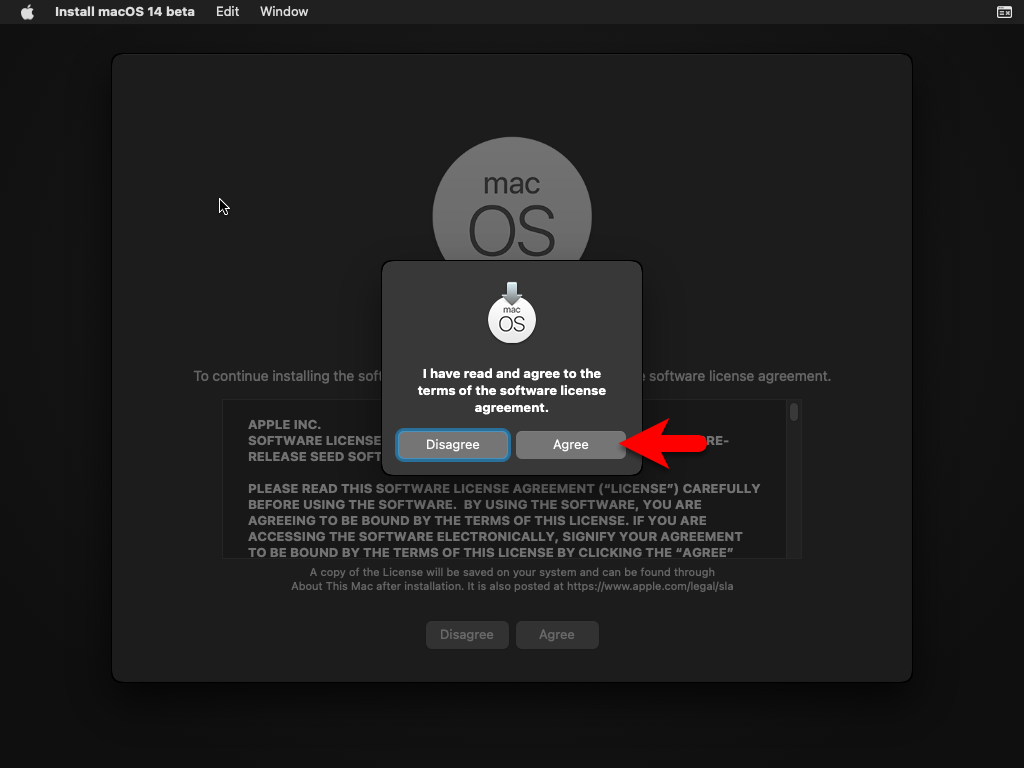
Agree with the terms and conditions of macOS Sonoma.
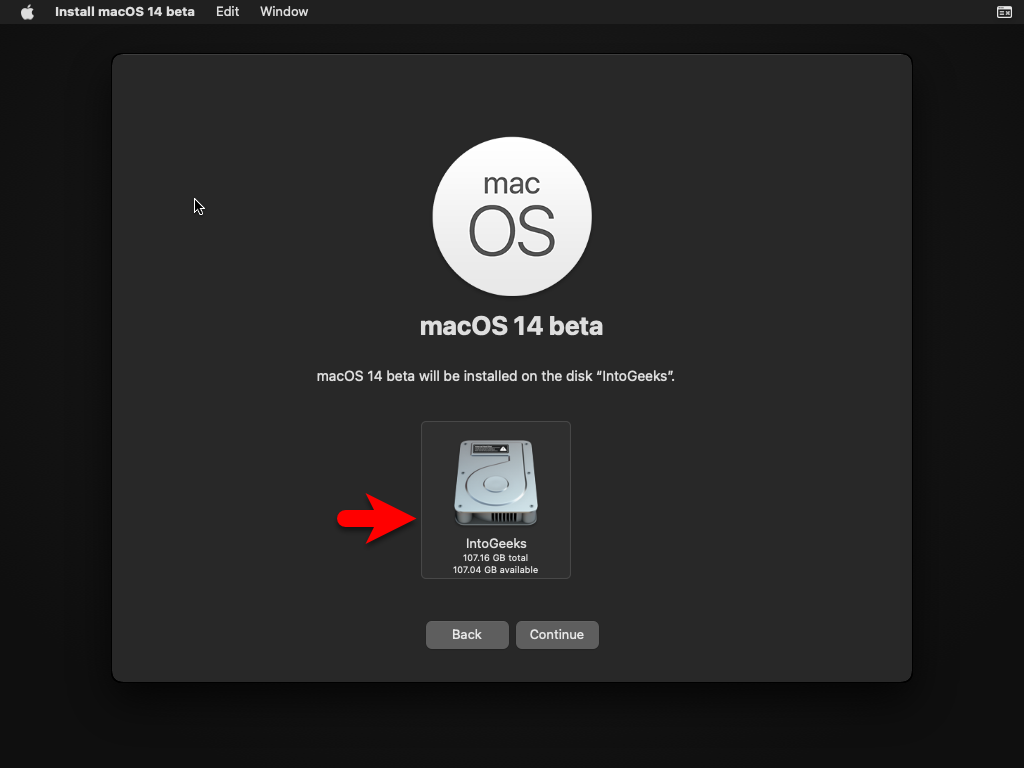
Select the disk where you want to install macOS Sonoma and click continue.
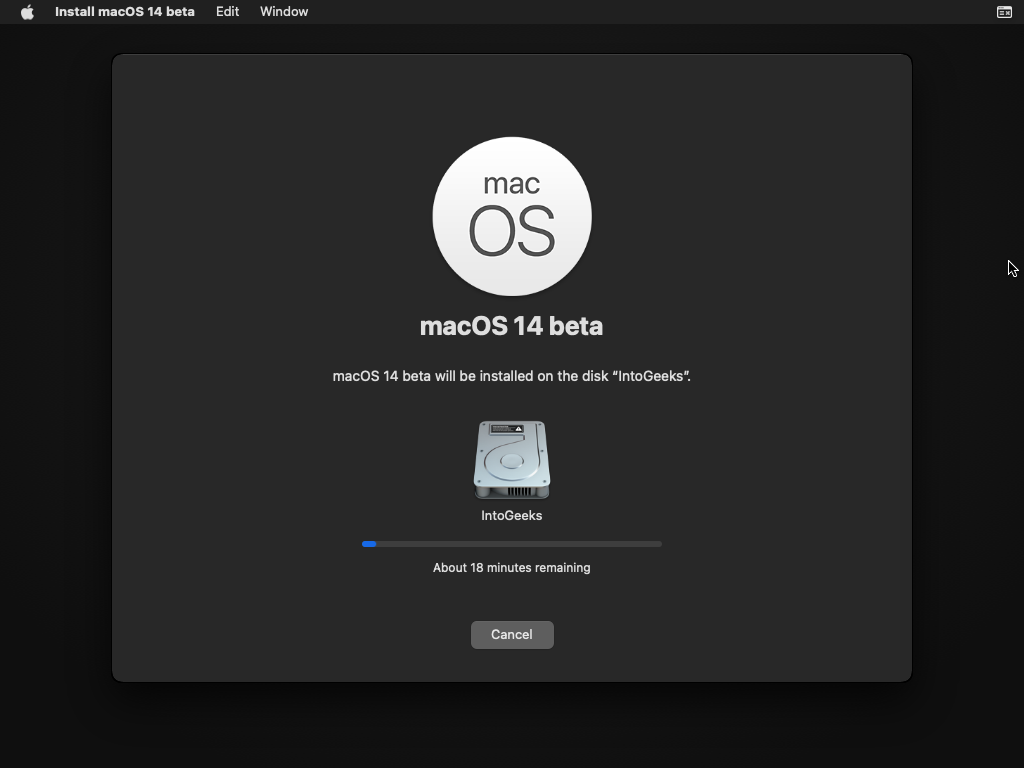
Now it will start installing macOS Sonoma on VMware on Windows PC, wait for it until it should be installed on VMware on Windows PC. Also, during the installation of macOS Sonoma, the virtual machine will restart several times.
Complete the Basic Settings of macOS Sonoma
While the installation of macOS Sonoma is successfully completed on VMware on Windows PC. Therefore, for the first use, you need to complete the basic settings of macOS Sonoma on VMware. To complete the basic settings of macOS Sonoma on VMware follow up the below-down steps.
- Once the installation is completed, on the first welcome window select your language and click continue.
- On the written and spoken languages click continue.
- On the accessibility window simply click not now.
- On the data & privacy window again click continue.
- In the migration and assistant window click on the not now option.
- Now you can enter your Apple ID email address, if you don’t want to add the Apple ID simply click on set up later.
- Agree with the terms and conditions of macOS Sonoma.
- Create your computer account, enter your name, account name, password, and hint, then click continue.
- In the enable location services click on continue.
- Select your time zone then click continue.
- In the Analytics window click continue.
- On the screen time window simply click on set up later.
- Choose your look for macOS Sonoma then click continue.
- And finally, macOS Sonoma 14 is successfully installed on VMware on Windows PC. To check the details of macOS Sonoma head over to the left-handed window side then click on About this Mac.


Conclusion
Once the macOS Sonoma is successfully installed on VMware on Windows PC, the only thing that remains is to fix the macOS Sonoma screen resolution on VMware on Windows PC. So, the process is pretty much easy you can fix the macOS Sonoma screen resolution on VMware by installing the VMware Tools. When the VMware Tools is installed you can use the macOS Sonoma full-screen mode and the drag and drop features between the guest OS and host.

Is there a way to install Ventura or Sonoma on AMD processors?
2023-09-09T17:16:40.156Z Wa(03) vcpu-3 DarwinPanic: panic(cpu 3 caller 0xffffff800d10a046): initproc failed to start — exit reason namespace 6 subcode 0x1 description: Library not loaded: /usr/lib/libSystem.B.dylib
vmx Bluetooth-Win32: ERROR retrieving local radio info: No more data is available
2023-10-14T17:44:59.539Z Wa(03) vmx Bluetooth host backend not available