
How to Create macOS Sonoma ISO Image File
How to Create macOS Sonoma ISO Image File
At the recent WWDC23 Worldwide Developers Conference apple unveiled the latest operating system called macOS Sonoma with new features and enhancements. The new feature of macOS Sonoma widgets, gaming mode, now in macOS Sonoma it has the ability to place the widgets on any part of the screen. And the gaming mode is a new feature that allows gamers to play games inside a Mac machine with the highest frame rate. The gaming mode in macOS Sonoma allows the game to detect the GPU and CPU usage completely. The new dynamic wallpaper is much more interesting than the old version of the macOS operating system. Here is the new wallpaper of macOS Sonoma with the highest resolution 6K completely free.
And much more improvements you will be able to see inside macOS Sonoma than macOS Ventura previous operating system of Apple.Inc. However, as macOS Sonoma is right now in beta developer mode, then you won’t be able to download and install the macOS Sonoma directly on your computer. To download macOS Sonoma developer beta mode, you have to register to an Apple Developer account. So, there are no worries you will be able to download the macOS Sonoma ISO, DMG, and VMDK files from the below down links free of cost.
- Download the macOS Sonoma DMG File for a Clean Installation
- Download macOS Sonoma VMDK File For (VirtualBox & VMware)
- Download macOS Sonoma ISO File For (VirtualBox & VMware)
Through this article, I will show you step-by-step how to create a macOS Sonoma ISO image file for VirtualBox and VMware. To run macOS Sonoma on a Virtual machine you need two different files, whether macOS ISO image file or vmdk file. So, to run the macOS Sonoma whether on VirtualBox or VMware you need to create the ISO image file. As the ISO Image file is sued for CD/DVD format, but this ISO image file of macOS Sonoma is used for VirtualBox and VMware on Windows PC.
How to Create macOS Sonoma ISO Image File
To create a macOS Sonoma ISO image file for VirtualBox and VMware, firstly you need to download the InstallAssistant.pkg file of macOS Sonoma from the Apple developer website. The installer file of macOS Sonoma is a beta mode image, that contains the macOS Sonoma installer image file. And this file is available in beta mode on the main server of Apple.
Create macOS Sonoma ISO Image File
To create the ISO image file of macOS Sonoma whether you need an actual Mac machine or Virtual Machine that should have a pre-installed macOS operating system such as macOS Monterey on VMware. To install any macOS operating system on a virtual machine is pretty straightforward with a few clicks you will be able to install it.
Once you have the macOS actual machine or virtual machine, simply run the installation of InstallAssistant.pkg file on your macOS. Complete the installation of the InstallAssistant.pkg file on your macOS.

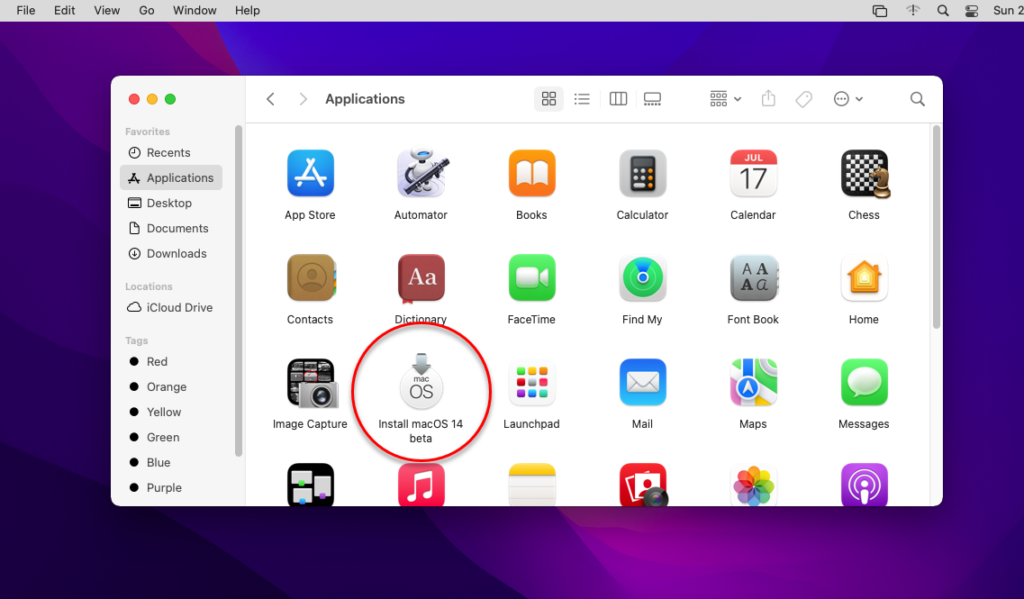
When the installation of the macOS Sonoma InstallAssistant.pkg file is successfully completed the file will locate in the “Application Folders” directory.
Now it’s time to create the macOS Sonoma ISO image file using the terminal window and apply a few commands. To open up the terminal click on the search spotlight option, then type terminal, once the terminal appeared hit enter to open it.

Now apply the below down commands step by step to create a macOS Sonoma ISO image file.
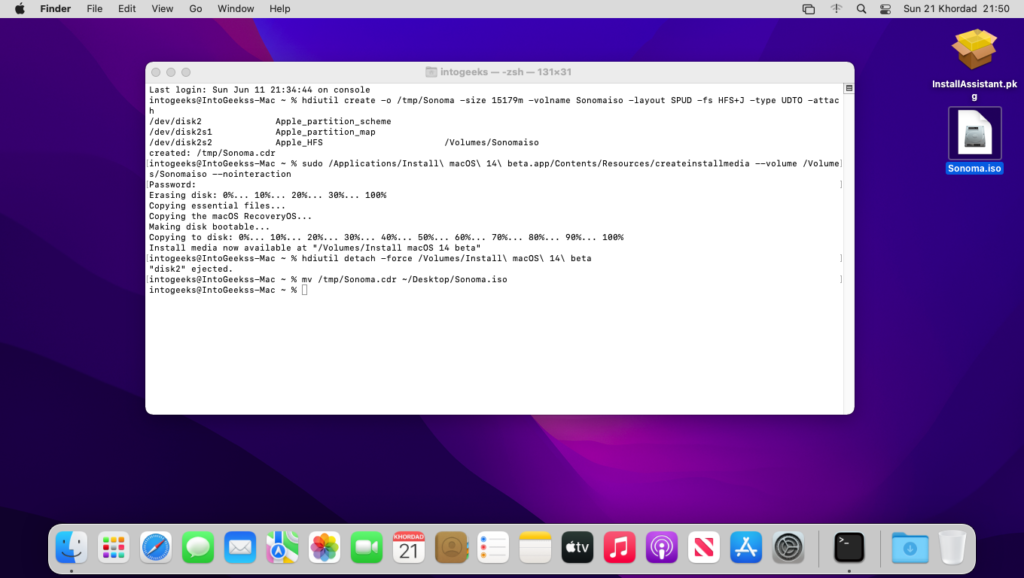
hdiutil create -o /tmp/Sonoma -size 15179m -volname Sonomaiso -layout SPUD -fs HFS+J -type UDTO -attachHere are some important parameters to consider:
- Size: Typically ranging from 15GB to 19GB.
- Volume name: It is recommended to keep the volume name “Sonomasio” to avoid any potential errors during ISO file creation.
- Layout SPUD: This specifies a single partition with the Apple Partition Map layout.
- -fs HFS+: The file system option indicates the usage of Mac OS Extended for the macOS drive.
- Type: Selecting UDTO ensures that the file format is suitable for the DVD/CD master.
- Attach: This flag ensures that the created volume is automatically mounted within macOS.
Use the ‘createinstallmedia’ tool to create a macOS 14 Installer:
sudo /Applications/Install\ macOS\ 14\ beta.app/Contents/Resources/createinstallmedia --volume /Volumes/Sonomaiso --nointeractionForce Unmount “Install macOS Sonoma beta” Volume:
hdiutil detach -force /Volumes/Install\ macOS\ 14\ betaMove the Sonoma.cdr file to Desktop and rename the .cdr file to the .iso file.
mv /tmp/Sonoma.cdr ~/Desktop/Sonoma.isoConclusion
Once you have successfully created the macOS Sonoma ISO Image file, it will be located on your desktop. So, you can move the ISO image file of macOS Sonoma from the virtual machine to the Windows desktop. Once you moved it to the desktop you can create a new virtual machine and install it on your Windows PC.

2 Comments