
How to Install macOS Sonoma on VirtualBox on Windows PC?
How to Install macOS Sonoma on VirtualBox on Windows PC?
At the recent WWDC23 Worldwide Developer Conference Apple unveiled the latest operating system macOS Sonoma. macOS Sonoma is one of the newest Apple operating systems for Macintosh computers, macOS Sonoma has brought many enhancements and features. macOS Sonoma is the 14 major releases of Apple operating systems and the successor of macOS Ventura. It was June 5, 2023, the Apple held the WWDC Keynote, which introduced the latest iOS, iPadOS, WatchOS, tvOS, and finally the macOS. As macOS Sonoma 14 is right now in developer beta mode, later in the summer the public beta version will be available for users through the updates. The name of macOS Sonoma is taken from the wine region located in California.
macOS Sonoma 14 with interesting features the new widgets, that have the ability right now to place it on any place of the desktop. The new gaming mode increased the gaming performance of the MacBook, while playing the game automatically it will detect the GPU and CPU. The lock screen has been changed and the lock is similar to iOS, and iPadOS. And there are bunches of changes in macOS Sonoma like video-conferencing Apps can overlay the presenter’s webcam on the top of screen sharing. Improvements were seen in Safari, and Messages, Alongside the next big changes in macOS Sonoma, Apple announced the developer’s tools for porting the Windows games to macOS, the gaming port toolkit.
However, through this article, you will learn step-by-step how to install macOS Sonoma on VirtualBox on Windows PC. Whenever the macOS operating system is in beta mode the best way to test its features is to install it on the virtual machine. The installation process of macOS Sonoma on VirtualBox is straightforward you can proceed with a few clicks.
Related:
How to Install macOS Sonoma on VirtualBox on Windows PC?
To continue installing macOS Sonoma on VirtualBox on Windows PC, only you need the virtualization software that is available to download. And to install the macOS Sonoma on your actual machine firstly you need to create a bootable USB flash drive, then continue the installation. Also, macOS Sonoma is compatible with the below-down machines.
macOS Sonoma supports Macs with Apple Silicon and Intels Xeon-W or 8th Generation Coffee Lake/Amber Lake chips or later. And drops support various models released in 2017.
- iMac (2019 or later)
- iMac Pro
- MacBook Air (2018 or later)
- MacBook Pro (2018 or later)
- Mac Mini (2018 or later)
- Mac Pro (2019 or later)
- Mac Studio (all models)
To install macOS Sonoma on VirtualBox on Windows you need to download the below down requirements files. The very first thing is you need to download and install the VirtualBox with its extension pack on your Windows PC. And the next thing is you need to download the macOS Sonoma ISO image file or its vmdk file.
How to Create macOS Sonoma ISO Image File
- Download the macOS Sonoma ISO Image file
- Download the macOS Sonoma VMDK file
- Download VMware Workstation Pro 17
Create a New Virtual Machine for macOS Sonoma on VirtualBox
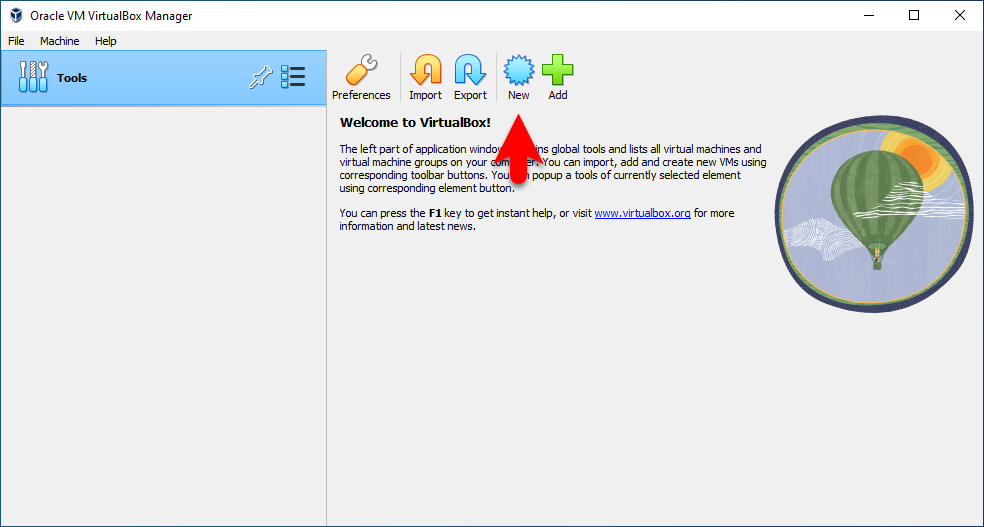
To create a new virtual machine for macOS Sonoma on VirtualBox on Windows, simply open up the VirtualBox. Once the VirtualBox is opened on the first welcome window click on New option.
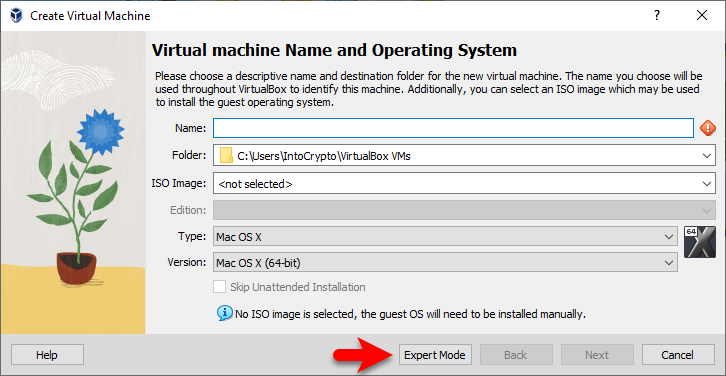
When the next window opened click on the expert mode option.
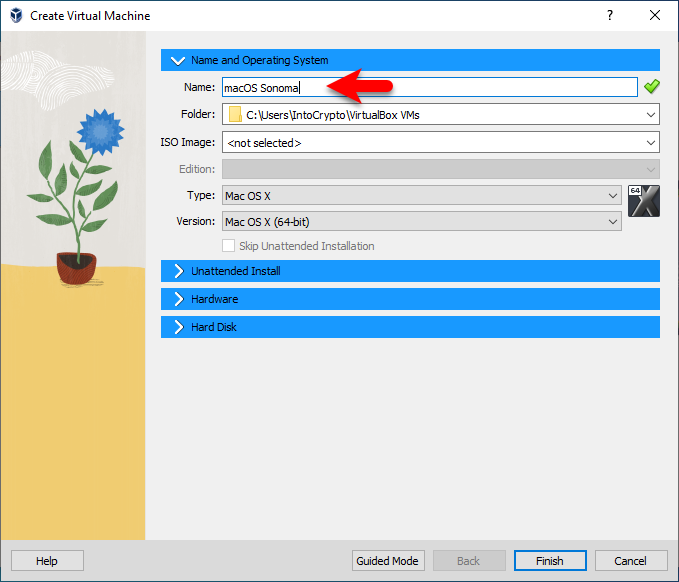
Now give a name for the virtual machine, simply type macOS Sonoma, specify the location, and Type Mac OS X, Version, Mac OS X (64-Bit).
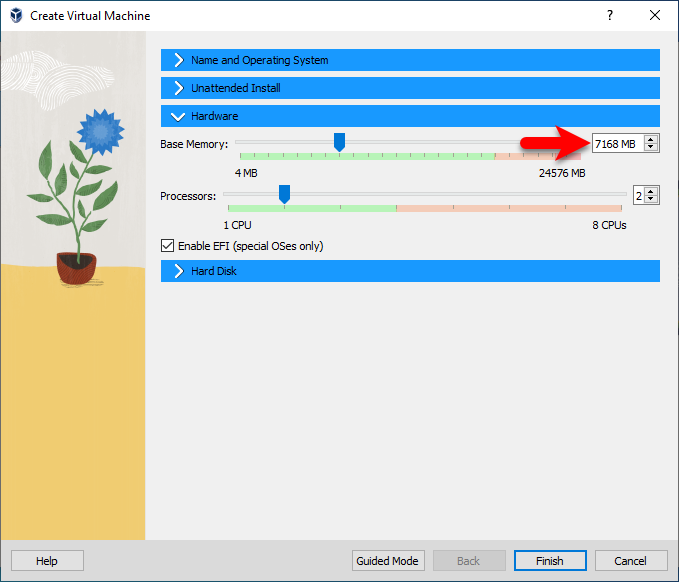
On the hardware tab increase the base memory size and the processor.
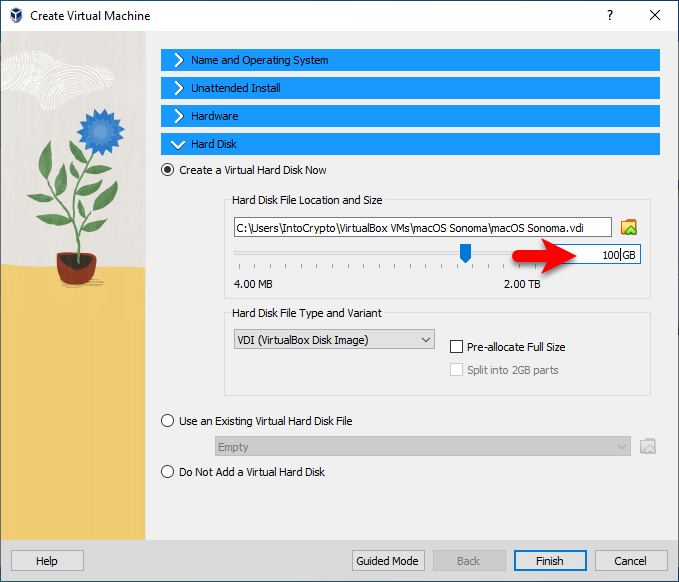
Select the maximum disk size for macOS Sonoma then specify the location.
Edit the Virtual Machine Settings
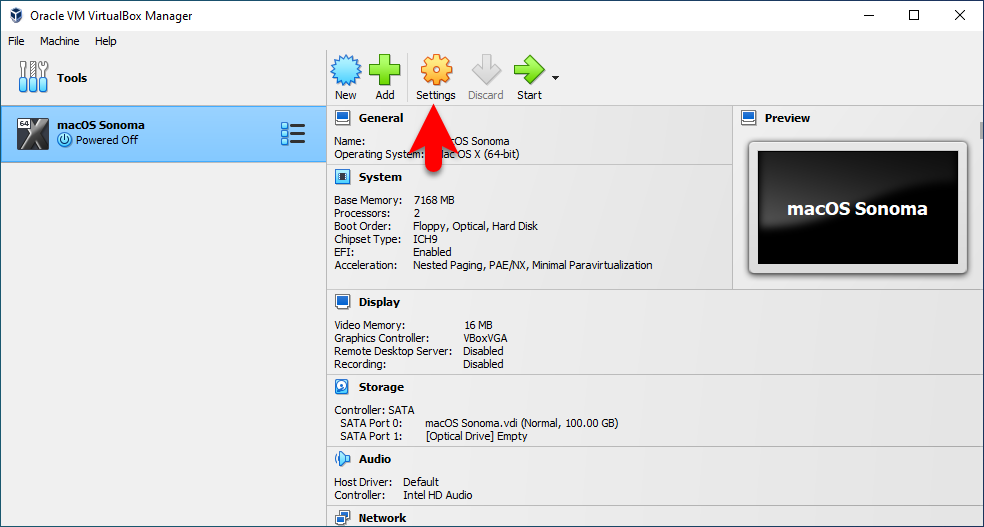
Once the virtual machine of macOS Sonoma is successfully created on VirtualBox, for better performance you need to edit some settings. Select the macOS Sonoma virtual machine then click on the settings option.
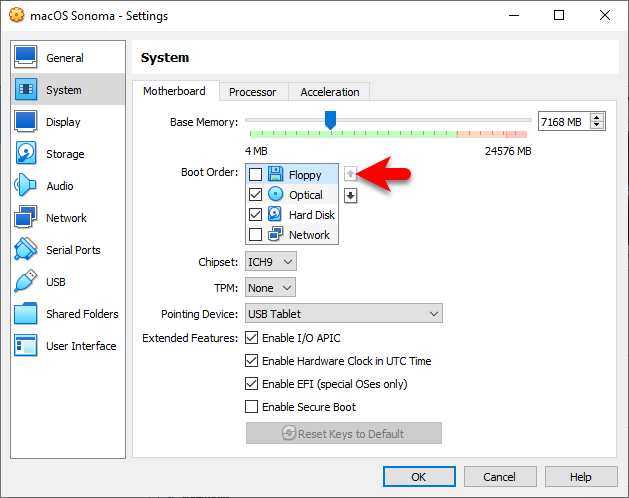
When the settings window opened, from the left-handed window side select the system tab, then uncheck the floppy disk.
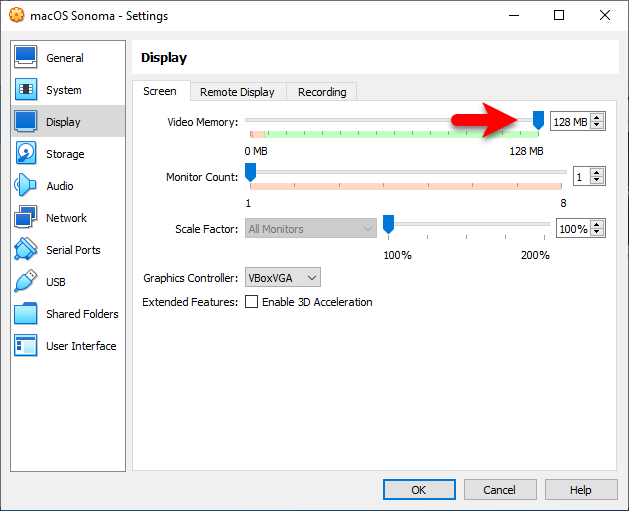
Select the display tab, then increase the video memory size up to 128 MB.
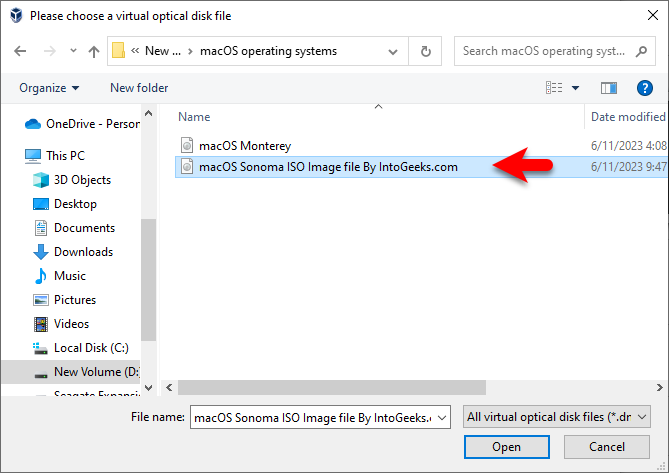
Select the Storage tab, click empty>disk icon>choose a disk file.

Now select the macOS Sonoam ISO Image file, then click on open.
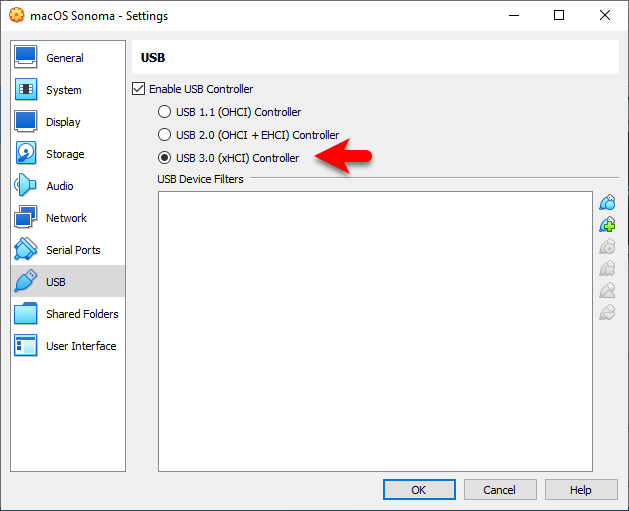
Go to the USB tab, then select the USB 3.0 controller and click on OK to save the changes.
Apply the Commands
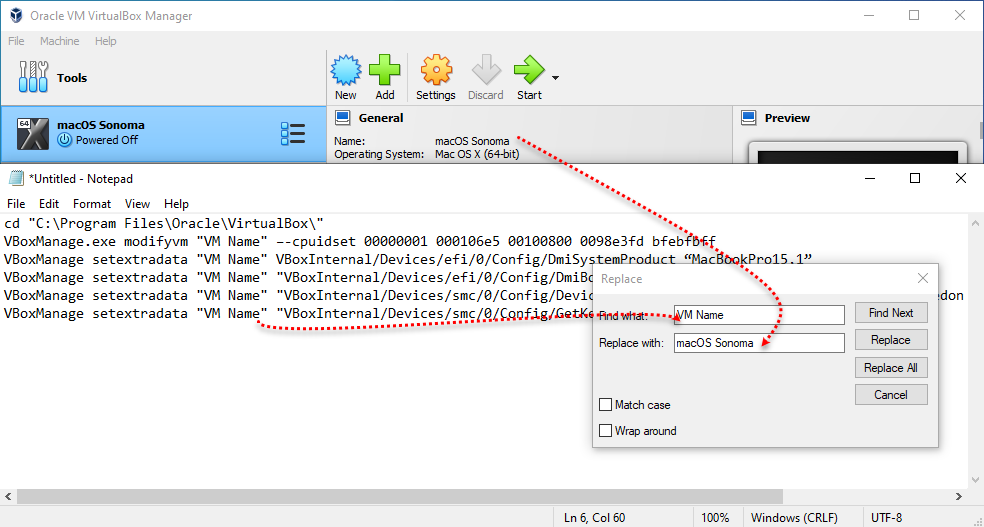
Once the virtual machine is successfully created for macOS Sonoma, then the next step is to edit some commands for macOS Sonoma virtual machine. These commands are a piece of small code that configures the macOS Sonoma virtual machine on VirtualBox on a Windows PC. Remember that if you don’t apply these commands you won’t be able to continue a single step of the installation of macOS Sonoma on VirtualBox on Windows PC.
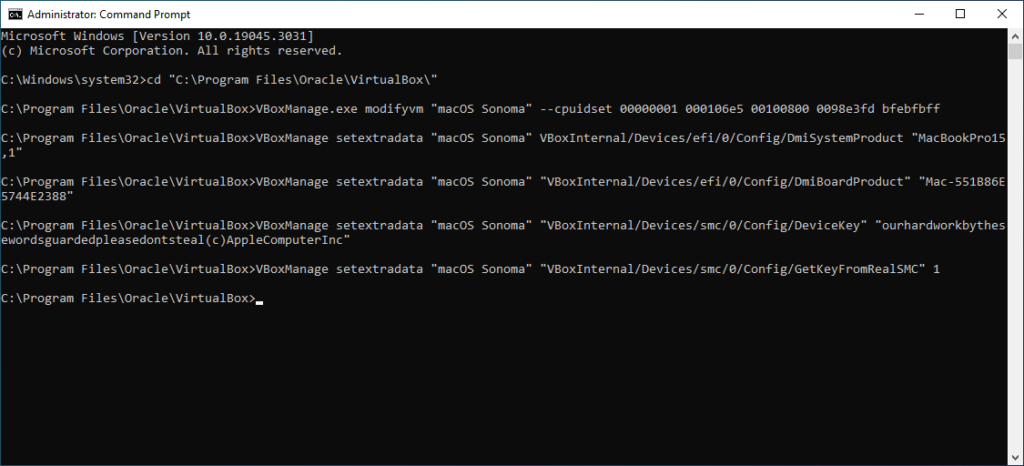
To apply the commands simply close the VirtualBox from the background, once the VirtualBox is closed copy and paste the below commands in a notepad window.
cd "C:\Program Files\Oracle\VirtualBox\"
VBoxManage.exe modifyvm "VM Name" –-cpuidset 00000001 000106e5 00100800 0098e3fd bfebfbff
VBoxManage setextradata "VM Name" VBoxInternal/Devices/efi/0/Config/DmiSystemProduct “MacBookPro15,1”
VBoxManage setextradata "VM Name" "VBoxInternal/Devices/efi/0/Config/DmiBoardProduct" "Mac-551B86E5744E2388"
VBoxManage setextradata "VM Name" "VBoxInternal/Devices/smc/0/Config/DeviceKey" "ourhardworkbythesewordsguardedpleasedontsteal(c)AppleComputerInc"
VBoxManage setextradata "VM Name" "VBoxInternal/Devices/smc/0/Config/GetKeyFromRealSMC" 1
Simply replace the “VM Name” with the name of the macOS Sonoma virtual machine.
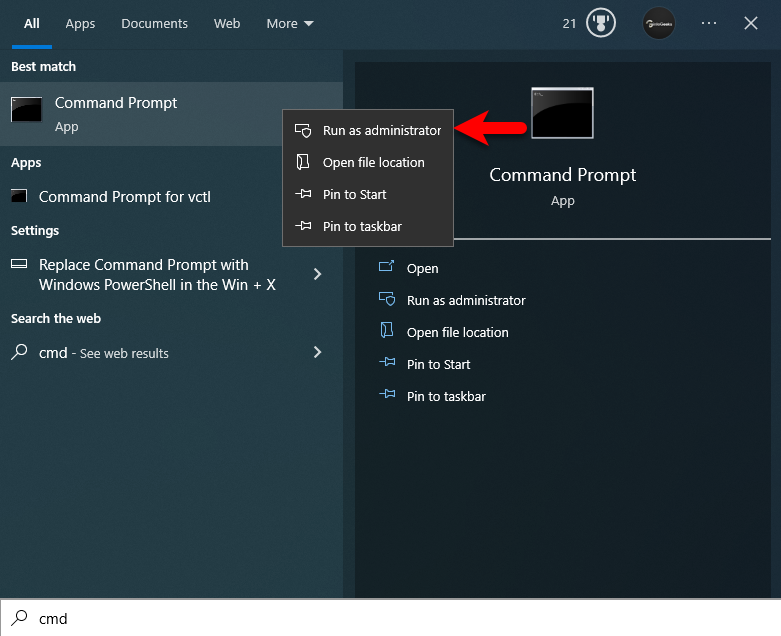
Now navigate to the Windows start menu and type their cmd, once the cmd appeared right-click and run as administrator.
Copy the first line of the commands and paste it into the command prompt window then hit enter, then copy the rest of the commands and paste it into the command prompt window then and hit enter.
Perform a Clean Installation of macOS Sonoma on VirtualBox
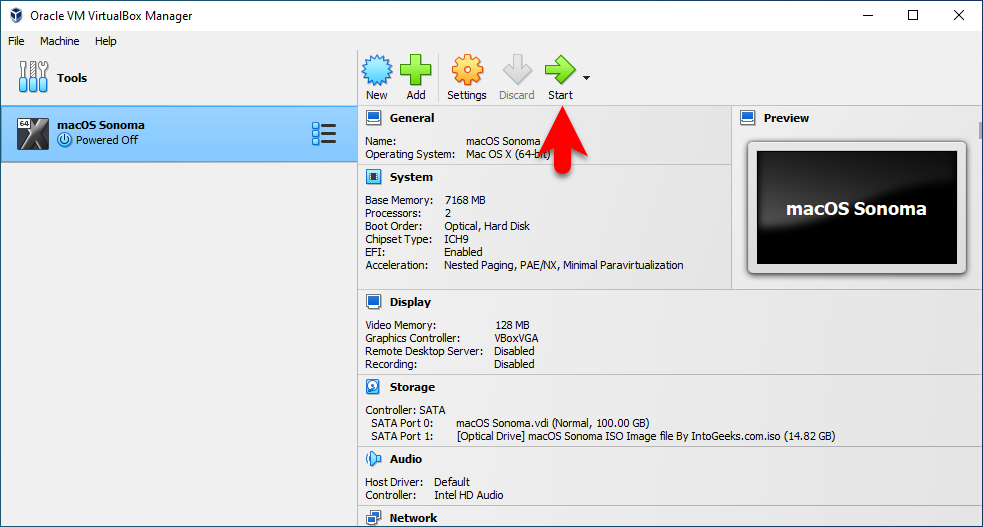
When each and everything is successfully done, so now it’s time to install macOS Sonoma on VirtualBox on Windows PC. To install macOS Sonoma open up the VirtualBox, then select the macOS Sonoma virtual machine then click on Start.
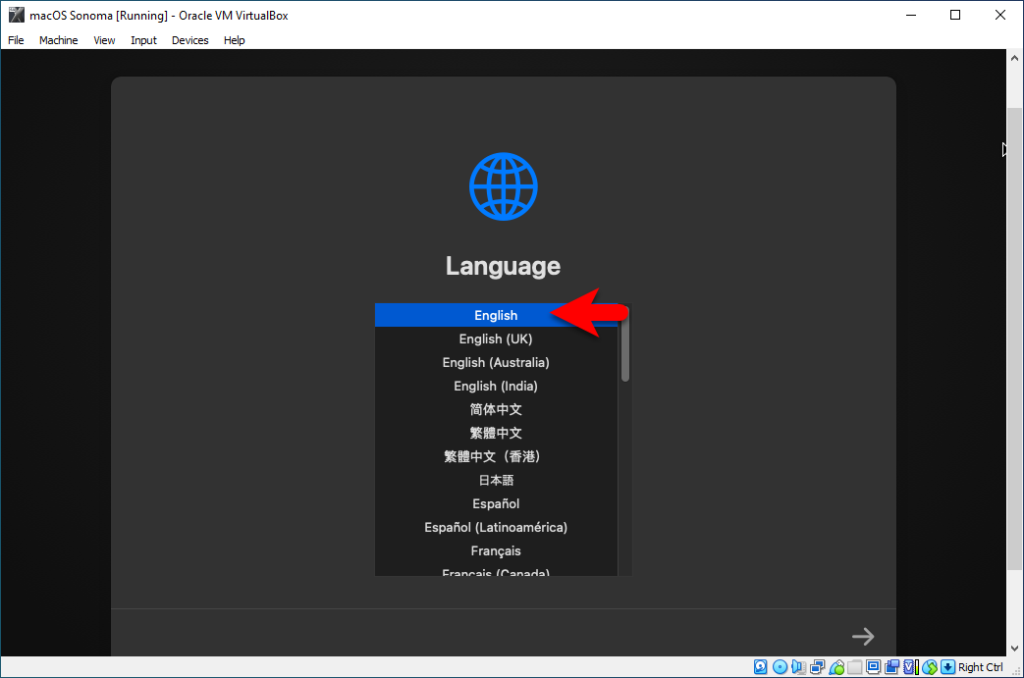
When the installation is launched on the first window select your language and click continue.
On the recovery window select the disk utility and click continue.
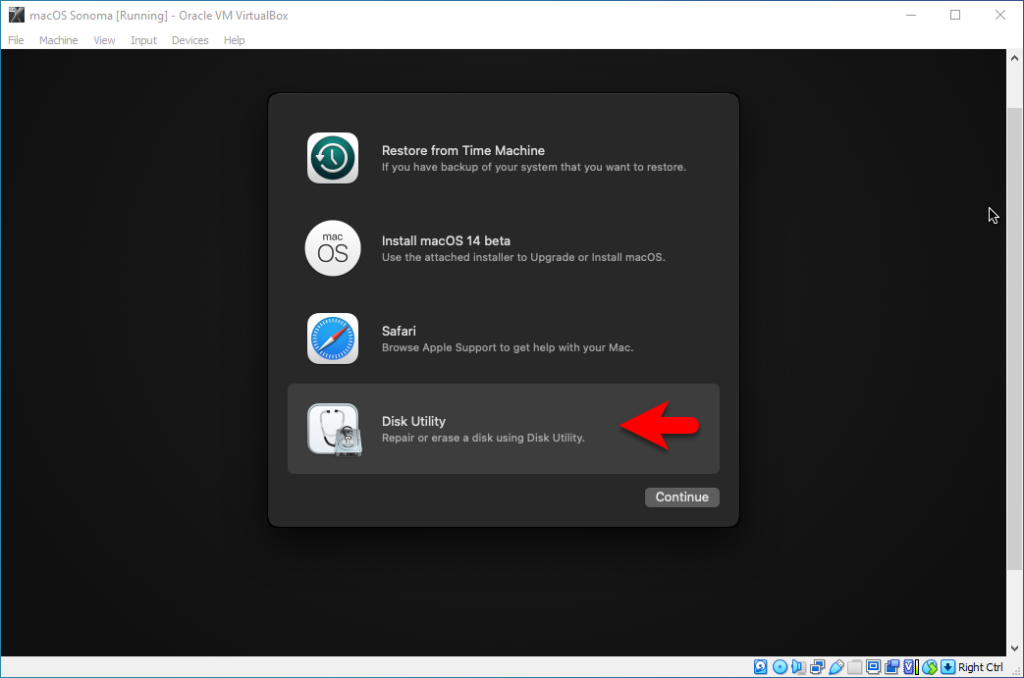
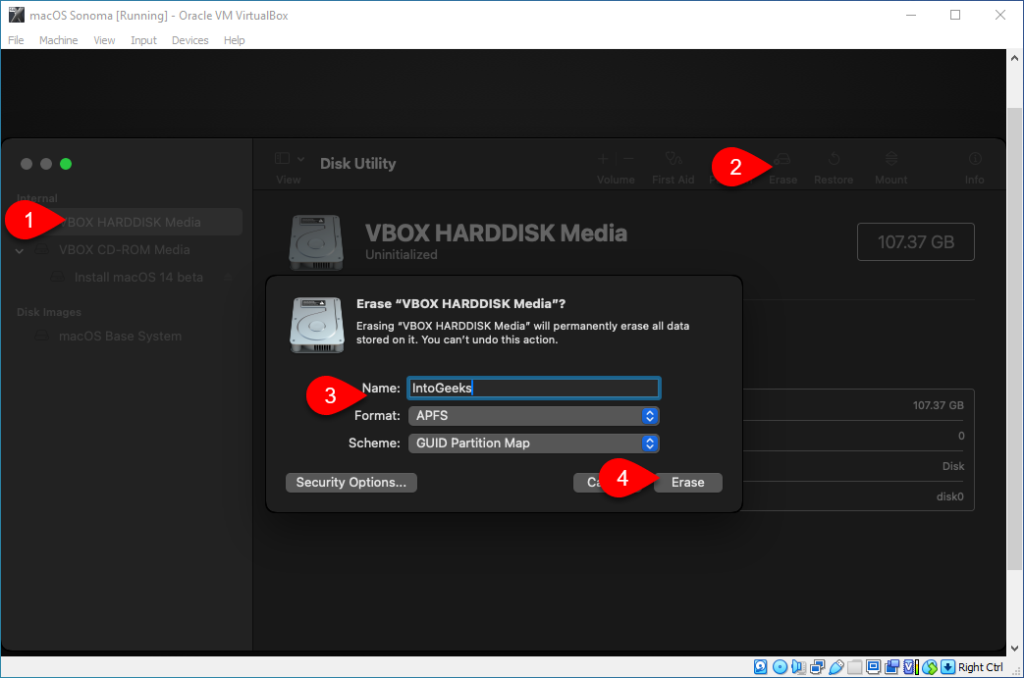
On the disk utility window from the left-handed window side select the “VBOX HARDDISK MEDIA”, then click on erase option and format the disk according to the below-down parameters.
- Name: Optional
- Format: APFS
- Scheme: GUID Partition Map
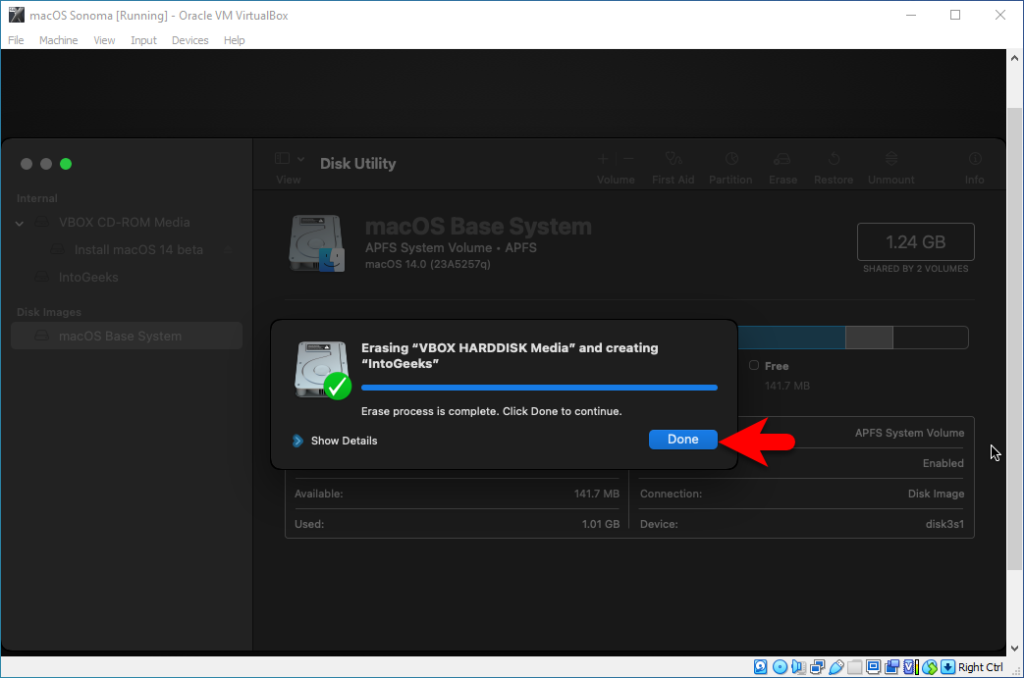
When the disk is formatted simply click on the done option and close the disk utility window.
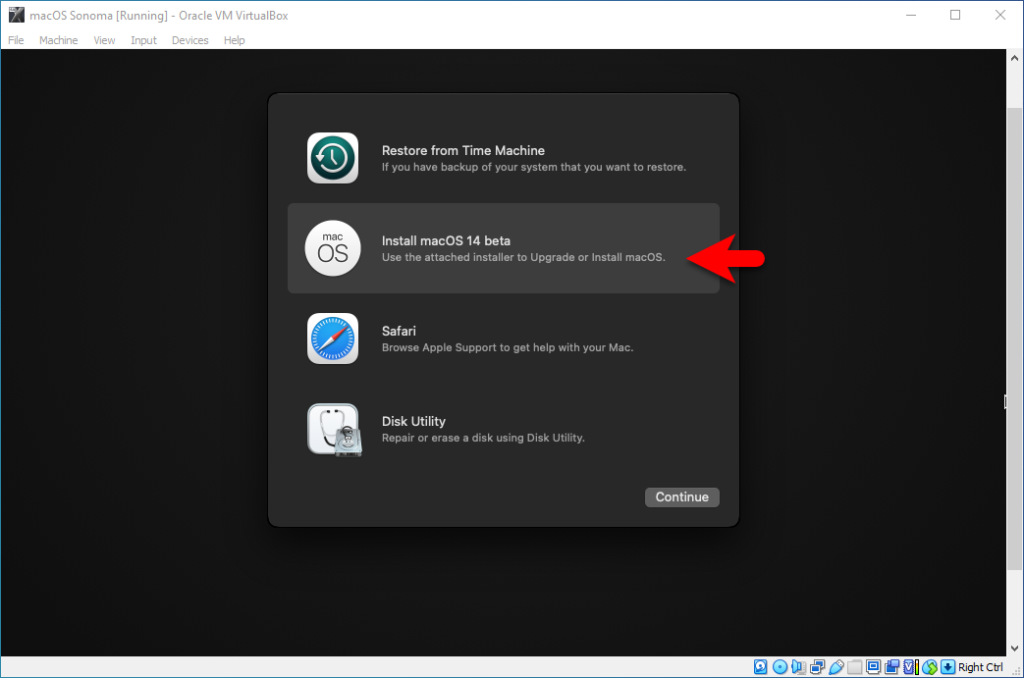
Now again on the recovery window select Install macOS Sonoma and click continue.
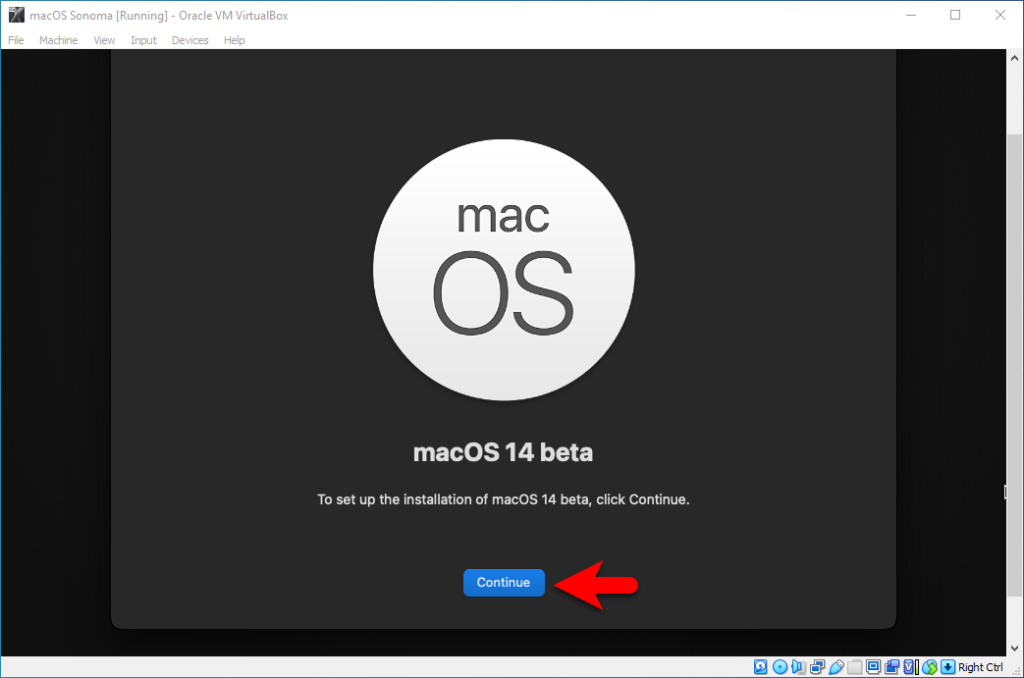
To set up the installation of macOS Sonoma click continue.
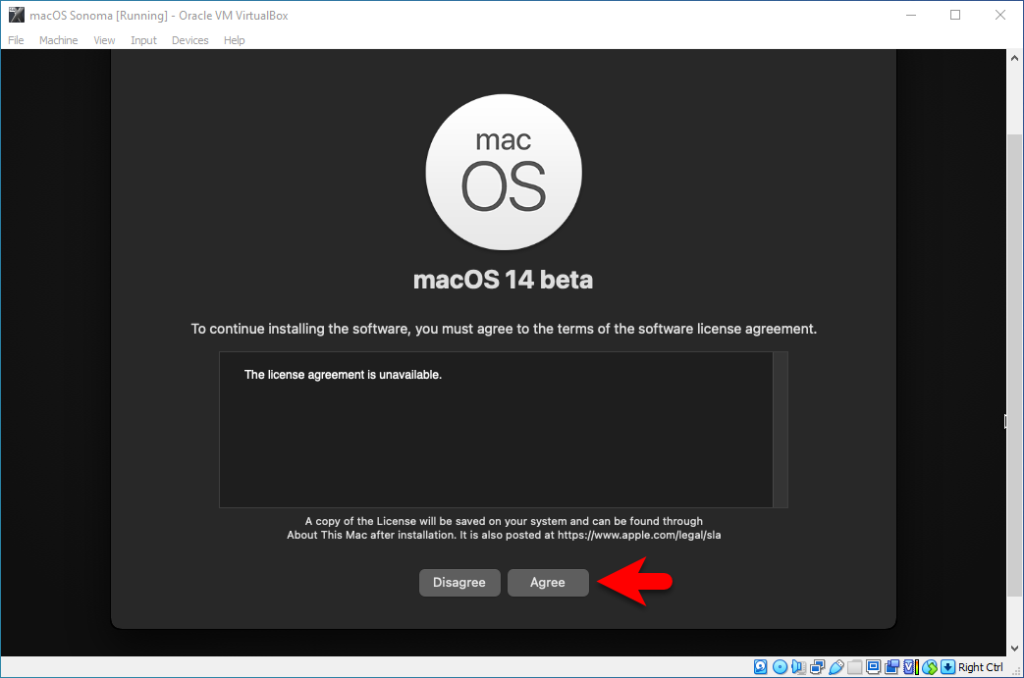
Agree with the terms and conditions of macOS Sonoma.
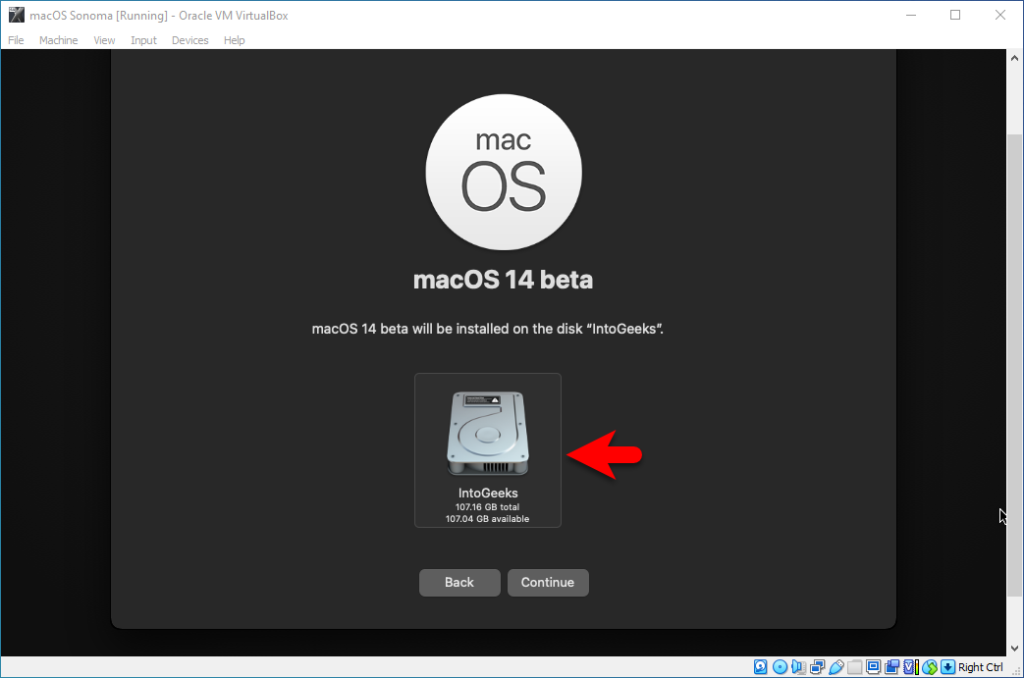
Select the disk where you want to install macO Sonoma then click continue.
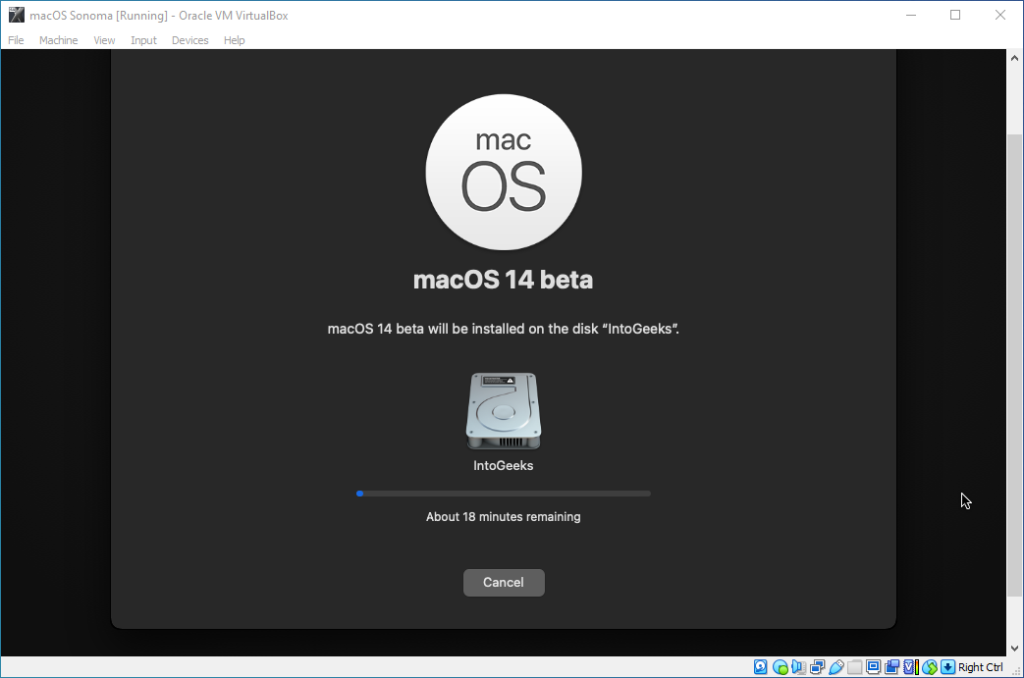
And now it will start installing macOS Sonoma on VirtualBox on Windows PC. The installation process may take time, and during the installation, the virtual machine will restart several times.
Complete the Basic Settings of macOS Sonoma on VirtualBox
When the installation of macOS Sonoma is successfully completed on VirtualBox on Windows PC. Therefore, to proceed to its main window, you need to complete the basic settings. To complete the basic settings follow up the below down steps.
- On the first window select your language and click continue
- On the written and spoken languages click continue, also you can select another language too
- On the accessibility window click on Not now
- On the Data & Privacy window, click continue
- In the migration and assistant window click on not now option
- You can enter your Apple ID, if you don’t want simply click on set up later
- Agree with the terms and conditions of macOS Sonoma
- Create your computer account, enter your full name, account name, password, and hint, then click continue
- In the enable location services click continue and click don’t use
- Select your time zone
- In the analytics window click continue
- On the screen time window click Set up later
- Choose your look for macOS Sonoma then click continue
- And finally, macOS Sonoma 14 is successfully installed on VirtualBox on Windows PC. Also, to check the details of macOS Sonoma on VirtualBox navigate to the left-handed window side then click on Apple Logo>and click on About This Mac option.
Conclusion
These are the steps to install macOS Sonoma on VirtualBox on Windows PC with a few clicks. As still macOS Sonoma is in beta mode but again experimenting with the beta mode on virtual machines is pretty interesting. You can experiment with all the new enhancements and features of macOS Sonoma on a virtual machine. Also, the only thing that remains is to enter macOS Sonoma full-screen mode on VirtualBox on Windows PC. You can enter the full-screen mode of macOS Sonoma on VirtualBox by applying a few commands.


When powering up VM
Powering VM up…
VM Name: macOS Sonoma
Failed to query SMC value from the host(VERR_INVALID_HANDLE).
Result Code: E_FAIL (0X8004005)
Component: ConsolWrap
Interface: IConsole {6ac83d89-6ee7-4e33-8ae6-b257b2e81be8}
My installation is not working correctly.
It stops with the message:
An error occurred while preparing the software update.
Can someone help me?