
macOS Sonoma is the 14th version of the Apple macOS operating system for Macintosh computers. macOS Sonoma the successor major release of macOS Ventura, the macOS Sonoma released at the Apple event called WWDC23 Worldwide Developer Conference 2023 on June 5, 2023. The first beta developer version of macOS Sonoma was released on June 2023. And the public beta version of macOS Sonoma is expected to be released later in the summer. The name macOS Sonoma has been taken from the wine region located in the United States of America California.
However, macOS Sonoma released bunches of best and enhancements features for their users. And more than that the macOS Sonoam brought lots of new changes and features and unique wallpaper. You can get the new wallpaper of macOS Sonoma in 6k resolution. On the other hand, macOS Sonoma features are the following, the new widgets can be replaceable on any part of the desktop. The gaming mode feature boosts your gaming performance on a Mac machine while playing a game on a Mac machine your PC will detect the GPU and CPU. And Apple announced a new developer tool that ports the Windows game to macOS.
Through this article, you will learn how to downgrade macOS Sonoma to macOS Ventura. As of right now, macOS Sonoma is in beta mode, most of you might install the macOS Sonoma through the developer account. And most of you might install the macOS Sonoma through the Developer Beta Acess Utility Software. So, the macOS Sonoma beta version is buggy and it might not be safe for your computer. You can downgrade to macOS Ventura with a few steps.
macOS Sonom is supported by the below down machines
- iMac (2019 or later)
- iMac Pro
- MacBook Air (2018 or later)
- MacBook Pro (2018 or later)
- Mac Mini (2018 or later)
- Mac Pro (2019 or later)
- Mac Studio (all models)
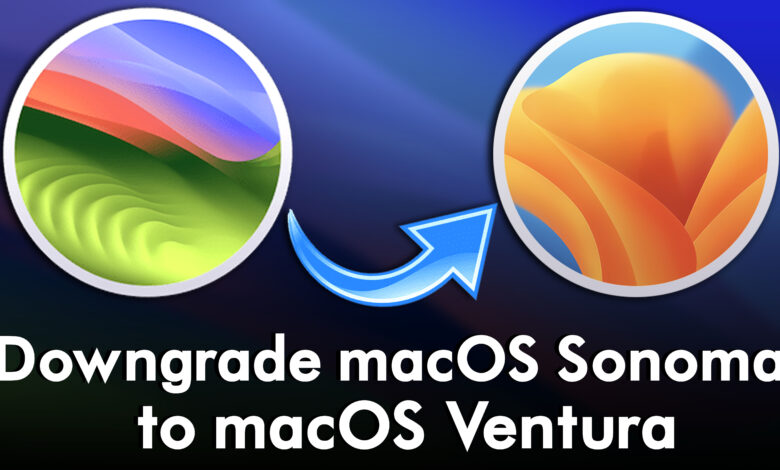
How to Downgrade macOS Sonoma to macOS Ventura?
Currently, if you are using macOS Sonoma on your actual computer, you can downgrade to macOS Ventura. So, I recommend you downgrade because macOS Sonoma is right now in the beta version it is not safe for your personal computer. If you want to experiment with the macOS Sonoma, you can use a virtual machine, such as VirtualBox & VMware to install it and test the macOS Sonoma features.
There are two different methods of installing macOS Sonoma on VirtualBox & VMware on Windows PC. Also, the macOS Sonoma download links are included in the article.
- How to Install macOS Sonoma on VirtualBox on Windows PC?
- How to Install macOS Sonoma on VMware on Windows PC?
Steps to Downgrade to macOS Ventura
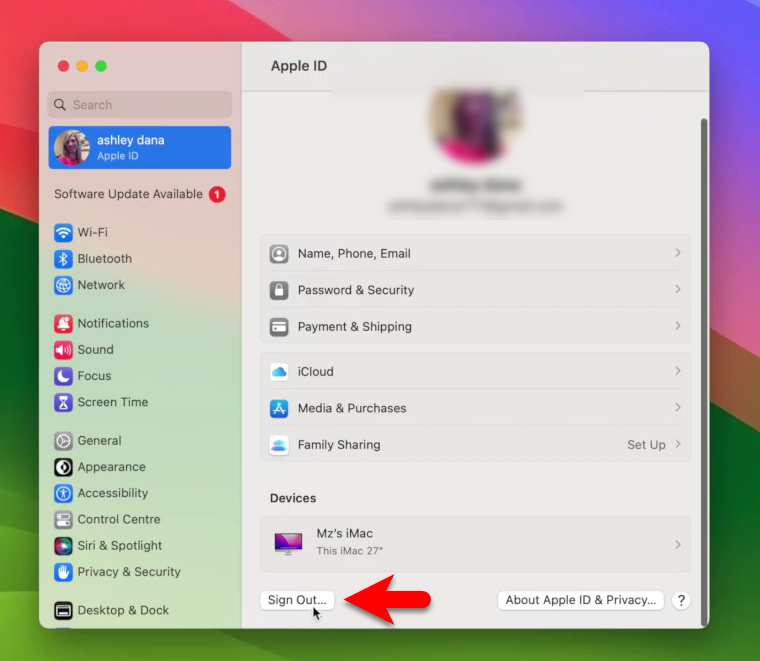
To downgrade from macOS Sonoma to macOS Ventura, firstly you need to back up your important and necessary files. Then you need to sign out from your Apple ID, simply head over to the system settings app and open it. Click on your Apple ID profile icon, then click on the sign-out option.
Now open up your Safari browser, then click the following macOS Ventura official download link, and download the macOS Ventura installer file.
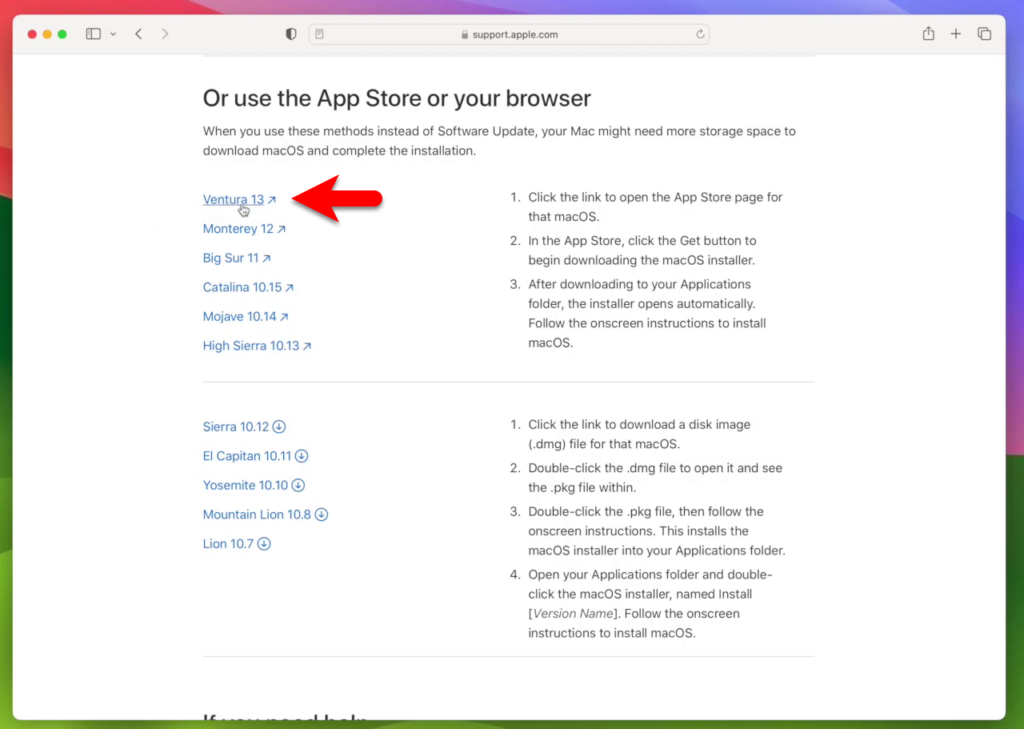
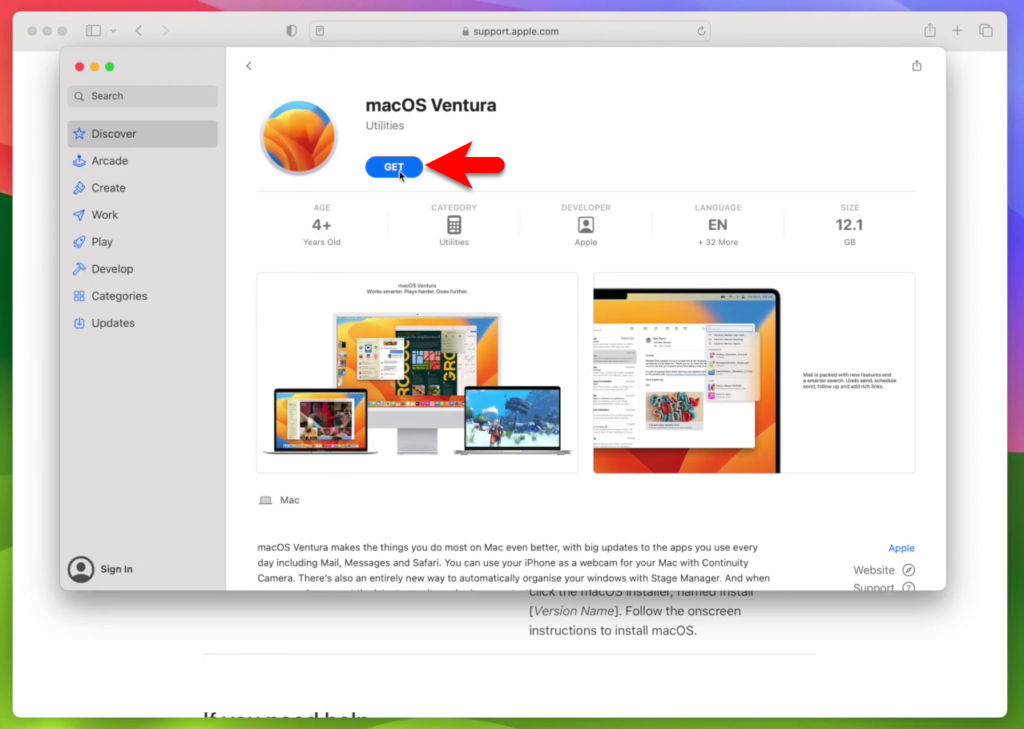
Once you clicked the link, automatically you will be redirected to the App Store. Then on the App Store click on the Get option.
Note: After the downloading of macOS Ventura is completed, the installation will launch simply press the Command+Q key to quit the installer.
Step1. Format the USB Flash Drive
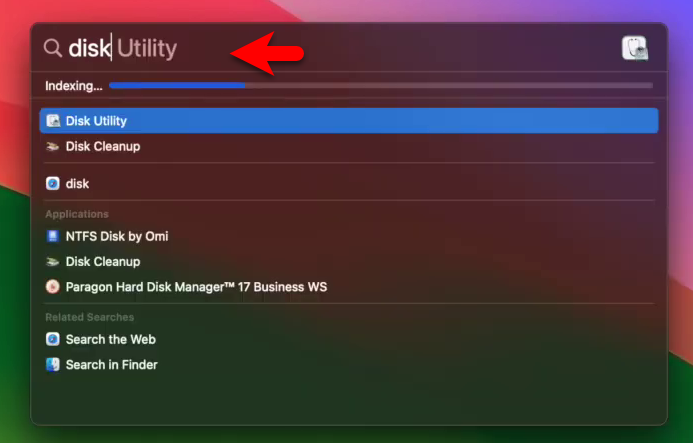
Now attach your USB drive to your Mac machine, then navigate to the search spotlight, there type disk utility.
When the disk utility is opened, go to the view menu and click on Show All Devices.
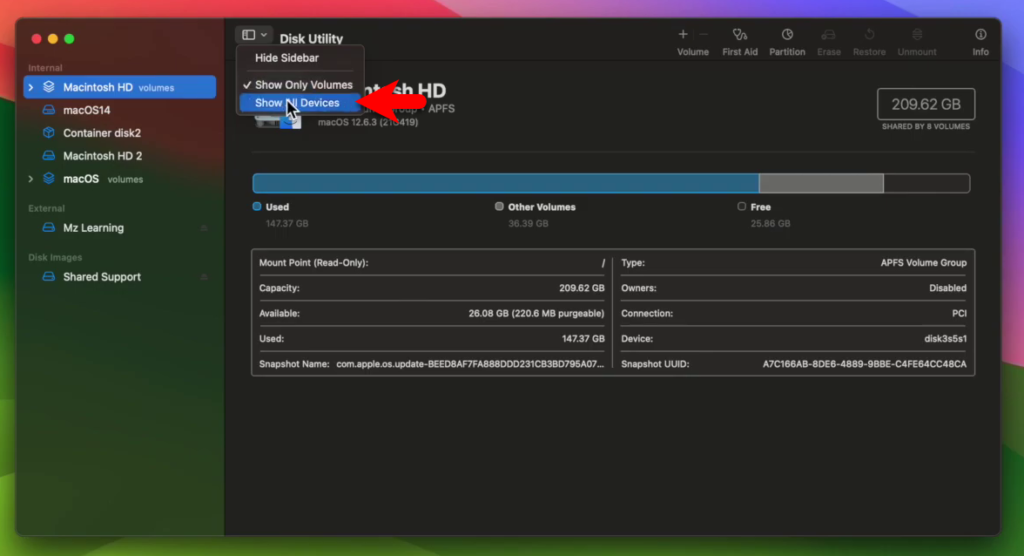
From the left-handed window, the side selects your USB drive, then click on erase and format the USB drive with the following parameters.
- Name: optional
- Format: APFS
- Scheme: GUID Partition Map
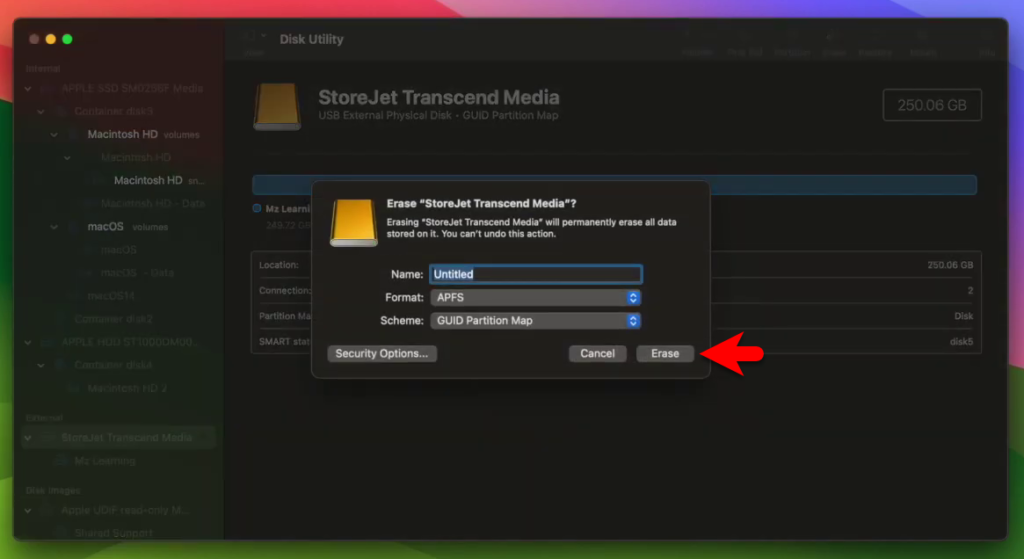
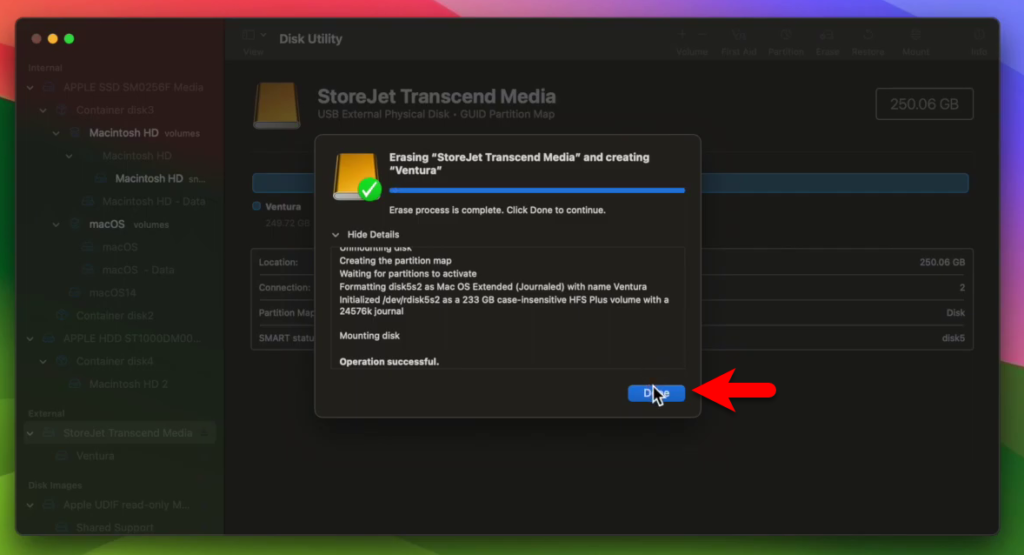
Once the disk is erased click on the done option and close the disk utility.
Step2. Create a Bootable USB Flash Drive
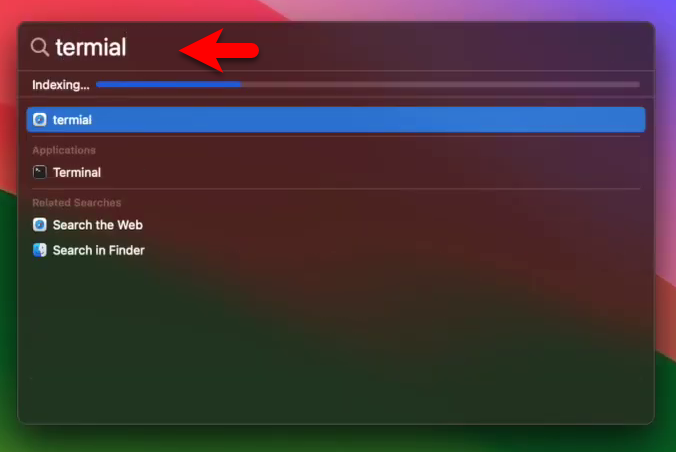
Once the USB flash drive is successfully formatted, now you have to create a bootable USB drive. Again navigate to the search spotlight, then open up the terminal.
When the terminal is opened copy the below commands, and paste them into the terminal. Enter your username password then hit enter, again enter “Y” then hit enter.
Note: Replace the “Ventura” end command name with the name of your USB flash drive.
sudo /Applications/Install\ macOS\ Ventura.app/Contents/Resources/createinstallmedia --volume /Volumes/Ventura 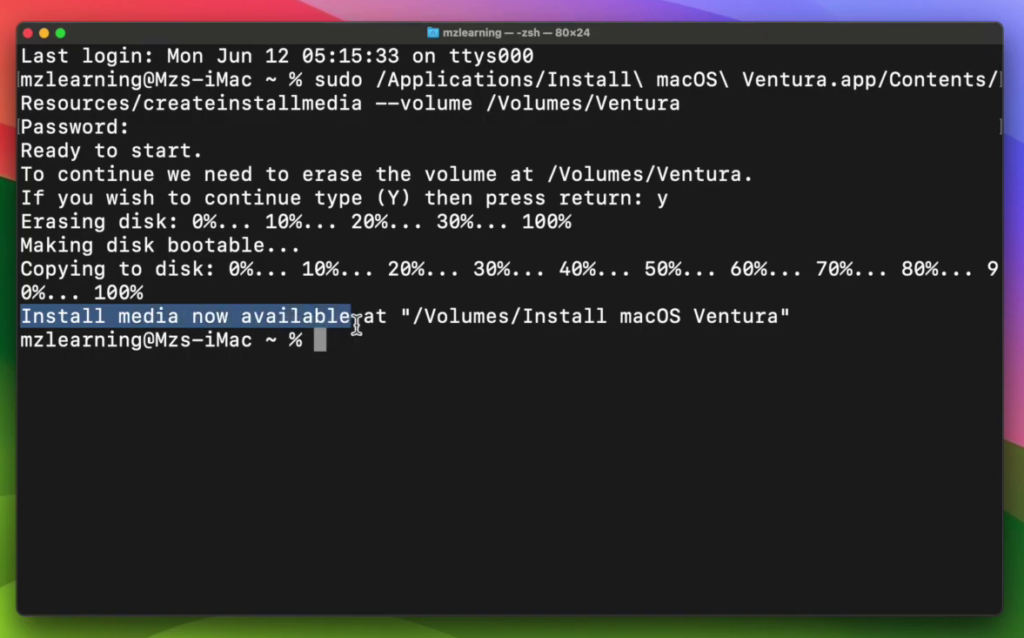
Step3. Allow the Radio Button
When the macOS Ventura USB flash drive is successfully created, simply restart your Mac machine, then press and hold the Command+R key. And on the recovery window click on Utilities>Startup Security Utility.
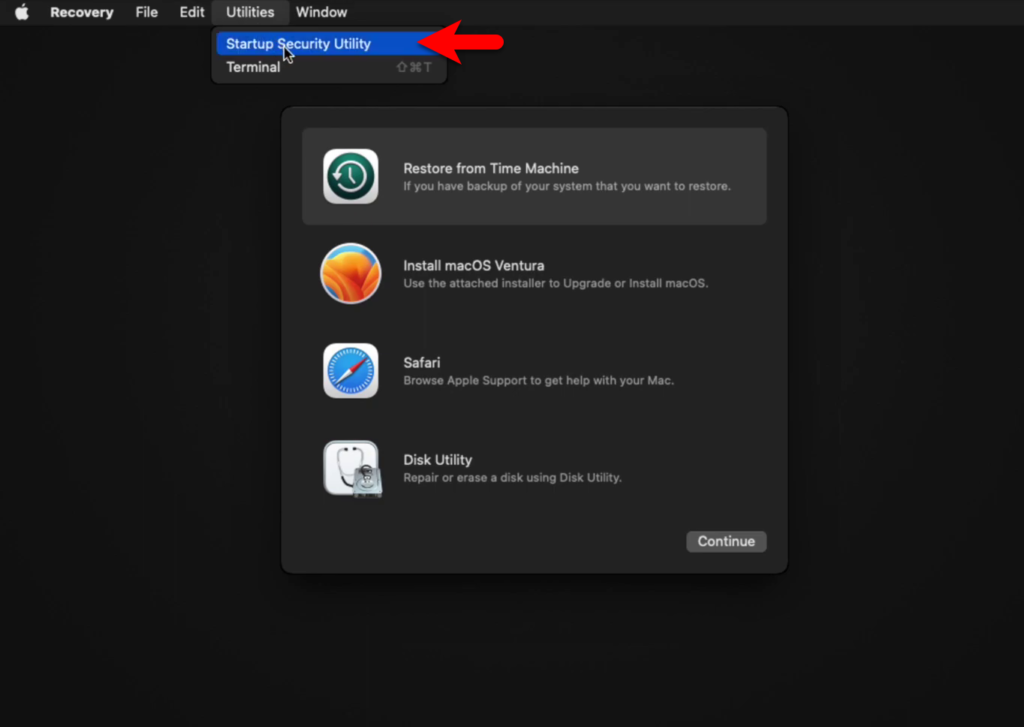
When the next window opened click on enter macOS password. Then enter your administrator password.

Now activate the radio button, by selecting the “Allow booting from external or removable media” option.
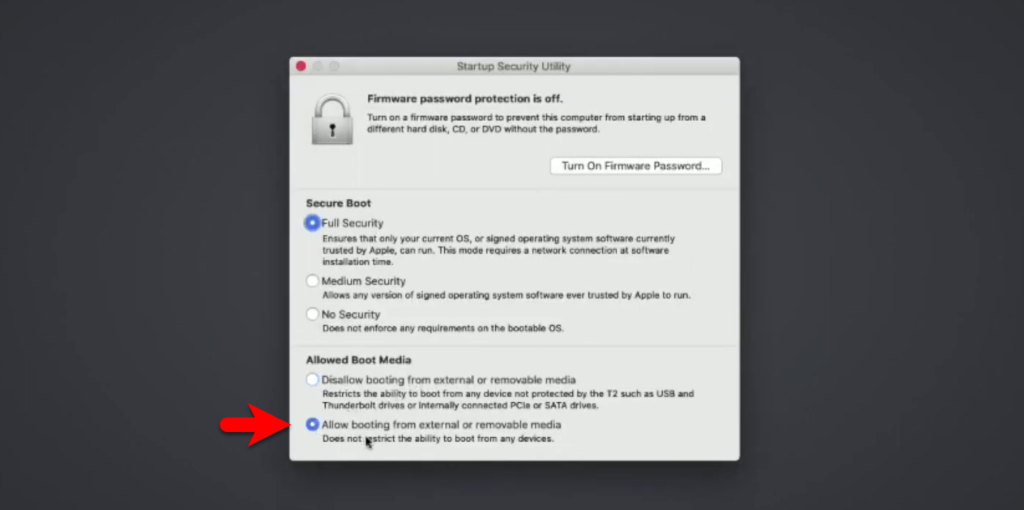
Note: Once you enabled the radio button on the startup security utility click, restart your Mac machine.
Step4. Install macOS Ventura
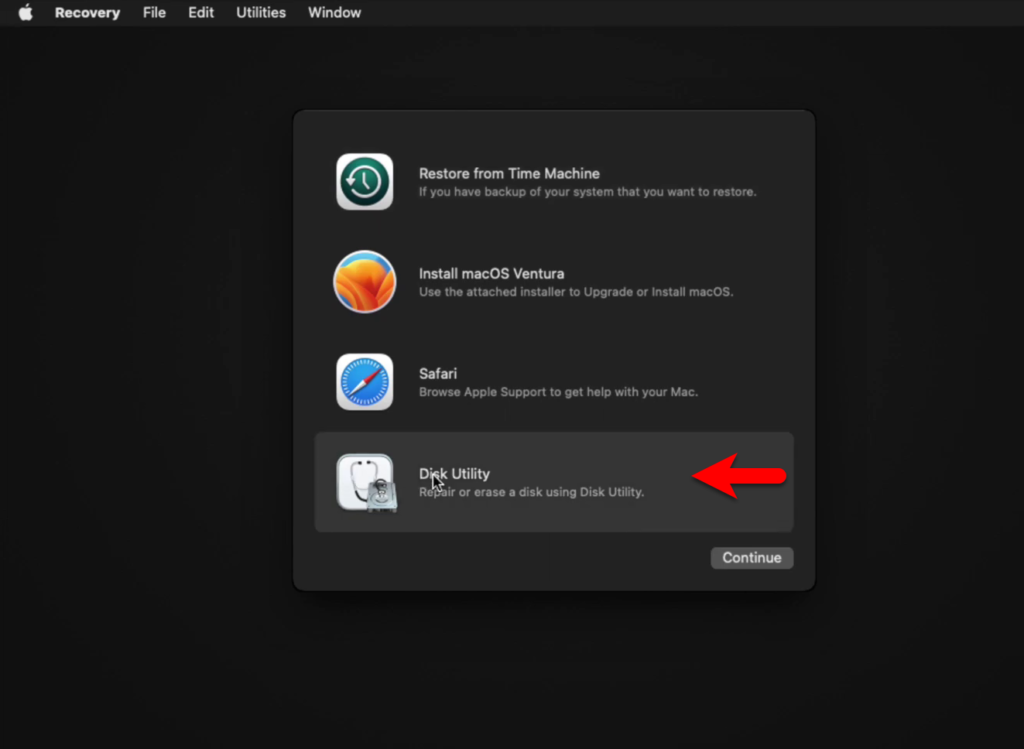
Once your Mac is restarted you need to press and hold the power button key on the Apple Silicon Mac to boot into the installation. And on the Intel Mac press and hold the option key to boot into the installation window. Then on the boot window select the bootable USB flash drive of macOS Ventura, then hit enter to boot into the installation. On the recovery window select the disk utility option, then click continue.
In the disk utility window select your hard drive where you want to install macOS Ventura. Then on the top menu bar click on the erase option, and format the hard drive according to the below-down parameters.
- Name: Macintosh HD
- Format: APFS
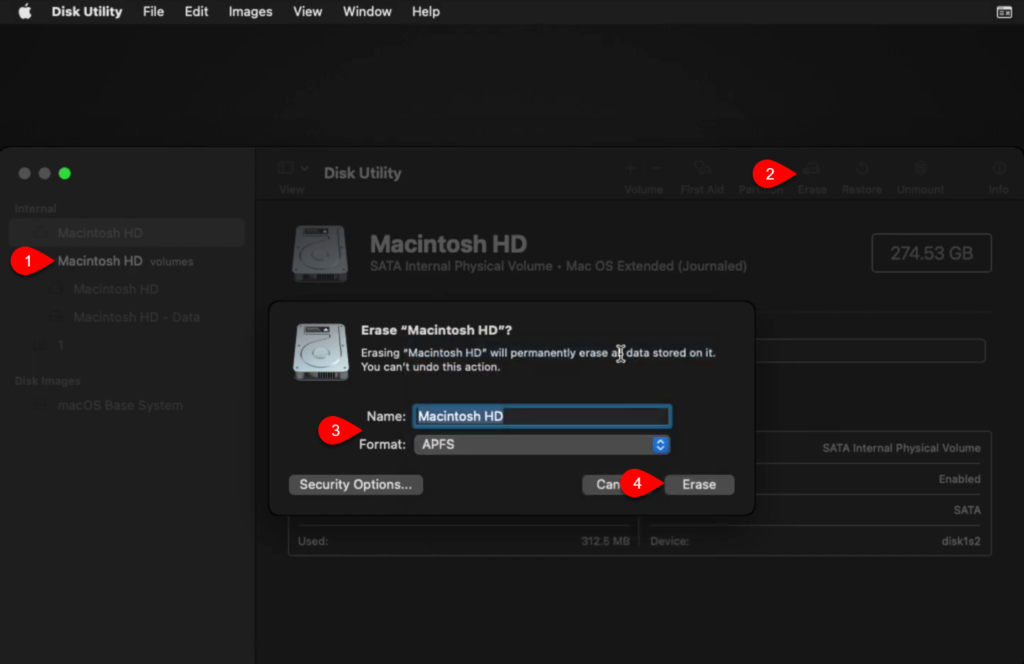
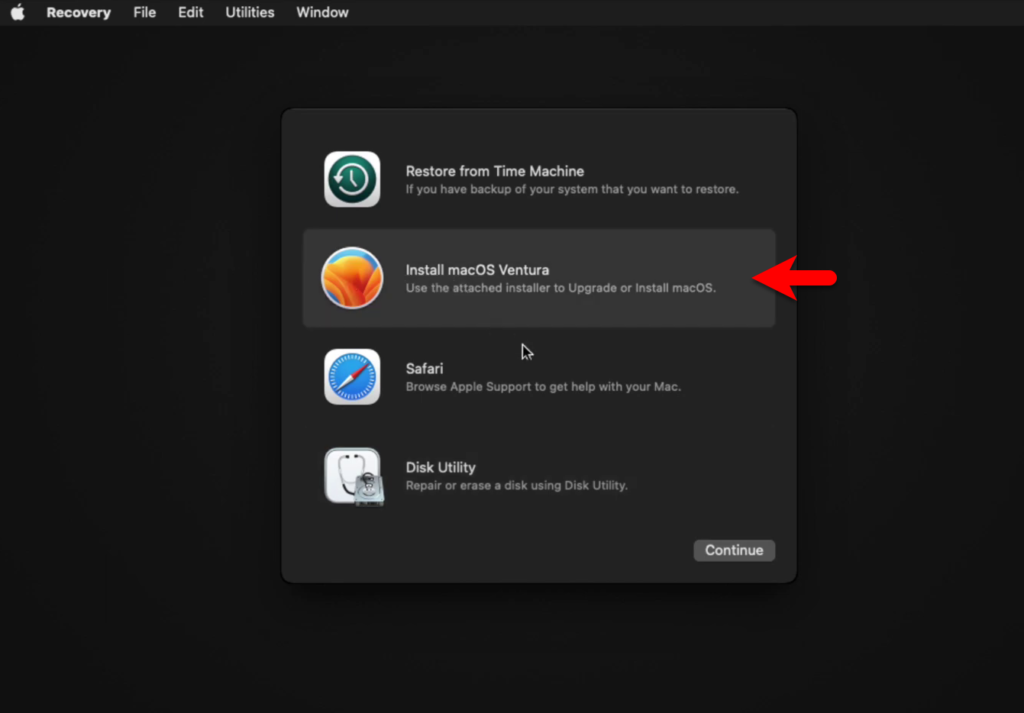
When the disk is successfully formatted click on done, then close the disk utility window. Again on the recovery window select Install macOS Ventura and click continue.
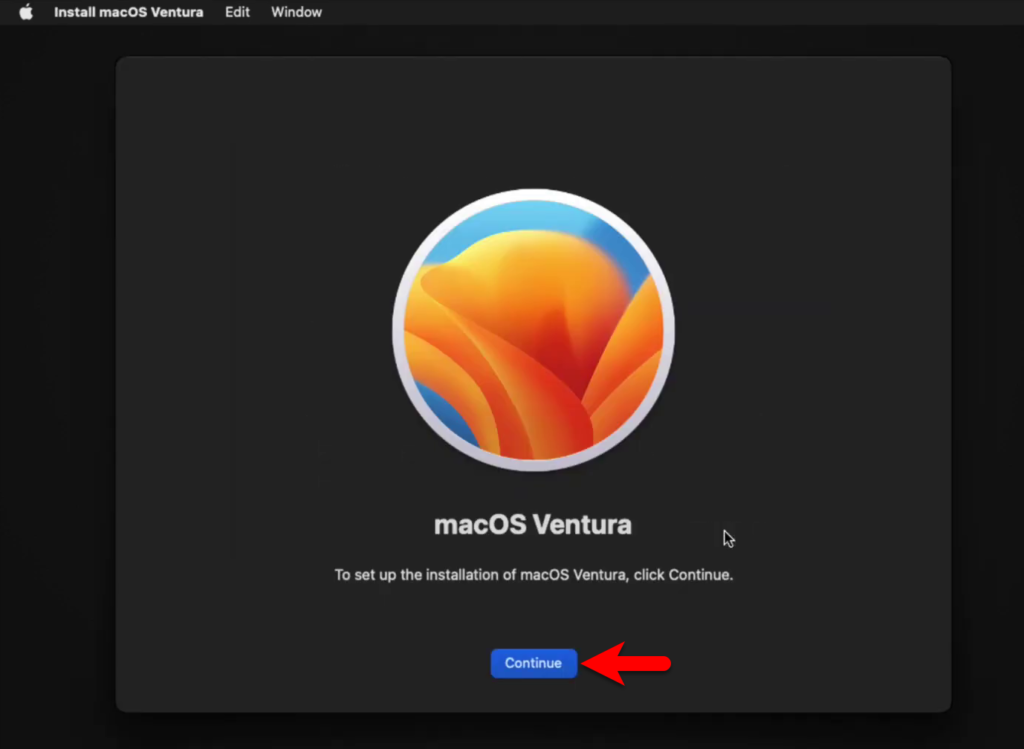
To set up the installation of macOS Ventura click continue.
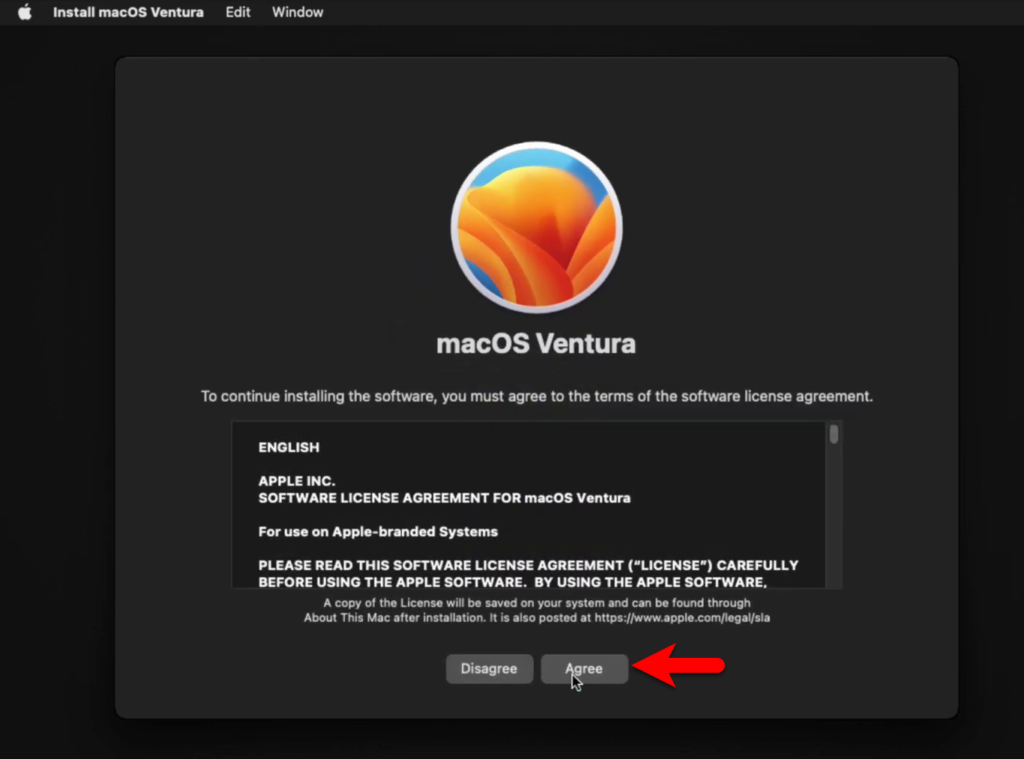
Agree with the terms and conditions of macOS Ventura.
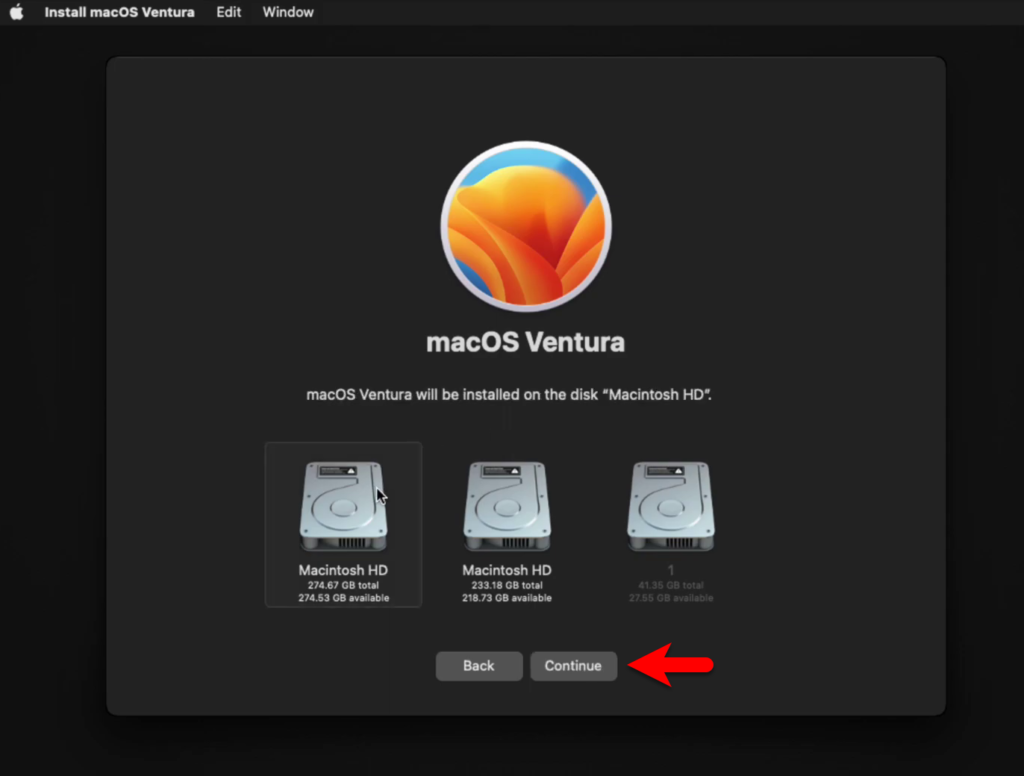
Now select the drive where you want to install macOS Ventura then click continue.
Now it will start installing macOS Ventura on your computer, wait for a few moments until the installation should be completed.

When the installation is successfully completed completed the few basic settings of macOS Ventura for the first use.
Also, you can download the macOS Sonoma all-installer files from the below-down links.
- Download macOS Sonoma VMDK File For (VirtualBox & VMware)
- Download macOS Sonoma DMG File for a Clean Installation
- Download macOS Sonoma ISO File For (VirtualBox & VMware)
Conclusion
Once the installation of macOS Ventura is successfully completed, you can enjoy using macOS Ventura on your Mac in place of macOS Sonoma. There are a few easy steps that you can downgrade your macOS Sonoma to macOS Vetura.


One Comment