After installing macOS Sonoma on VMware Workstation, you might notice that macOS Sonoma is not supporting the full-screen mode on VMware on Windows PC. But there is no worry there is a small software called VMware Tools that helps you to enter the full-screen mode of macOS Sonoma on VMware on a Windows PC. These small tools will help to get in touch with lots of macOS Sonoma features on VMware, such as full-screen mode, drag and drop, and 128MB screen display resolution.
Currently, macOS Sonoma 14 is in beta developer mode, but there are no worries you have the option to install the macOS Sonoma beta version of VMware on a Windows PC. Such as we have created a macOS Sonoma beta developer mode ISO image file for VirtualBox & VMware. And we have covered the installation of macOS Sonoma in two different articles, such as installing macOS Sonoma on VirtualBox and VMware on Windows PC.
- How to Install macOS Sonoma on VirtualBox on Windows PC?
- How to Install macOS Sonoma on VMware on Windows PC?
However, to install macOS Sonoma on VirtualBox or VMware Workstation, firstly you need to install the virtual machine software, then the next option is you need to download the macOS Sonoma ISO image file or its vmdk file. And the next option is you need to create a new virtual machine for macOS Sonoma on VirtualBox or VMware on Windows PC. And the final step is you need to perform a clean installation of macOS Sonoma on the Virtual Machine. Once you have completed the installation of macOS Sonoma on VMware Workstation, then follow up the below down guide to install the VMware Tools.
- Download macOS Sonoma VMDK File For (VirtualBox & VMware)
- Download macOS Sonoma ISO File For (VirtualBox & VMware)
How to Install VMware Tools on macOS Sonoma?
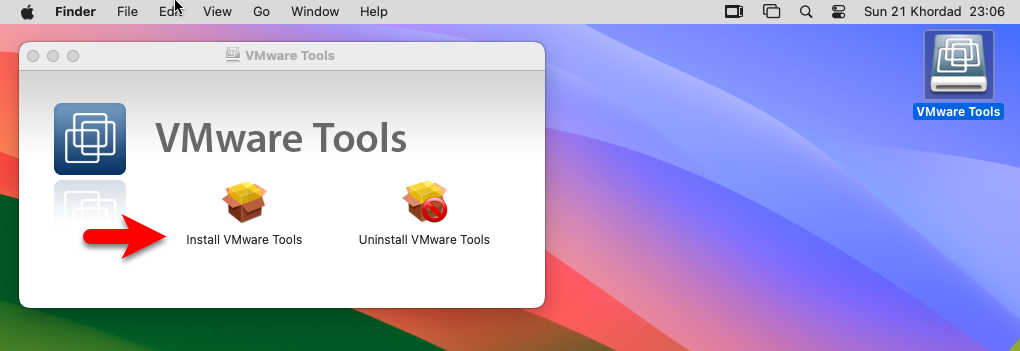
To continue installing VMware Tools on macOS Sonoma, simply launch the virtual machine of macOS Sonoma. On the top menu bar click on VM tab>then click on the Install VMware Tools option. Wait for a few moments until the installation software of VMware Tools should appear on the desktop. Then double-click on VMware Tools to launch the installation, and again double-click on Install VMware Tools.
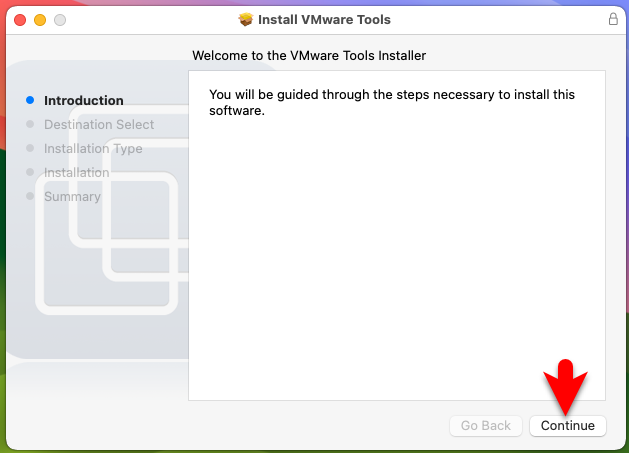
When the installation of VMware Tools launched on the first window click continue.
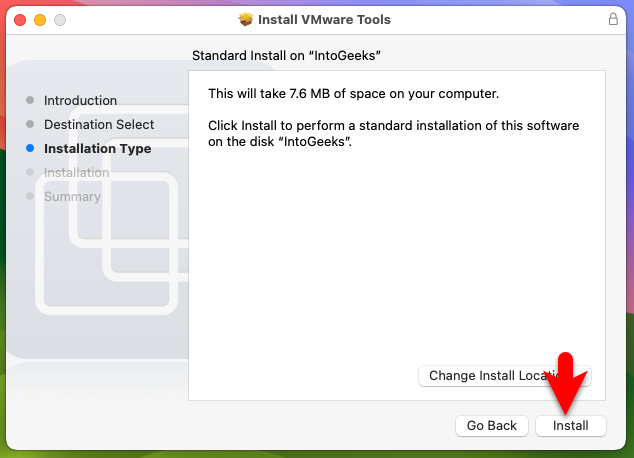
On the installation type window, you can change the installation location, in my case leave it as default then click on install.
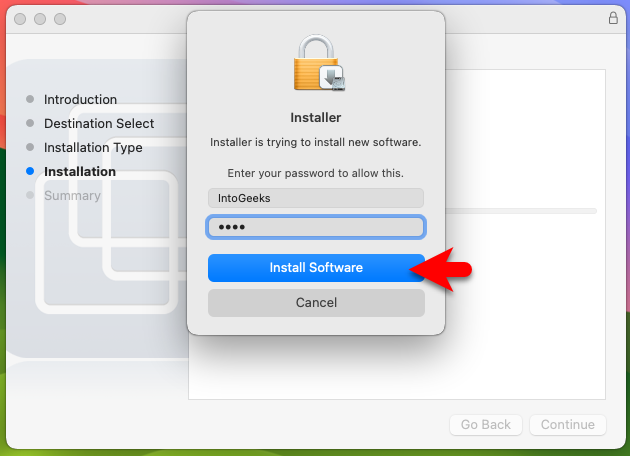
Now enter the username and password and click on Install the software.
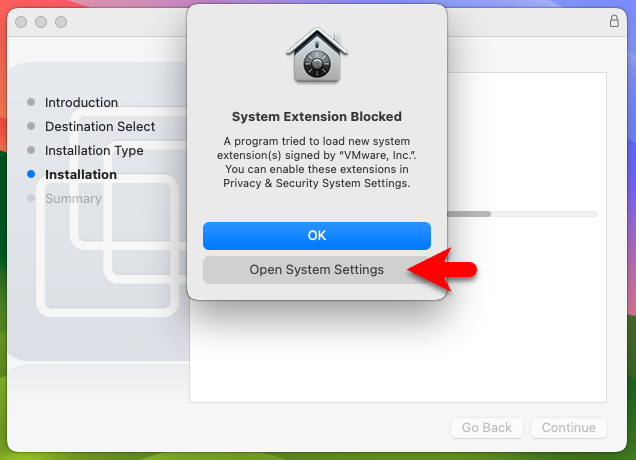
During the installation, you will face a warning that “System Extension Blocked, A program tried to load new system extensions signed by VMware, Inc. You can enable these extensions in privacy & security system settings”. To enable the VMware Tools services simply click on the “Open Security Settings” option.
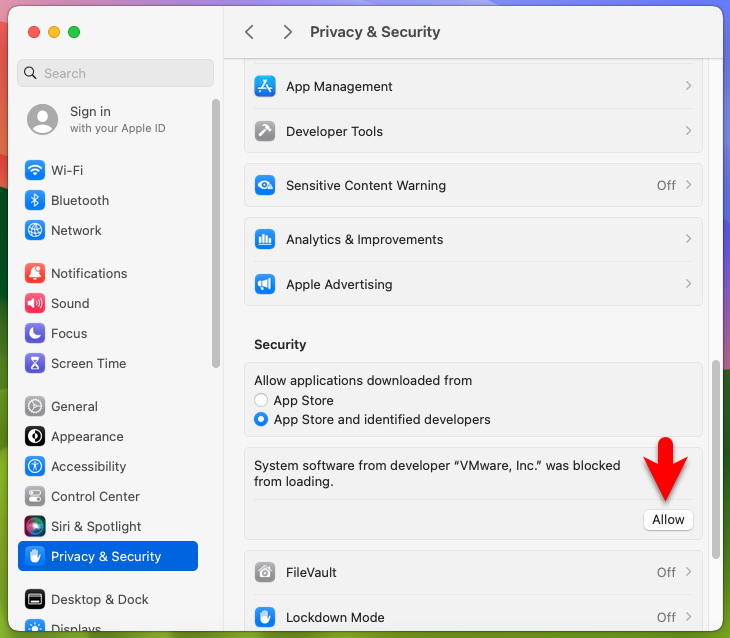
When the privacy & security window opened click on Allow option.
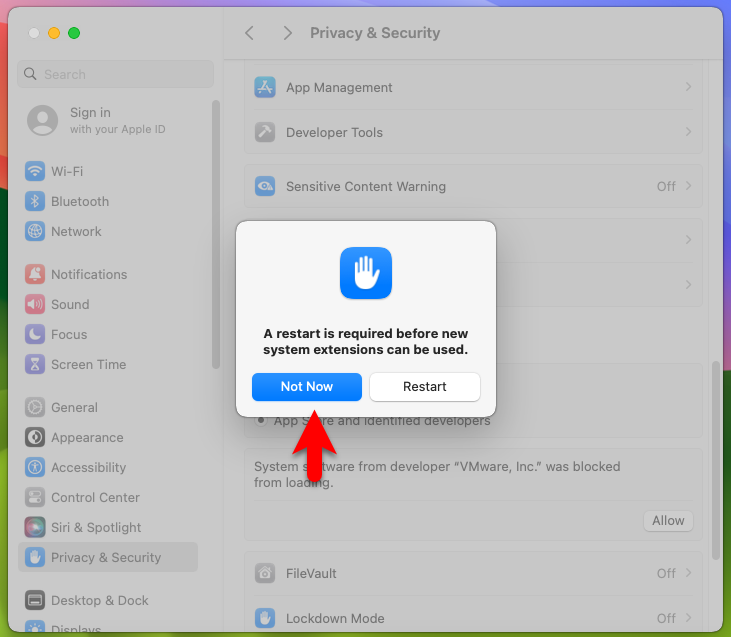
When you clicked allow, again click on the not now option.
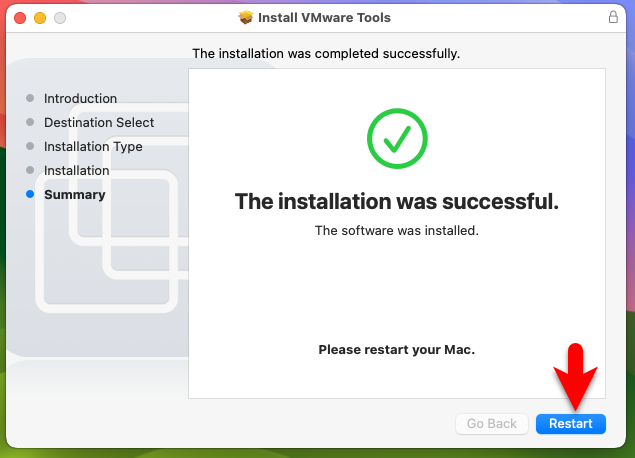
When the installation of VMware Tools is successfully completed, you need to click on restart to restart the virtual machine of macOS Sonoma.
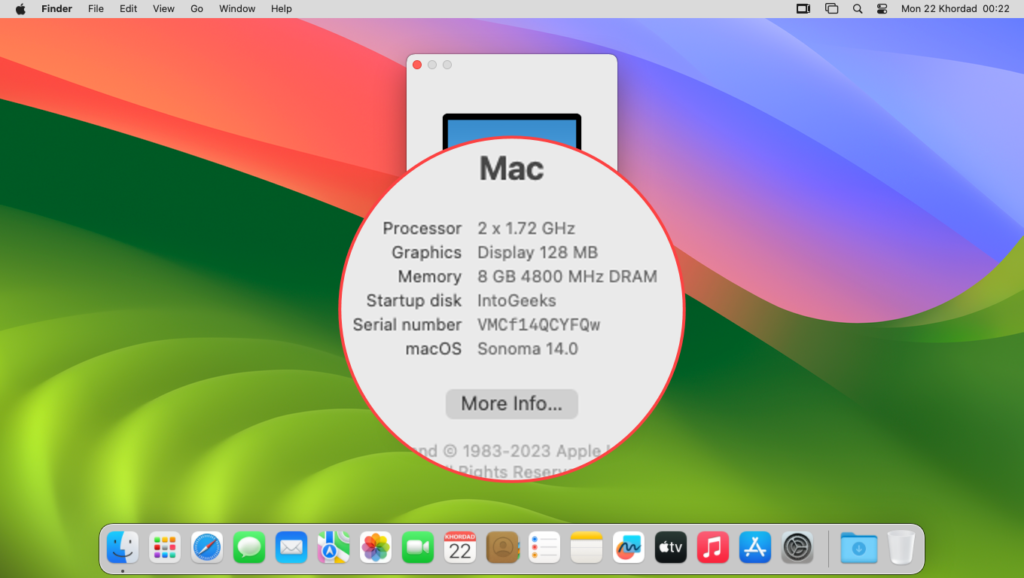
Once the virtual machine is successfully restarted again coming back to macOS Sonoma. Navigate to the left-handed window side, click on About This Mac, then check the screen resolution of macOS Sonoma and its display size.
- How to Install VMware Tools on macOS Mojave?
- How to Install VMware Tools on macOS Catalina?
- How to Install VMware Tools on macOS Monterey?
- How to Install VMware Tools on macOS Ventura?
Conclusion
Once the installation of VMware Tools is successfully completed on macOS Sonoma on VMware. All the features will be enabled like an actual Mac machine. You can drag & drop files between the guest OS and virtual machine, and also you will enter the full-screen mode resolution of macOS Sonoma on VMware on a Windows PC.