How to Install macOS Mojave Final on VirtualBox on Windows PC?
How to Install macOS Mojave Final on VirtualBox on Windows PC?
It was on 4th June 2018 that Apple held its biggest event Worldwide developer conference. And macOS Mojave 10.14 was just kicked out by Apple on that day with all its new features and dark mode feature. As previously before macOS Mojave 10.14 there was an operating system called macOS High Sierra. Which was pretty simple than macOS Mojave 10.14. macOS Mojave 10.14 is the fifteenth major release of the macOS Apple operating system for Macintosh computers. The public version of macOS Mojave 10.14 was released on September 24, 2018, for people through the update parts, and through the dmg file installation. Overall, every year Apple is releasing operating systems, such as Sierra, High Sierra, Mojave, Catalina, Big Sur, Monterey, and Ventura. Each of the Apple operating systems is named after the different places that are located in the United States of America.
However, macOS Mojave 10.14 name has been taken from the place which refers to the Mojave desert, which is a part series of Southern California. And macOS Mojave is the first Apple operating system that brings several iOS apps to the operating system. The apps are Apple News, Voice Memos, and Home. And the other advanced and comprehensive feature of macOS Mojave is dark mode. Apple decided to bring some changes to its operating system, and the dark mode is the first change in macOS Mojave. As Microsoft released the dark mode in Windows 10, in 2015. Also, macOS Mojave is the final Apple operating system that supports 32-Bit applications.
Related:
- How to Install macOS Big Sur Final on VMware on Windows PC?
- How to Install macOS Ventura 13 on VMware on Windows PC?
- How to Install macOS Ventura 13 on VirtualBox on Windows PC?
- How to Install macOS Monterey Final on VirtualBox on Windows PC?
- How to Install macOS Monterey Final on VMware on Windows PC?
- How to Install macOS Big Sur Final on VirtualBox on Windows PC?
- How to Install macOS Catalina Final on VMware on Windows PC?
- How to Install macOS Catalina Final on VirtualBox on Windows PC?
- How to Install macOS Mojave Final on VMware on Windows PC?
It’s Possible to Install macOS Mojave on Windows?
Through this guide, you will learn a step-by-step guide on how to install macOS Mojave Final on VirtualBox on Windows PC. You might think is it possible to install the macOS on Windows PC? Of course, it’s possible thanks to the world of virtualization that allows us to test several operating systems at the same time on a single PC.
There is two popular virtualization technology that allows you to test macOS on Windows PC. The first one is VirtualBox, and the second one is VMware Workstation. As VirtualBox is completely an open-source virtual machine software that allows you to test Windows, macOS, Linux, Android OS, and other operating systems on a single physical machine. So, VMware Workstation comes with a purchase method, if you want to install VMware Workstation on your Windows PC. Then you have to pay money yearly or monthly, don’t worry here is the latest version of VMware Workstation which is completely free for you to install it on your Windows PC.
macOS Mojave requires a GPU that supports metal, and there is a list of compatible machines that are compatible with macOS Mojave.
- iMac (Late 2012 or later)
- iMac Pro
- MacBook (Early 2015 or later)
- MacBook Air (Mid 2012 or later)
- MacBook Pro (Mid 2012 or later)
- Mac Mini (Late 2012 or later)
- Mac Pro (Mid 2010 or later)
Also, to install macOS Mojave on VirtualBox on Windows PC. Make sure that your computer is having the below-down requirements.
- 4GB or RAM (8GB is recommended)
- Minimum of 2 Core Processors
- 30GB of hard disk space (SSD is recommended)
- Virtualization technology should be enabled on the BIOS
How to Install macOS Mojave Final on VirtualBox on Windows PC?
To get started with the installation of macOS Mojave on a Windows PC, firstly you need to download the prerequisites files such as VirtualBox plus its extension pack. The next thing is you need to download the macOS Mojave ISO image file.
- Download the macOS Mojave ISO image file
- Download the macOS Mojave VMDK file
- Download & Install VirtualBox on Windows PC
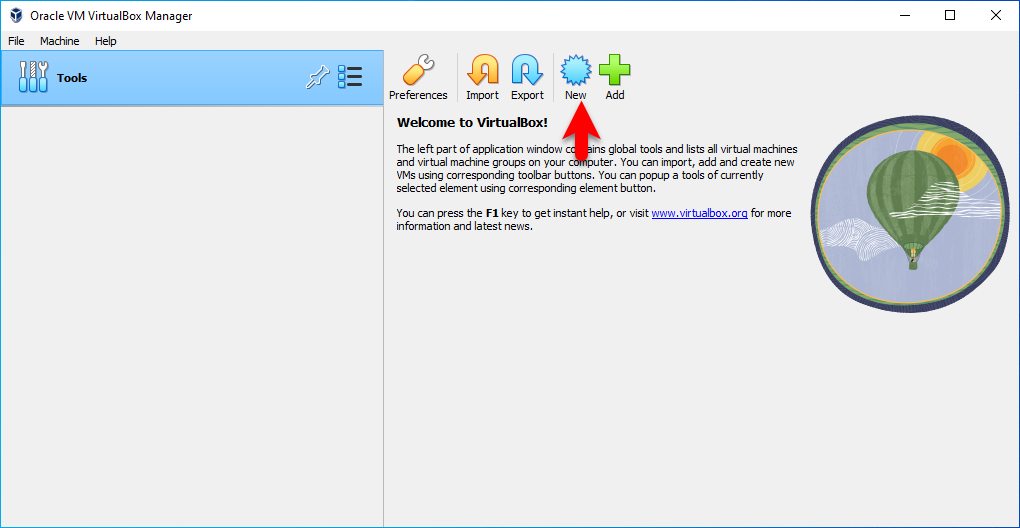
Once you have downloaded the required files, open up the VirtualBox on the first window and click on new.
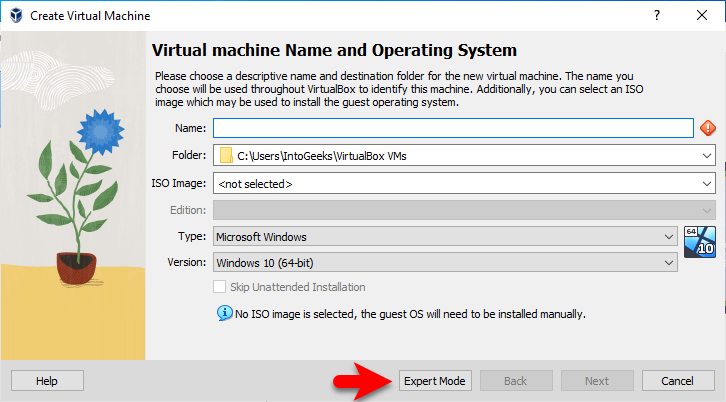
When the next window opened click on the expert mode option.
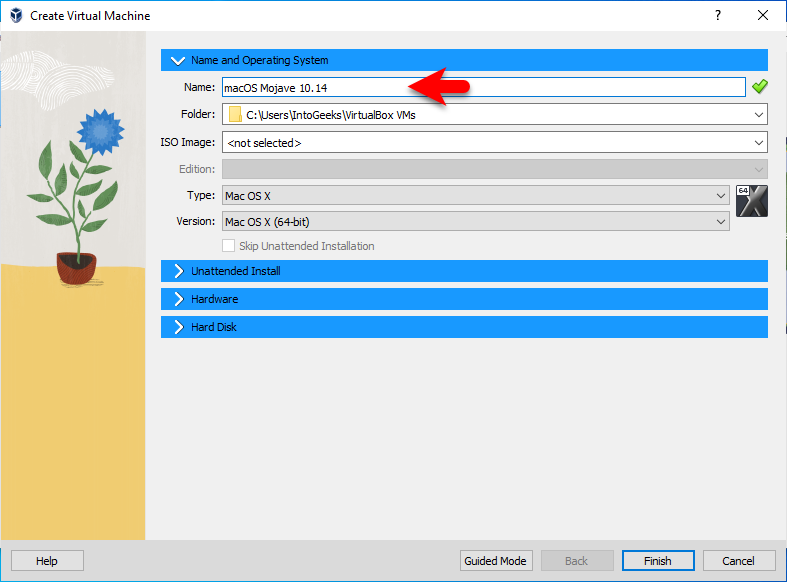
Now type the name of the virtual machine, select the location, select the type Mac OS X, and select the version Mac OS X (64-Bit).
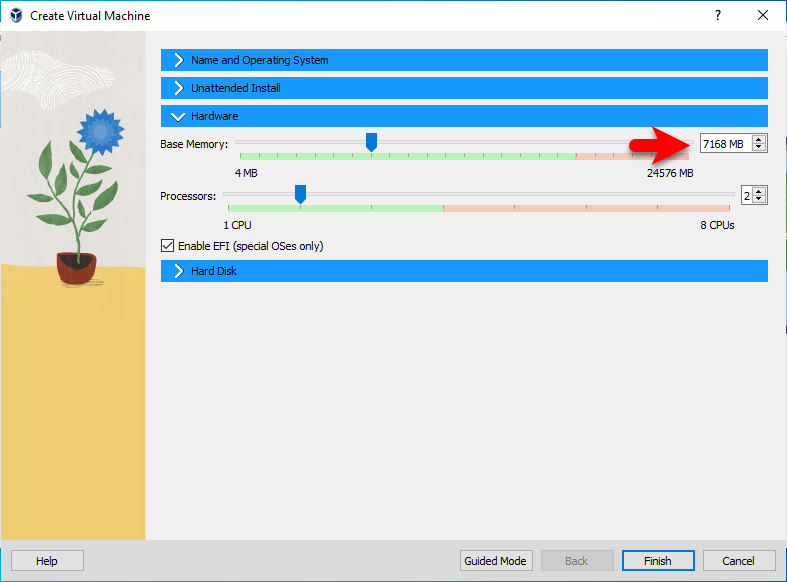
Click on the hardware tab, increase the size of base memory, and increase the number of processors.
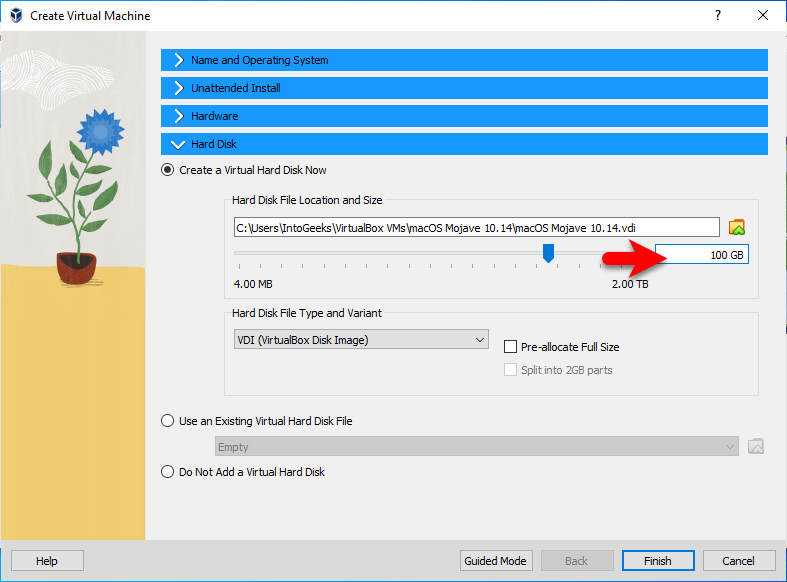
Click on the hard disk tab, increase the size of the hard disk for macOS Mojave, and click finish to create the virtual machine.
Edit the Virtual Machine Settings For Better Performance
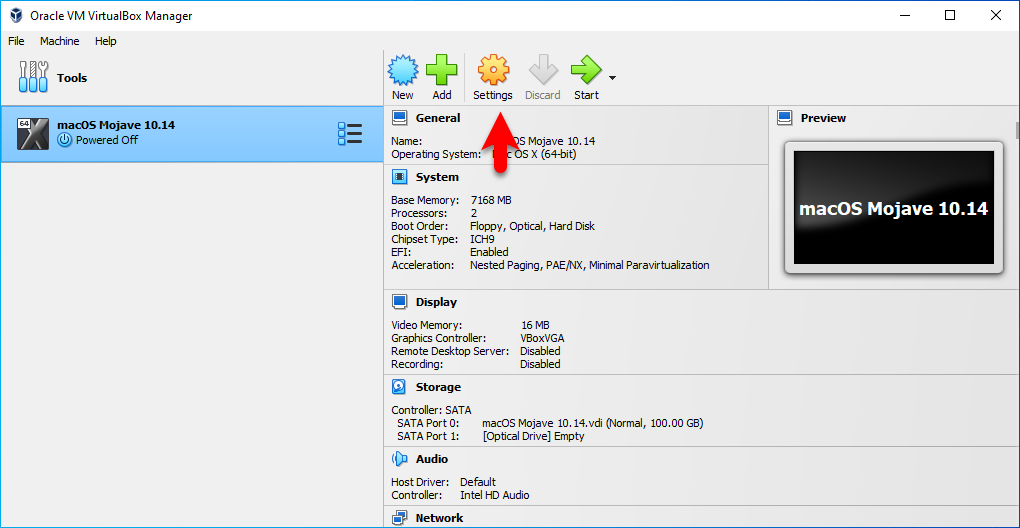
Once the virtual machine is successfully created for macOS Mojave, then you need to edit some settings for macOS Mojave to have better performance while installation. Simply click on settings, to edit the virtual machine settings.
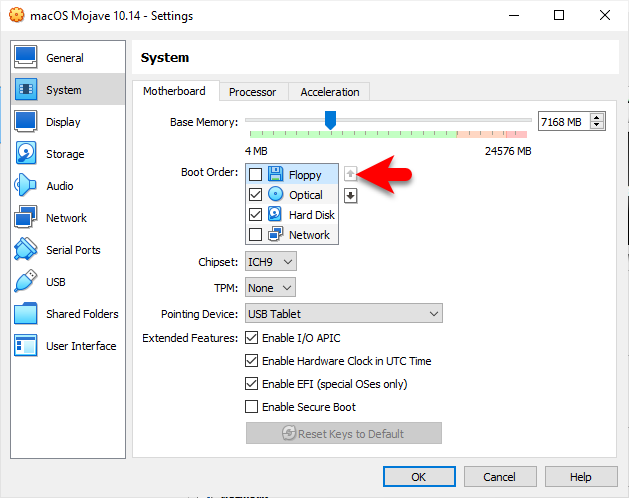
When the settings window opened, from the left-handed window side select the hardware tab, and uncheck the floppy.
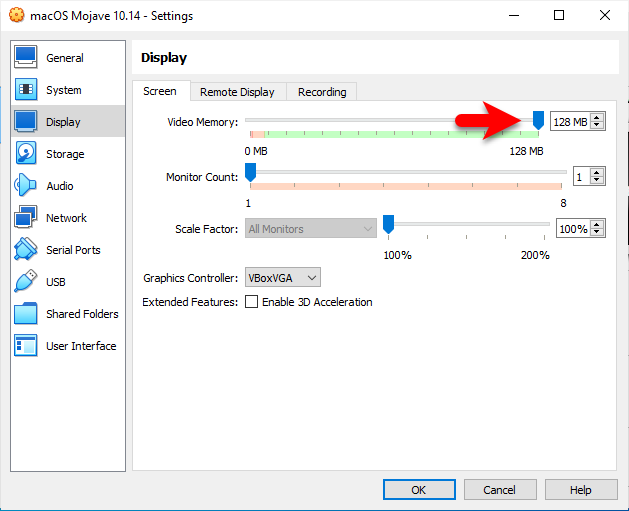
Select the display tab, and increase the video memory up to 128MB.
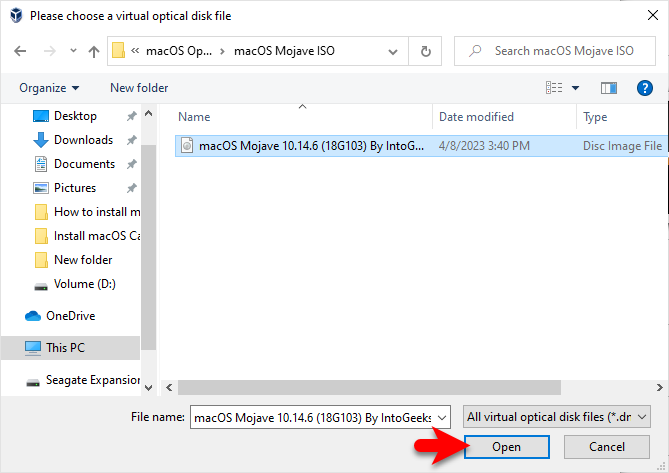
Select the storage tab, click empty>disk icon>Choose a disk file to insert the macOS Mojave ISO file.
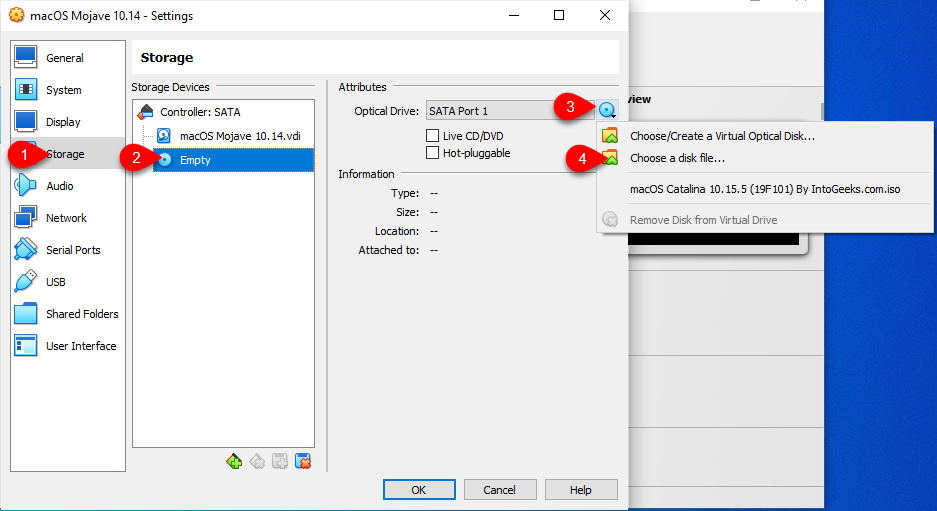
Select the macOS Mojave ISO image file and click on open.
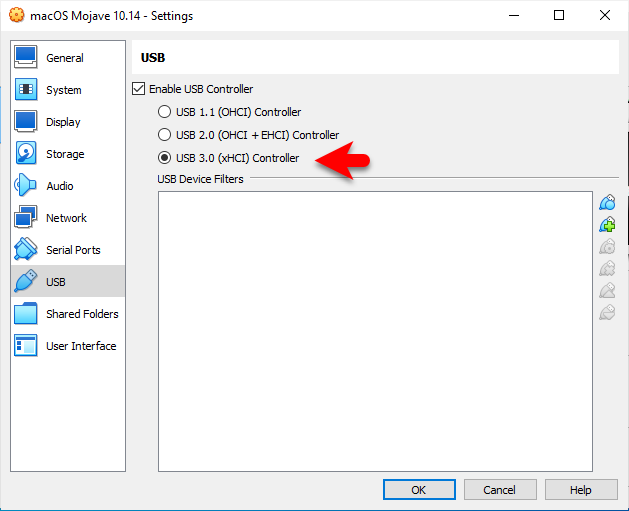
Now navigate to the USB Controller tab, then select the USB 3.0 option and click on OK to save the changes.
Apply the Commands
Once you have created the virtual machine for macOS Mojave on VirtualBox on Windows PC. Now the next thing is you have to apply the commands that configure the virtual machine of macOS Mojave on VirtualBox on Windows PC. The commands will configure the virtual machine of macOS on VirtualBox on Windows PC. Be sure to apply the commands properly otherwise you won’t be able to continue the installation of macOS Mojave on a Windows PC.
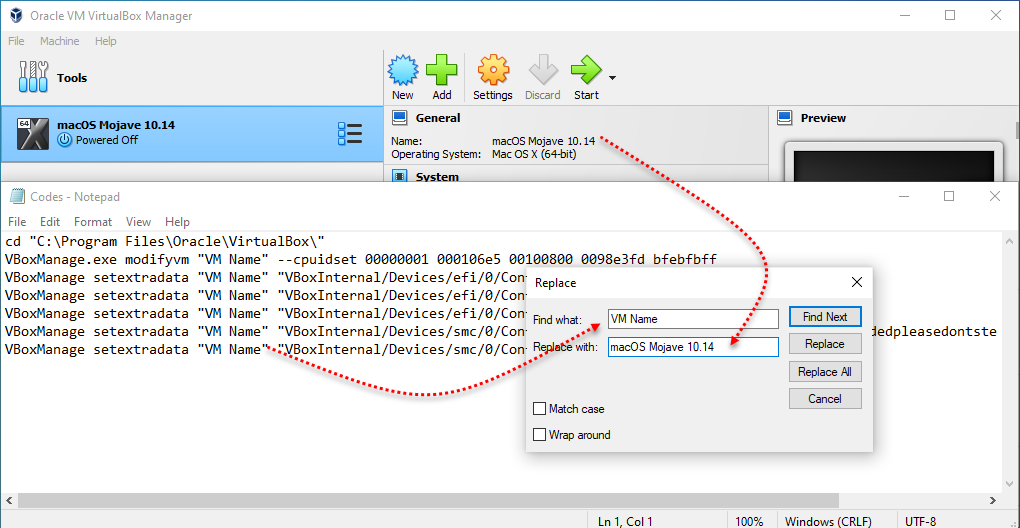
Open up the notepad then copy and paste the below commands.
cd "C:\Program Files\Oracle\VirtualBox\"
VBoxManage.exe modifyvm "VM Name" --cpuidset 00000001 000106e5 00100800 0098e3fd bfebfbff
VBoxManage setextradata "VM Name" "VBoxInternal/Devices/efi/0/Config/DmiSystemProduct" "iMac19,1"
VBoxManage setextradata "VM Name" "VBoxInternal/Devices/efi/0/Config/DmiSystemVersion" "1.0"
VBoxManage setextradata "VM Name" "VBoxInternal/Devices/efi/0/Config/DmiBoardProduct" "Mac-AA95B1DDAB278B95"
VBoxManage setextradata "VM Name" "VBoxInternal/Devices/smc/0/Config/DeviceKey" "ourhardworkbythesewordsguardedpleasedontsteal(c)AppleComputerInc"
VBoxManage setextradata "VM Name" "VBoxInternal/Devices/smc/0/Config/GetKeyFromRealSMC" 1
Once you have pasted the commands in Notepad, click on edit>replace, then replace the VM Name with the name of the macOS Mojave virtual machine.
When you have changed the VM Name, simply head over to the Windows start menu and type their cmd. Once it appeared right-click and run as administrator.
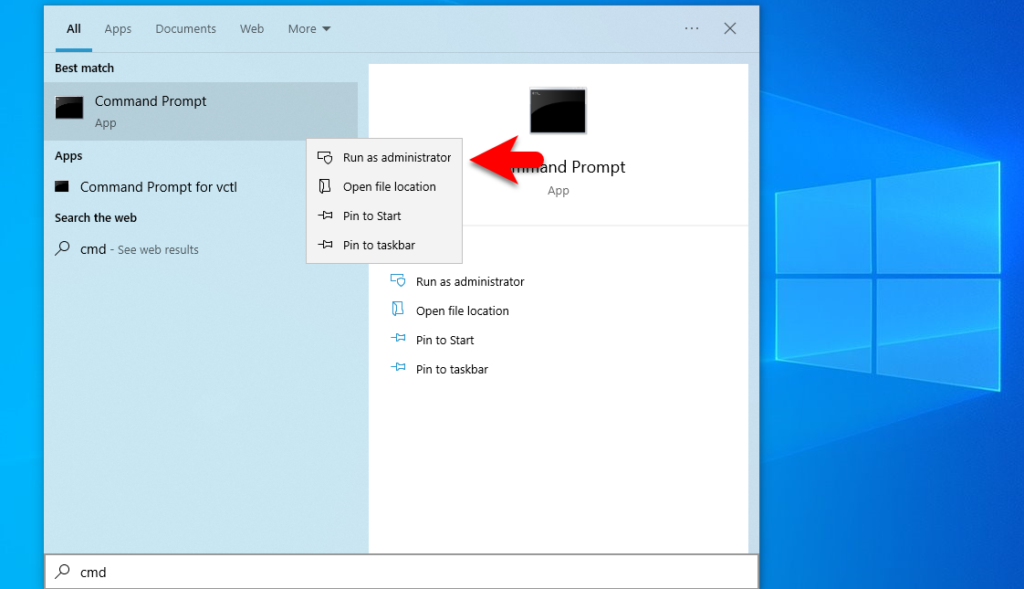
When the command prompt opened, apply the commands line by line.

Perform A Clean Installation of macOS Mojave on VirtualBox on Windows PC
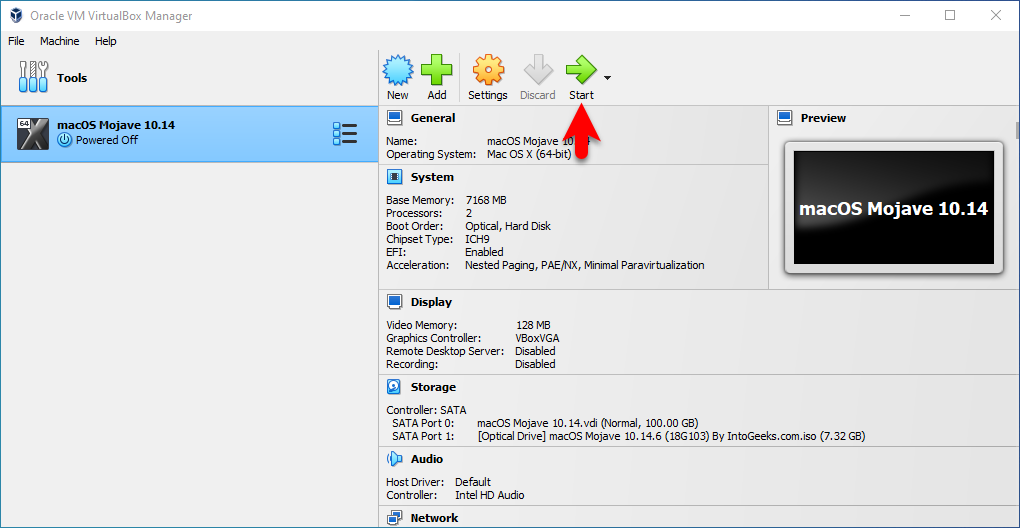
When you have created the virtual machine, edited the settings, and apply the commands to configure the virtual machine of macOS Mojave on a Windows PC. Now it’s time to perform a clean installation of macOS Mojave on VirtualBox on a Windows PC. Simply open up the VirtualBox on the main window and click on the start option.
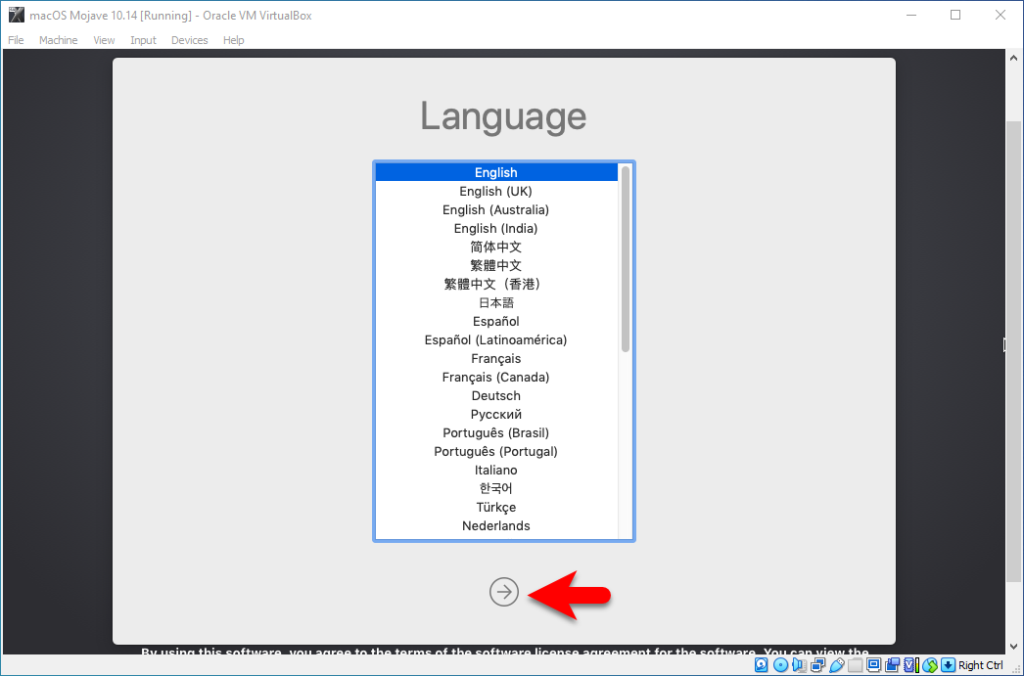
When the installation launches, on the first window select your language and click continue.
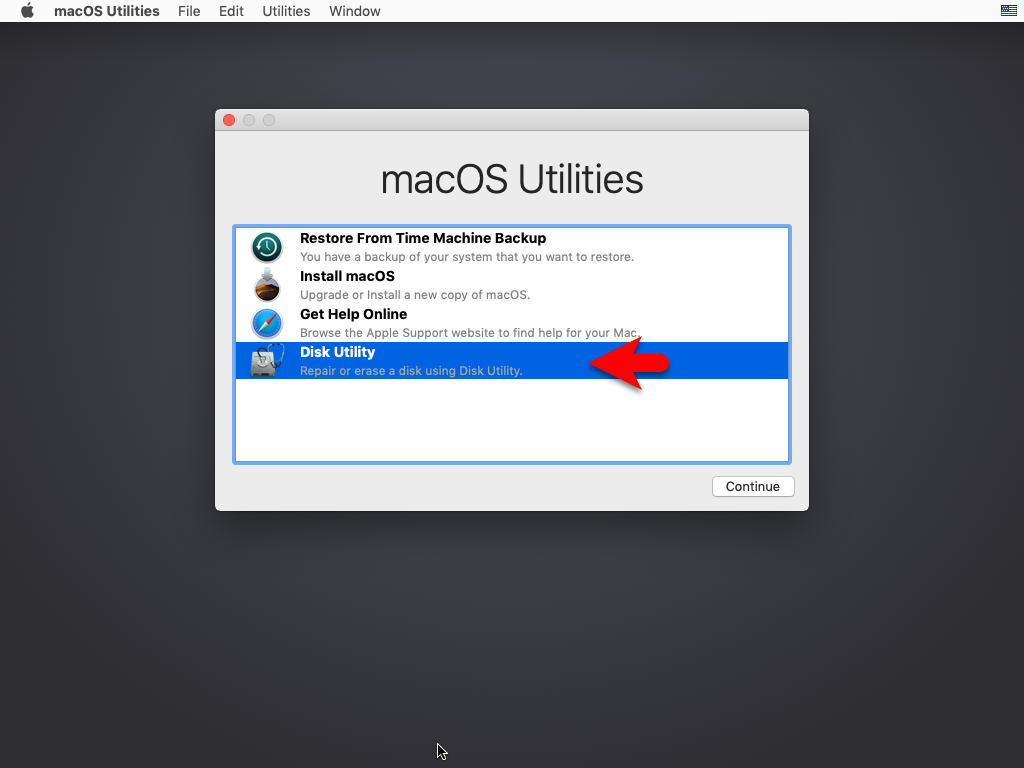
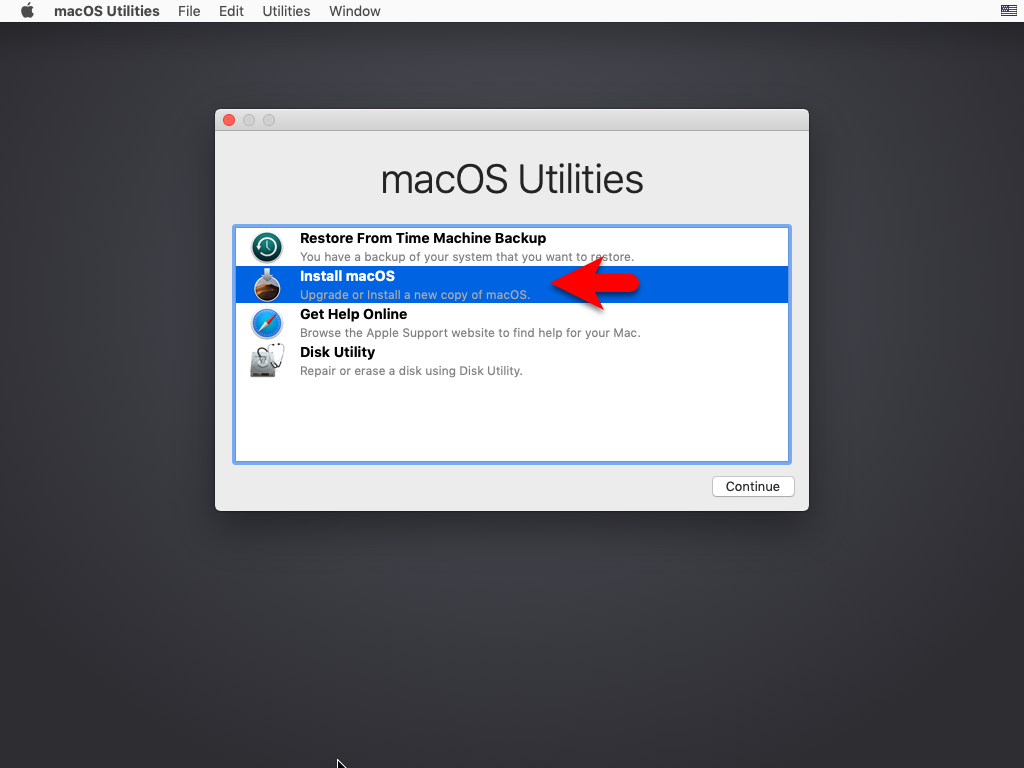
On the Utilities window select the disk utility, and click continue.
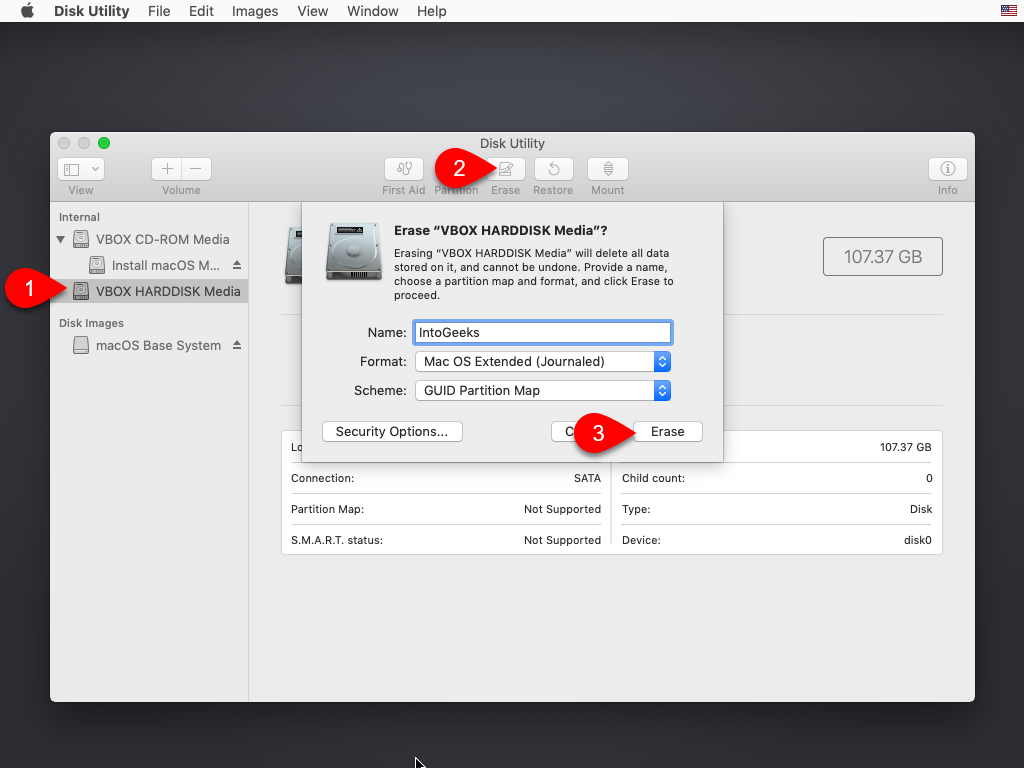
When the Disk Utility opens from the left-handed window side select the VBOX HARDDISK MEDIA, then click on erase. And format the disk for macOS Mojave according to the below down parameters.
- Name: Optional
- Format: Mac OS X Extended Journaled
- Scheme: GUID Partition Map
When the disk is erased click on the done option.
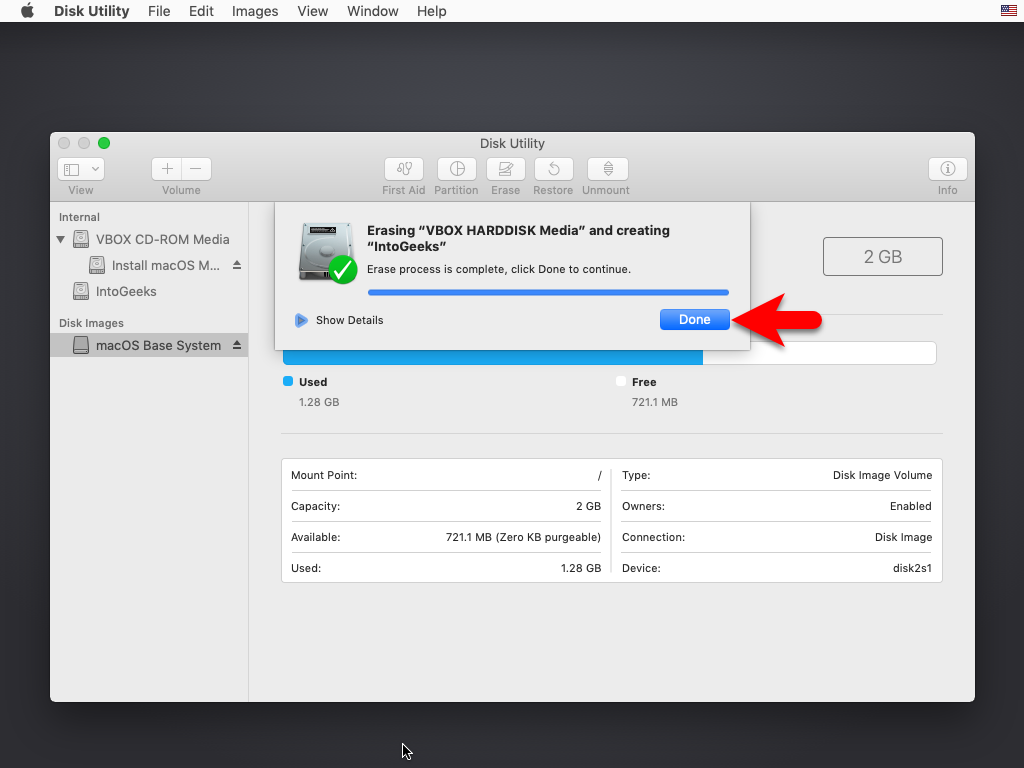
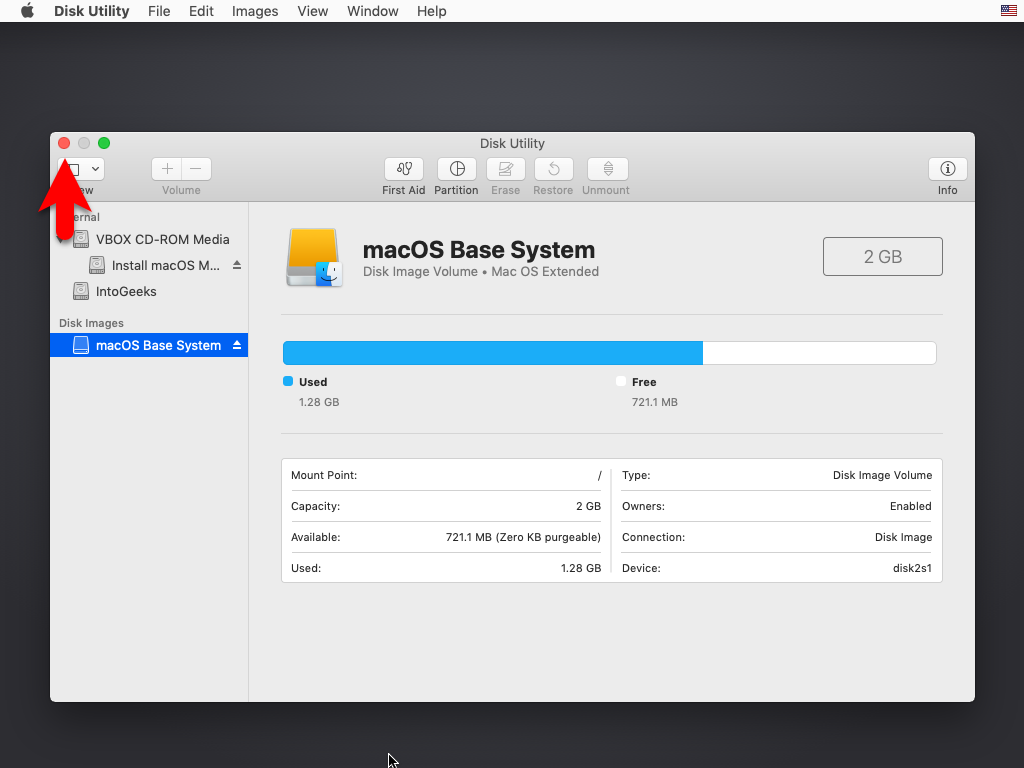
Now close the disk utility.
Again here install macOS and click continue.
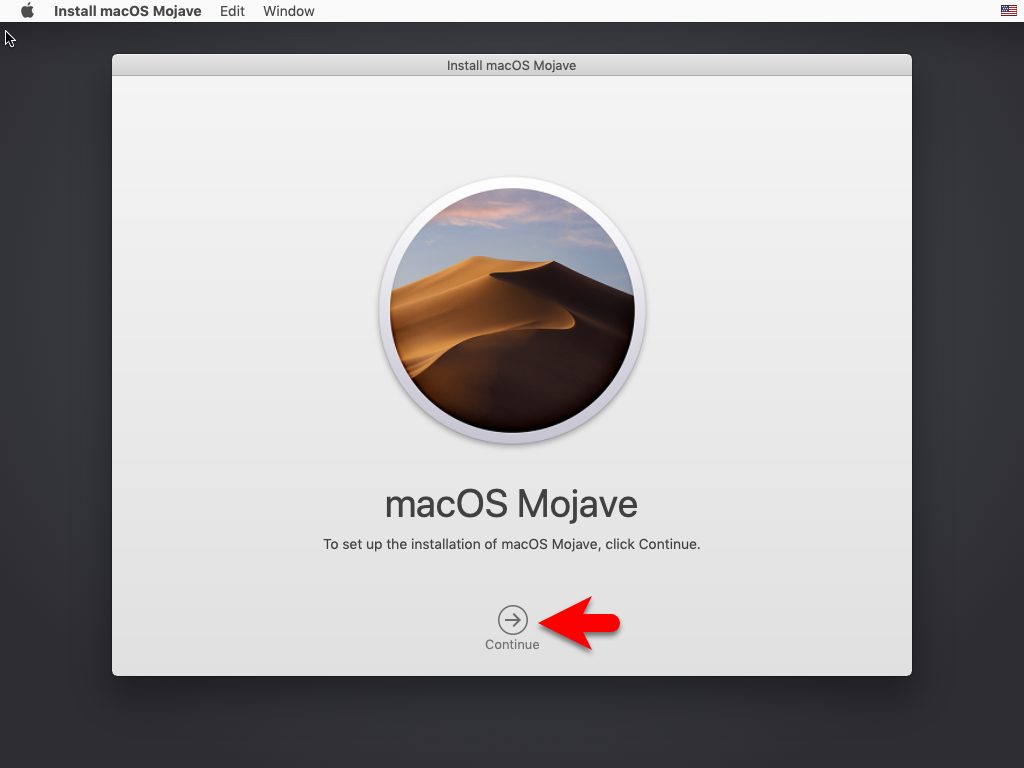
To set up the installation of macOS Mojave click continue.
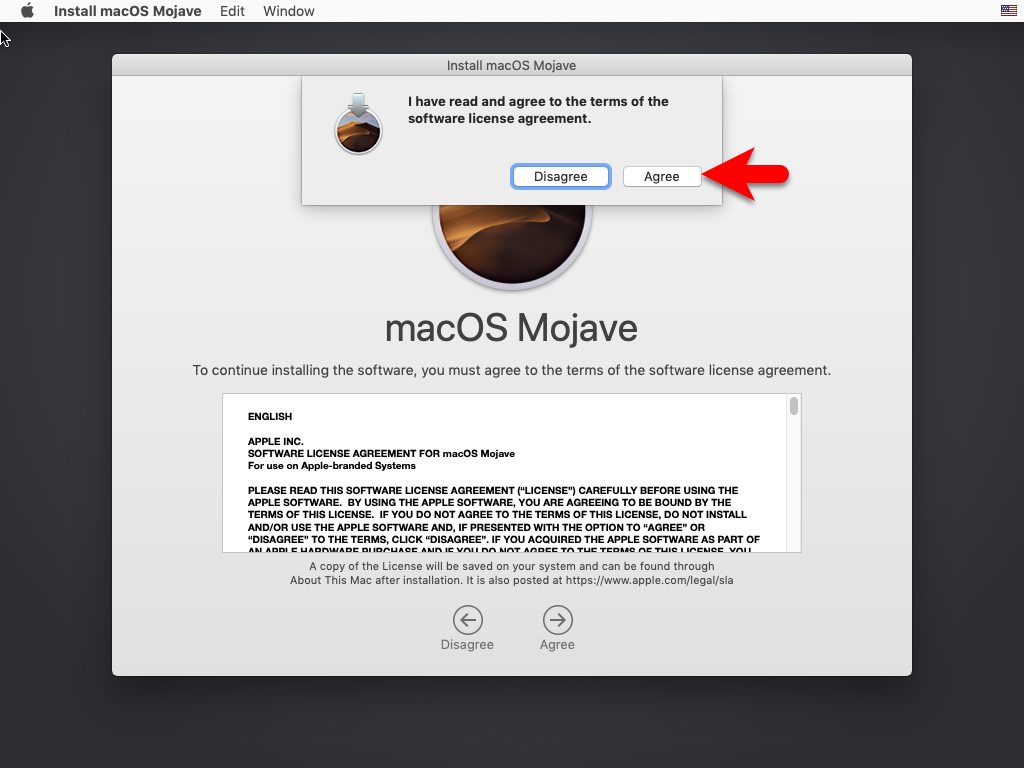
Agree with the terms and conditions of macOS Mojave.
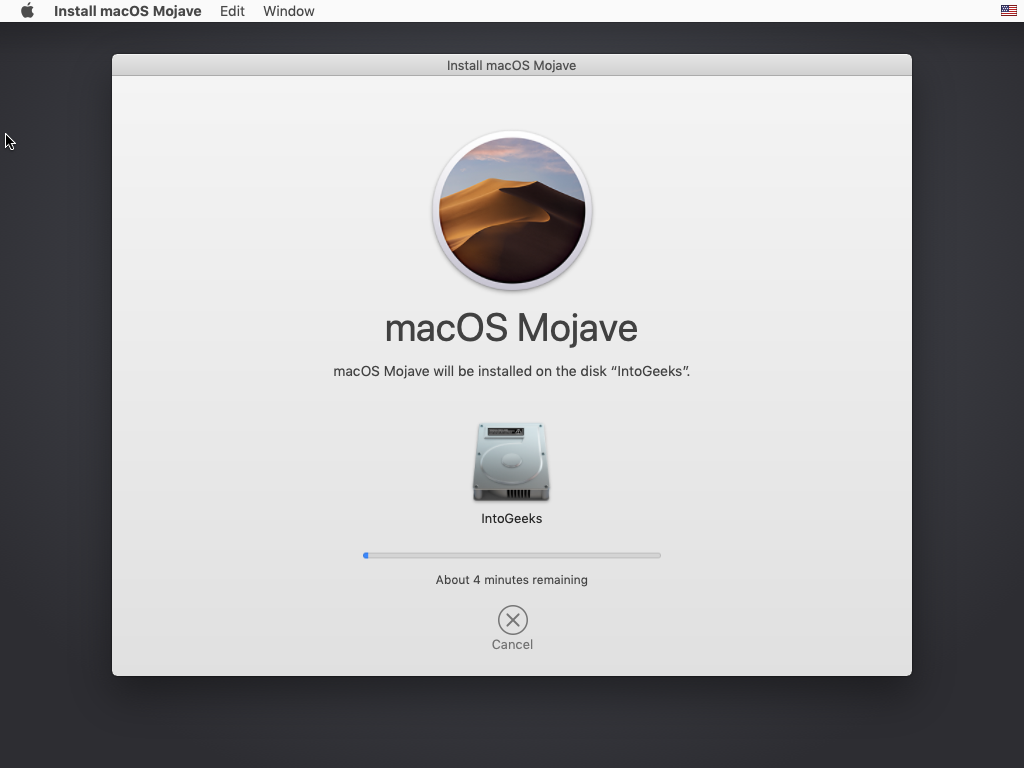
Select the disk then click on Install to start installing macOS Mojave.

Now it will start installing macOS Mojave on VirtualBox on Windows PC.
Complete the Basic Settings of macOS Mojave
When the installation of macOS Mojave is successfully completed on VirtualBox on Windows PC. Therefore, you need to complete some basic settings.
- On the first welcome window select your country and click continue.
- Select your keyboard and click continue.
- On the data & privacy simply click continue.
- Select the option Don’t transfer any information right now and click continue.
- Click on Set up later, on the Apple ID window.
- Agree with the terms and conditions of macOS Mojave.
- Create your computer account by entering your full name, account name, and password, confirm your password then click continue.
- On the express setup window simply click continue.
- Select your mode for macOS Mojave and click continue.
- Wait until it should set up your Mac for the first use.
- And finally, macOS Mojave is successfully installed on VirtualBox on Windows PC.


Conclusion
When the macOS Mojave is successfully installed on VirtualBox on Windows PC. And the next thing just remained to enter the full-screen mode of macOS Mojave on VirtualBox on Windows PC. You can make the full-screen of macOS Mojave on VirtualBox by applying a few commands.


3 Comments