macOS Catalina is the sixteenth major release of Apple Inc’s desktop operating system for Macintosh computers. It’s the successor major release of macOS Mojave and it was announced at WWDC 2019 on June 3rd, 2019, and its public version was released on October 7, 2019. Catalina is the first version of the macOS operating system that supports only 64-Bit applications and the first to include an Activation lock. And it’s the final Apple operating system that has a significant number of 10. And its successor macOS Big Sur, that released on November 12, 2020. On the 3rd of June 2019 on the other side of macOS Catalina Apple announced the latest version of WatchOS, tvOS, iPadOS, and Mac Pro 2019.
Always Apple is taking the operating system name from mountains or famous places. Also, this time Apple selected the name for macOS Catalina from Santa Catalina Island. This is one of the biggest Islands located in Southern California.
Also, macOS Catalina is compatible with the following MacBook Machines.
- iMac (Late 2012 or later)
- iMac Pro
- MacBook (Early 2015 or later)
- MacBook Air (Mid 2012 or later)
- MacBook Pro (Mid 2012 or later)
- Mac Mini (Late 2012 or later)
- Mac Pro (Late 2013 or later)
There are other guides for macOS operating systems on VirtualBox & VMware on Windows PC.
Related: How to Install macOS Catalina Final on VirtualBox on Windows PC
- How to Install macOS Big Sur Final on VMware on Windows PC?
- How to Install macOS Ventura 13 on VMware on Windows PC?
- How to Install macOS Ventura 13 on VirtualBox on Windows PC?
- How to Install macOS Monterey Final on VirtualBox on Windows PC?
- How to Install macOS Monterey Final on VMware on Windows PC?
- How to Install macOS Big Sur Final on VirtualBox on Windows PC?
There are some major release features of macOS Catalina
- Catalyst is the latest development inside macOS Catalina that allows the developer to write apps that can run on iOS, macOS, and iPadOS.
- Systems Extensions, the three important extensions added to macOS Catalina. They are the following extensions Network extensions, Endpoint Security extensions, and driver extensions.
- DriverKit, GateKeeper, and Mac App installer packages are designed with a developer ID to run in macOS Catalina.
- Activation Lock, dedicated system volume, the system runs on its own read-only volume.
- Voice Control, Sidecar, and Sidecar allow the users to run the iPad, iOS, and display on Mac wireless.
- And there are lots of other features to macOS Catalina, and now the current version of macOS Catalina is 10.15.7.
Through this article, you will learn step-by-step how to install macOS Catalina Final on VMware on Windows PC. So, since macOS Catalina is in the beta version you can test it on virtual machines. The method is pretty straightforward, and you can install the different operating systems on virtual machines on macOS, Windows, and Linux. Whenever it comes to virtual machine technology there are few virtualization tools. Like VirtualBox, VMware Workstation/VMware Player, VMware Fusion, and Hyper-V. When you are a Windows user then VirtualBox and VMware is the best option to test the macOS operating systems.
You can install macOS, Linux, Windows, Android OS, and other operating systems on VirtualBox & VMware on Windows PC. So, if you want to install the Windows operating system on macOS, then you have to use the VirtualBox & VMware Fusion, or Parallels desktop on your Mac machine.
How to Install macOS Catalina Final on VMware on Windows PC?
To get started on how to install macOS Catalina on VMware on Windows PC. Firstly you have to download the VMware Workstation latest version, and second thing is you need to download the macOS Catalina ISO image file or VMDK file. All the links are available below down. Simply download the files and continue with its installation on VMware on Windows PC.
When you have downloaded the VMware Workstation, continue its installation with a few clicks, and make ready to create a new virtual machine for macOS Catalina on Windows PC.
Create a New Virtual Machine for macOS Catalina
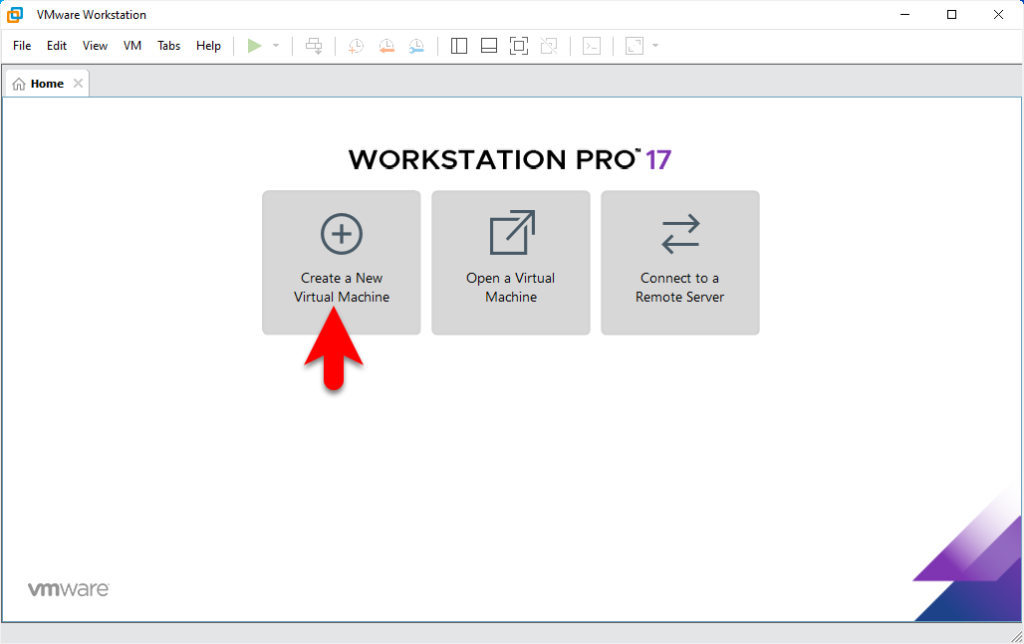
To create a new virtual machine for macOS Catlina, open up the VMware Workstation or player. When VMware opened on the main window click on Create a new virtual Machine.
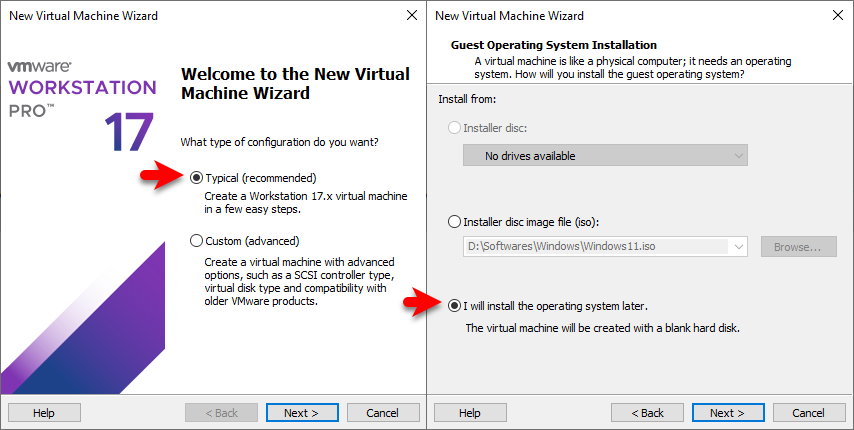
When the next window opened select the typically recommended option then click next. On the next window select the option I will install the operating system later and click next.
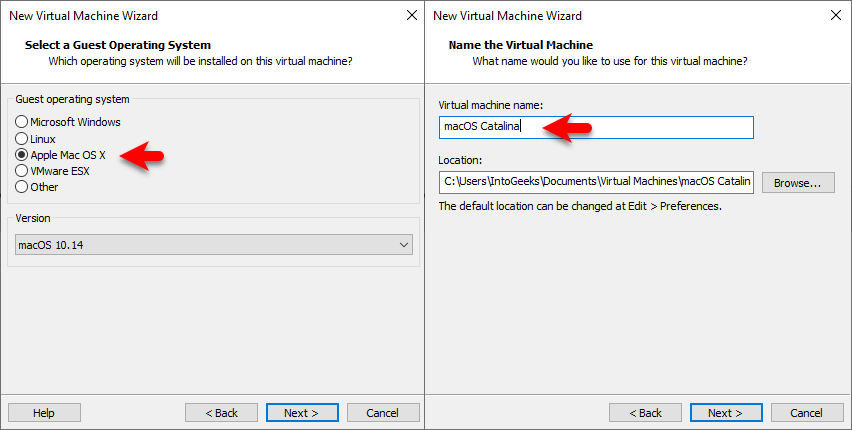
Select the Guest operating system, Apple Mac OS X, then select the version macOS 10.14 or 10.15 then click next. On the next window type the name of the Virtual machine and click next.
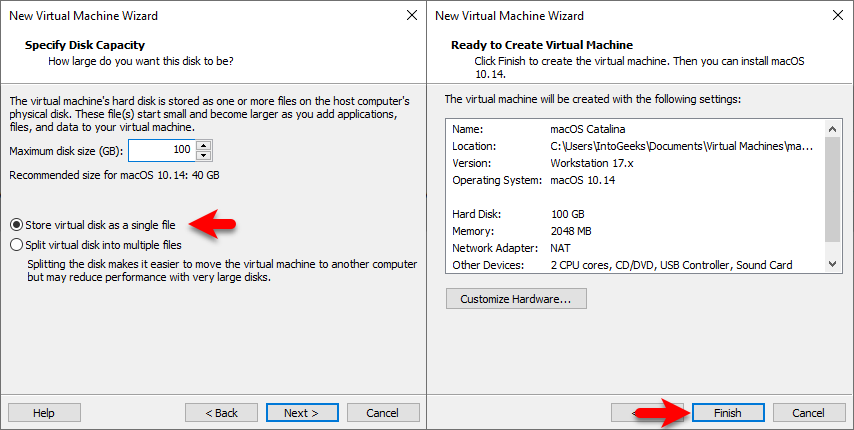
Select the option, store the virtual machine disk as a single file, then select the maximum disk size then click next. Now click on Finish the option to create the virtual machine for macOS Catalina.
Edit Virtual Machine Settings of macOS Catalina for Better Performance
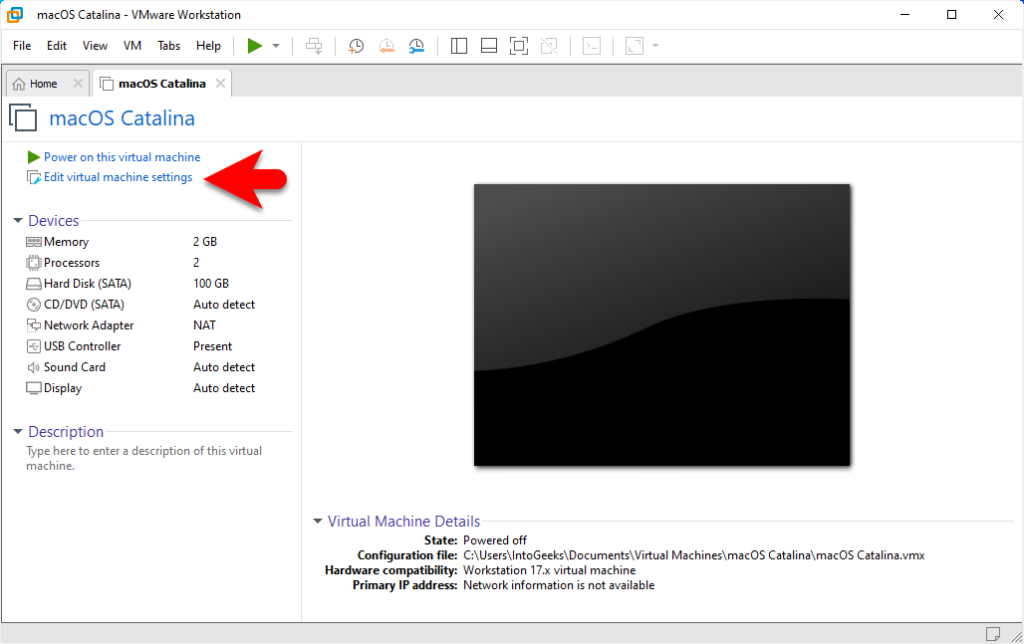
To run macOS Catalina more smoothly on VMware on Windows PC, then you have to edit some settings of it. After the virtual machine is successfully created simply click on Edit virtual machine settings.
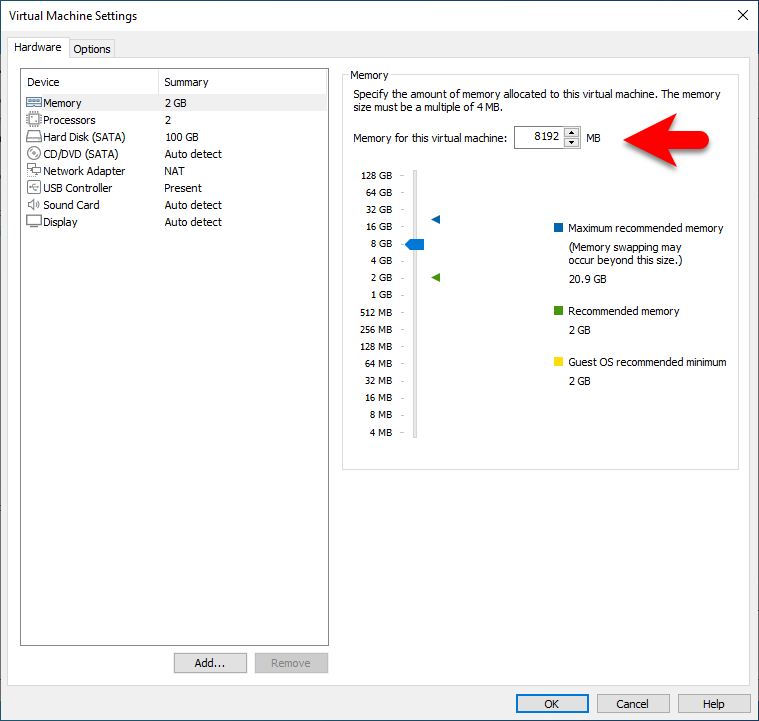
When the settings window opened on the left-handed window side select the Hardware tab>Memory and increase the size of the memory.
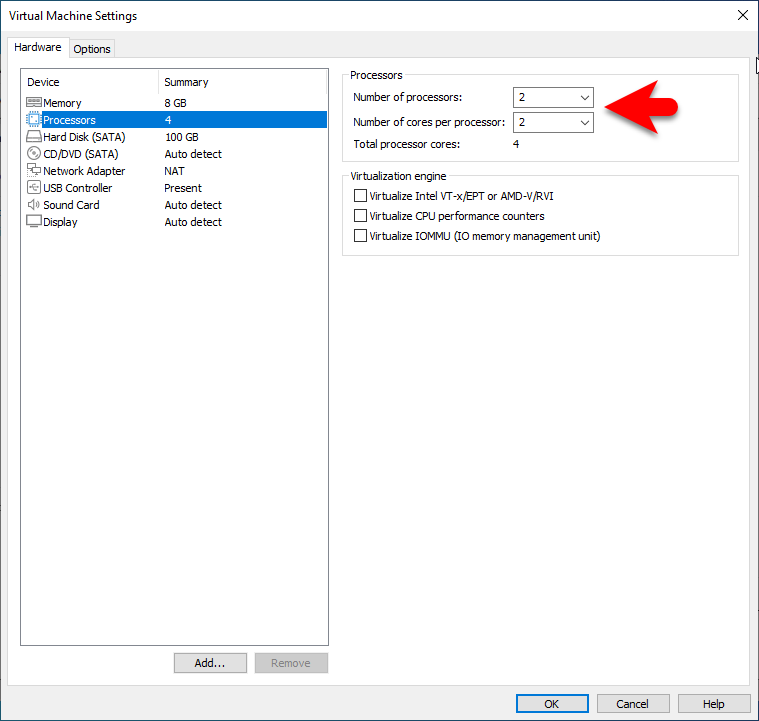
Select the processor tab, and increase the number of processors.
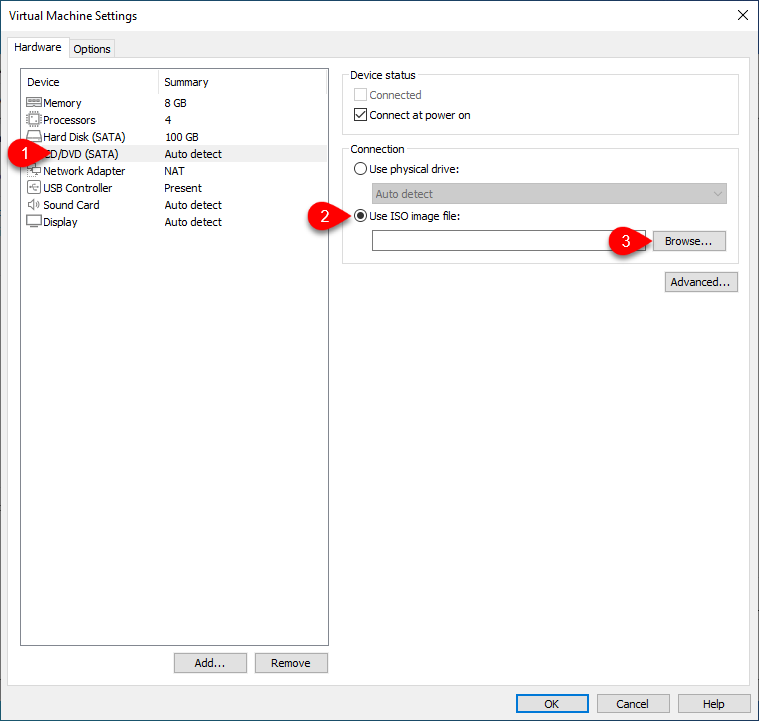
Select the CD/DVD (SATA) option, click on Use ISO image file, then click on Browse to insert the macOS Catalina ISO image file.
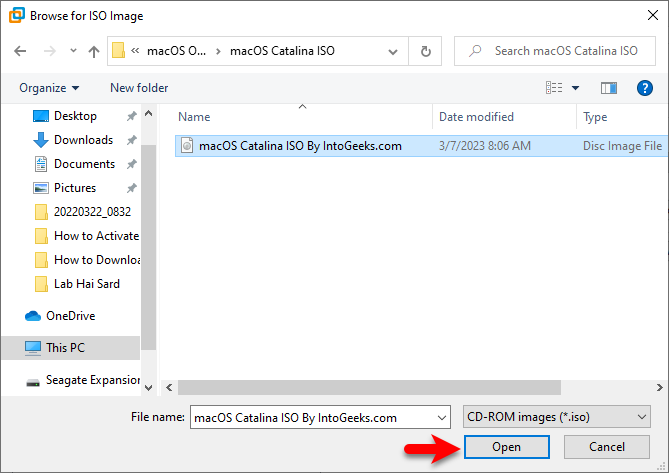
Select the macOS Catalina ISO Image file and click open.
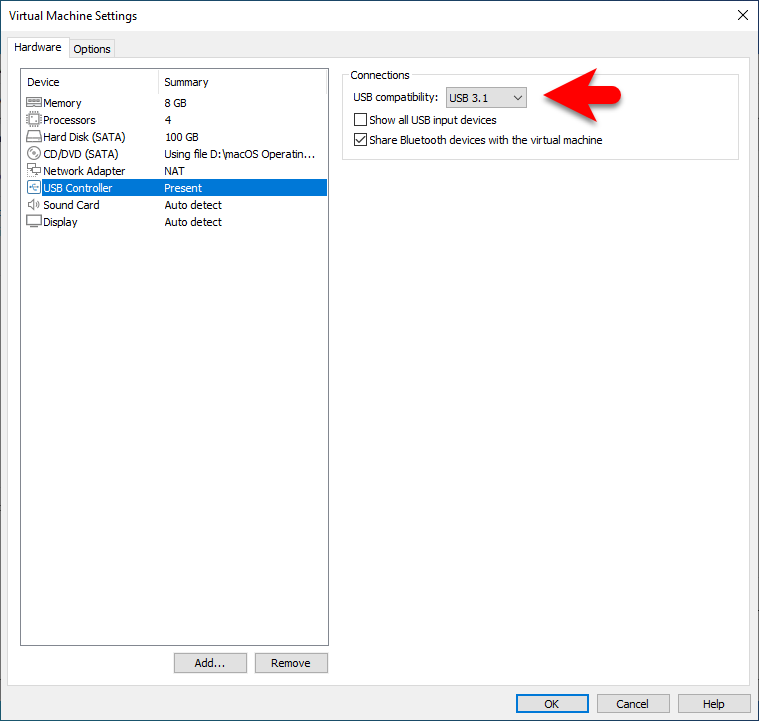
Select the USB controller tab, then select USB 3.1. Once the changes are made click on OK to save the changes.
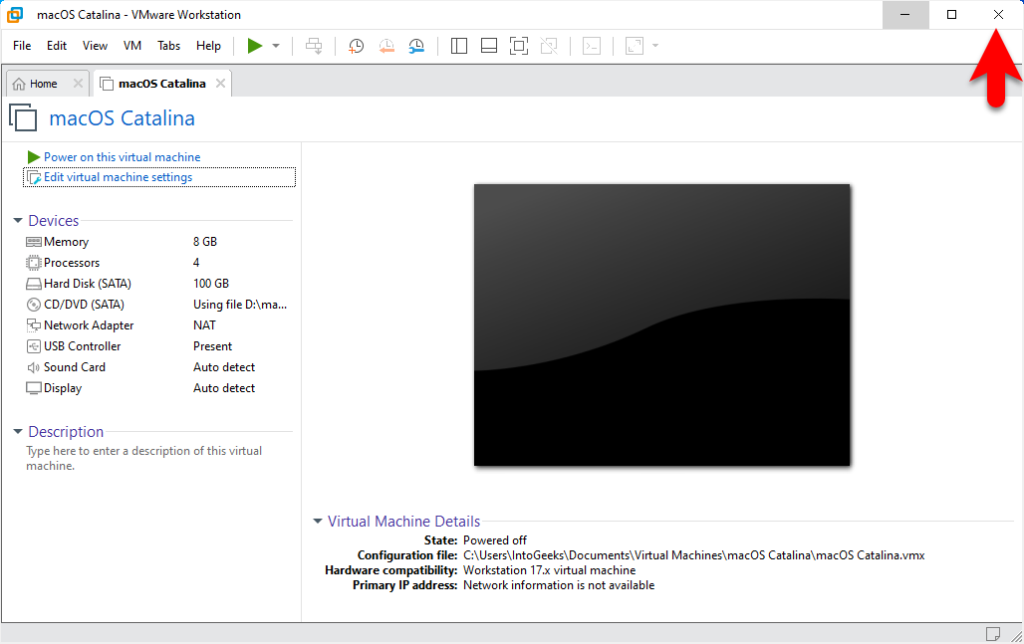
Edit the VMX file of macOS Catalina
What is the VMX file? VMX file is a piece of small commands that allow you to configure the macOS Operating system on VMware on a Windows PC. So, if you don’t edit the vmx file you won’t be able to install the macOS on VMware on Windows PC. So, to edit the vmx file simply completely close the VMware Workstation from the background.
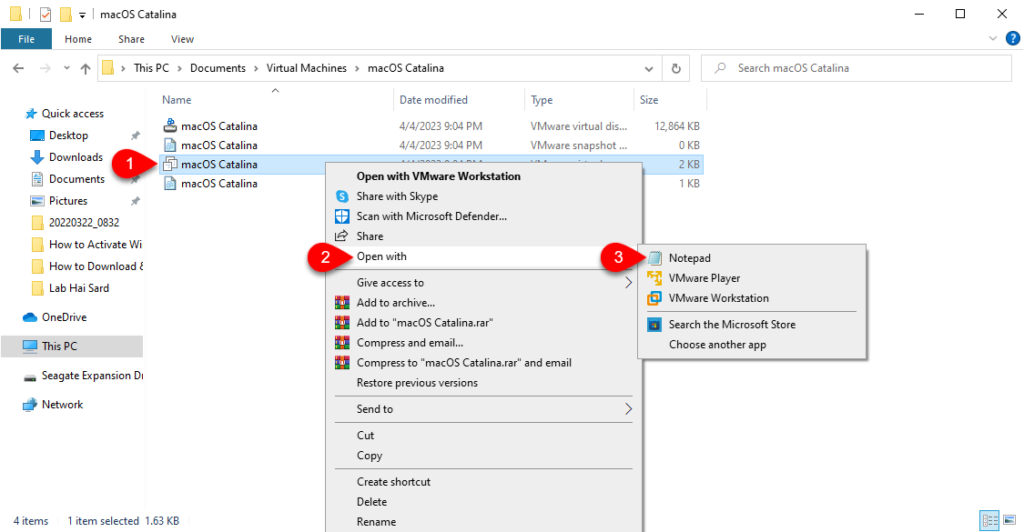
When the VMware is closed navigate to Documents>Virtual Machines folder>right-click on VMX file>Open With>Notepad.
Now scroll down and at the end type the below commands, and save the file.
Smc.version = "0"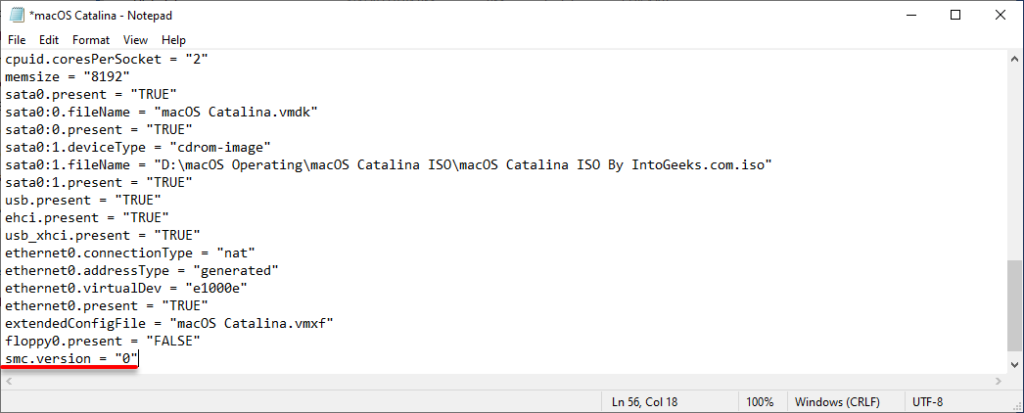
Perform A Clean Installation of macOS Catalina on VMware on Windows PC
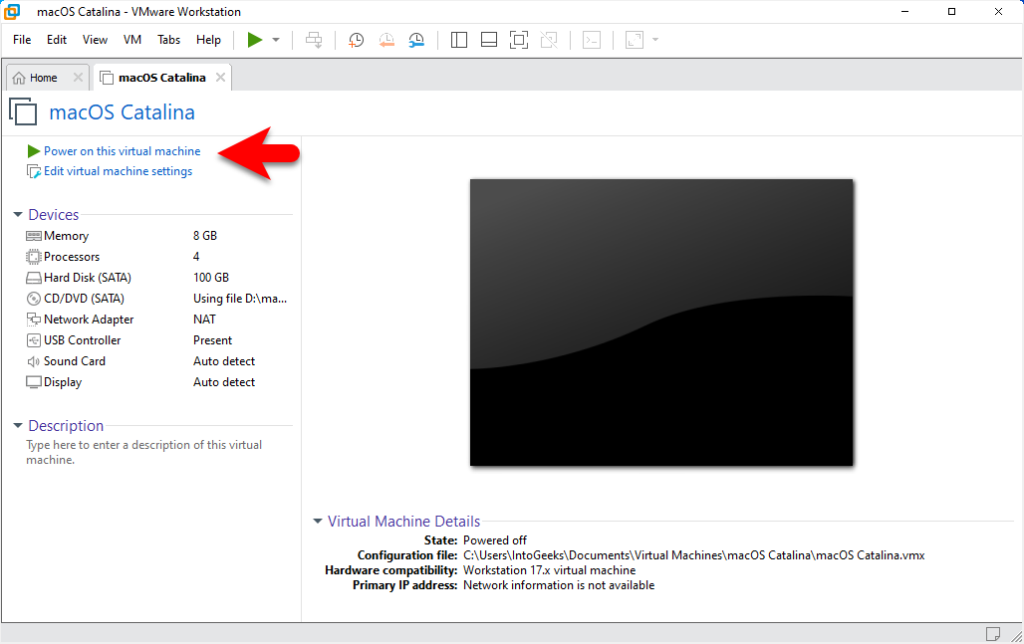
When the virtual machine and vmx file are done, now it’s time to install macOS Catalina. Again head over to the VMware Workstation and open it. Once the VMware opened click on “Power on this virtual machine” to start the installation.
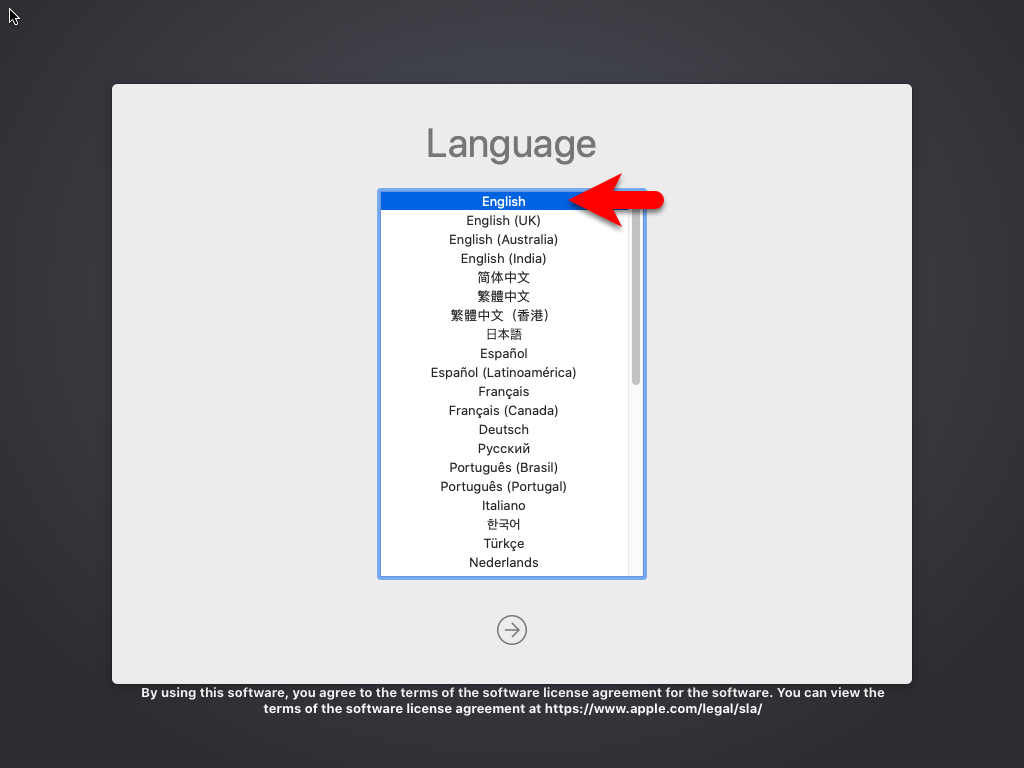
When the installation launches on the first welcome window select your language and click continue.
On the macOS Utility window, select the Disk Utility window and click continue.
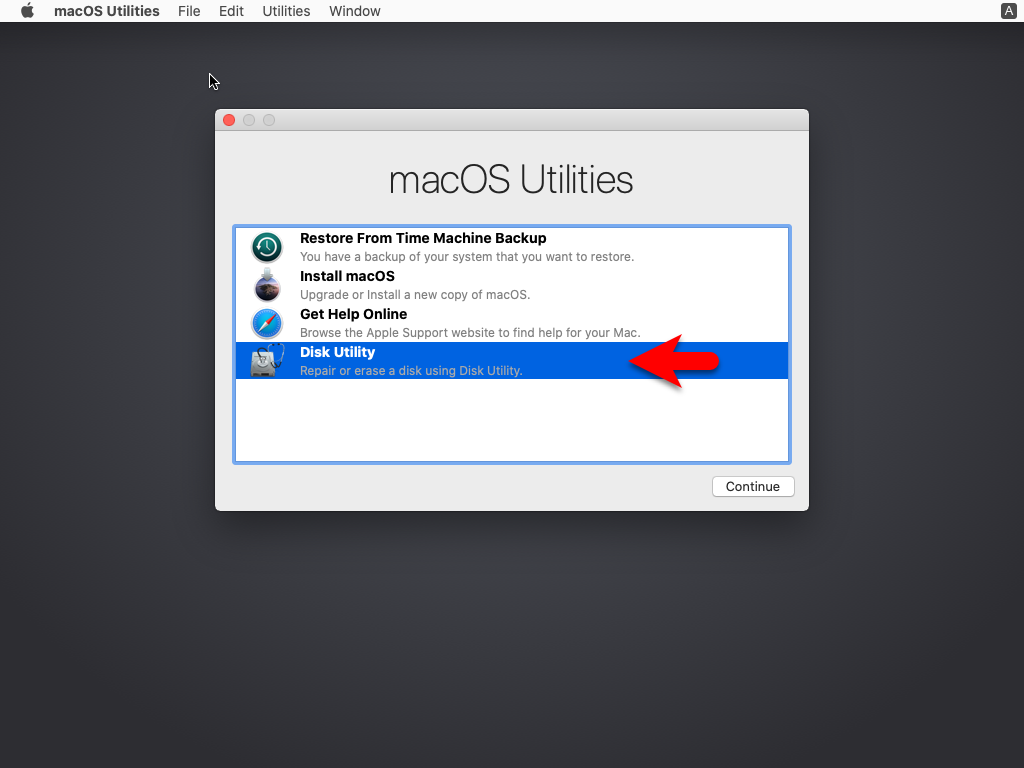
When the disk utility window opened, from the left-handed window side select the (VMware Virtual SATA Disk), then click on Erase option, and format the disk with the following parameters.
- Name: Optional
- Format: Mac OS X Extended Journaled
- Scheme: GUID Partition Map
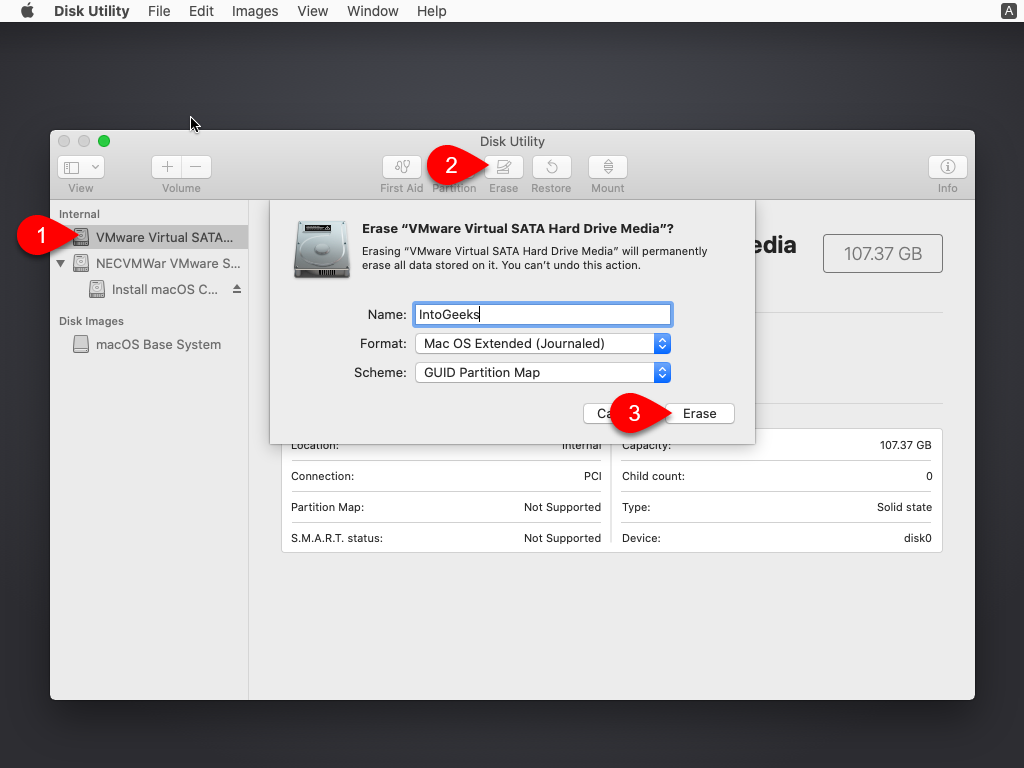
When the disk is erased click on the done option.
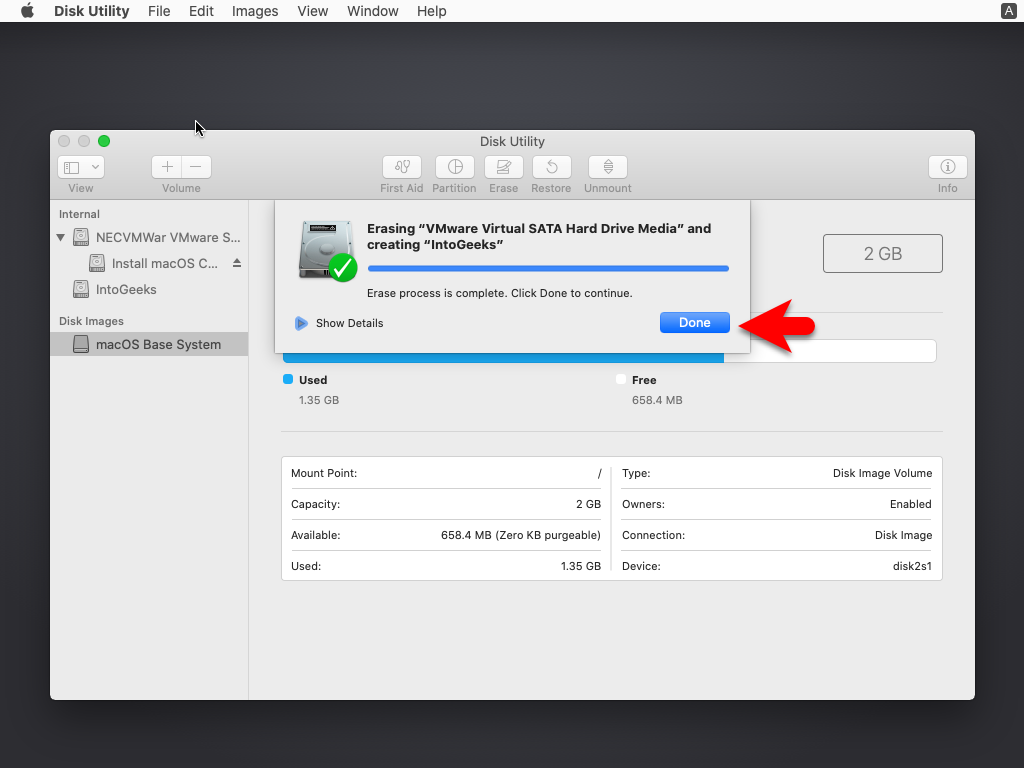
Now close the disk utility window.
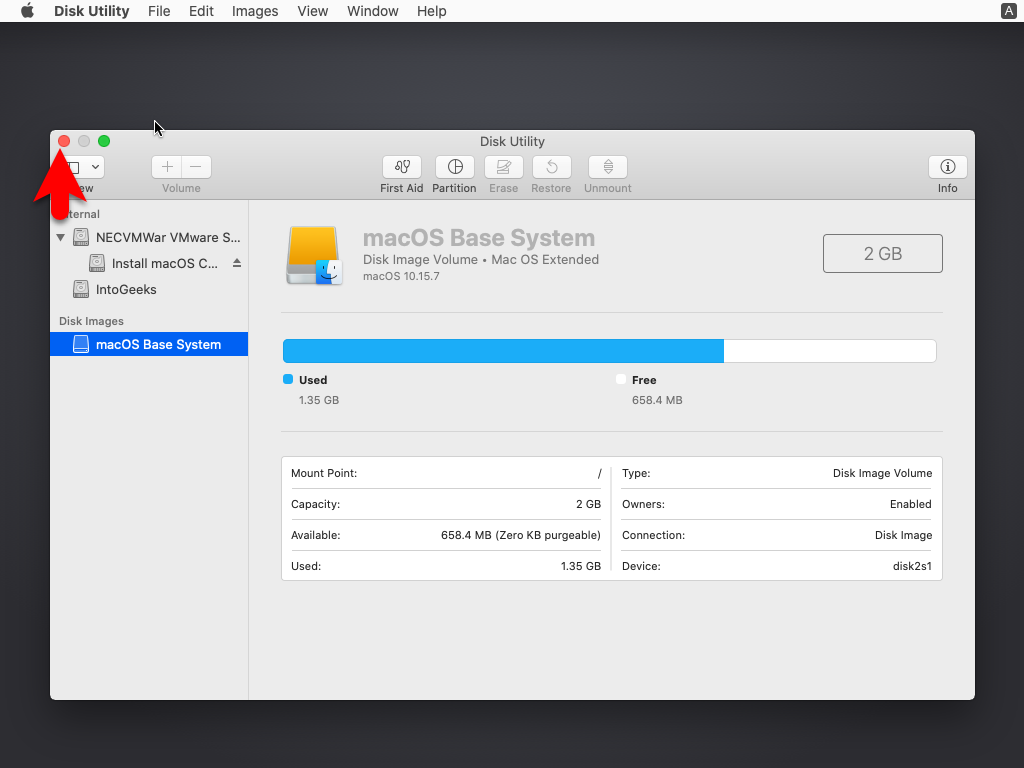
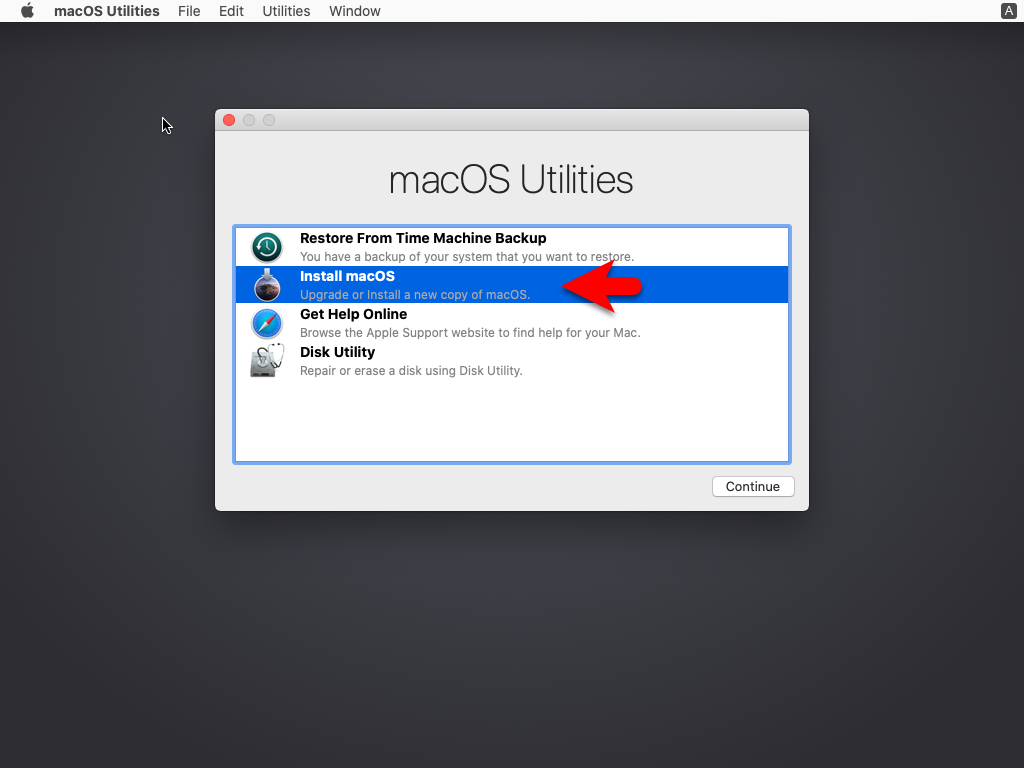
Now select “Install macOS” and click continue to proceed to macOS Catalina installation.
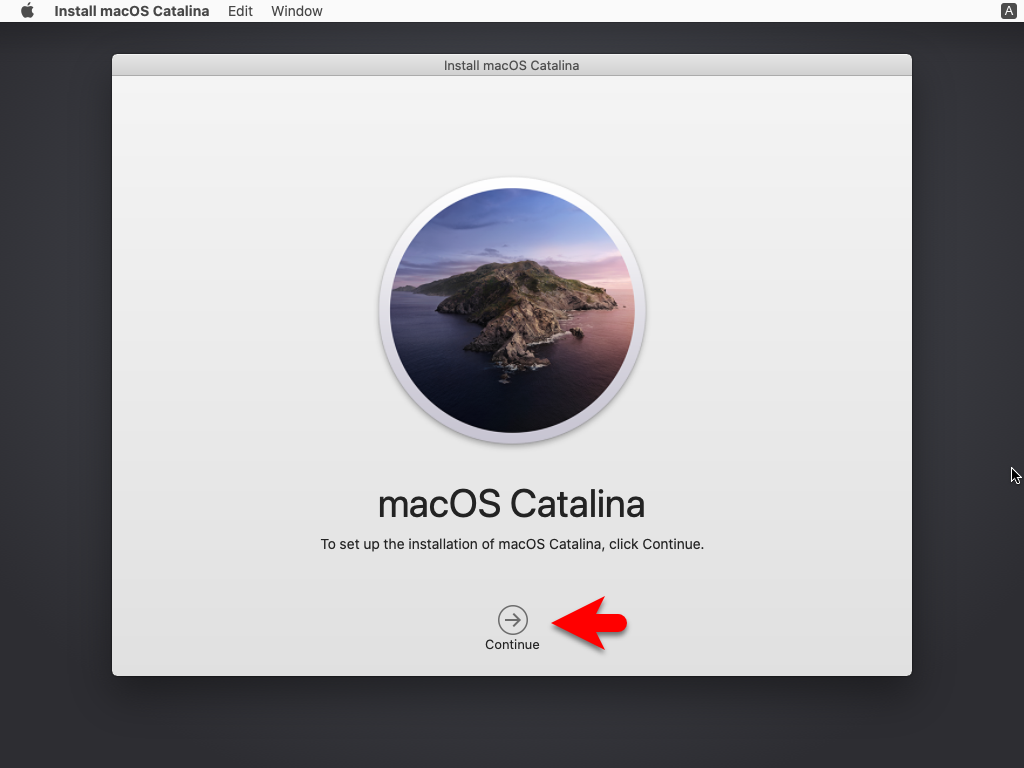
To set up the installation of macOS Catalina click continue.
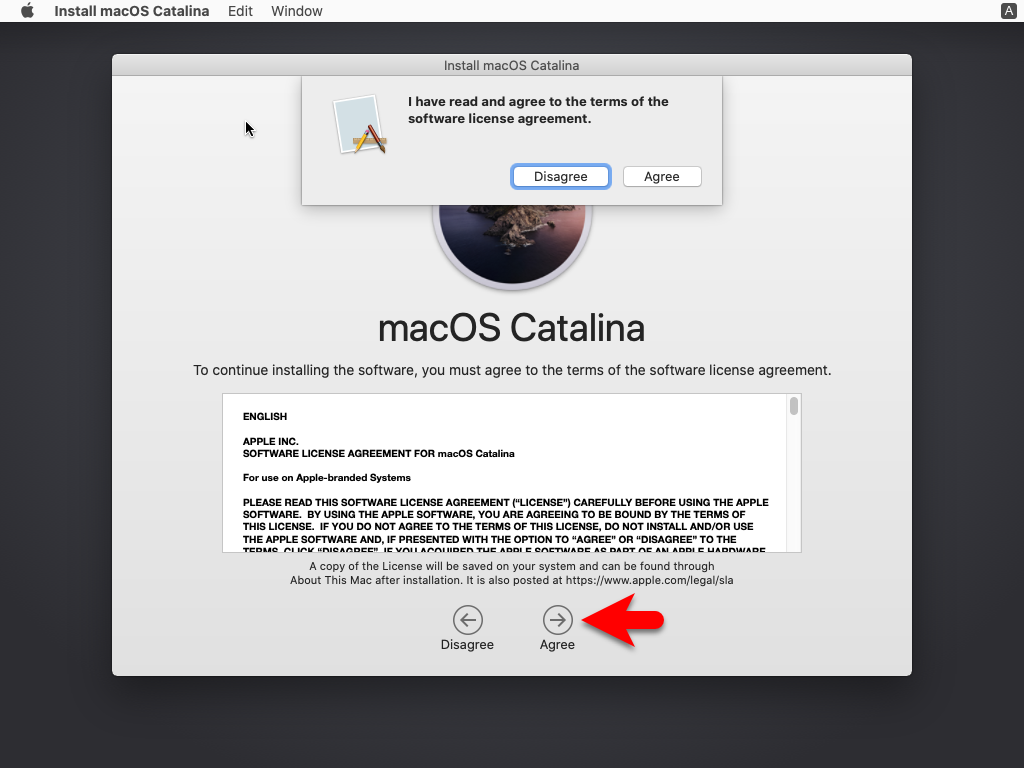
Agree with the terms and conditions of macOS Catalina.
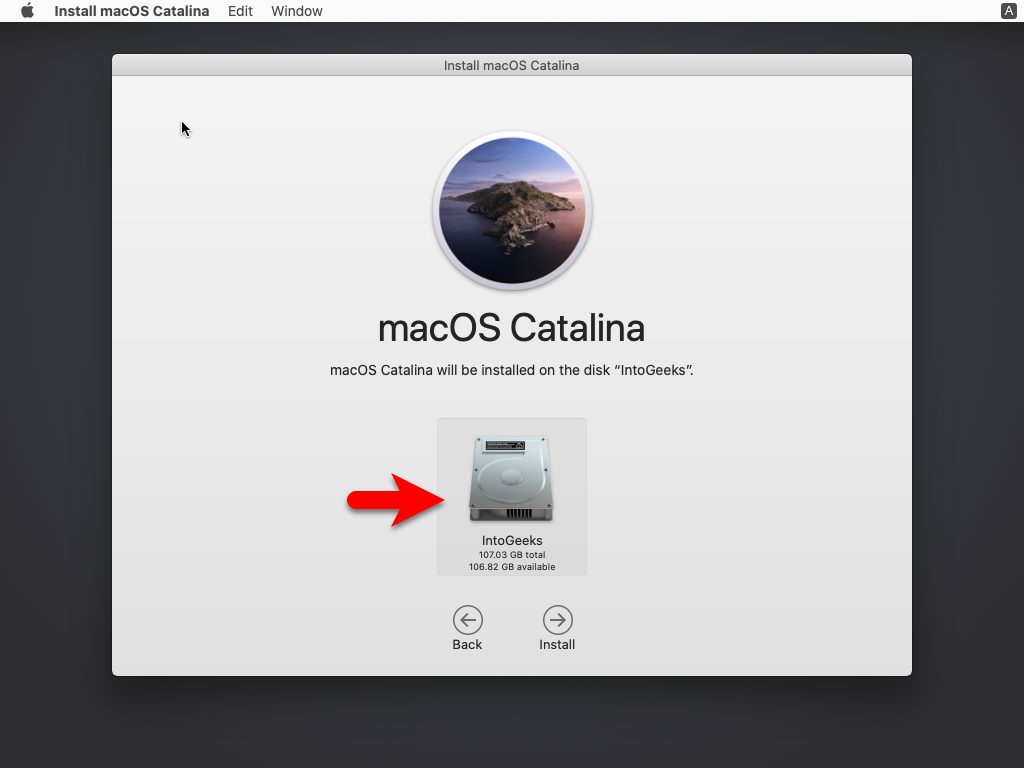
Select the disk to install macOS Catalina, this disk is formatted in the Disk Utility window.
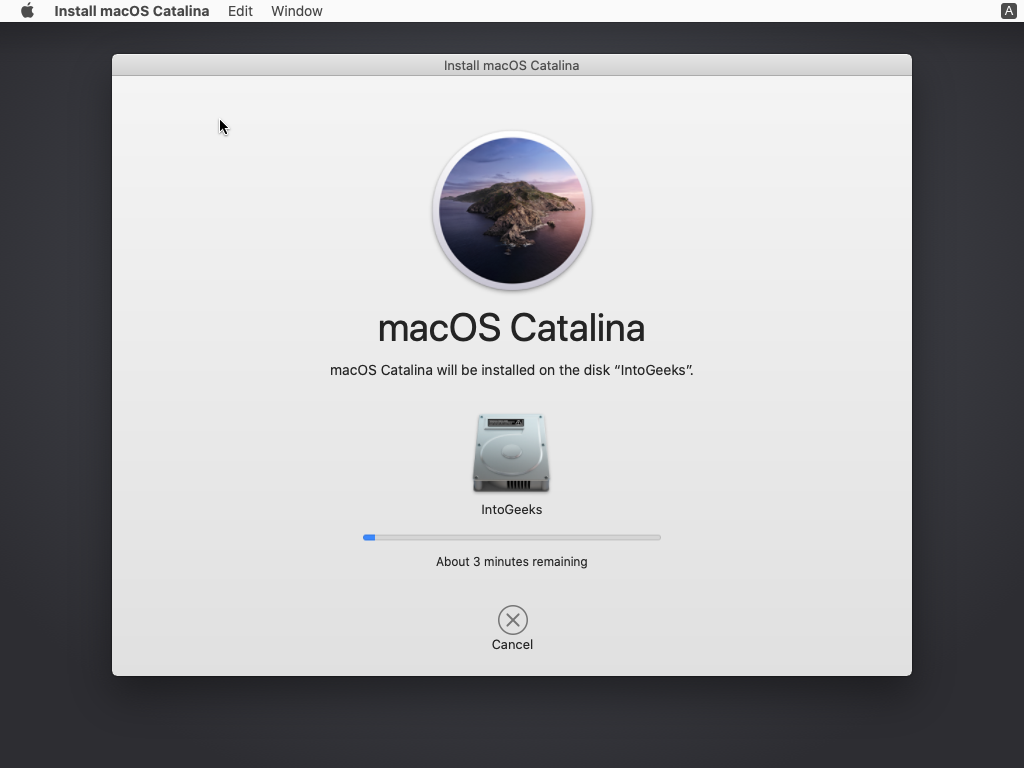
Now it starts installing macOS Catalina on VMware on Windows PC. So, the installation process may take lots of time, and during the installation, the virtual machine will restart several times. Don’t do anything until the installation should complete.
Complete the Basic Settings of macOS Catalina
When the installation of macOS Catalina is successfully completed on VMware on Windows PC. So, for the first use, you need to complete the basic settings.
- Once the installation is completed on the first window select your country and click continue.
- Select your written and spoken languages and click continue.
- On the data & privacy window click continue.
- Choose the option “Don’t transfer any information now” and click continue.
- Now you can enter your Apple ID, if you don’t want to add your Apple ID simply click on sign up later.
- Agree with the terms and conditions of macOS Catalina.
- Create your computer account, by entering your full name, account name, and password.
- On the express setup window simply click continue.
- Again on the analytics window click continue.
- Click on Set up later on the screen time window.
- Uncheck the box Siri and click continue.
- Choose your look for macOS Catalina and click continue.
- And finally, macOS Catalina is successfully installed on VMware on Windows PC.


Related:
- How to Install macOS Mojave Final on VMware on Windows PC?
- How to Install VMware Tools on macOS Catalina?
When the macOS Catalina is successfully installed on VMware on Windows PC. You will notice the small screen size of it, so there is a solution to fix its small screen on VMware on Windows PC. To use the full-screen mode of macOS Catalina on VMware on Windows PC. You need to install the VMare Tools on it, you can check the above link on how to install the VMware Tools on macOS Catalina on Windows PC.


6 Comments