
Why not test the latest version of the macOS operating system on our Windows PC, so through this guide I will show you how to install macOS Ventura on VirtualBox on Windows PC. macOS Ventura is the nineteenth major release of Apple.inc The macOS Ventura version 13 is the desktop and Mac operating system. Also, macOS Ventura is a major success release of Apple after macOS Monterey. It was announced at the WWDC Worldwide developer conference in 2022 on June, 6. And the public version of macOS Ventura was launched on 24, October 2022. The name Ventura has been taken from the city of Ventura, and it’s the tenth release of Apple that its name has been taken from the city located in California.
Inside macOS Ventura, you will see lots of changes and new features that make macOS Ventura more interesting and stunning. The new system features of macOS Ventura contain the Stage manager, which provides an alternative interface for multitasking. The new weather app in macOS Ventura also has the ability to show the weather forecast. While clicking on the Weather app directly the app will open it will not redirect you to the weather website. The clock will manage and displays the world time and alarms. Freeform is a whiteboard app that supports real-time collaboration.
Related:
- How to Install macOS Big Sur Final on VirtualBox on Windows PC?
- How to Install macOS Big Sur Final on VMware on Windows PC?
- How to Install macOS Monterey Final on VirtualBox on Windows PC?
- How to Install macOS Monterey Final on VMware on Windows PC?
- How to Install macOS Ventura 13 on VMware on Windows PC?
The other updates like Mail, Safari, Messages, Facetime, Continuity Camera, System References, Photos library, Game center, Font Book, Maps, Siri, Apple Music, new backgrounds and screensaver, Bugs fixes, Improved game controller support, Apple Virtualization support, iCloud security.
If you compare macOS Ventura with macOS Monterey or Big sure, then you will see lots of changes which was not available in other macOS versions. Also, the best features are the weather app and the clock app, which is super exciting for macOS Ventura users.
Install macOS Sonoma on VirtualBox & VMware
macOS Sonoma is the new Apple operating system that launched on June 5 2023 at the recent Apple event WWDC23 Worldwide Developer Conference. And right now it’s in beta mode, you can check the ways of installing it on VirtualBox and VMware.
- How to Install macOS Sonoma on VirtualBox on Windows PC?
- How to Install macOS Sonoma on VMware on Windows PC?
How to Install macOS Ventura 13 on VirtualBox on Windows PC?
To install macOS Ventura on VirtualBox on Windows PC. You need good hardware requirements which allow you to run the macOS Ventura more smoothly on VirtualBox on Windows PC. Why test macOS Ventura on VirtualBox on Windows? the reason is when you don’t have a MacBook or Mac computer, then you can test the macOS operating system inside VirtualBox on Windows PC. On the other side, whenever the macOS Beta version is released no one is testing it directly on their actual machine, that’s why Virtual Machines is the best source to install the macOS operating systems.
If you are using Windows 10 or Windows 11, you can easily install macOS Ventura on VirtaulBox on your Windows PC. On the other hand, to proceed with the installation you need to enable the Virtualization Technology option on your computer BIOS window.
Also, the macOS Ventura is compatible with the following computers. The list below MacBooks is the latest model of Mac computers that have the highest graphic and hardware components. On the other side, the macOS Ventura is compatible with Mac M1, and Mac M2 chips.
- iMac (2017 and later)
- iMac Pro (2017)
- Mac Pro (2019 and later)
- Mac Mini (2018 and later)
- Mac Studio (2022)
- MacBook Pro (2017 and later)
- MacBook Air (2018 and later)
- MacBook (2017 and later)
What is VirtualBox? VirtualBox is an open-source virtualization software that allows you to install multiple operating systems at the same time on one physical machine. Like you can test macOS, Linux, Ubuntu, Windows, and Android operating systems on VirtualBox by creating a virtual machine.
So, for installing macOS Ventura 13 on VirtualBox firstly you have to install the VirtualBox on your Windows PC. When the installation is completed, install its extension pack by clicking on the preferences tab> and on the extension option. If you don’t install the extension pack on VirtualBox then you might face the keyboard and mouse stuck error during the installation. So, the below down guide will show you how to install the VirtualBox+Extension Pack on Windows PC.
Requirements for installing macOS Ventura 13 on VirtualBox on Windows PC
- Virtualization Technology should be enabled on the BIOS
- macOS Ventura ISO Image file + VMDK file
- VirtualBox + its extension Pack
- 4GB of Ram (8GB is recommended)
- 40GB of Disk Space (80GB is Recommended) for later updates
- Edit the Virtual machine settings for better installation performance
Here is the guide on how to convert a macOS ISO image file to a vmdk file on Windows PC.
Steps to Create a Brand Virtual Machine for macOS Ventura 13 on VirtualBox on Windows PC
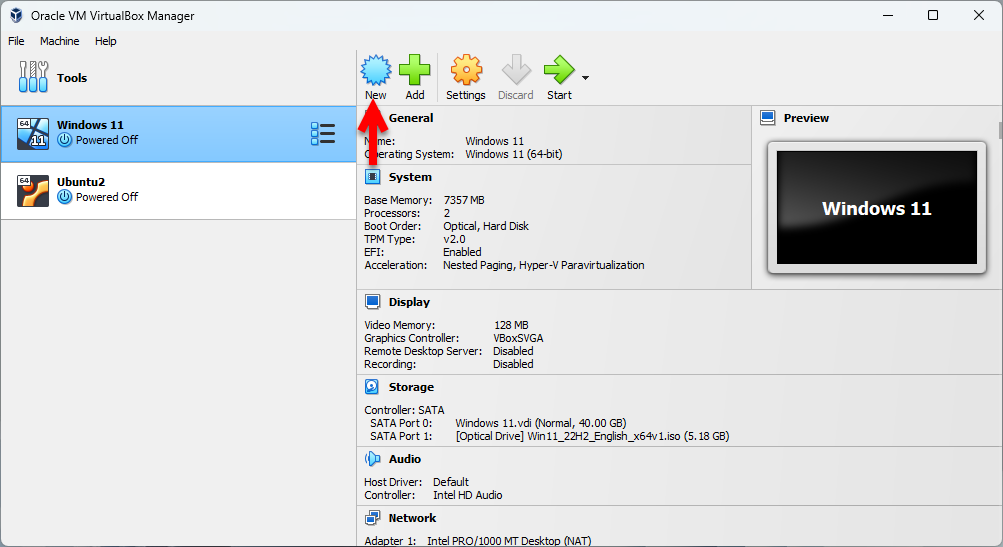
After you have successfully installed the VirtualBox on your Windows PC with its extension pack. So, now it’s time to create a brand new virtual machine for macOS Ventura 13 on VirtualBox on Windows PC. Simply open up the VirtualBox, and on the first window click on the “New” option.
When the next window opened, simply click on expert mode.

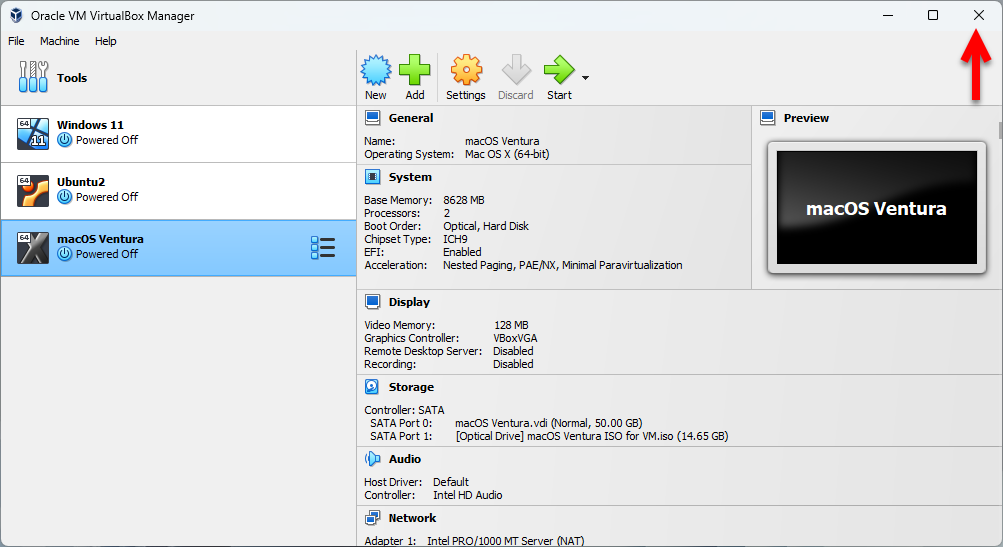
Now click on the “name and operating system” option, type the virtual machine name, macOS Ventura, select the type Mac OS X, and select the version Mac OS X (64-Bit).

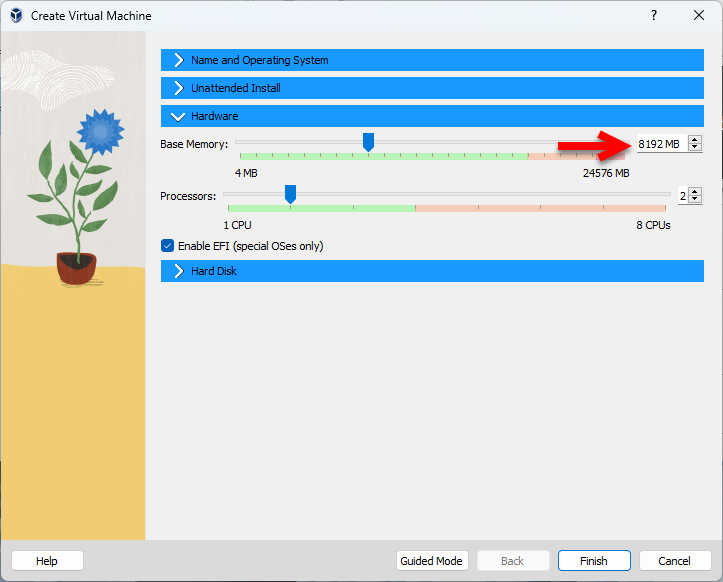
Now go to the hardware tab, increase the base memory, and increase the processor.
Now go to the hard disk tab, specify the hard disk location, and increase the size of the hard disk for macOS Ventura installation. Select the hard disk type (VMDK (Virtual Machine Disk). Finally, click on the Finish option to create the virtual machine.

Edit macOS Ventura 13 Virtual Machine Settings on VirtualBox
After you have successfully created the virtual machine for macOS Ventura 13 on VirtualBox on Windows PC. So, there are some other settings like adding the macOS Ventura ISO image file. And the other settings like disabling the floppy disk, or other necessary settings to perform, while installing macOS Ventura the virtual machine should not have any kind of lagging.
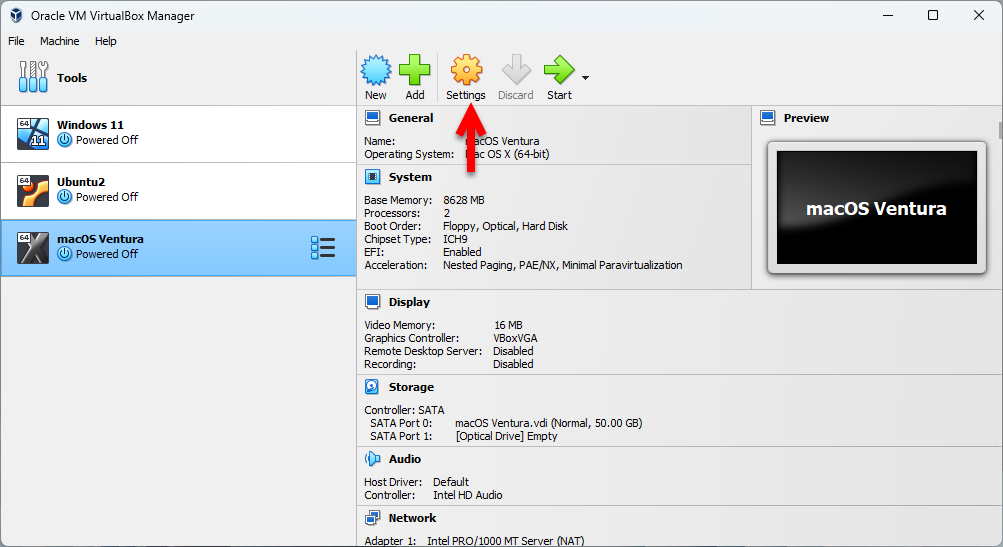
To edit the virtual machine settings simply click on the settings option.
When the settings window opened, from the left-handed corner of the window select the System tab>Motherboard>then uncheck the floppy disk.

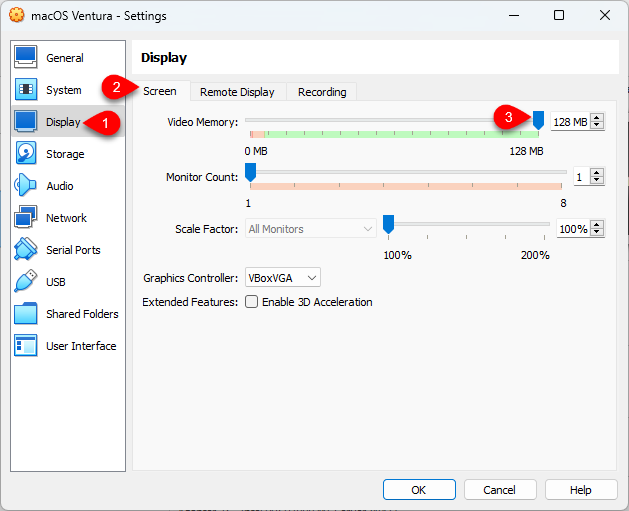
Select the display tab>Screen>then increase the video memory up to 128MB.
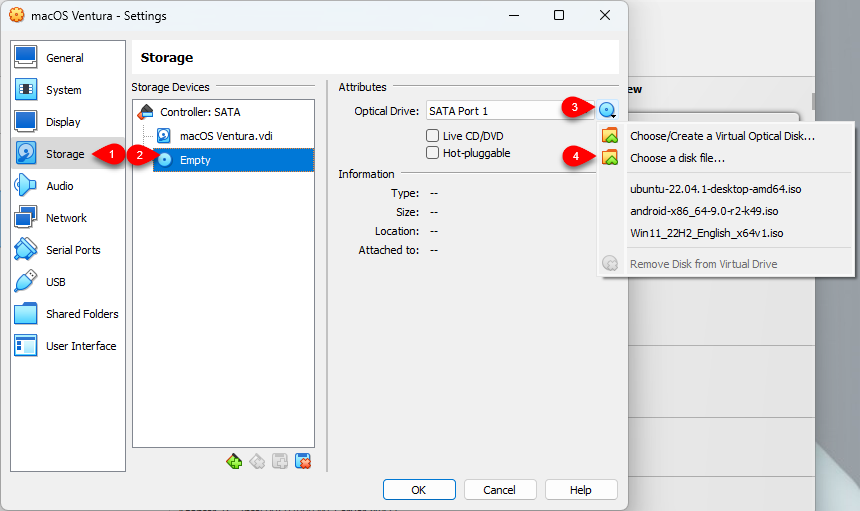
Select the storage tab>Empty>click on the disk icon>Choose a disk file.
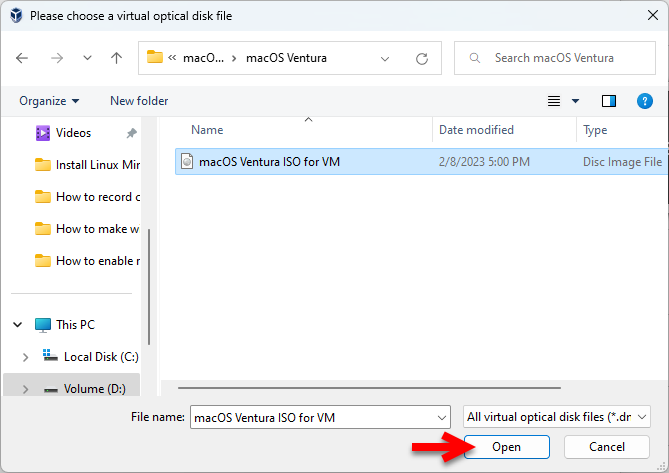
Now go to the place where you have saved the macOS Ventura ISO Image file, select the ISO file, and click open.
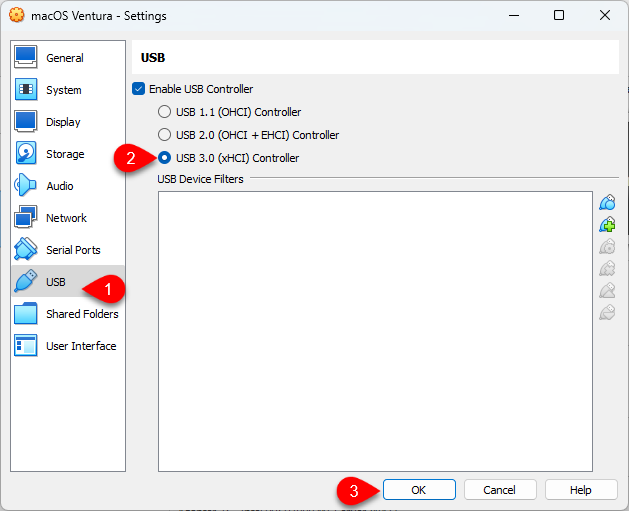
Click the USB tab>then enable the USB controller and select the USB 3.0 (xHCI) controller and click OK.
Apply Commands
There are some necessary commands that you have to enter through the command prompt window to VirtualBox. If you don’t apply the commands, then you won’t be able to boot into the macOS Ventura installation. With the same thing, if you want to install any other macOS version operating system on VirtualBox on Windows PC, you have to apply the commands. So, in this case, to apply the commands, there is an important thing to configure which is the “VM Name” in the code with the name of Virtual Machine “Whatever its”. Once the commands are done you can apply them to the commands prompt window.
To apply the commands simply close the VirtualBox if it’s running in the background.
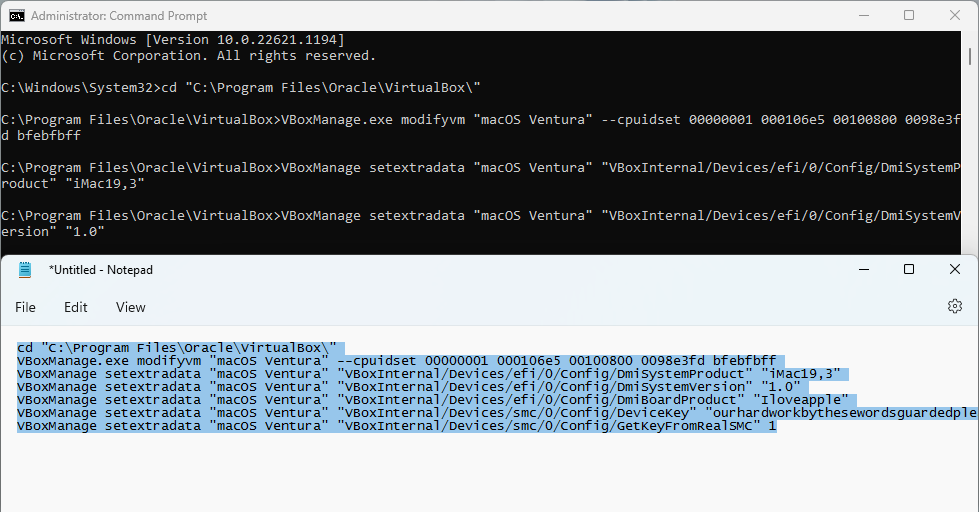
Now you can copy the below down commands and paste them into the notepad window.
For Intel Processor
cd "C:\Program Files\Oracle\VirtualBox\"
VBoxManage.exe modifyvm "VM Name" –-cpuidset 00000001 000106e5 00100800 0098e3fd bfebfbff
VBoxManage setextradata "VM Name" VBoxInternal/Devices/efi/0/Config/DmiSystemProduct “MacBookPro15,1”
VBoxManage setextradata "VM Name" "VBoxInternal/Devices/efi/0/Config/DmiBoardProduct" "Mac-551B86E5744E2388"
VBoxManage setextradata "VM Name" "VBoxInternal/Devices/smc/0/Config/DeviceKey" "ourhardworkbythesewordsguardedpleasedontsteal(c)AppleComputerInc"
VBoxManage setextradata "VM Name" "VBoxInternal/Devices/smc/0/Config/GetKeyFromRealSMC" 1

For AMD Processor
cd "C:\Program Files\Oracle\VirtualBox\"
VBoxManage.exe modifyvm "VM Name" --cpuidset 00000001 000106e5 00100800 0098e3fd bfebfbff
VBoxManage setextradata "VM Name" "VBoxInternal/Devices/efi/0/Config/DmiSystemProduct" "iMac11,3"
VBoxManage setextradata "VM Name" "VBoxInternal/Devices/efi/0/Config/DmiSystemVersion" "1.0"
VBoxManage setextradata "VM Name" "VBoxInternal/Devices/efi/0/Config/DmiBoardProduct" "Iloveapple"
VBoxManage setextradata "VM Name" "VBoxInternal/Devices/smc/0/Config/DeviceKey" "ourhardworkbythesewordsguardedpleasedontsteal(c)AppleComputerInc"
VBoxManage setextradata "VM Name" "VBoxInternal/Devices/smc/0/Config/GetKeyFromRealSMC" 1
VBoxManage modifyvm "VM Name" --cpu-profile "Intel Core i7-6700K"
After you pasted the code into the notepad window simply on the top menu bar click on Edit>Replace.
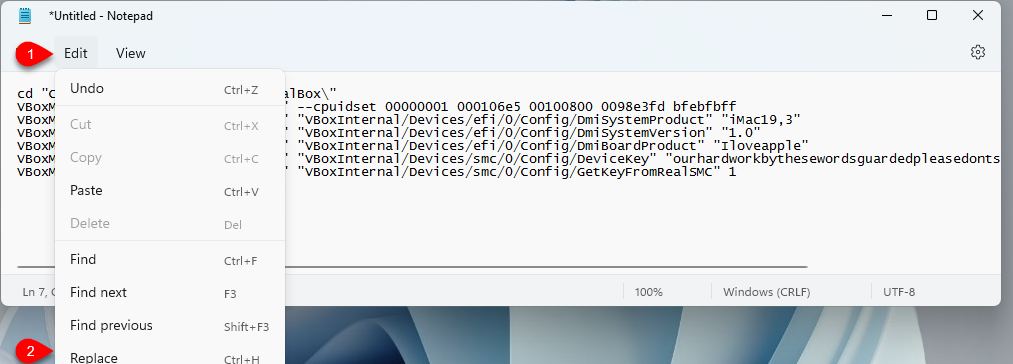
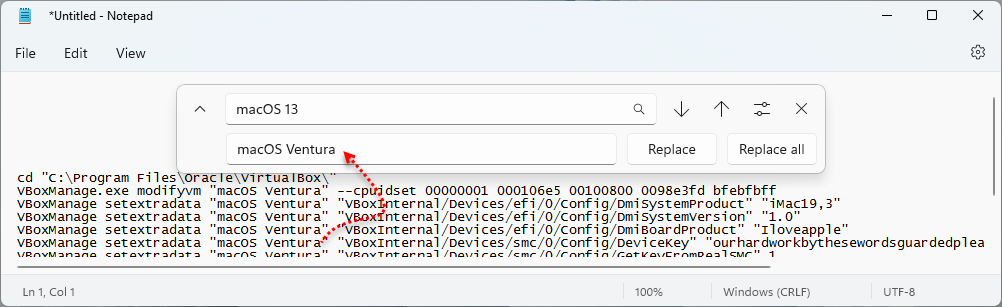
Now replace the VM Name with the name of the macOS Ventura virtual machine and click on replace all.
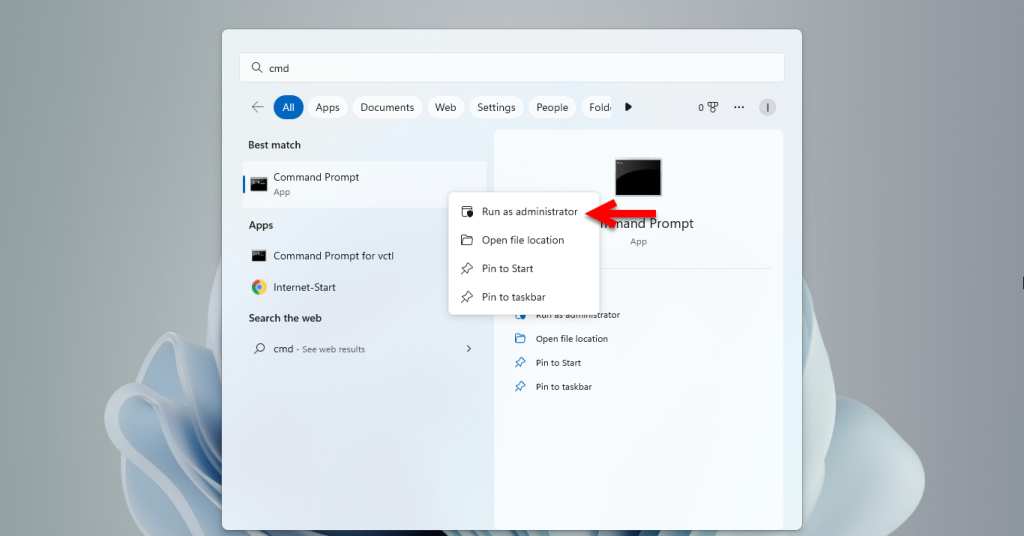
When the virtual machine name is replaced in the commands, simply navigate to the Windows start menu and search for the commands prompt. When it appeared right-click and run as administrator.
Now copy all the commands from notepad and apply them to the commands prompt window and hit enter. When the commands are applied simply close the commands prompt window.
Perform a Clean Installation of macOS Ventura on VirtualBox on Windows PC
Taking from the very beginning step of installing macOS Ventura on VirtualBox on Windows PC. The first was to install the VirtualBox on Windows PC, edit the virtual machine settings for better performance, and Apply the necessary commands. And finally, it’s time to perform a clean installation of macOS Ventura 13 on VirtualBox on a Windows PC.
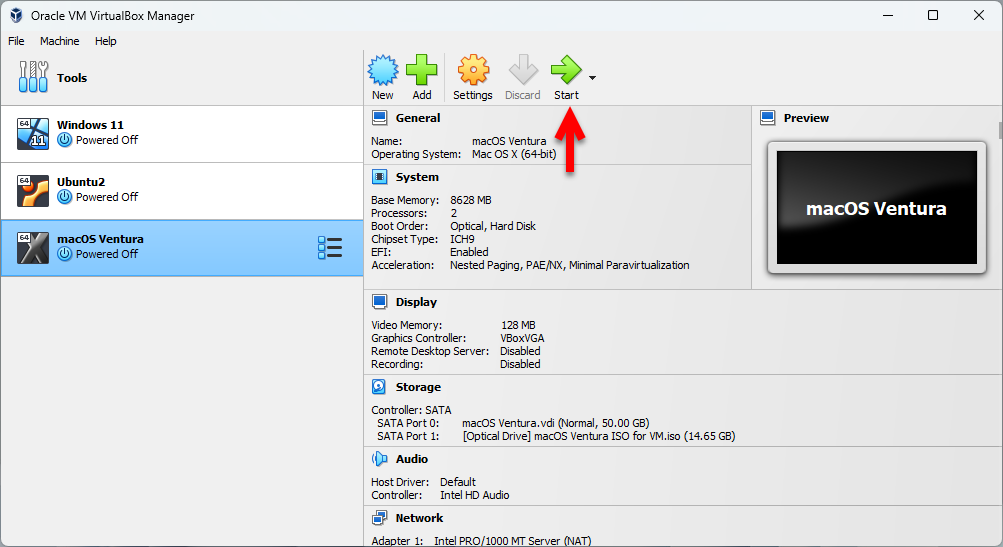
To install macOS Ventura fire up the VirtualBox, then select the macOS Ventura virtual machine and click on start.
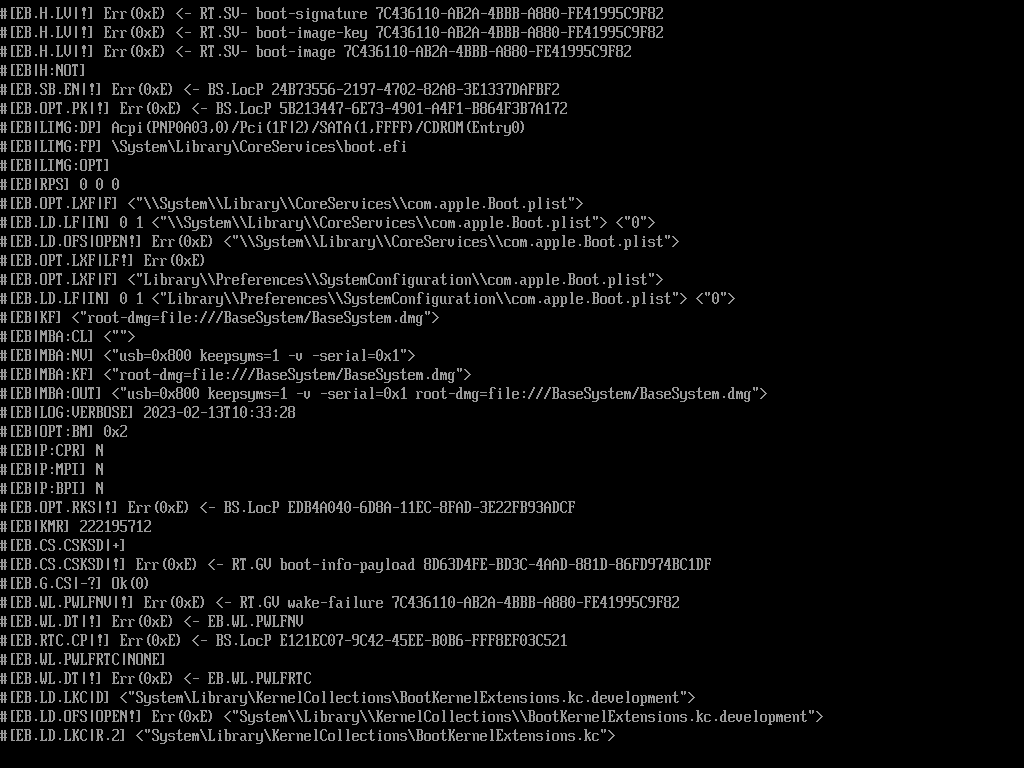
While the installation proceeds wait for the first window full of codes to go ahead.
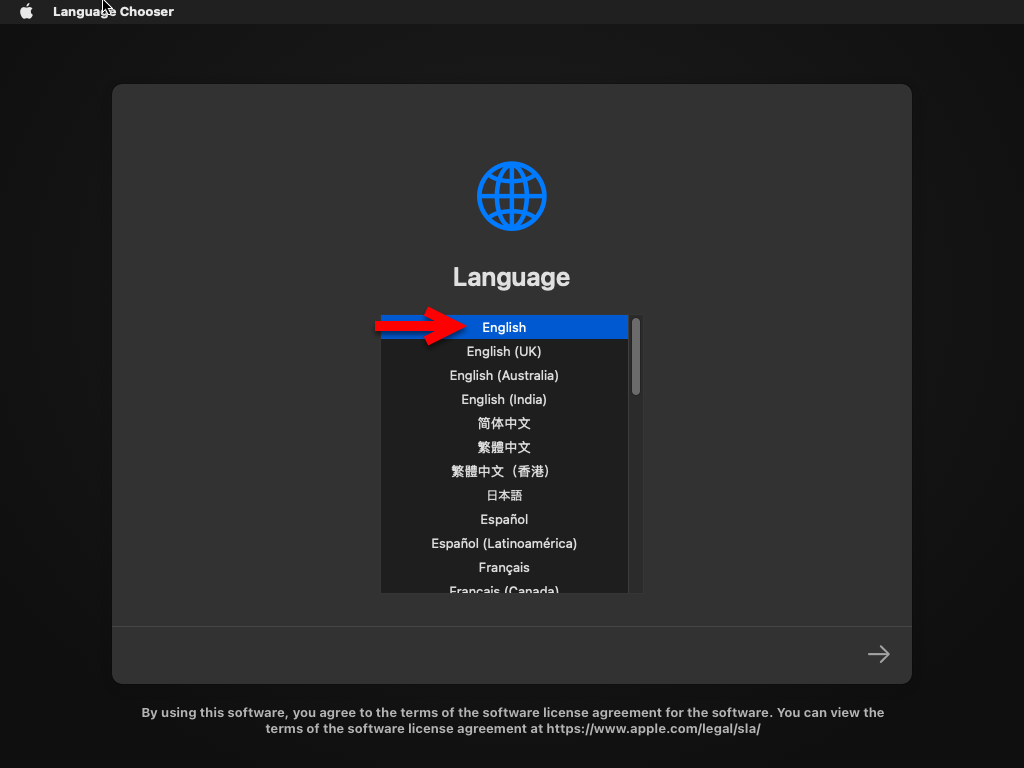
When the installation of macOS Ventura is launched on the first window select your language and click continue.
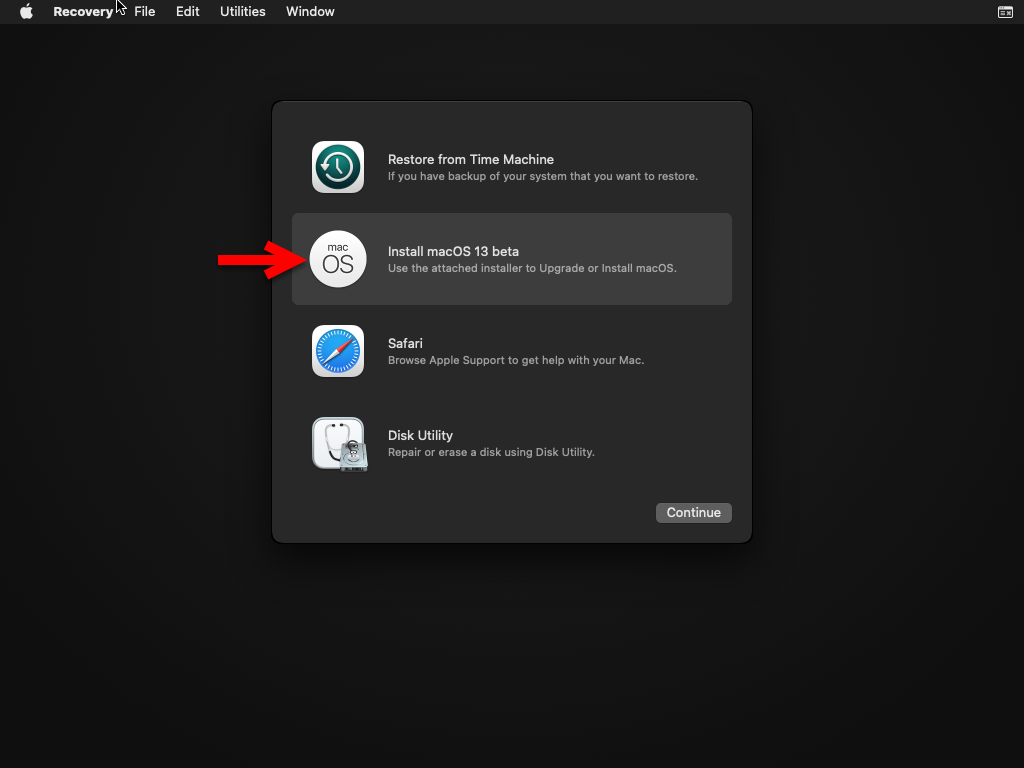
On the recovery window, select the Disk Utility option and click continue.
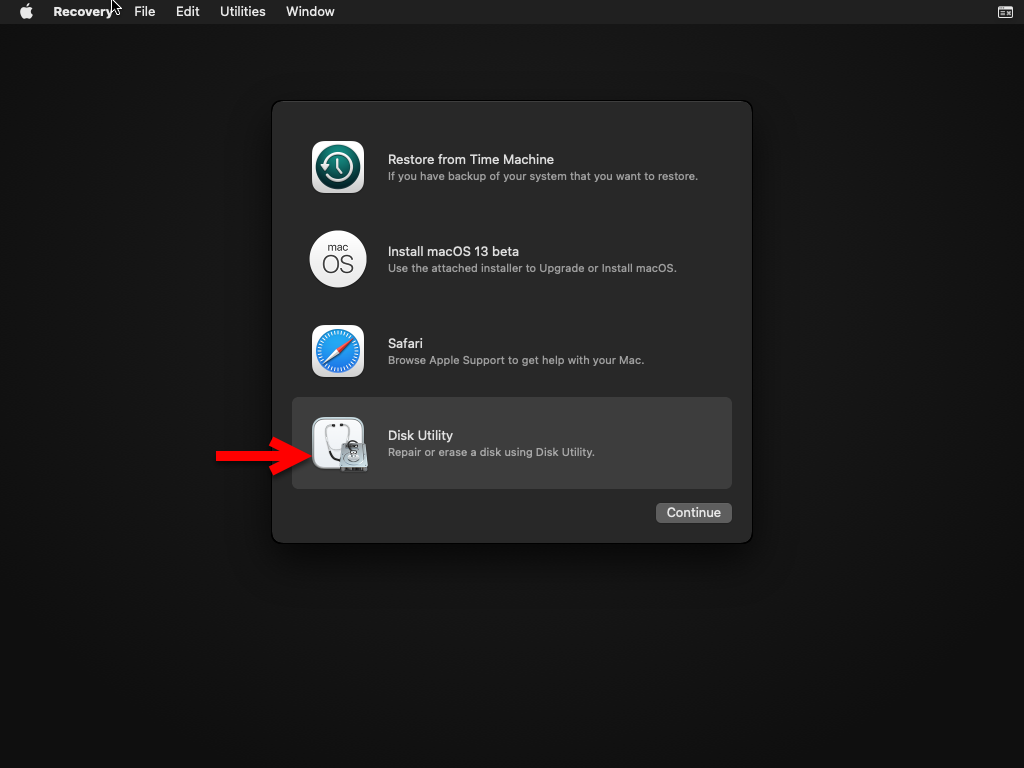
From the left-handed window, side select “VBOX HARDDISK MEDIA”, then click on the erase option. After clicking on the erase option you have to format the disk for macOS Ventura, simply format the disk according to the below down formats. So, to format the disk simply click on erase option.
- Name (optional)
- Format (APFS)
- Scheme (GUID Partition Map)
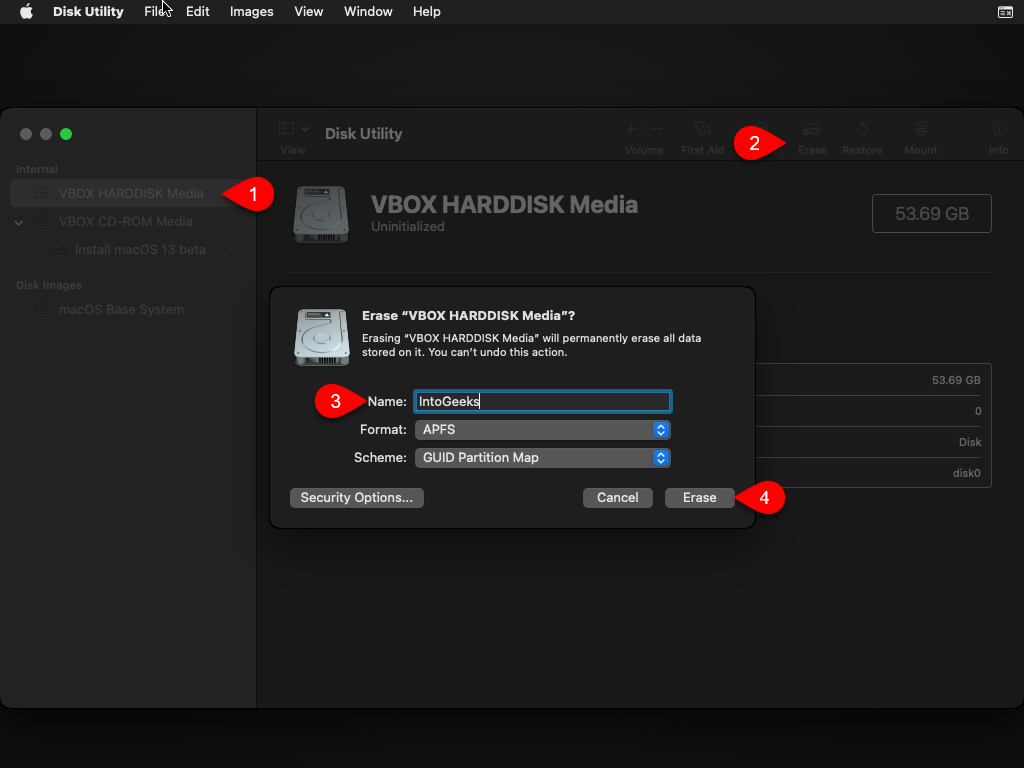
While the disk is formatted simply click on Done.
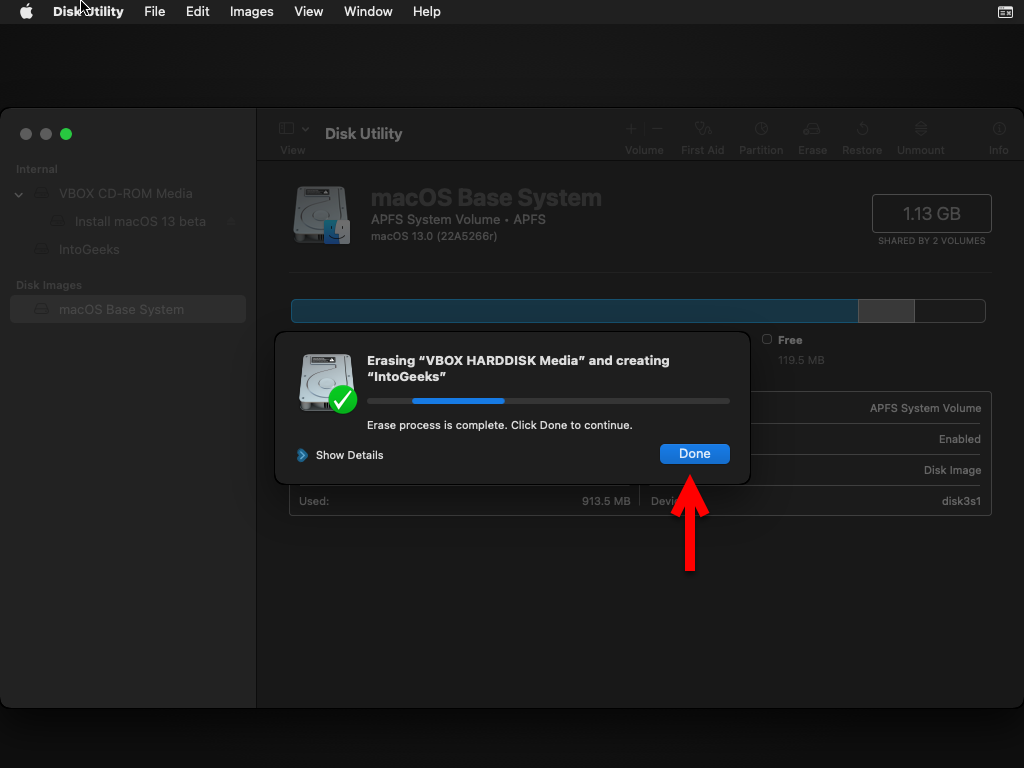
When the is formatted simply close the recovery window.
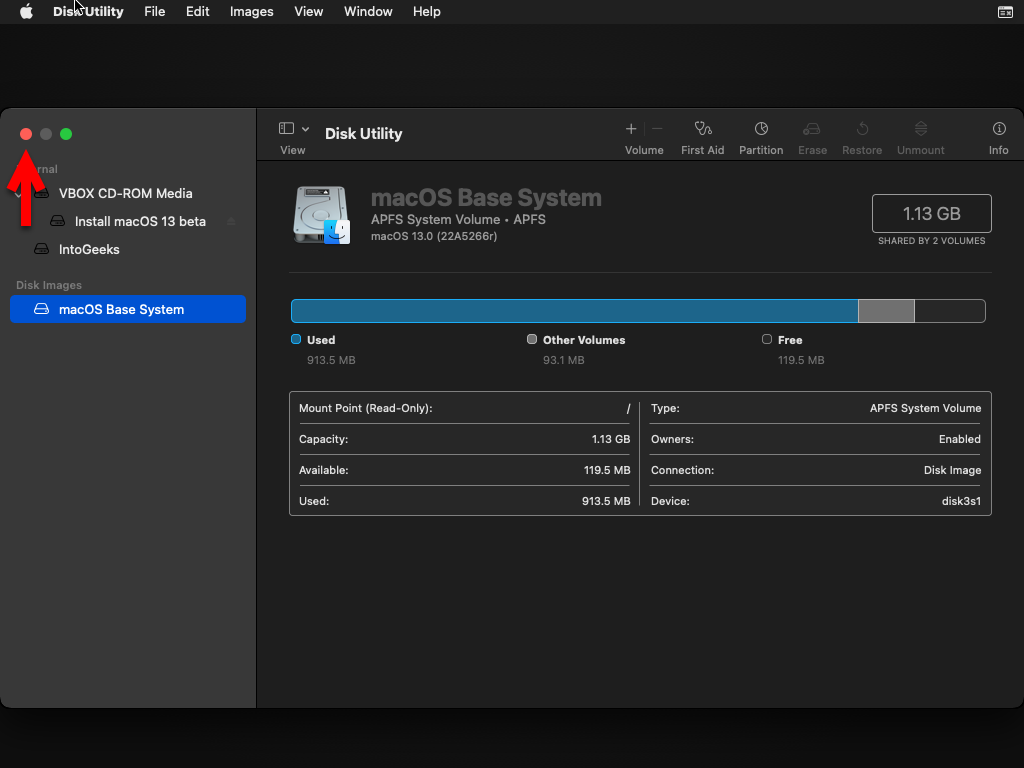
Now again coming back to the installation window select “Install macOS Ventura 13” and click continue.
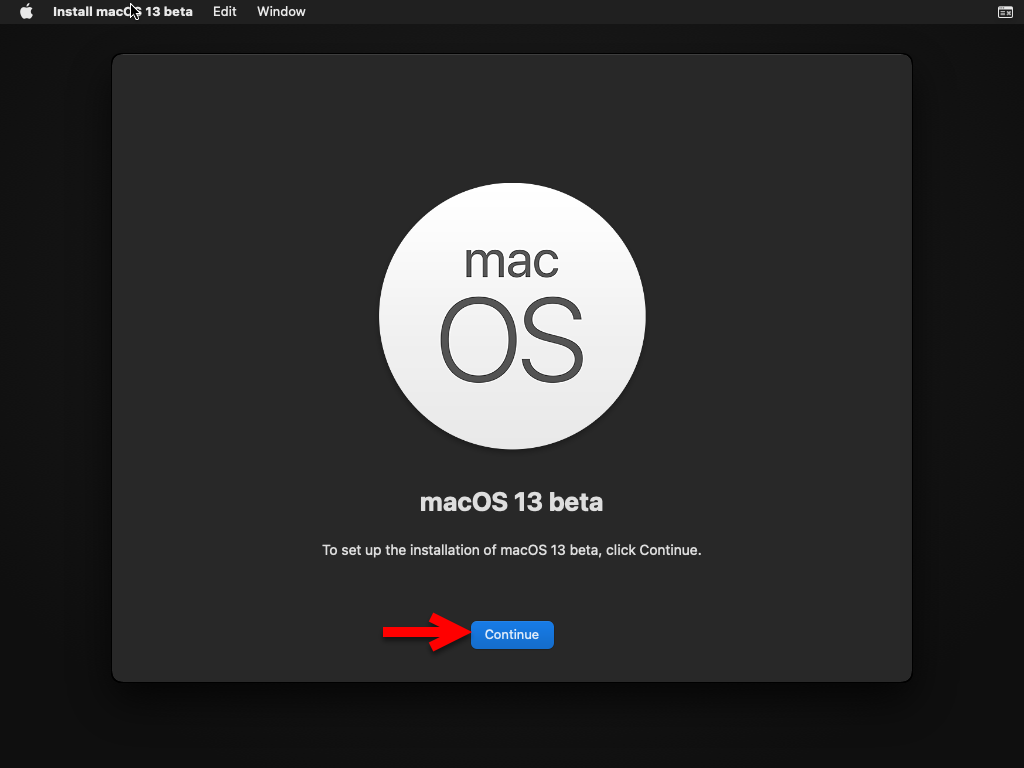
To set up the installation of macOS Ventura 13, click on continue to proceed with the installation.
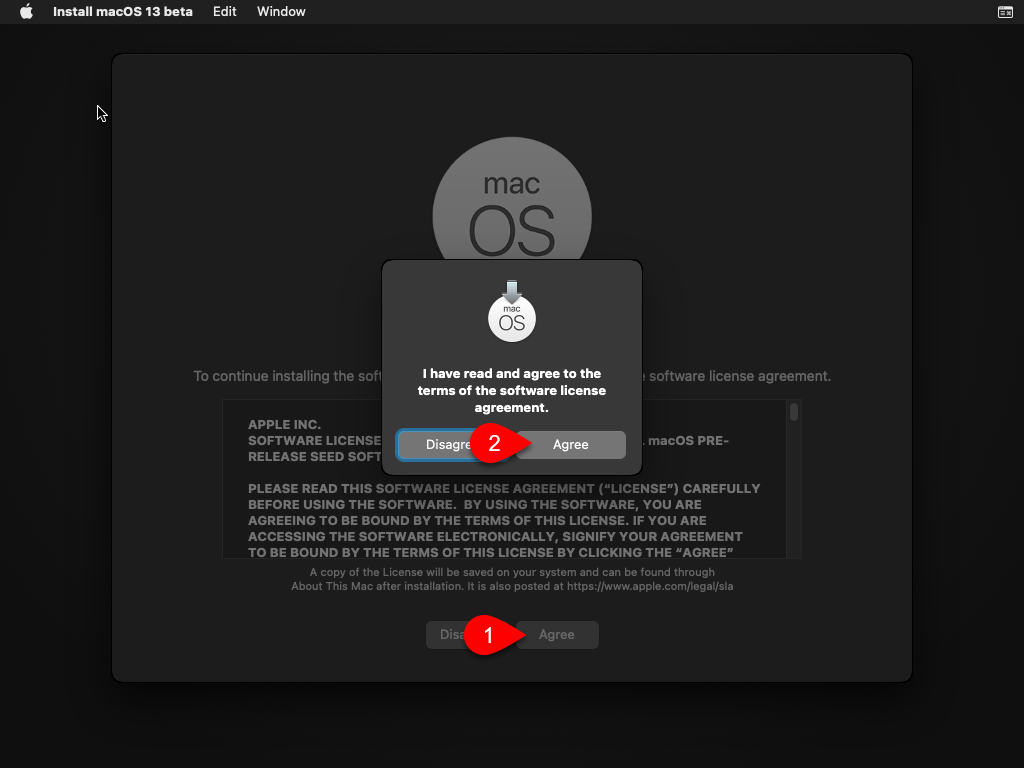
Agree with the terms and conditions of macOS Ventura.
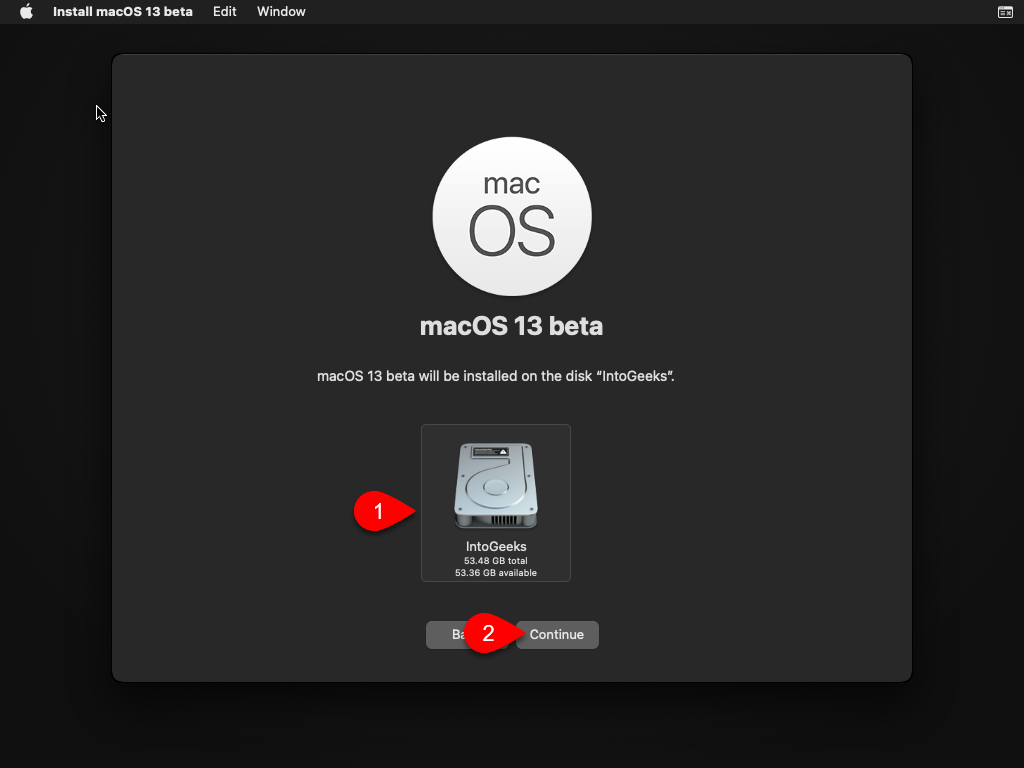
Now select the disk where you want to install macOS Ventura and click continue.
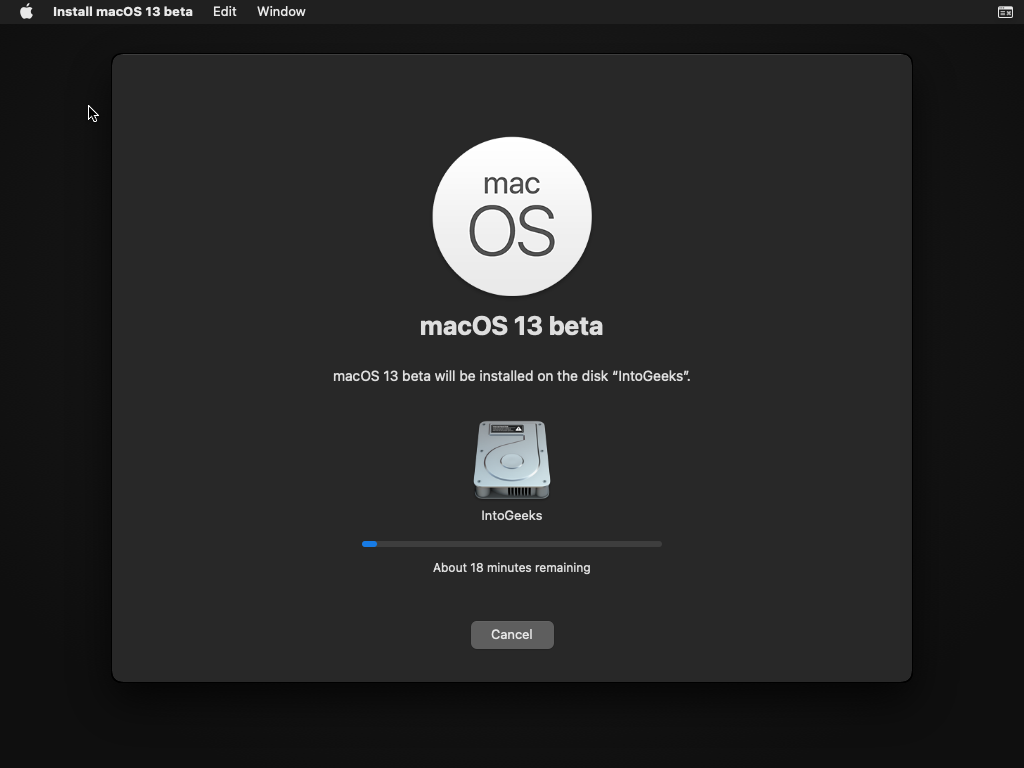
Now the installation will start installing macOS Ventura 13 on VirtualBox on Windows PC. In addition, the installation of macOS Ventura may take enough time. So, during the installation doesn’t do anything, and also while installing macOS Vnetura the Virtual machine will restart several times.
- Once the installation of macOS Ventura is completed, therefore, you need to edit a few basic things to proceed to macOS Ventura. So, in the first welcome window select your language and click continue.
- You can choose your written and spoken languages and click continue.
- In the accessibility window, there is nothing to do simply click on the not now option.
- Now select the option “My computer doesn’t connect to the internet” and click continue.
- On the Data & Privacy window simply click continue.
- On the migration, Assistant window click on the not now option.
- Now agree with the terms and conditions of macOS Ventura 13.
- Create your computer account by entering your name, account full name, and password, re-entering the password, and clicking continue.
- On the location and services simply click on continue.
- And on the next window again click on don’t use.
- Select your time zone for macOS Ventura and click continue.
- You make changes to the Analytics of macOS Ventura, and click continue.
- Set up the screen time, or if you don’t want it simply click on Set up later.
- And finally select the look for macOS Ventura, like dark mode, or light mode.
- And finally, macOS Ventura 13 installation was completed on VirtualBox on Windows PC.


Conclusion
You can have complete access to macOS Ventura 13 on VirtualBox on Windows PC. So, the installation is done smoothly without any issues or errors. And the very last thing that remains in macOS Ventura on Windows PC is to enter the full-screen mode of it VirtualBox. And that thing is only can be done with the command prompts window, by applying a few commands again. The commands are available in the above portion of commands, simply copy from there and apply it to have the full-screen mode access of macOS Ventura on VirtualBox on a Windows PC.


I did make every steps and my installation does not go to language choice. Whats happens? How many time i need wait on before step?
Everytime, my installation come back to recovery screen and don´t finish. Could you help me?