macOS Monterey is the latest operating system for Mac computers, released by Apple in late 2021. The new OS comes with several new features and improvements that aim to enhance the user experience. One of the most significant changes in macOS Monterey is the introduction of a new design language called “Monterey.” This new design includes refreshed icons and more pronounced color palettes that are meant to be more intuitive and aesthetically pleasing. Additionally, macOS Monterey features a new Control Center that provides quick access to commonly used settings and tools, such as Wi-Fi, Bluetooth, and AirDrop.
Another major feature of macOS Monterey is Universal Control. With this feature, users can seamlessly move between their Macs, iPad, and iPhones using a single mouse and keyboard. This allows for more fluid workflows and makes multitasking across devices more efficient. Safari, Apple’s web browser, has also received some notable updates in macOS Monterey. Safari now features a new tab design that allows for more tabs to be displayed on the screen at once, making it easier to navigate through multiple accounts. Additionally, Safari now includes a new feature called “Tab Groups” that allows users to organize tabs into groups, making it easier to switch between different projects or topics.
Finally, macOS Monterey includes several new privacy features designed to give users more control over their data. One such feature is “Private Relay,” a new way to browse the web with increased privacy and security. Private Relay encrypts all web traffic and prevents advertisers from tracking user activity online. Overall, macOS Monterey brings a range of new features and improvements that aim to make the Mac experience more intuitive and efficient, while also prioritizing user privacy and security.
Related:
- How to Install macOS Big Sur Final on VirtualBox on Windows PC?
- How to Install macOS Big Sur Final on VMware on Windows PC?
- How to Install macOS Monterey Final on VirtualBox on Windows PC?
- How to Install macOS Ventura 13 on VMware on Windows PC?
- How to Install macOS Ventura 13 on VirtualBox on Windows PC?
What is a Virtual Machine?
A virtual machine (VM) is a software program that emulates a computer system within a host operating system. It allows multiple operating systems to run simultaneously on the same physical hardware as if they were running on separate, independent computers.
In essence, a virtual machine is like a computer within a computer. It has its own virtual CPU, memory, storage, network interface, and other components that allow it to function as a standalone machine. The host operating system provides the resources needed to run the virtual machine, while the guest operating system (which runs on the virtual machine) behaves as if it were running on its own physical hardware.
Virtual machines have several advantages, including the ability to run multiple operating systems on a single machine, the ability to isolate applications and services for improved security, and the ability to easily create and manage software development environments. They are also commonly used in cloud computing environments, where they allow multiple customers to share the same physical infrastructure while maintaining separate and secure virtualized environments. Some popular virtual machine software programs include VirtualBox, VMware, and Microsoft Hyper-V. These programs allow users to create, configure, and manage virtual machines on their own hardware or in the cloud.
What is VMware?
VMware Workstation is one of the most advanced virtualization technology that allows users to test several operating systems at the same time on a single physical machine. On the other hand, VMware Workstation has the best features and ability to have complete access to an operating system on its platforms. More than that, VMware Workstation comes with two parts one is VMware Workstation/VMware Player. While installing VMware Workstation on your Windows PC, the VMware Player will install too. And there are many differences between VMware Workstation and VMware Player. VMware Workstation has the complete features that you have should you use any operating system on it. Also, the latest version of VMware Workstation is Pro 17, the VMware Workstation can be found on the internet as a paid version. You have to pay $199 dollar per year. But if you should use the VMware Player it’s completely free.
How to Install macOS Monterey Final on VMware on Windows PC?
To install macOS Monterey on VMware on Windows PC, firstly you need to look for the full-fill requirements. Like before the installation of macOS Monterey on VMware you have to enable the virtualization technology on the BIOS window. Install the VMware Workstation on your Windows PC. Download the macOS Monterey ISO image file or vmdk. Then create a new virtual machine for macOS Monterey on VMware on Windows PC. Then perform a clean installation of macOS Monterey on a Windows PC.
Also, if you are using any Macintosh PC, then the macOS Monterey is compatible with the following PCs.
- iMac (Late 2015 or later)
- iMac Pro
- MacBook (Early 2016 or later)
- MacBook Air (Early 2015 or later)
- MacBook Pro (Early 2015 or later)
- Mac Mini (Late 2014 or later)
- Mac Pro (Late 2013 or later)
- Enable the Virtualization technology on the BIOS menu.
- Download macOS Monterey or ISO image file.
- Install VMware Workstation Pro 17 on your Windows PC.
- For installing macOS Monterey on Windows PC 8 GB RAM is recommended.
- For the latest update of macOS Monterey installation 80GB of disk space is required.
- Create a new virtual machine for macOS Monterey.
- Install macOS Monterey on VMware on Windows PC.
Here is the guide on how to convert a macOS ISO image file to a vmdk file on Windows PC.
Create A New Virtual Machine for macOS Monterey on VMware on Windows PC
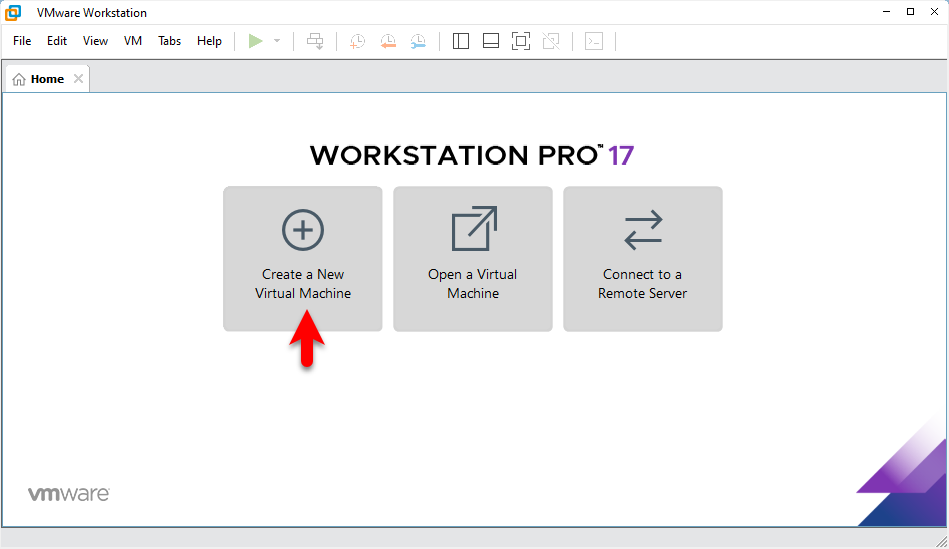
To create a new brand virtual machine for macOS Monterey on VMware on Windows PC. Simply navigate to the Windows start menu and fire up the VMware Workstation. On the first window click on Create a New virtual machine.
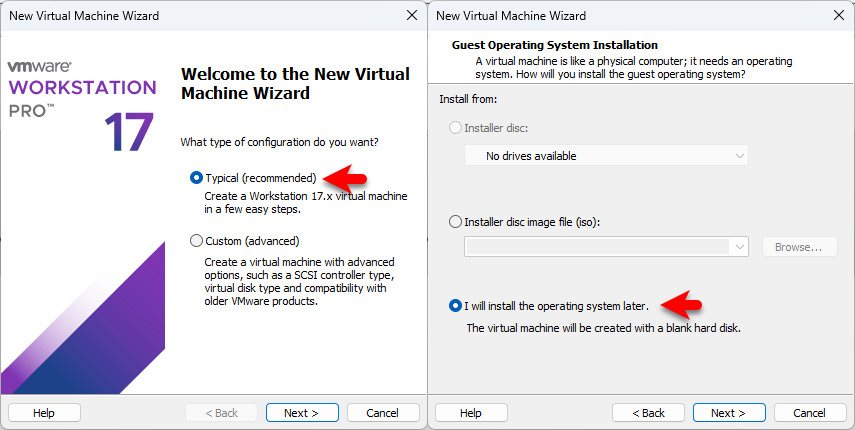
Select the option typically recommended then click next, select the option I will install the operating system later, and click next.
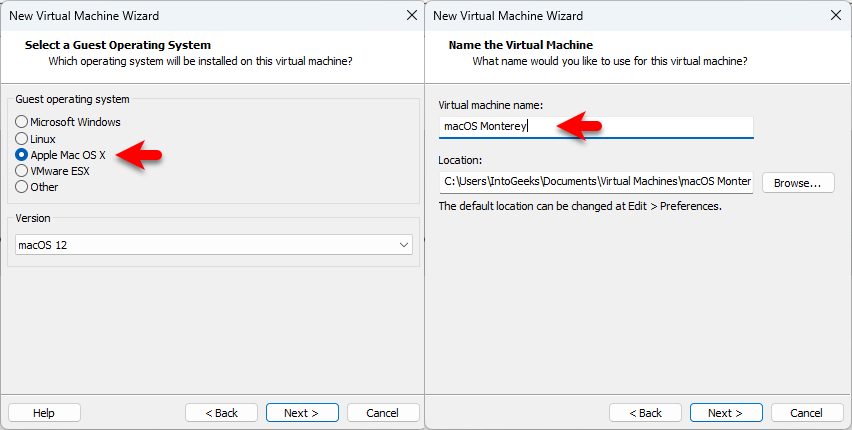
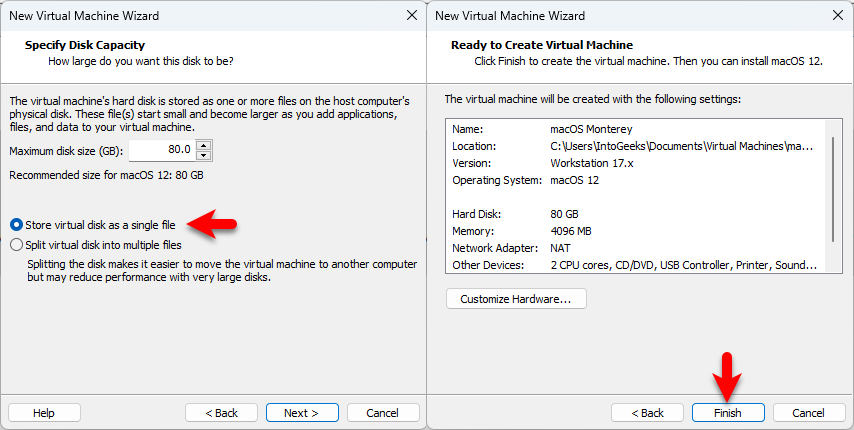
Select the guest operating system Appl Mac OS X, and the version macOS 12 then click next. Type the virtual machine name specify the location and click next.
Choose the option to store the virtual disk as a single file, then select the maximum disk size for macOS Monterey and click next. To finalize the virtual machine creation click on finish.
Edit the Virtual Machine Settings for Better Performance
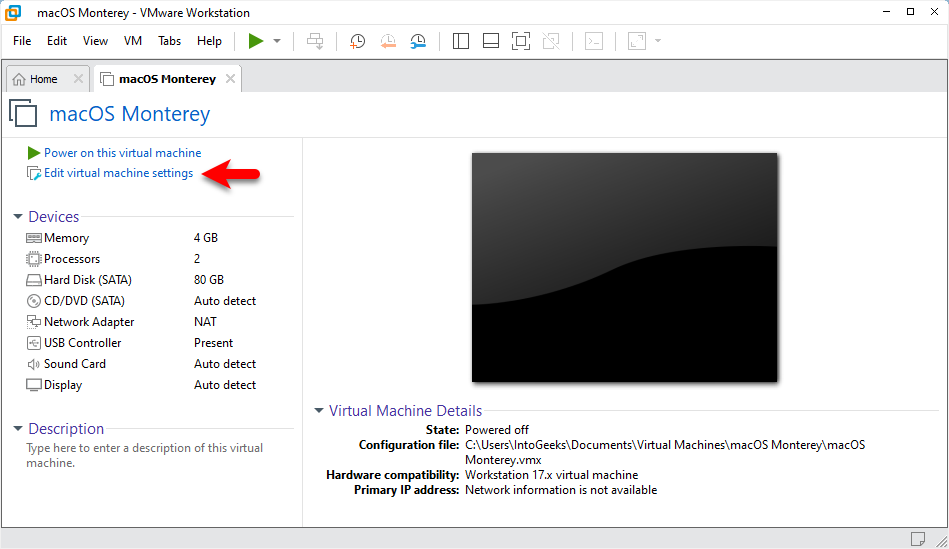
Once the virtual machine is successfully created for macOS Monterey. Therefore, for better performance and installation of macOS Monterey, you have to edit a few settings. So simply select the macOS Monterey virtual machine and click on edit virtual machine settings.
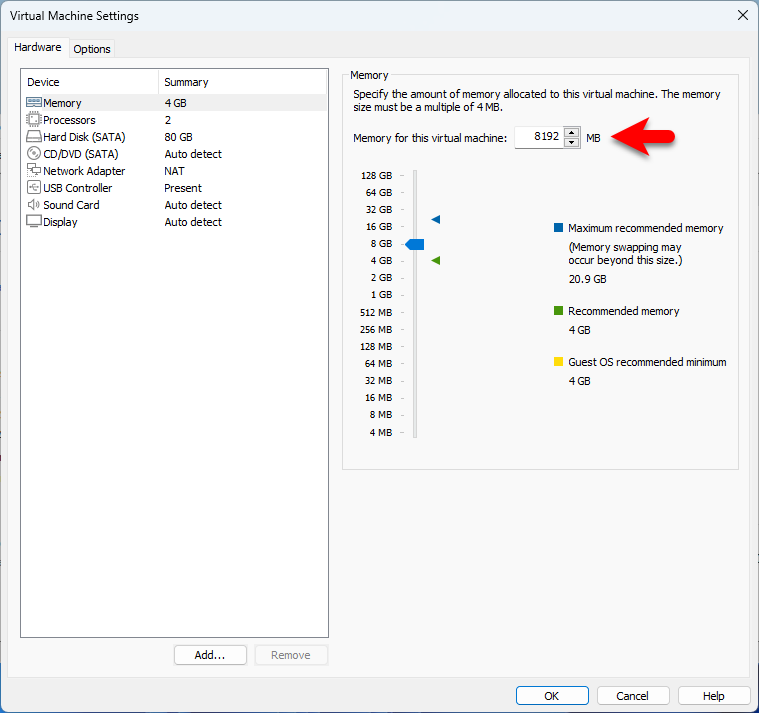
Once the virtual machine settings window opened from the left-handed window side select the hardware tab>memory and increase the size of memory.
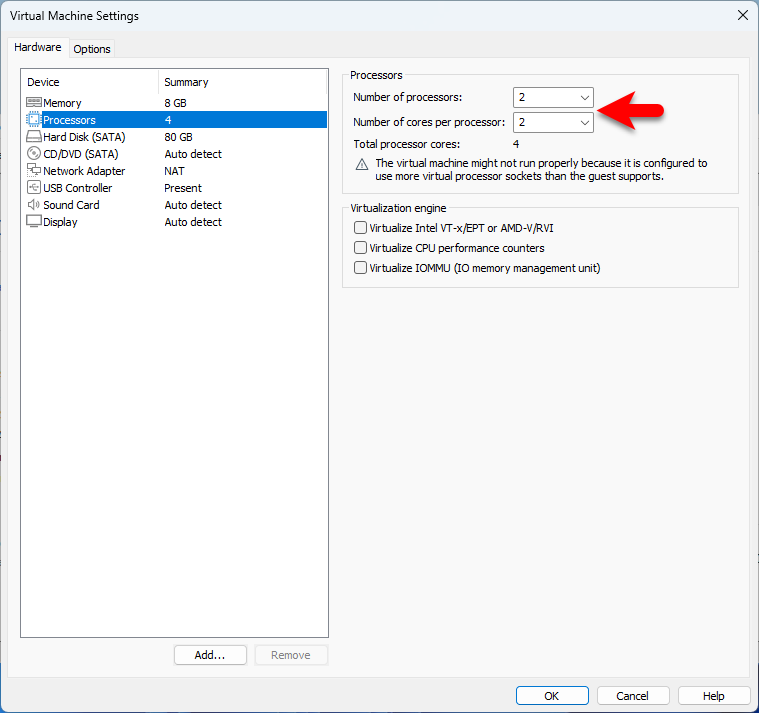
Select the processor tab and increase the number of processors.
Select the CD/DVD Sata choose the option Use an ISO image file and click on the browse option to insert the ISO image file of macOS Monterey.
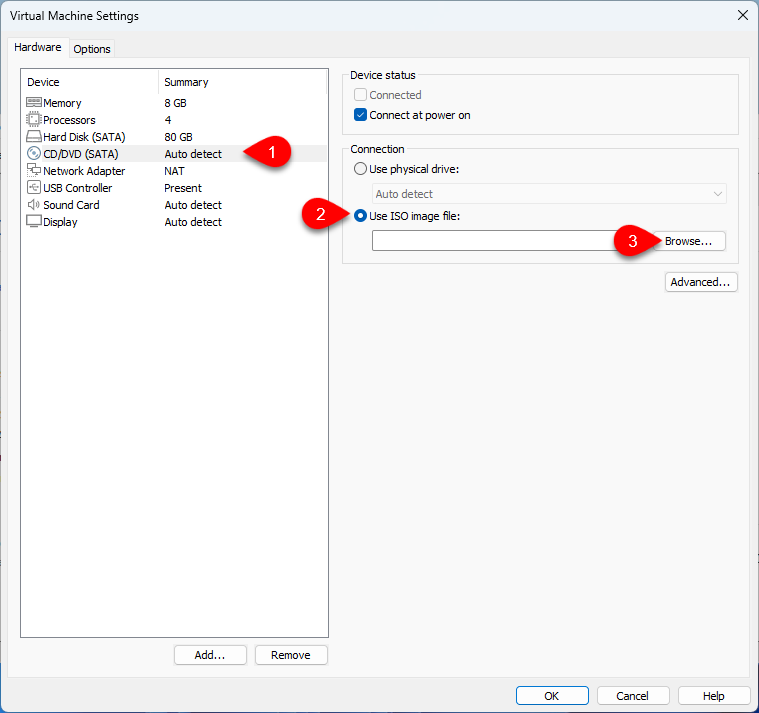
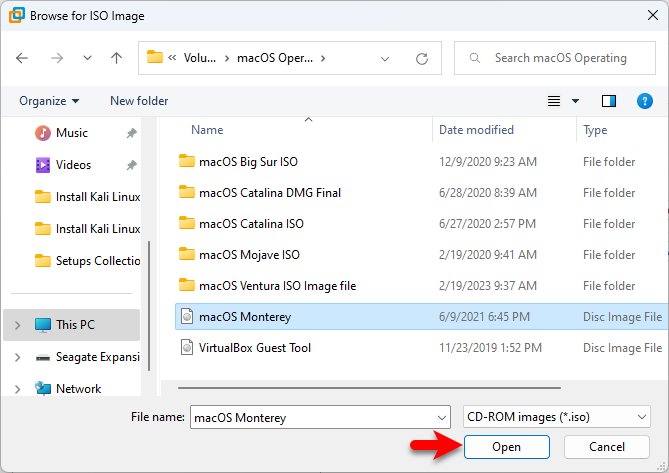
Now select the macOS Monterey ISO image file and click on open.
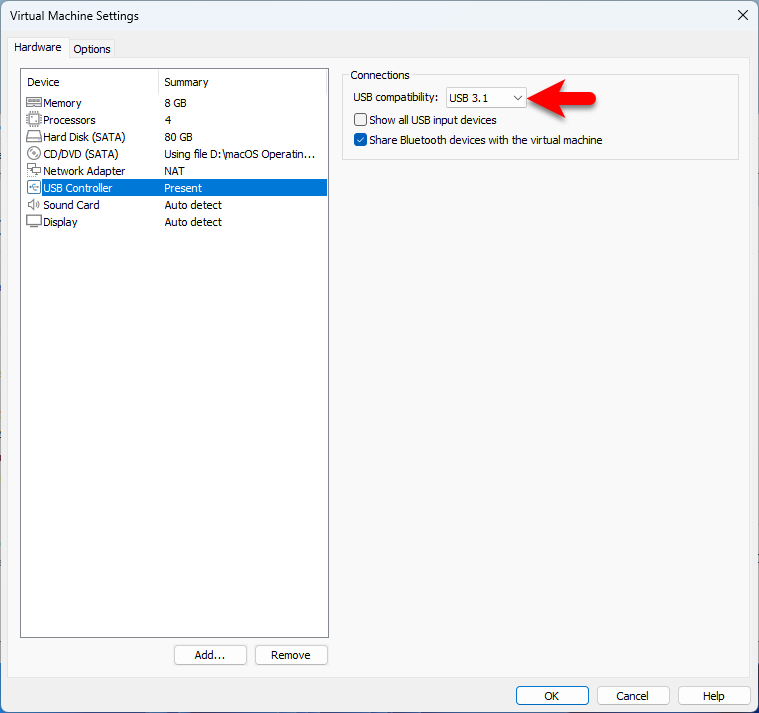
Now go to the USB tab, then select USB compatibility 3.1, and click on OK to save the changes.
Edit the VMX file to Configure the macOS Monterey on VMware on Windows PC
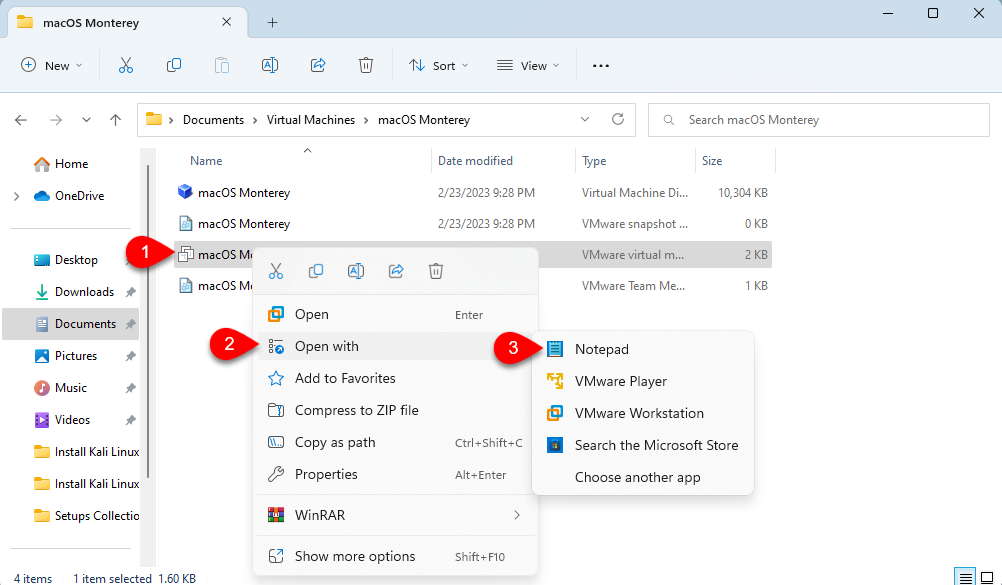
In order to continue the installation of macOS Monterey on VMware on Windows PC. So, you need to configure the macOS Monterey on VMware by editing its vmx file of it. Don’t forget that if you don’t configure the vmx file then you won’t be able to continue the installation. The vmx file is a piece of small commands that we insert that into any macOS directory. To edit the vmx directory of macOS Monterey firstly you have to close the VMware Workstation completely.
When the VMware Workstation is closed, go to the virtual machines folder find the macOS Monterey folder open it. And right-click on macOS Monterey vmx>open with>notepad.
While the vmx file opened scroll down to the bottom, and add the below commands. Then press and hold the ctrl+s to save the changes.
Smc.version = "0"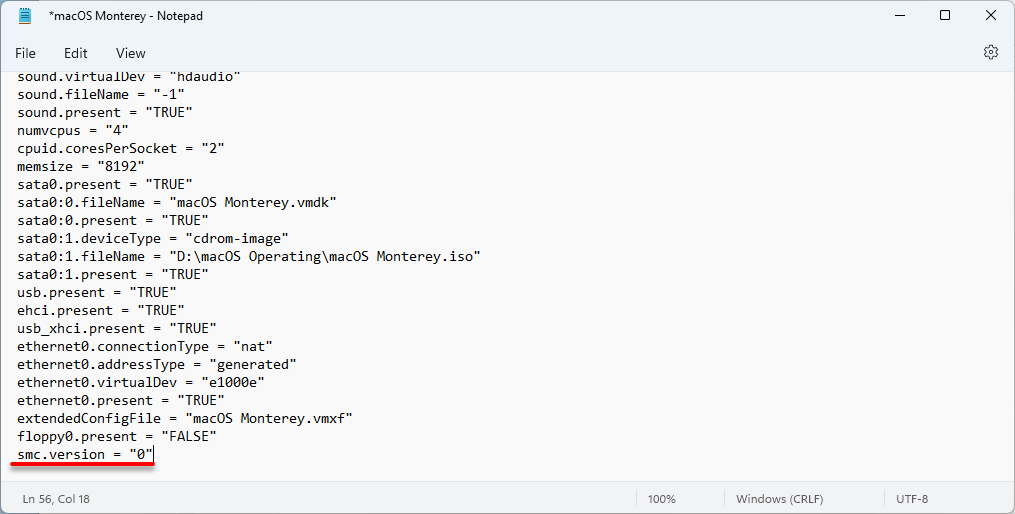
Perform a Clean Installation of macOS Monterey on VMware on Windows PC
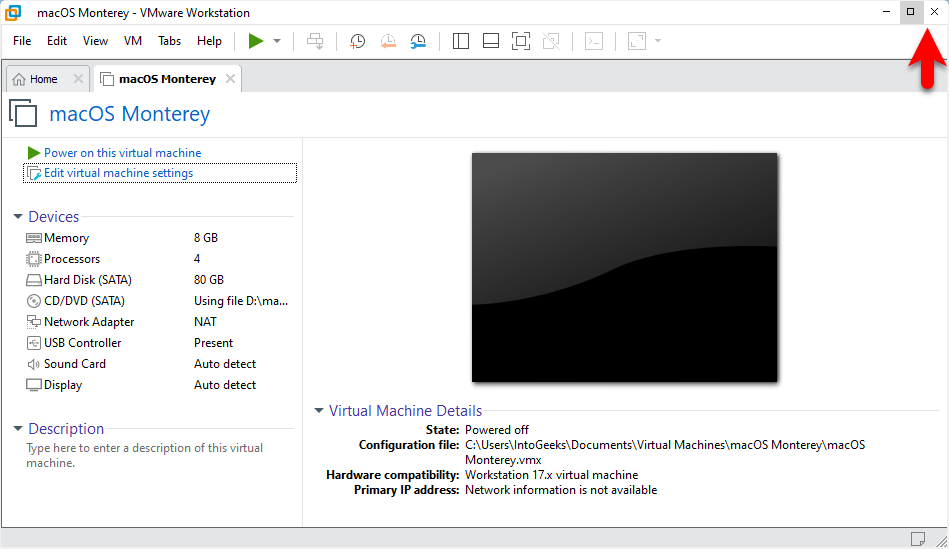
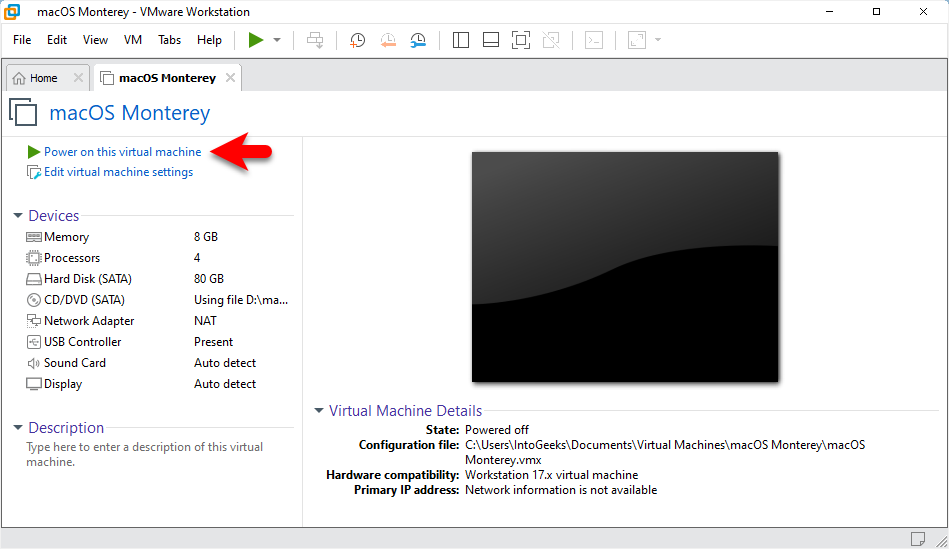
So, once the virtual machine is successfully created for macOS Monterey on Windows PC. You have to edit the virtual machine settings for better performance, then edit the vmx file of macOS Monterey for configuration. And the final step is you have to continue the installation of macOS Monterey on VMware on Windows PC. To start the installation click on Power on this virtual machine.
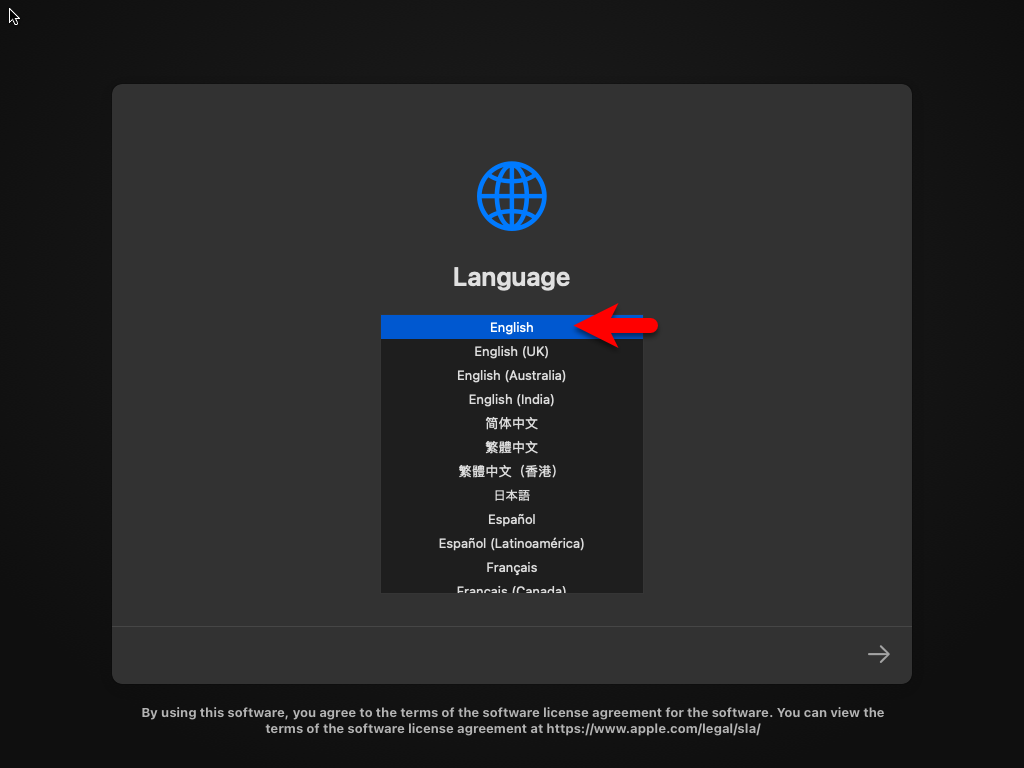
While the virtual machine successfully boots to macOS Monterey, on the first step select your language and click on continue.
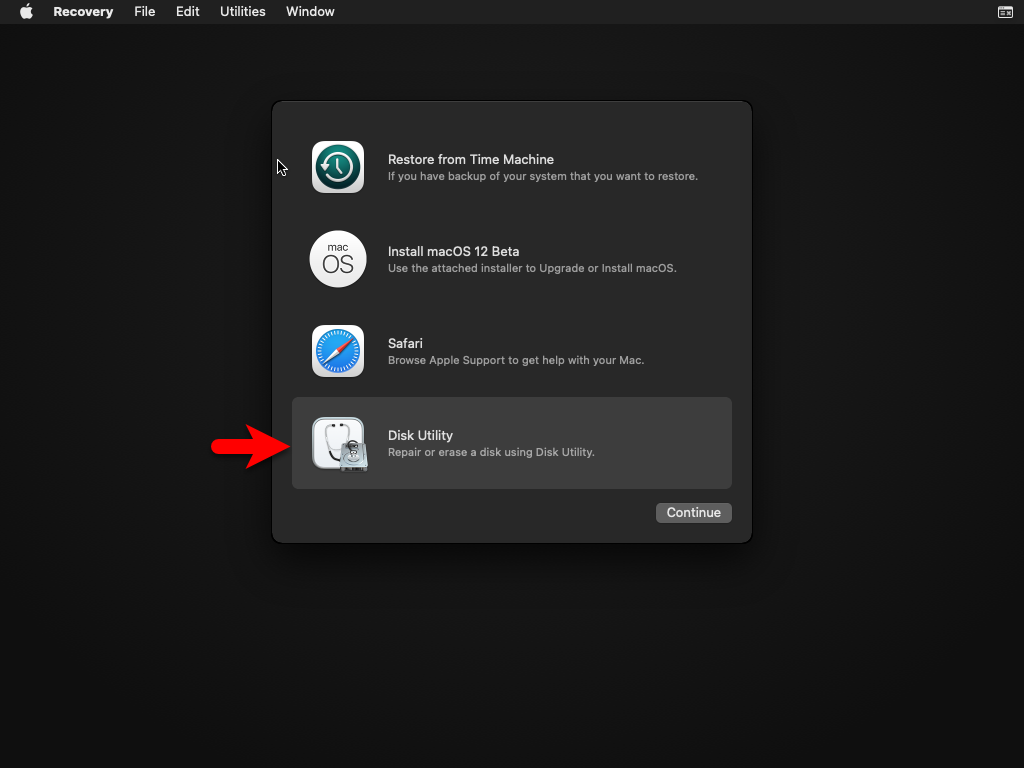
On the recovery, window selects the disk utility option, and click on the arrow option.
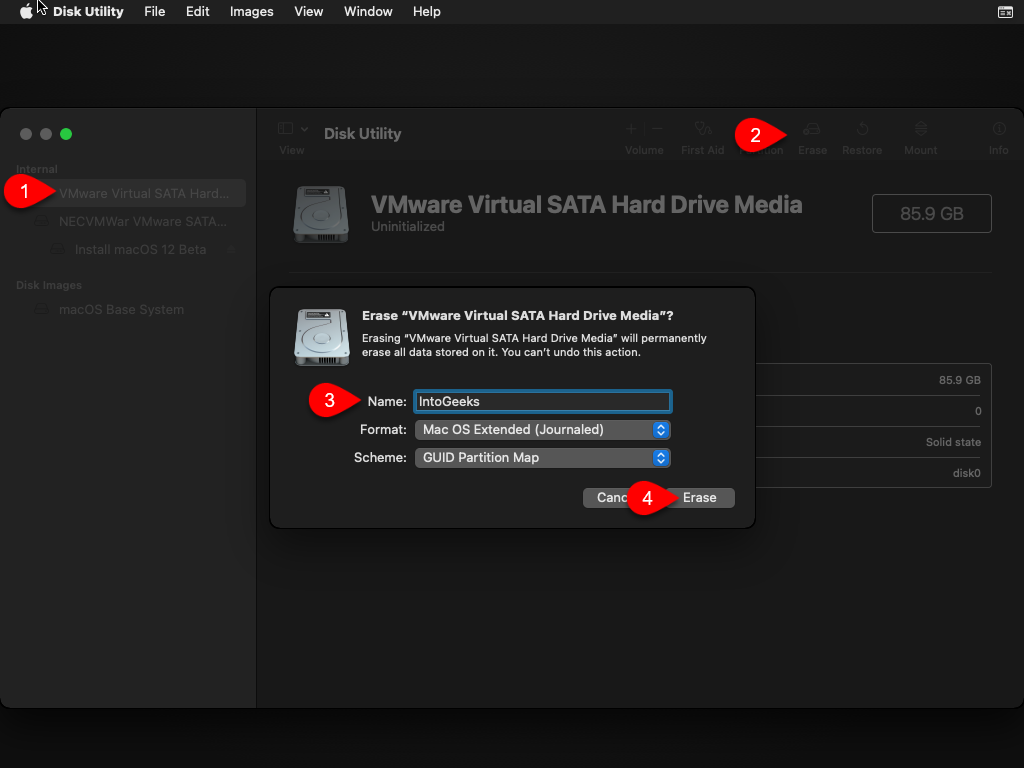
Select VMware virtual SATA hard disk option on the left-handed window side, then click on erase option. And format the disk with the following parameters.
- Name: Optional
- Format: Mac OS X Extended (Journaled)
- Scheme: GUID Partition Map
When the disk is erased click on the done option.
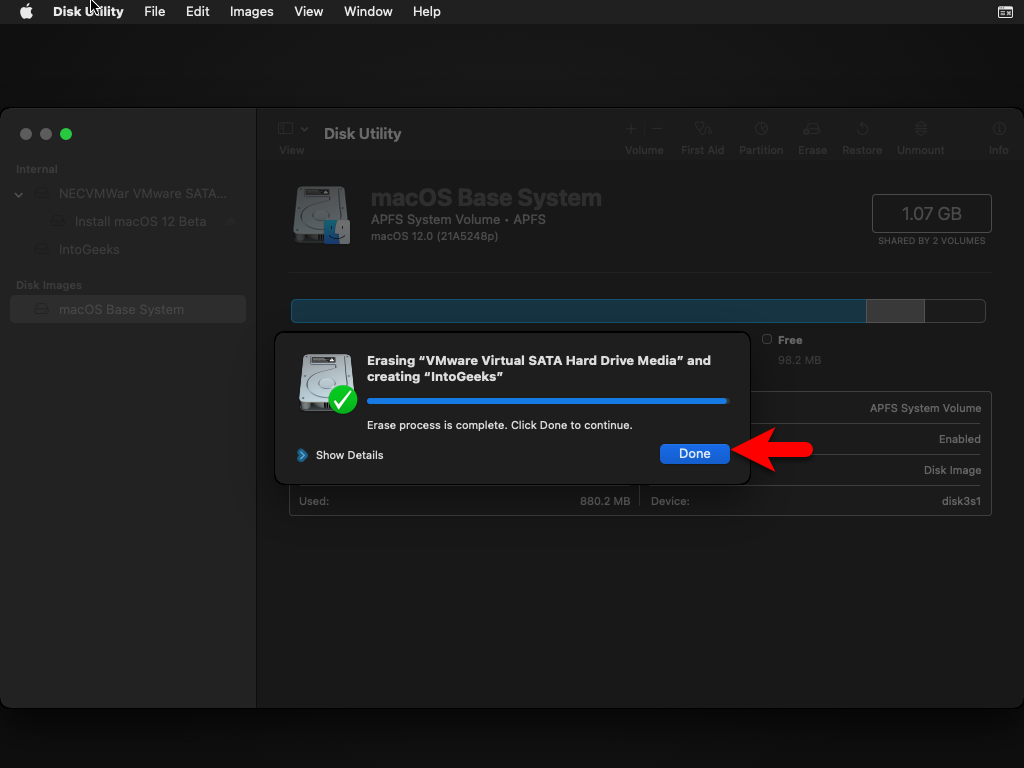
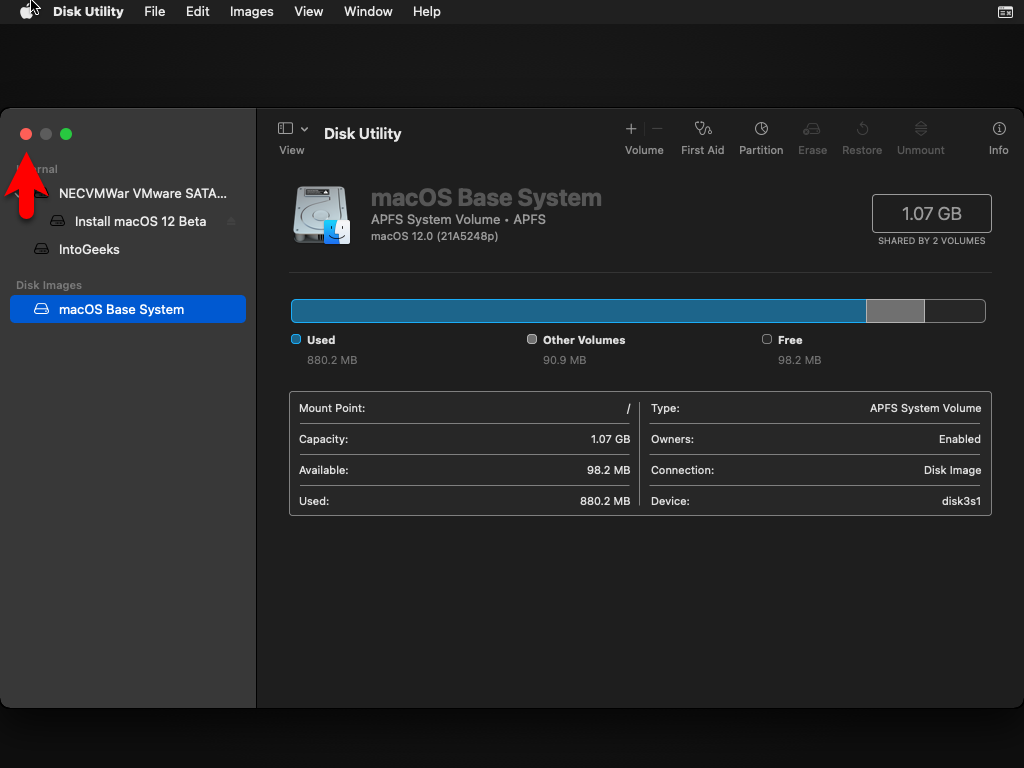
When the disk is erased successfully close the recovery window.
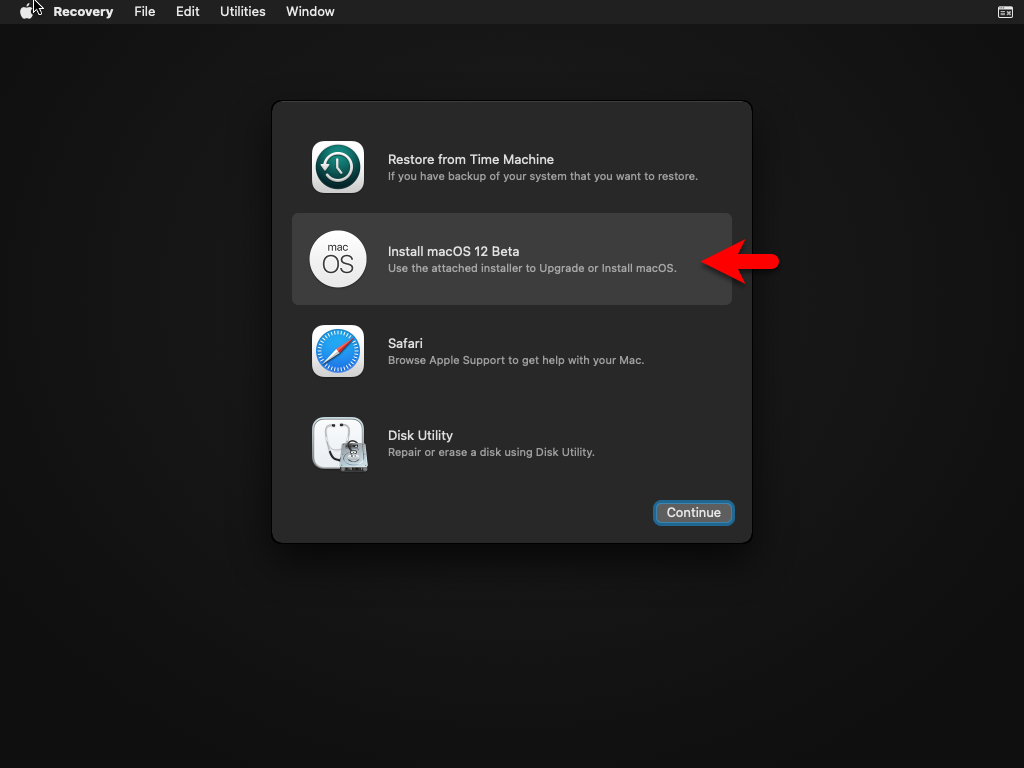
Now again in this step select Install macOS Monterey and click continue.
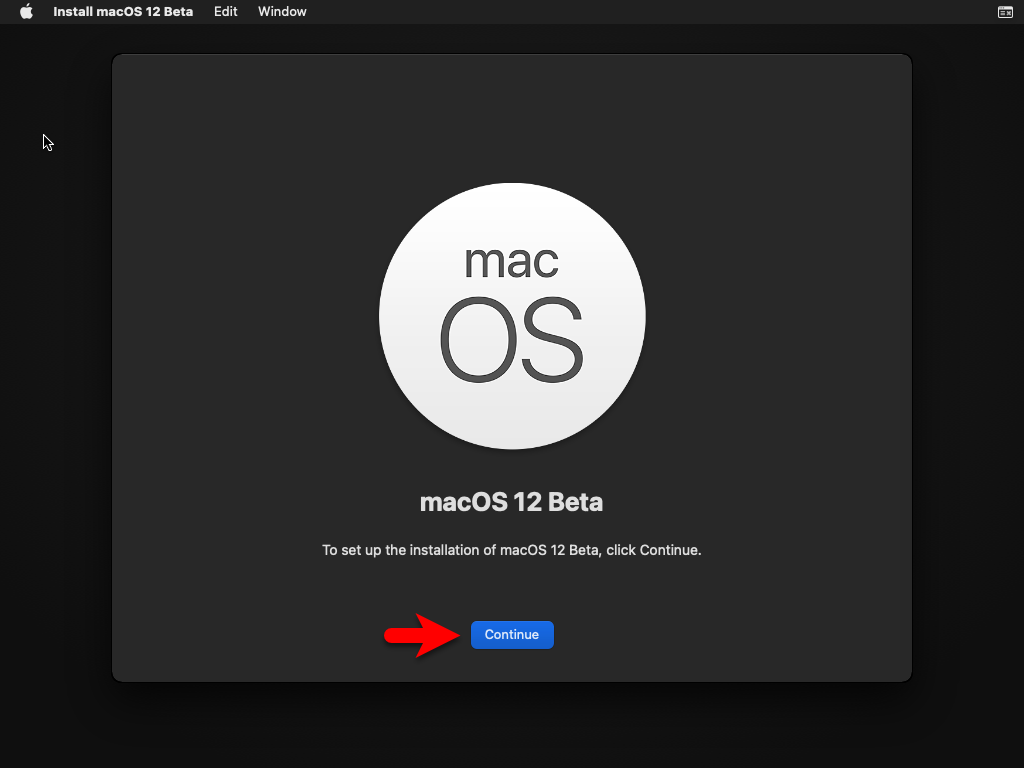
To set up the installation of macOS Monterey click on continue.
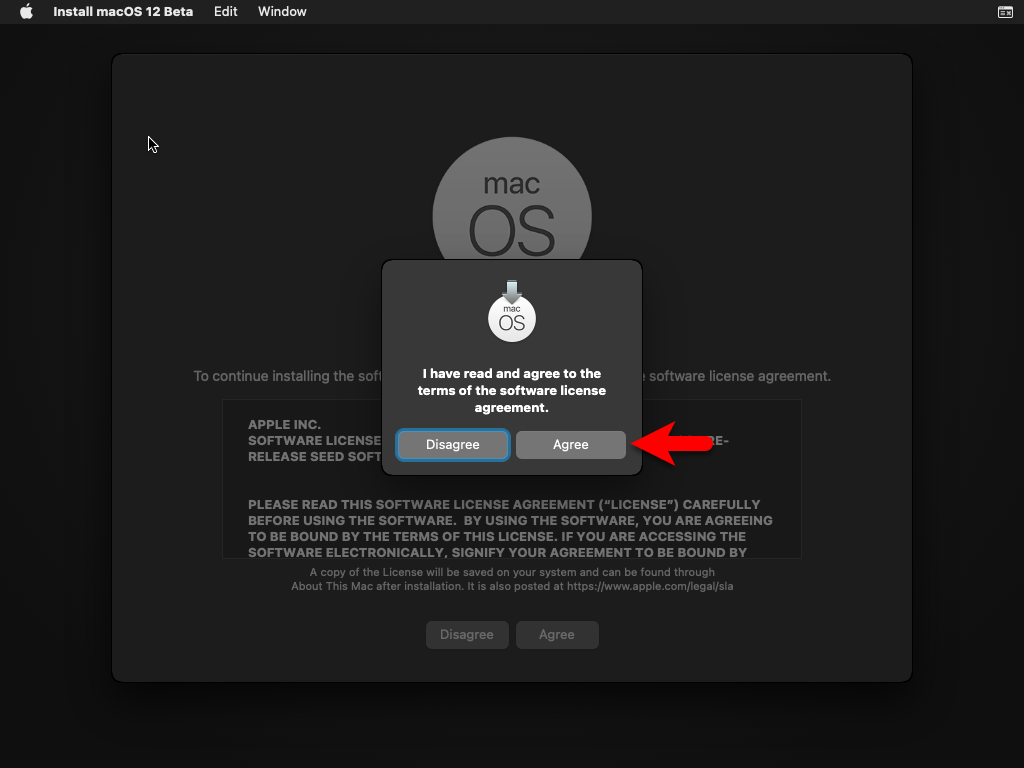
Agree with the terms and conditions of macOS Monterey.
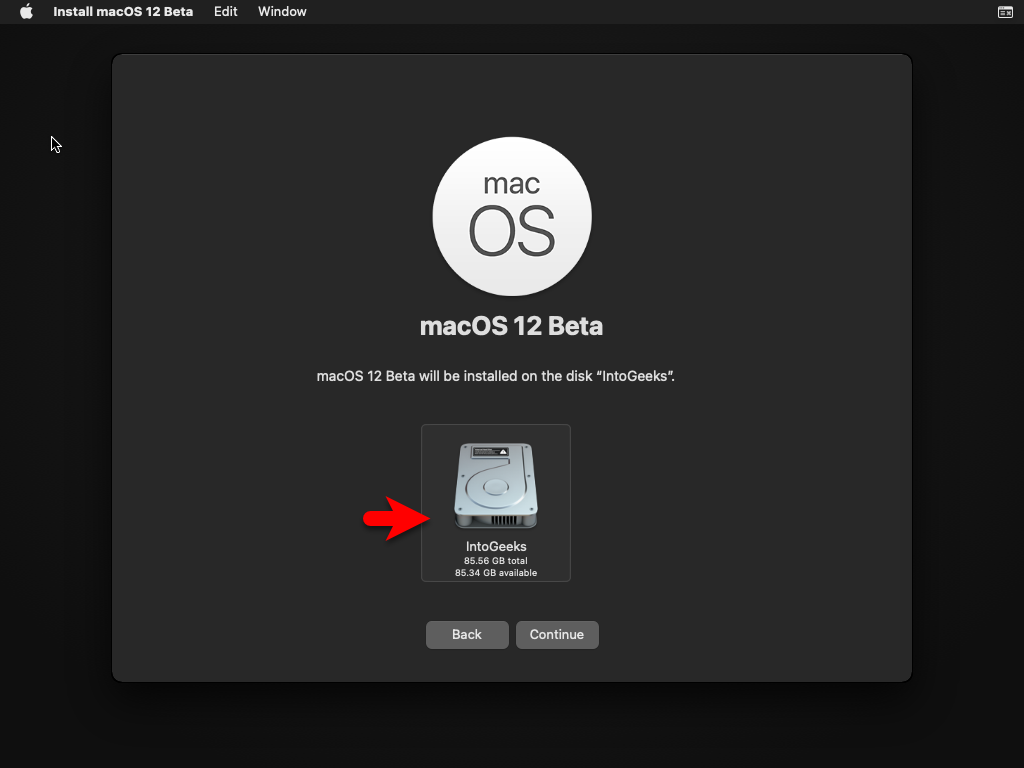
Select the disk to install macOS Monterey on it, the disk that you formatted in the previous step. Simply select that and click on continue.
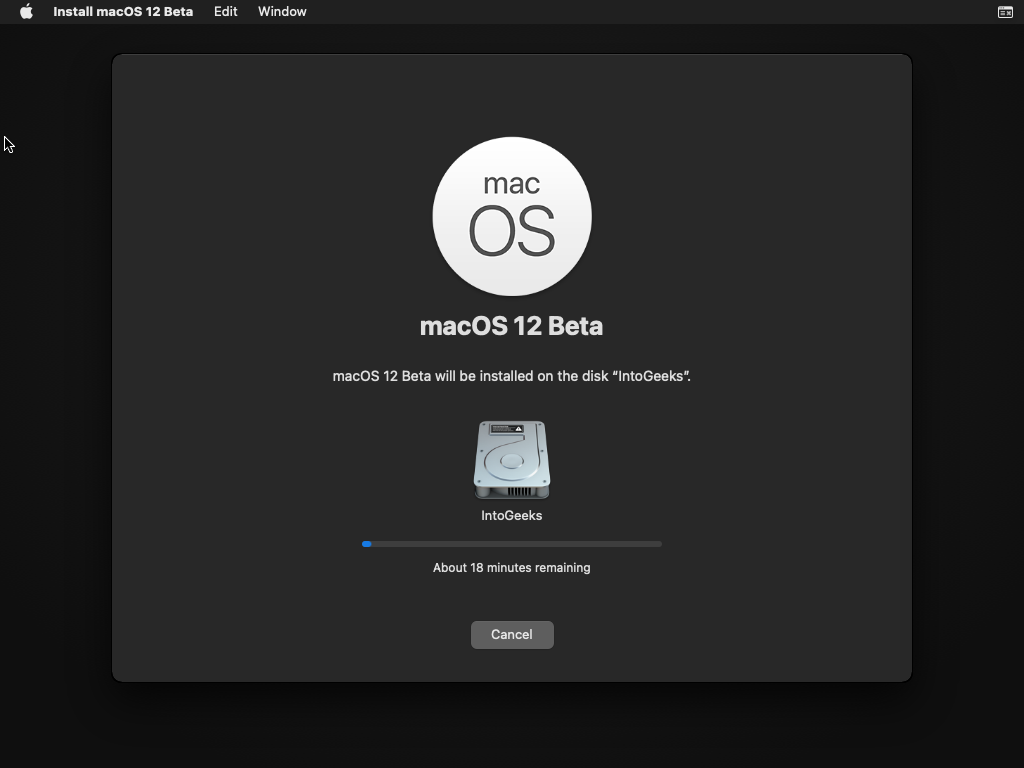
And now the installation will start installing macOS Monterey on VMware on Windows PC. So, the installation may take lots of time, also during the installation the virtual machine will restart several times. Don’t do anything until the installation should complete.
Complete the Basic Settings of macOS Monterey on VMware
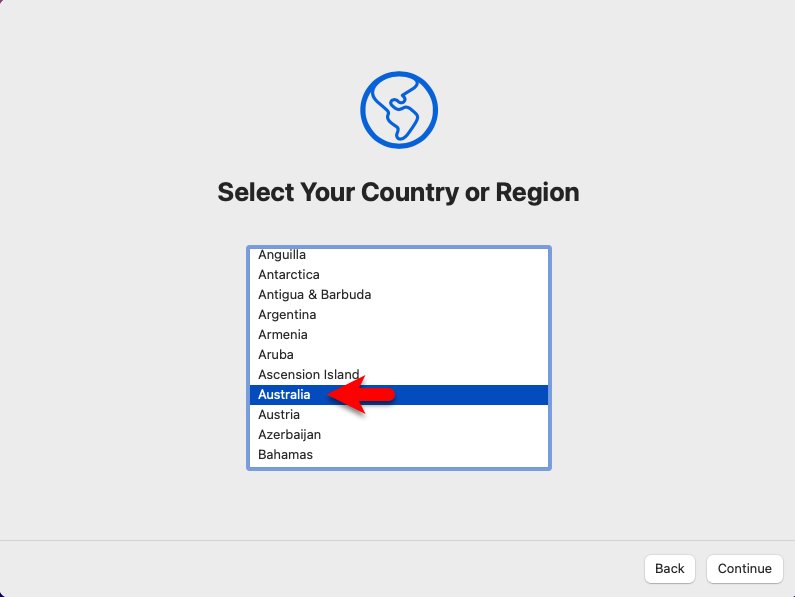
While the installation successfully completed, therefore, for the first use you have to complete the basic settings. In this case, on the first window select the country where you live and click continue.
In the written and spoken languages window, you can customize your languages there if you want to use more than one language on macOS Monterey.

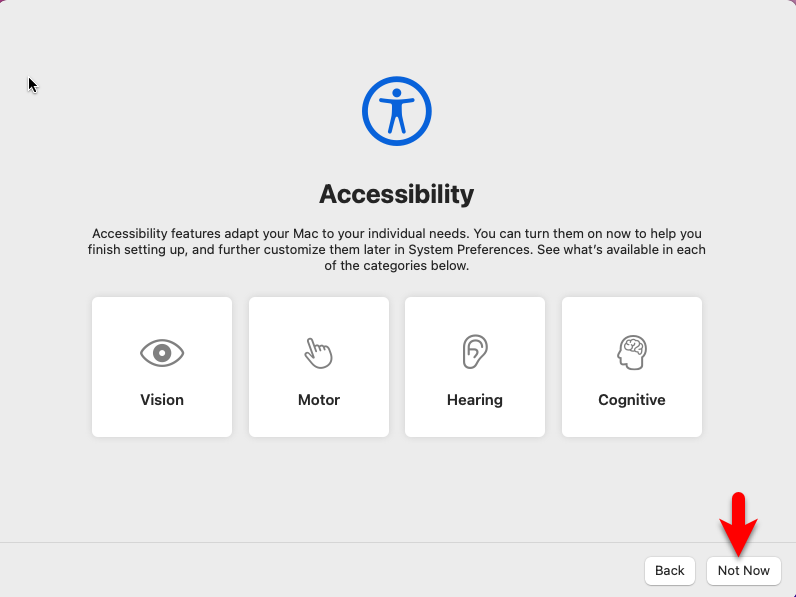
On the accessibility window simply click not now.
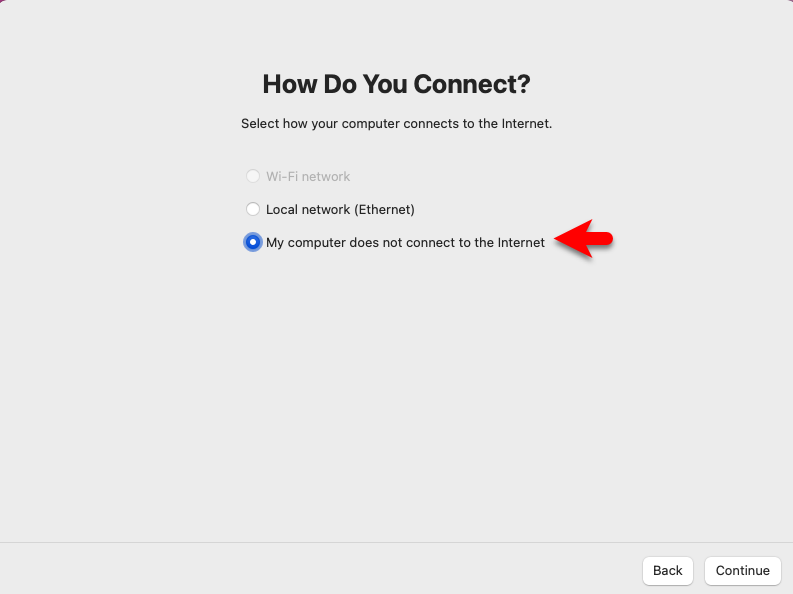
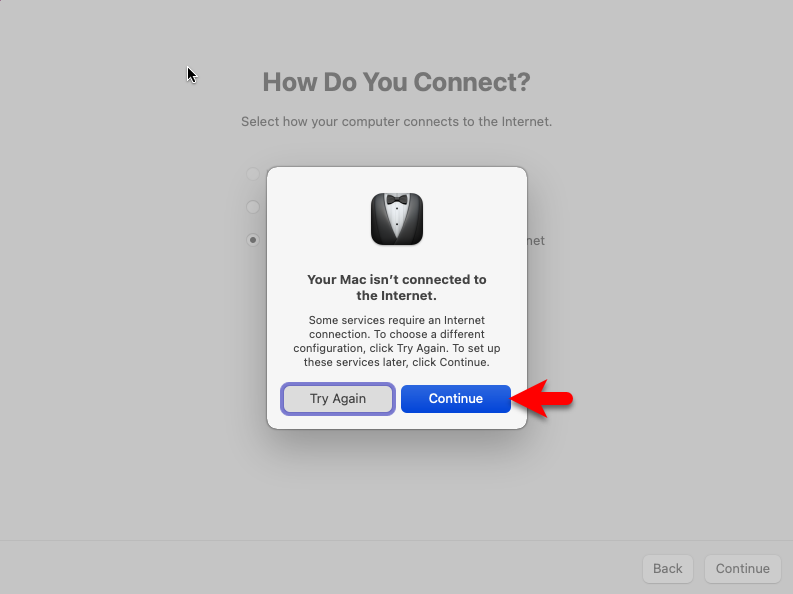
Select the option my computer does not connect to the internet and click continue.
Your Mac isn’t connected to the internet. Some services require an internet connection. To choose a different configuration, click try again. To set up these services click continue.
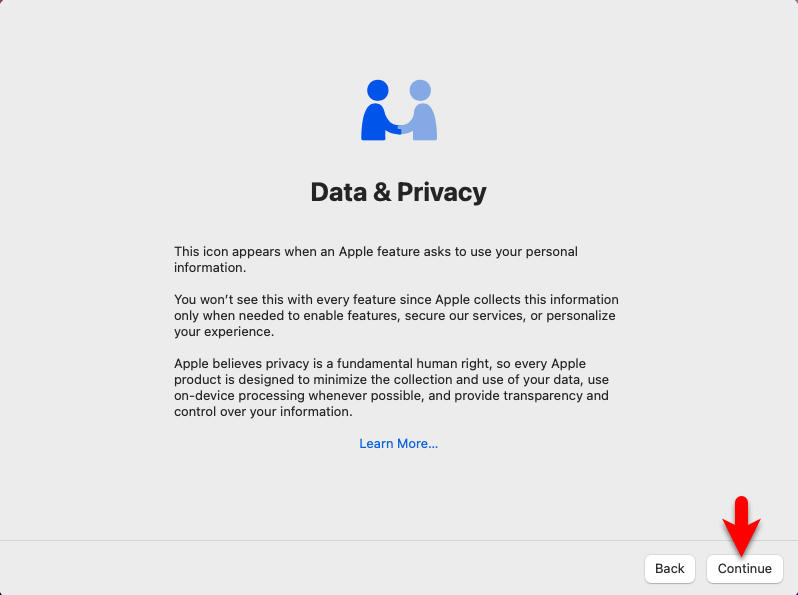
On the Data & Privacy window simply click continue.
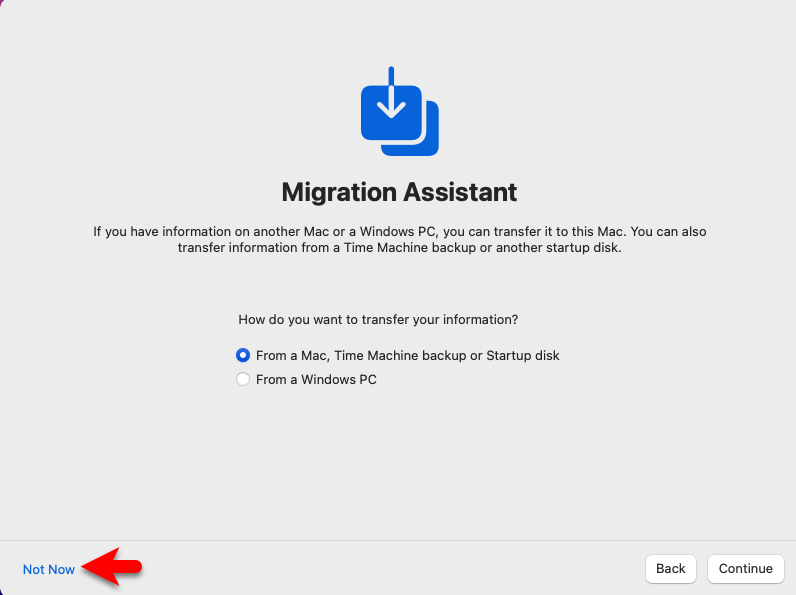
On the migration assistant window simply click on the not now option.
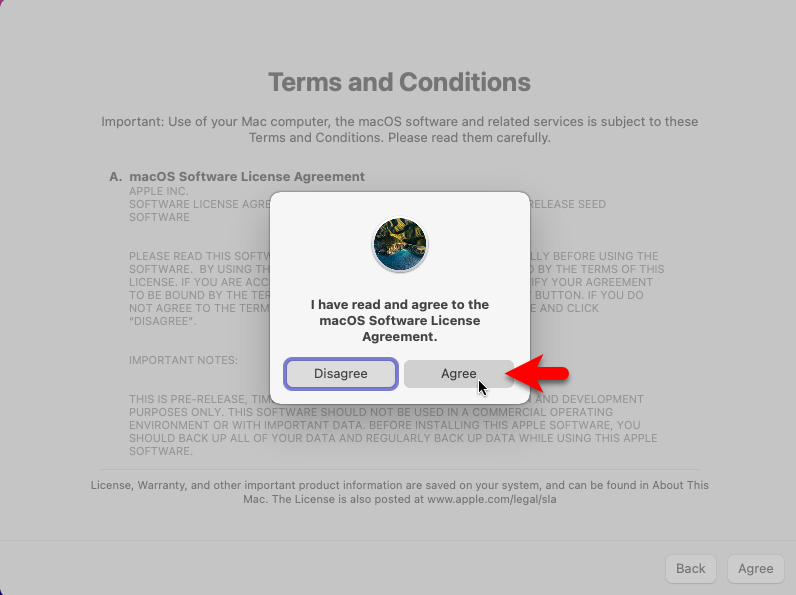
Agree with the terms and conditions of macOS Monterey.
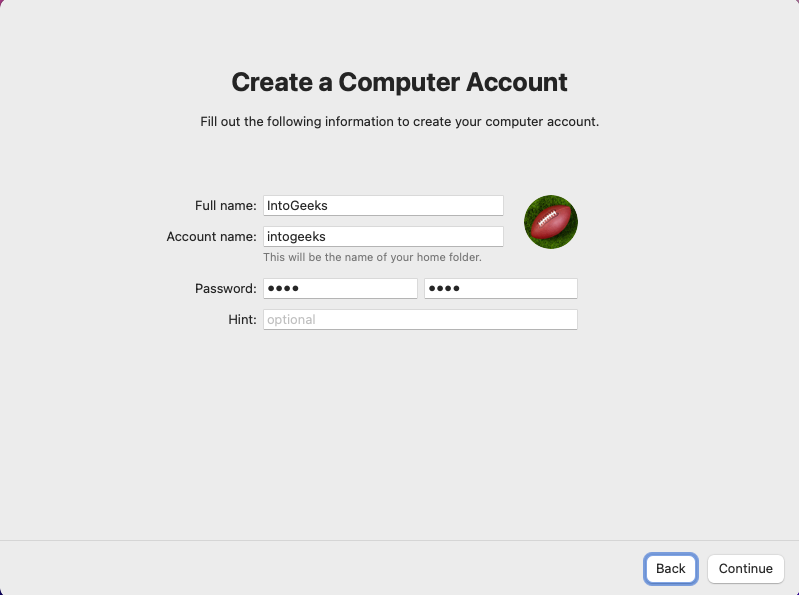
Create your computer account by entering your name, account name, and password, confirming your password, and clicking continues.
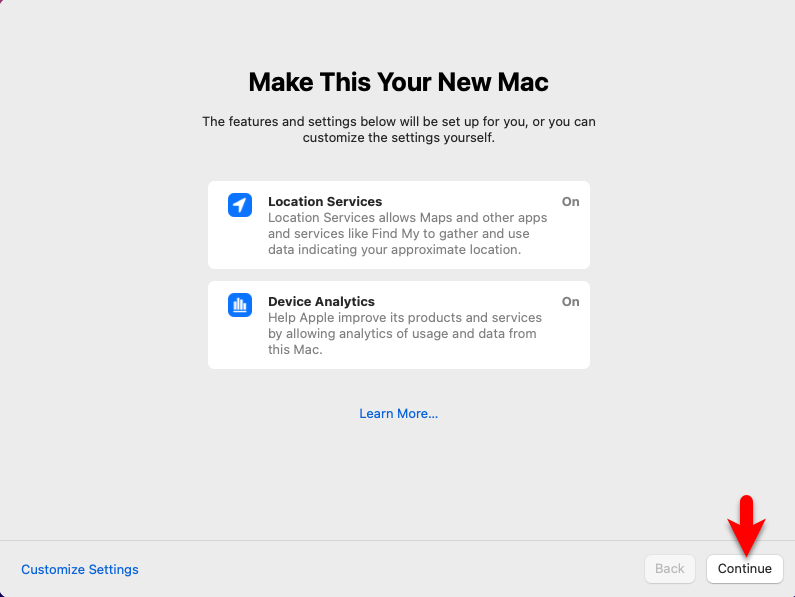
Now you can customize the settings for location services, device analytics, and much more. If you want to make any changes then do it, if not then simply click continue.
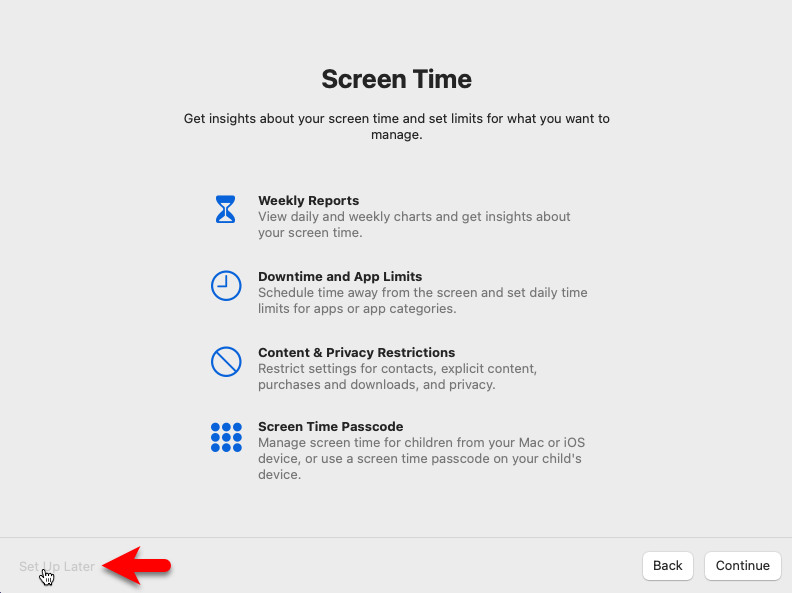
On the screen time window simply click on the set up later option.
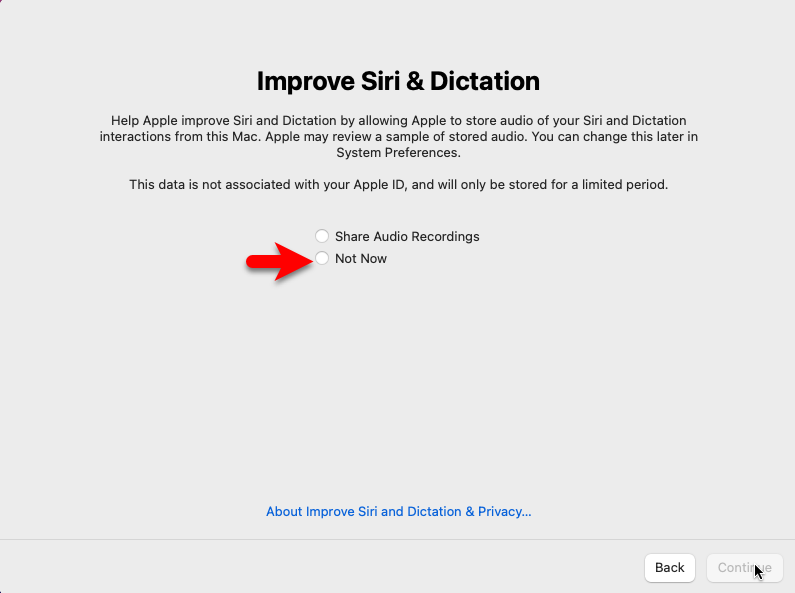
In Siri & Direction window select the not now option, and click continue.
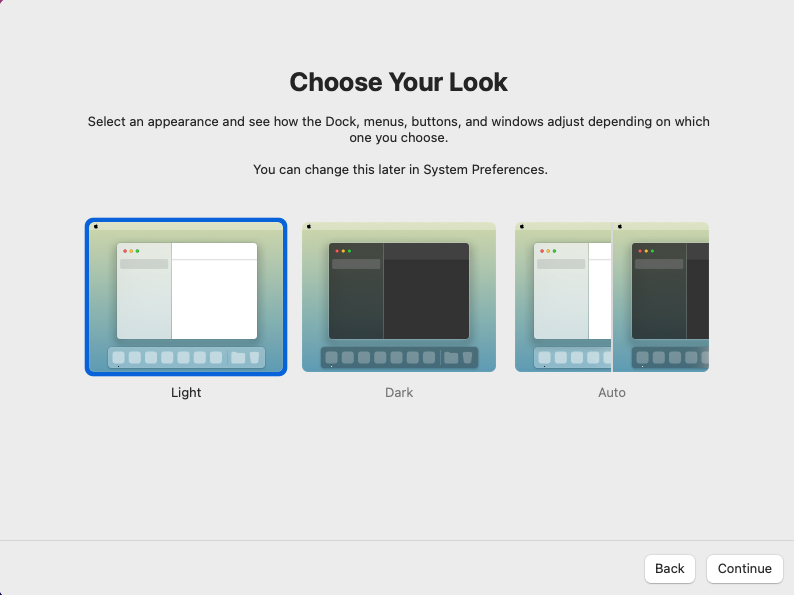
Select your look for macOS Monterey on VMware on Windows PC and click continue.
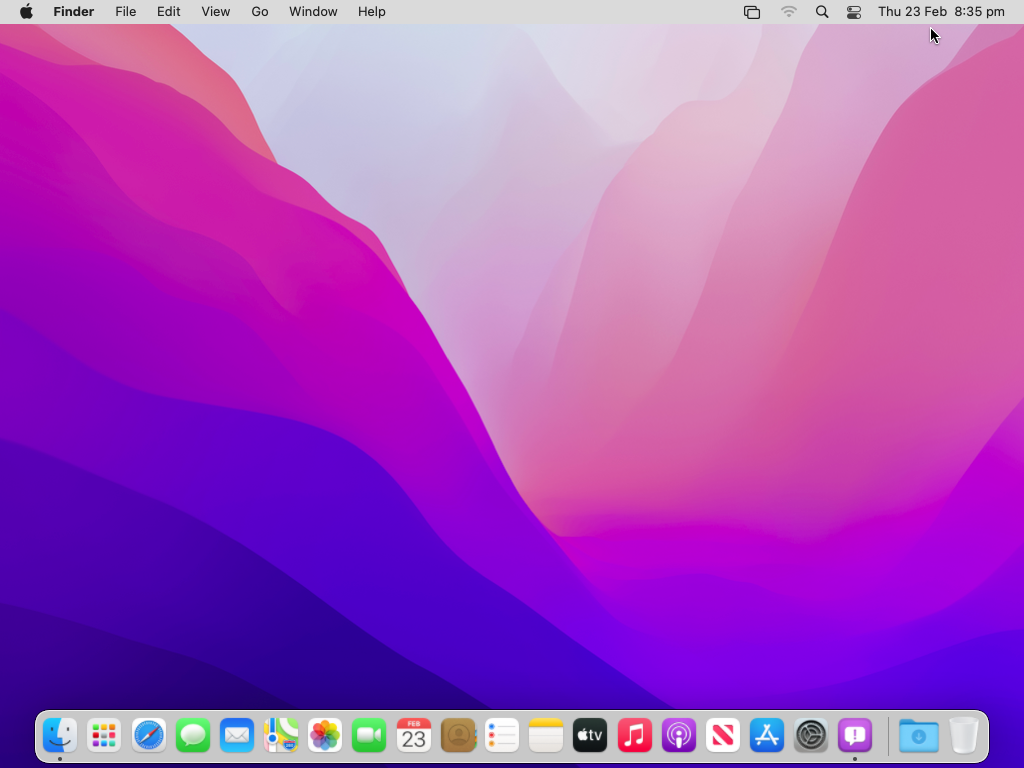
And finally, macOS Monterey is successfully installed on VMware on Windows PC perfectly.
Conclusion
The only thing that remains in this part of the installation of macOS Monterey is only the VMware Tools. The VMware tools will help you to give full access to a screen mode on VMware on Windows PC. Also, the VMware Tools allows you to enable the drag & drop method on between macOS Monterey guest OS and the actual host machine. The installation is pretty much easy simply click on the VM tab on the top>click on Install VMware Tools, then continue the installation of VMware Tools on macOS Monterey.

13 Comments