How to Install macOS Mojave Final on VMware on Windows PC?
How to Install macOS Mojave Final on VMware on Windows PC?
macOS Mojave version 10.14 is the fifteenth major release of macOS Apple Inc operating system for Macintosh computers. macOS Mojave was announced at one of the most significant Apple events, the WWDC Worldwide developer conference on June 4, 2018. And the public version of macOS Mojave 10.14 was released on September 28, 2018. And macOS Mojave name refers to the Mojave desert a part of a series of California-themed names. Also, macOS Mojave is the major successor release after macOS High Sierra.
Alongside macOS Mojave the most significant event of Apple introduced several new products such as MacBook, iOS, iPadOS, tvOS, WatchOS, and many more. And macOS Mojave is the first Apple operating system that brings several iOS apps to the desktop operating system. The iOS apps include Apple News, Voice Memos, and Home. The macOS Mojave includes comprehensive dark mode, which is one of the most users awaited features. Also, macOS Mojave is the final version of the Apple operating system that supports the 32-Bit software.
As macOS Mojave includes bunches of the best features, and the first interesting feature is dark mode. That dark mode inside macOS Mojave 10.14 made macOS Mojave more interesting to use daily. And there are other features such as Live background, major updates on Finder, News, Stocks, Voice Memos, Homes, group FaceTime, and All New Mac-App Store.
Through this article, you will be able to learn a step-by-step guide on how to install macOS Mojave 10.14 on VMware on Windows PC. This article is for those who have a lake of Mac machines, and the virtual machines will allow them to test macOS Mojave on Windows PC. The only requirements are a 64-Bit operating system, 8GB of RAM, and 40GB of disk space to run macOS Mojave on a Windows PC.
Related:
- How to Install macOS Big Sur Final on VMware on Windows PC?
- How to Install macOS Ventura 13 on VMware on Windows PC?
- How to Install macOS Ventura 13 on VirtualBox on Windows PC?
- How to Install macOS Monterey Final on VirtualBox on Windows PC?
- How to Install macOS Monterey Final on VMware on Windows PC?
- How to Install macOS Big Sur Final on VirtualBox on Windows PC?
- How to Install macOS Catalina Final on VMware on Windows PC?
- How to Install macOS Catalina Final on VirtualBox on Windows PC?
- How to Install macOS Mojave Final on VirtualBox on Windows PC?
How to Install macOS Mojave Final on VMware on Windows PC?
To get started with macOS Mojave installation on VMware on Windows PC. You have to fulfill some requirements such as VMware Workstation/VMware Player. And the second thing is the macOS Mojave ISO image file or VMDK file. Everything is available in the below-down section. Also, if you want to run macOS Mojave on VMware Workstation, then VMware Workstation will work only for free for a few days. And the VMware Player is completely free and won’t require any activation.
Also, macOS Mojave 10.14 is compatible with the below-down machines.
- iMac (Late 2012 or later)
- iMac Pro
- MacBook (Early 2015 or later)
- MacBook Air (Mid 2012 or later)
- MacBook Pro (Mid 2012 or later)
- Mac Mini (Late 2012 or later)
- Mac Pro (Mid 2010 or later)
- Download the macOS Mojave ISO Image file
- Download the macOS Mojave vmdk file
- Download VMware Workstation Player’s Latest version
Create a New Virtual Machine for macOS Mojave on VMware
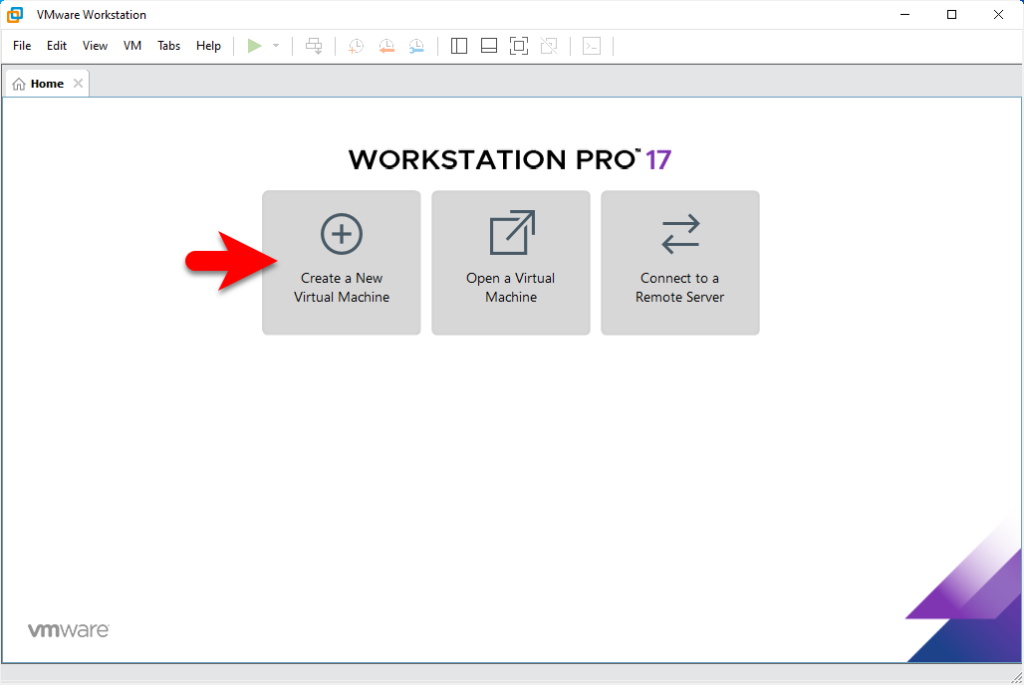
Firstly, you need to download and install VMware Workstation on your Windows PC. Once you have done its installation open it and on the main window click on Create a new virtual machine option.
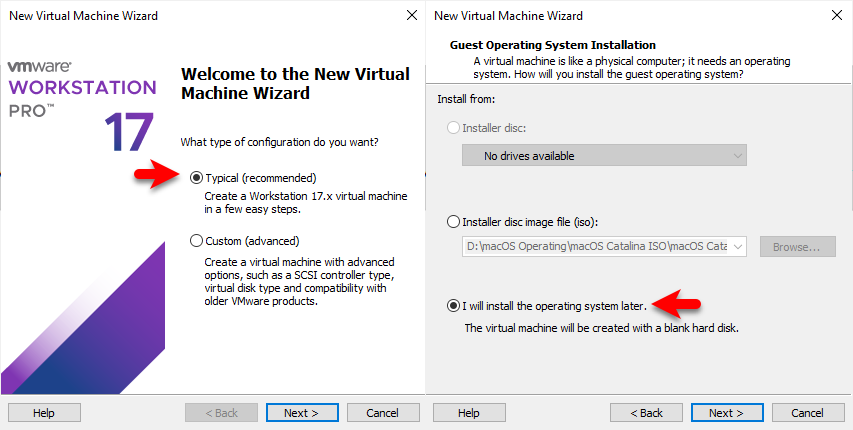
When the next window opened, select the typical (recommended) then click next. Select the option I will install the operating system later and click next.
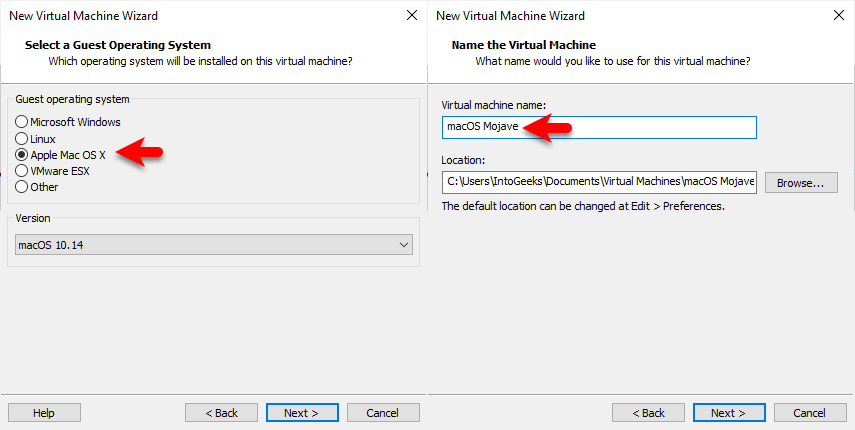
Select the guest operating system Apple Mac OS X, select the version macOS 10.14 then click next. Choose the virtual machine name, specify the location, and click next.
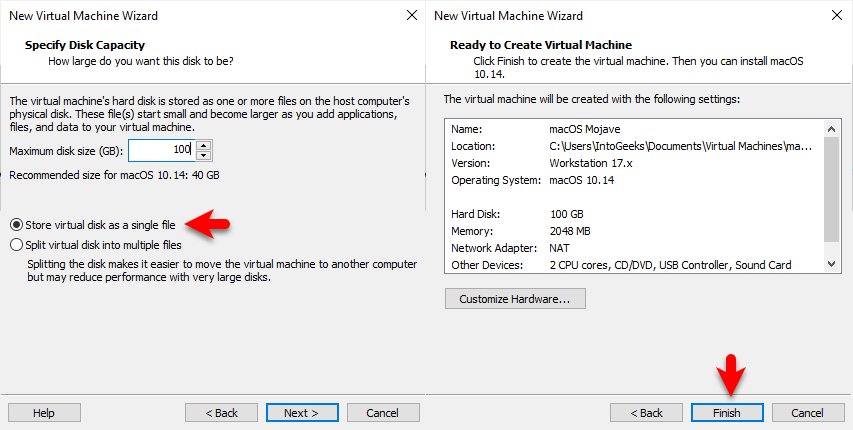
Choose the option “Store virtual disk as a single file”, then select the maximum disk size for macOS Mojave then click next. In the final step click finish to create the virtual machine.
Edit the Virtual Machine of macOS Mojave for Better Performance
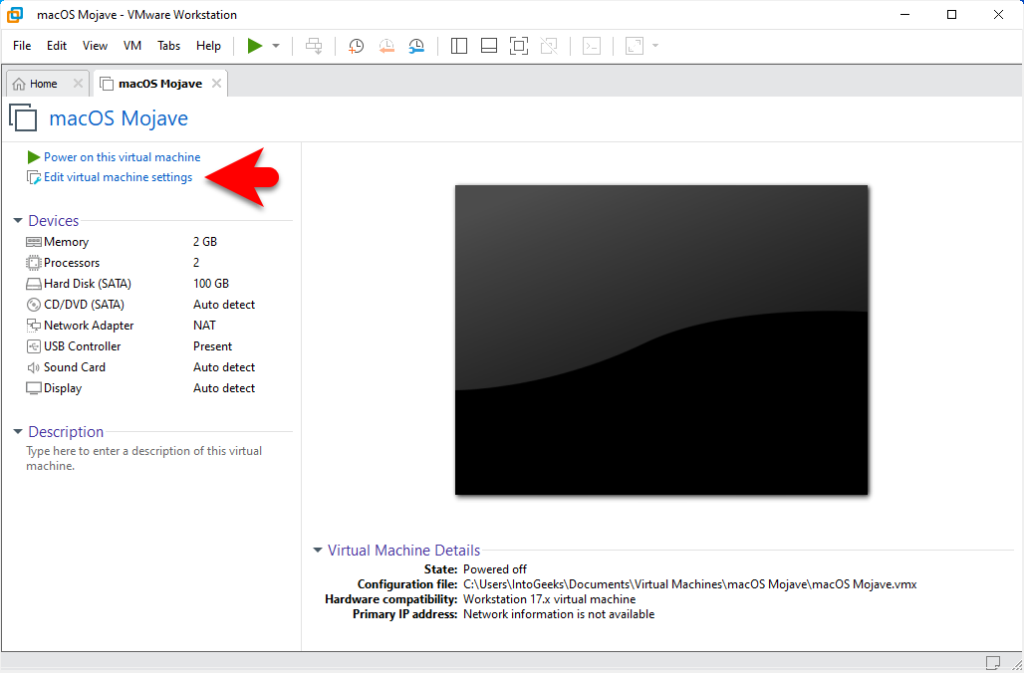
When the virtual machine is successfully created for macOS Mojave, then you need to edit some settings for better performance. Simply click on the edit virtual machine settings option, to open up the settings window.
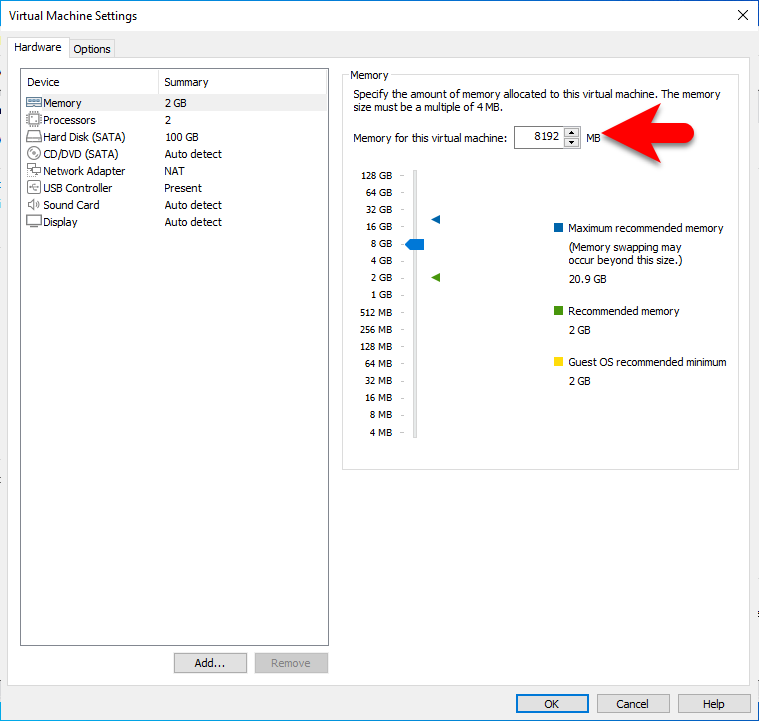
When the settings window opened, from the left-handed window side select the hardware tab, and increase the size of memory.
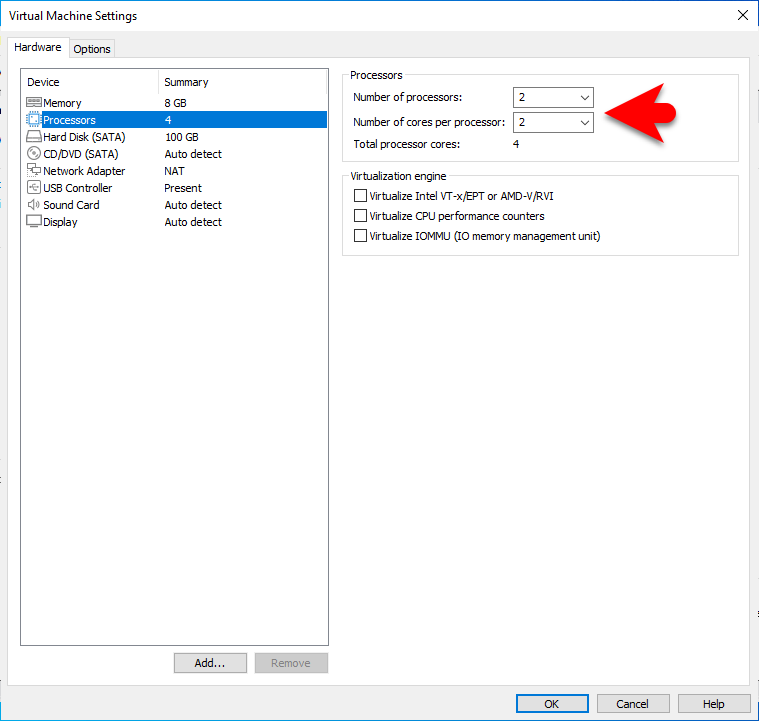
Select the processor tab, and increase the number of processors.
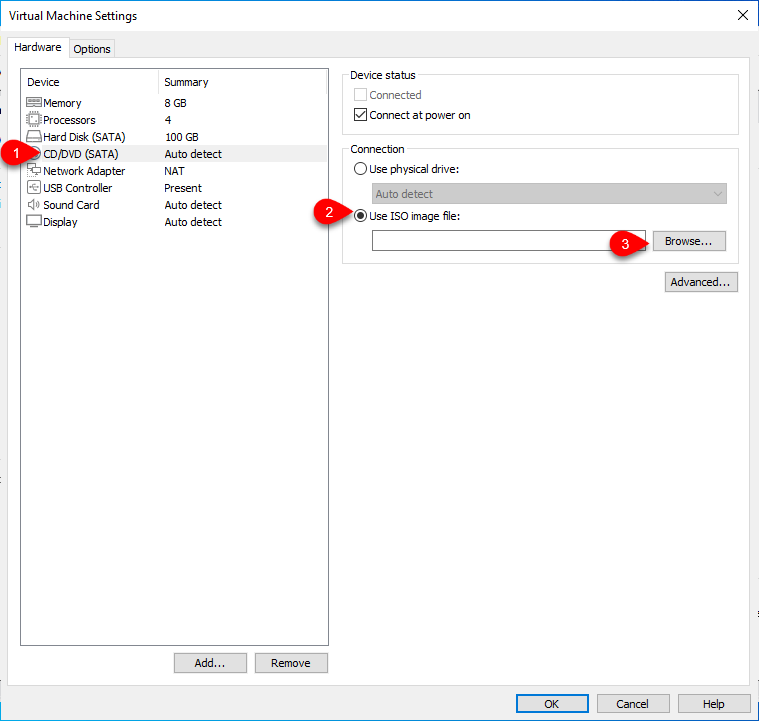
Select the CD/DVD SATA, click on Use ISO image file, then click on the browse option to add the macOS Mojave ISO Image file.
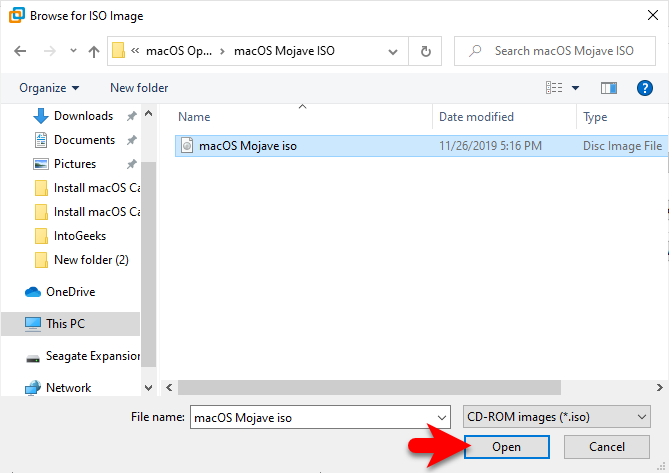
Select the macOS Mojave ISO image file and click open.
Select the USB Controller tab, select USB 3.1, then click on the OK option to save the changes.

Edit the VMX File
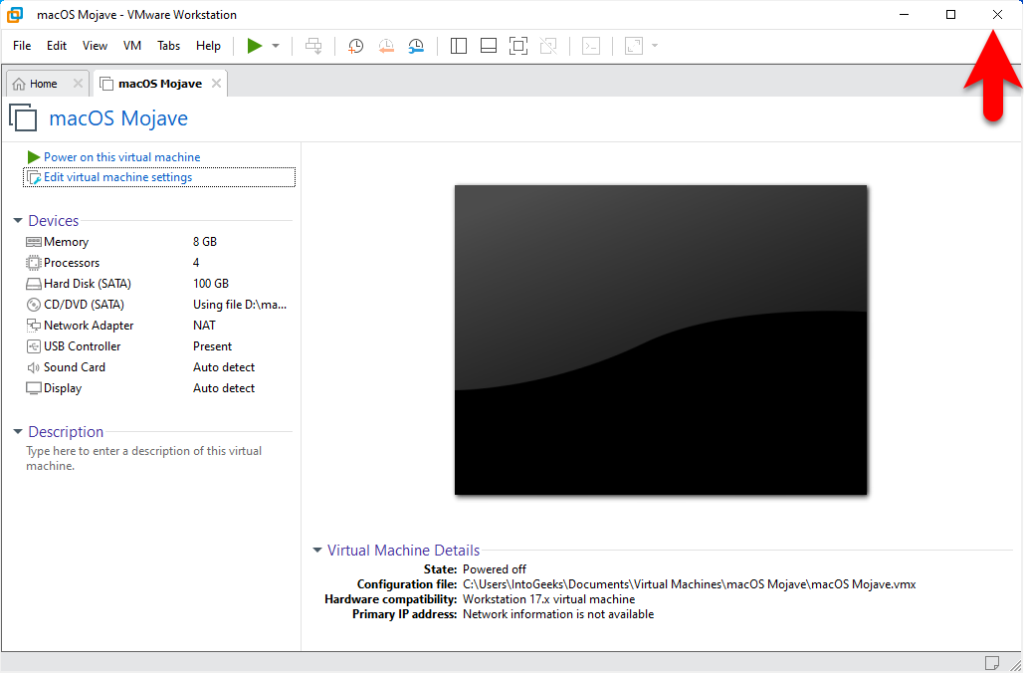
Once you have created the virtual machine of macOS Mojave on VMware, therefore, you need to add the vmx file. What is a vmx file? vmx file is the configuration of macOS on VMware Workstation on a Windows PC. If you don’t add the vmx file then you won’t be able to continue the installation of macOS on VMware single step. So, to edit the vmx file simply close up the VMware Workstation.
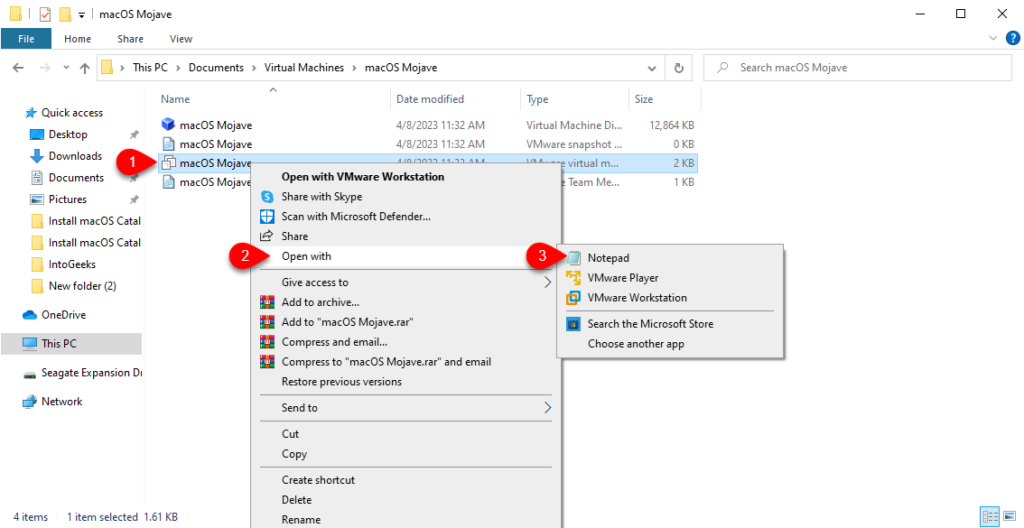
When the VMware is completely closed head over to the virtual machine folder>open up the macOS Mojave folder>Right-click on the vmx file>and open with Notepad.
When the vmx file is opened with Notepad, scroll down to the end then add the below commands. Once the commands are added, simply click on file>and click save as.
Smc.version = "0"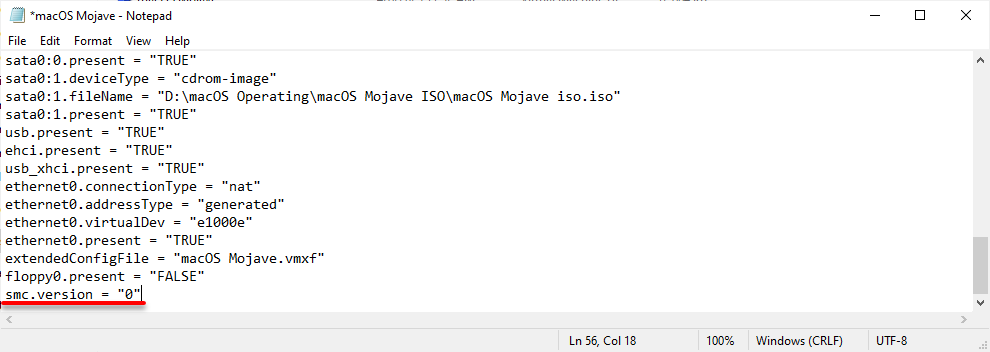
Perform a Clean Installation of macOS Mojave on VMware on Windows PC
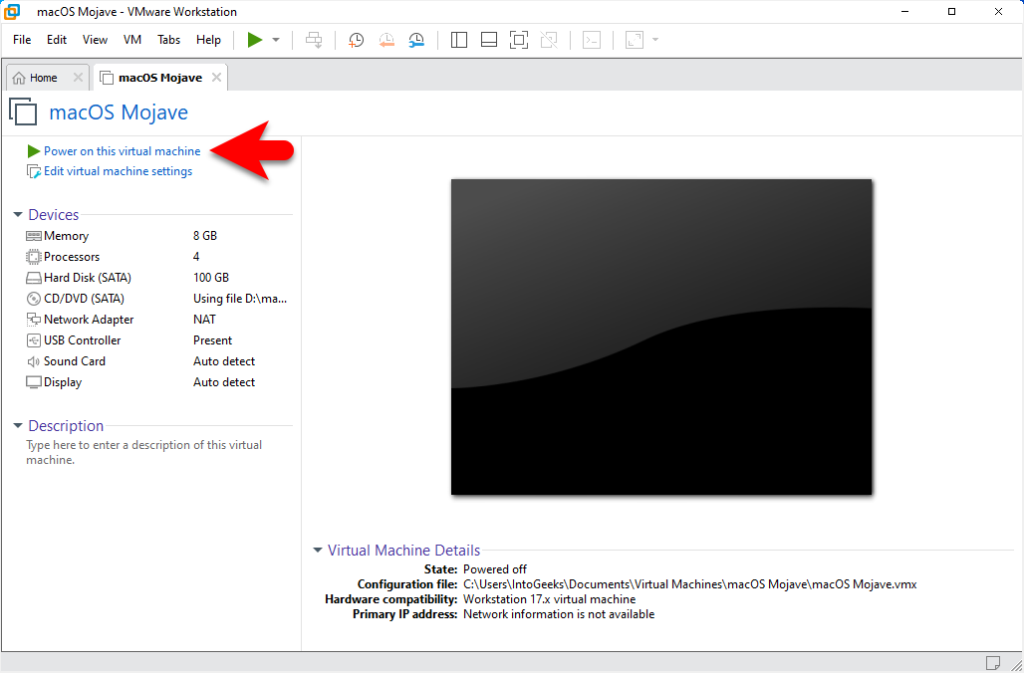
When the virtual machine of macOS Mojave is successfully created on VMware Workstation, and the vmx file is added. So, now it’s time to install the macOS Mojave on VMware on Windows PC. To install macOS Mojave again open up the VMware Workstation, and click on “Power on this virtual machine”.
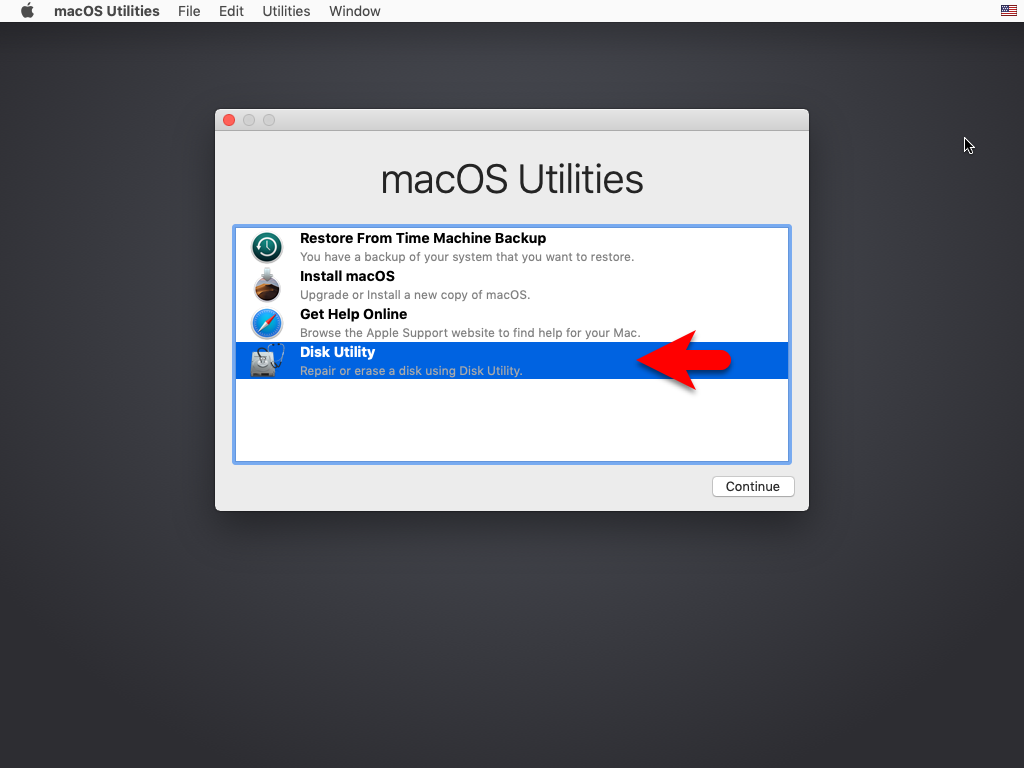
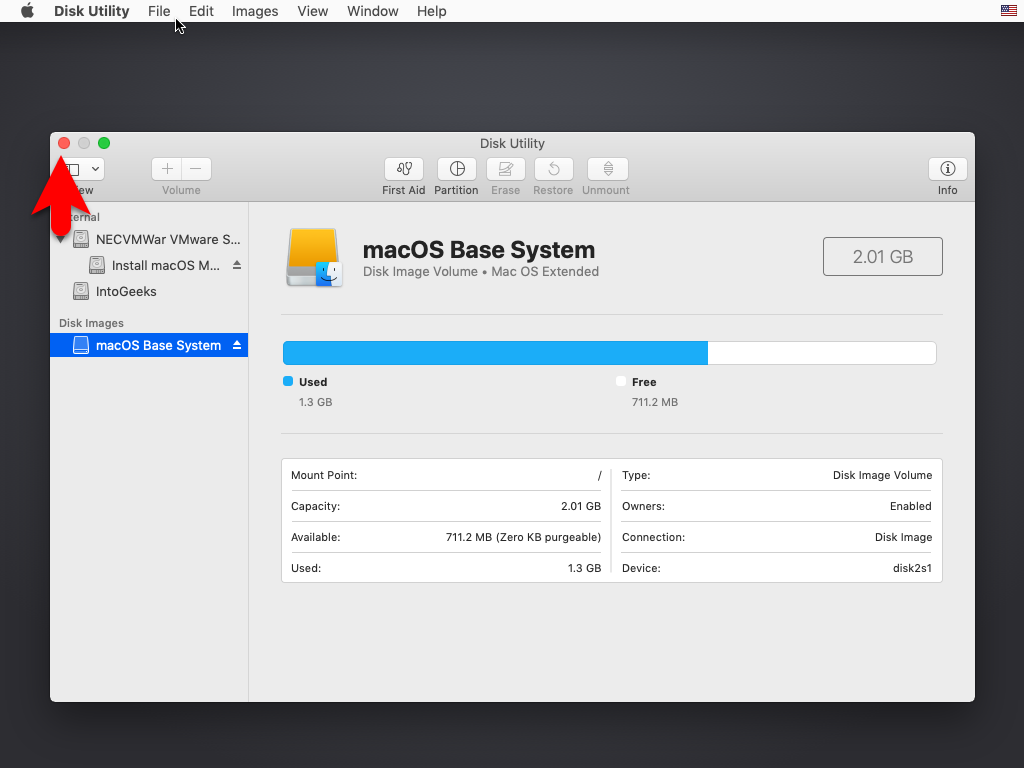
When the installation launches, on the first window select your language and click continue. On the next window select the disk utility option and click continue.
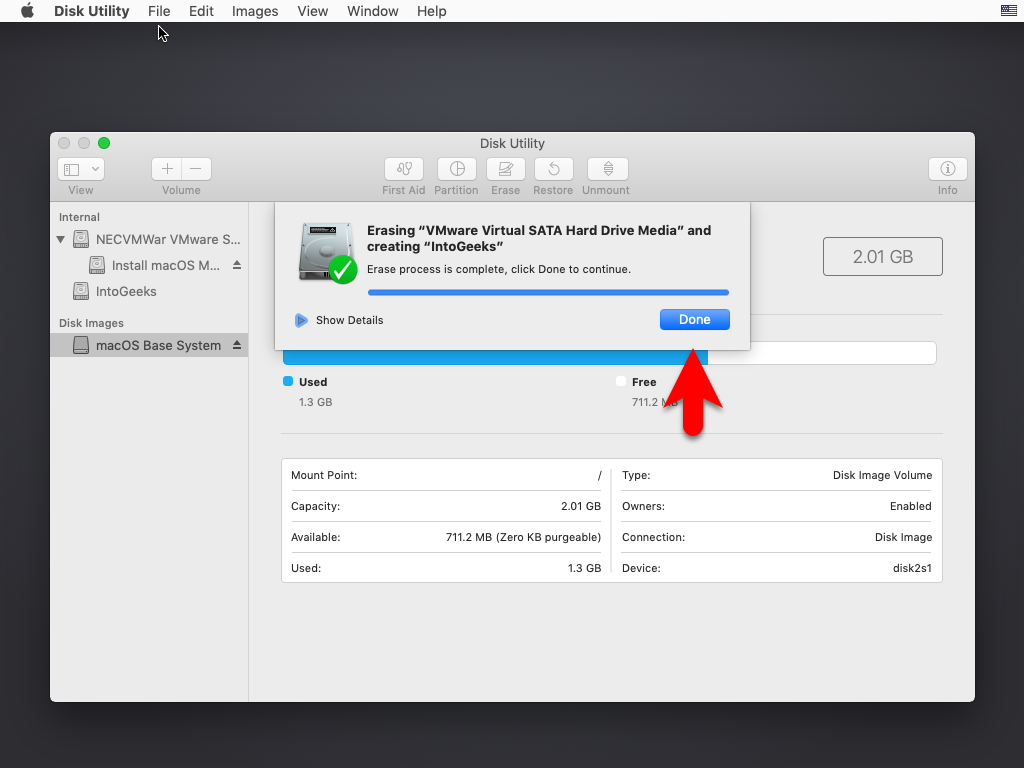
When the Utility window opened, from the left-handed window side select the “VMware Virtual SATA Hard Disk Media”, then click on erase, and format the disk according to the below parameters.
- Name: Optional
- Format: Mac OS X Extended Journaled
- Scheme: GUID Partition Map

When the disk is erased click on the done option.
Close the disk utility.
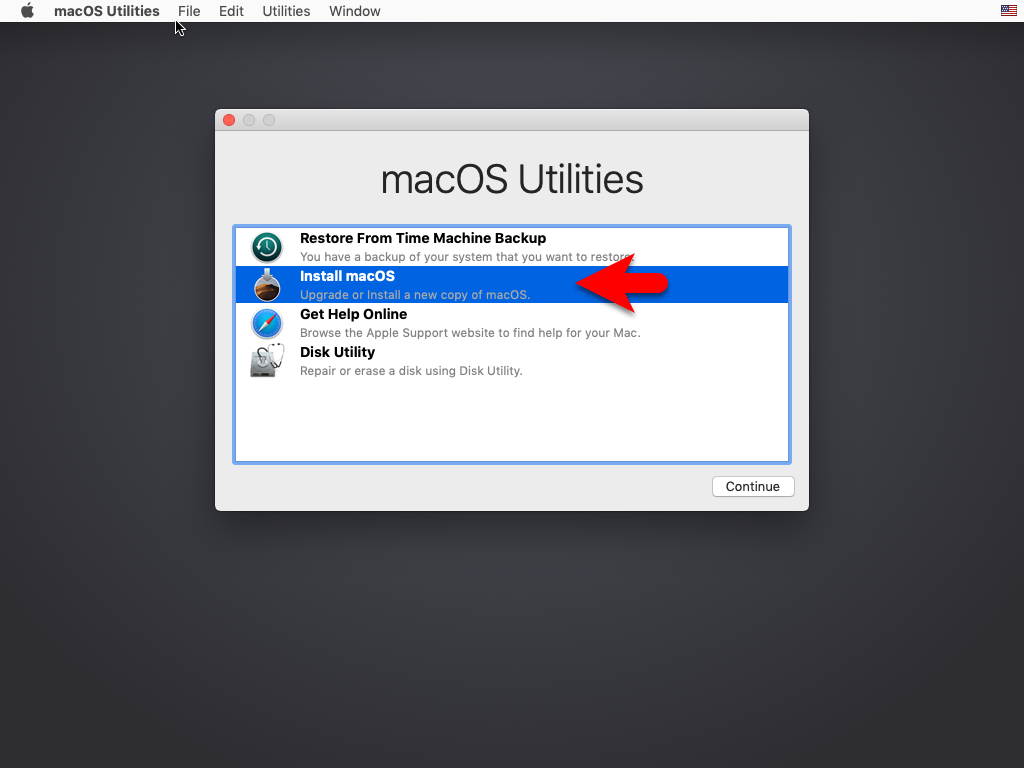
Now again on the utility window select Install macOS and click continue.
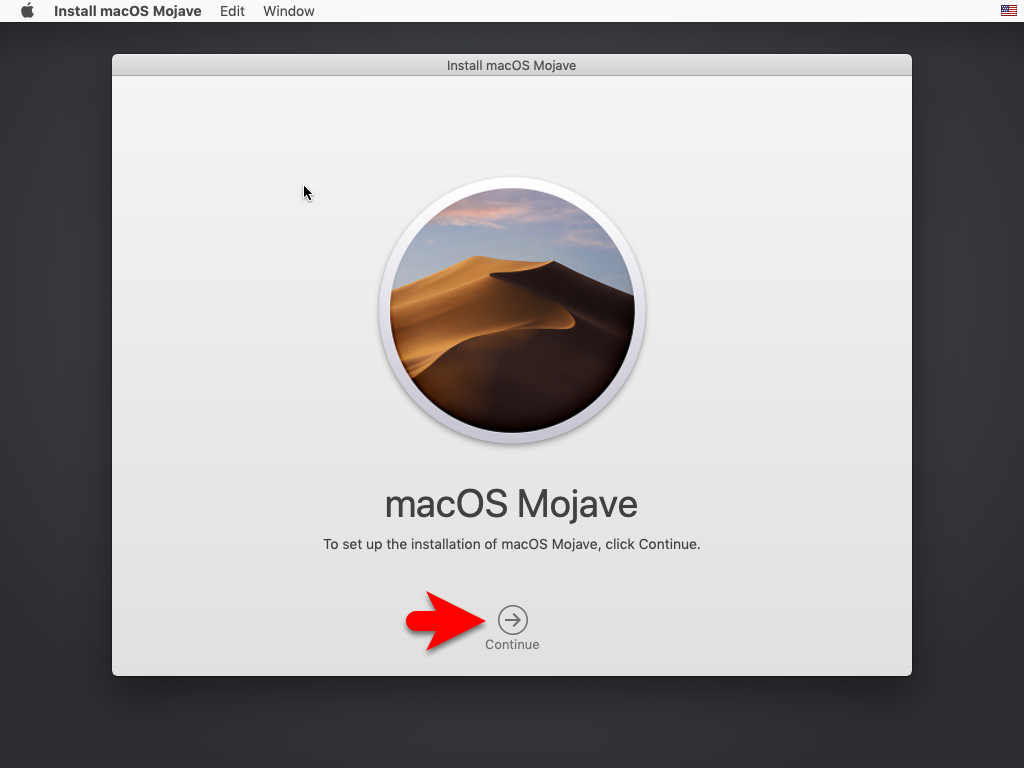
To set up the installation of macOS Mojave click continue.
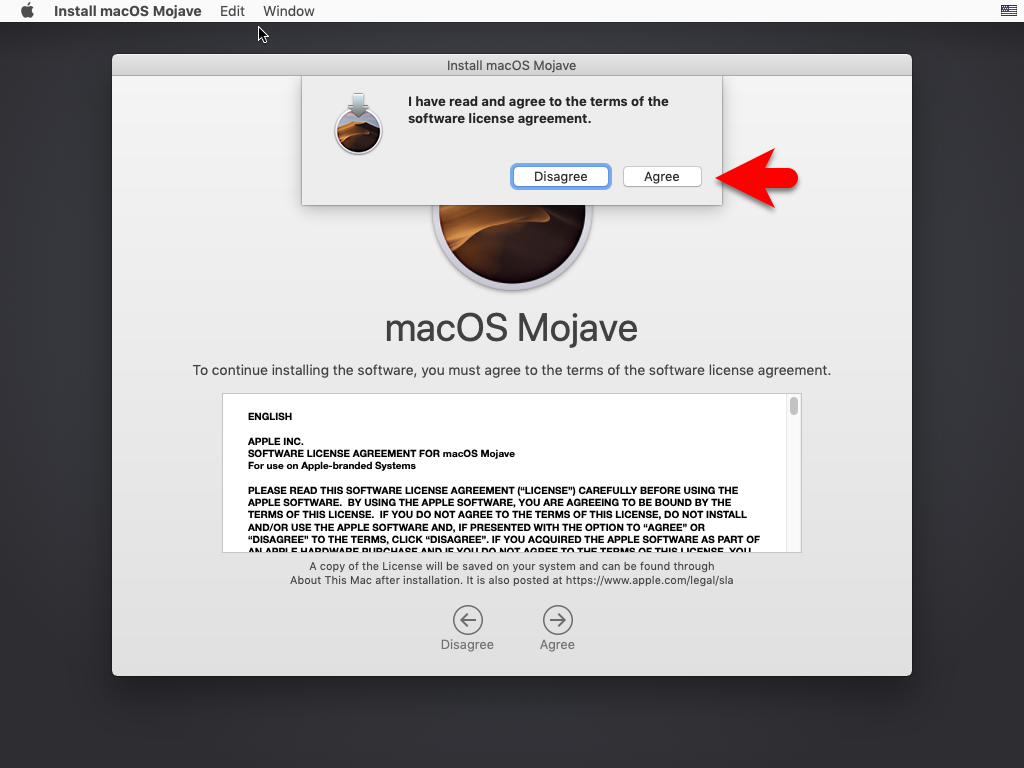
Agree with the terms and conditions of macOS Mojave.
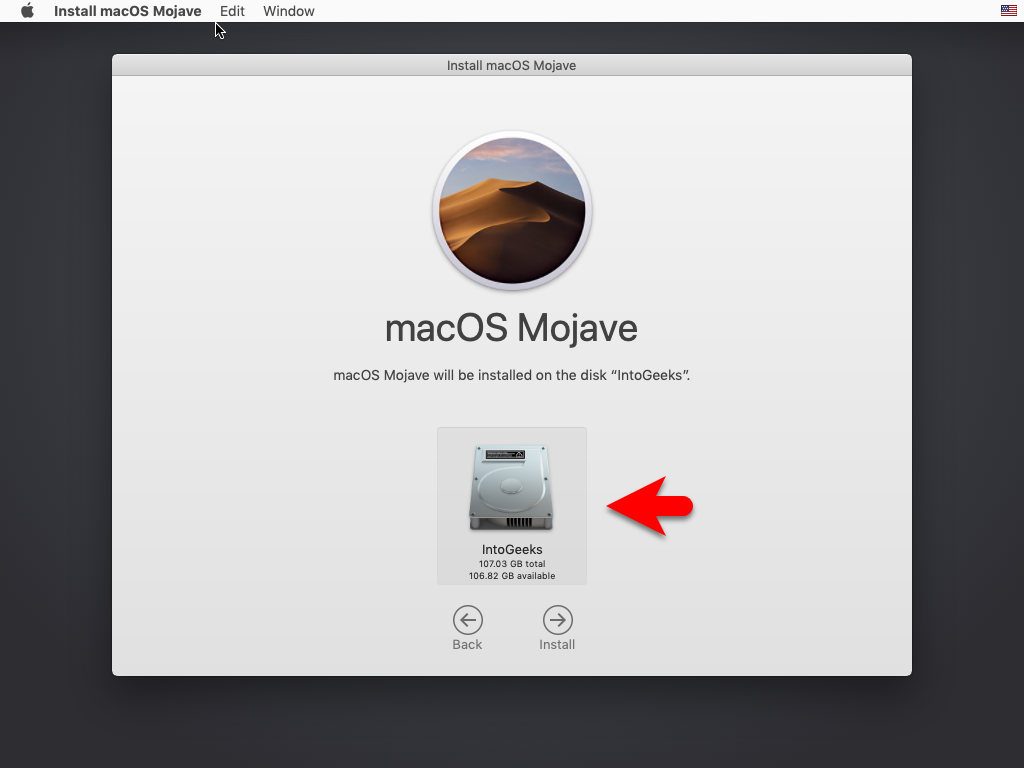
Select the disk where you want to install macOS Mojave, then click next.
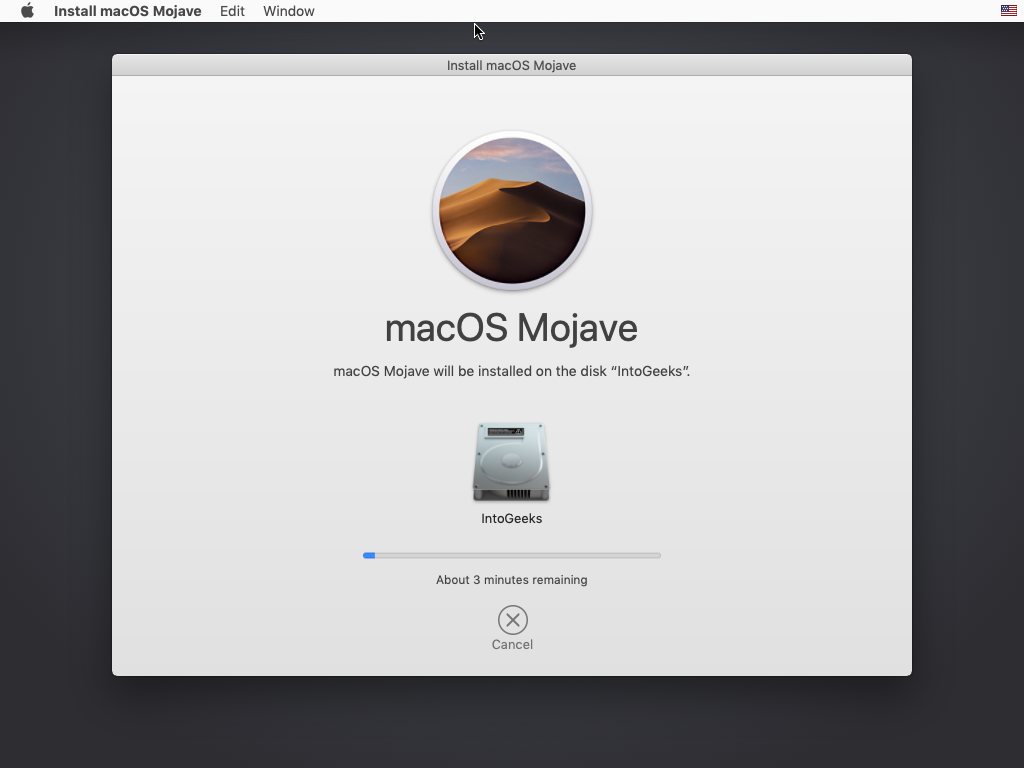
Now it will start installing macOS Mojave on VMware on Windows PC. So the installation process will take time, wait for it until it should complete. Also, during the installation, the virtual machine will restart several times.
Complete the Basic Settings of macOS Mojave
When the installation of macOS Mojave is completed on VMware on Windows PC. Then to use macOS Mojave on Windows PC, you need to complete a few steps of settings.
- On the first window select your language and click continue
- Select your keyboard and click continue
- On the data & privacy window simply click continue
- Click on Don’t transfer any information right now and click continue
- Click on Set up later on the Apple ID window
- Agree with the terms and conditions of macOS Mojave
- Create your computer account such as, enter your full name, account name, and password, and confirm the password.
- On the express setup window click continue
- Choose your look for macOS Mojave and click continue
- And finally, macOS Mojave 10.14 is successfully installed on VMware on Windows PC


Conclusion
When the macOS Mojave is successfully installed on VMware on Windows PC. You can use it continuously without any issues as an actual machine. Internet, drag & drop each everything will work perfectly on VMware on Windows PC. Also, to use the full-screen mode of macOS Mojave on VMware, then you have to install the VMware Tools.


3 Comments