How to Install macOS Monterey Final on VirtualBox on Windows PC?
How to Install macOS Monterey Final on VirtualBox on Windows PC?
macOS Monterey is the latest version of Apple’s desktop operating system for Mac computers, released on October 25, 2021. It introduces new features and improvements across the system, including enhancements to FaceTime, Focus, and Universal Control. One of the most significant changes is the new Focus mode, which allows users to customize notifications and apps based on their current activity, whether it’s work, personal time, or sleep. This feature helps users stay focused and reduce distractions.
Another notable improvement is Universal Control, which enables users to control multiple Apple devices, including Macs and iPads, using a single keyboard and mouse. This feature allows for seamless transitions between devices and makes it easier to use multiple devices together. FaceTime also received a significant update, with new features such as spatial audio, grid view, and the ability to share content during video calls. Additionally, there are new features in Safari, Maps, and the Notes app, among others.
macOS Monterey also includes several under-the-hood improvements, including updates to the Safari browser engine and improved performance on Apple Silicon Macs. It also brings support for Apple’s new ProRes video codec and new accessibility features, such as the ability to control the Mac with eye movements. Overall, macOS Monterey brings several new features and improvements to the Mac, making it a worthwhile upgrade for Mac users.
Related:
- How to Install macOS Big Sur Final on VirtualBox on Windows PC?
- How to Install macOS Big Sur Final on VMware on Windows PC?
- How to Install macOS Monterey Final on VMware on Windows PC?
- How to Install macOS Ventura 13 on VMware on Windows PC?
- How to Install macOS Ventura 13 on VirtualBox on Windows PC?
macOS Monterey is compatible with the following MacBooks machines.
- iMac (Late 2015 or later)
- iMac Pro
- MacBook (Early 2016 or later)
- MacBook Air (Early 2015 or later)
- MacBook Pro (Early 2015 or later)
- Mac Mini (Late 2014 or later)
- Mac Pro (Late 2013 or later)
What is VirtualBox?
VirtualBox is a software application that allows you to run multiple virtual machines on a single physical computer. It enables you to install and run different operating systems (such as Windows, Linux, or macOS) within a virtual environment as if they were installed on separate physical machines.
Using VirtualBox, you can create and manage virtual machines with different configurations and settings, including the amount of memory and storage allocated to each machine. This makes it a useful tool for developers, IT professionals, and anyone who needs to test software applications or run multiple operating systems on a single computer. VirtualBox is free and open-source software, developed by Oracle Corporation, and is available for Windows, macOS, Linux, and Solaris operating systems.
VirtualBox provides you with the best environment to install and test multiple operating systems at the same freely on a single physical drive. So, through this guide, you will be able to learn how to install macOS Monterey Final on VirtualBox on Windows PC. The installation process of macOS Monterey might be more complicated than installing it on VMware Workstation, but it might be interesting for you.
How to Install macOS Monterey Final on VirtualBox on Windows PC?
For installing macOS Monterey on VirtualBox on Windows PC firstly you need to complete the requirements. Such as the first thing is you need to download and install the VirtualBox on your Windows PC + Its extension pack’s latest version. The next thing is to be sure that the Virtualization technology should be enabled on the BIOS of your computer. Then download the macOS Monterey ISO image file, from the below downlinks.
- Enable the virtualization technology on the BIOS of your computer.
- Download and install the latest version of VirtualBox + its extension pack on your Windows PC.
- Download the macOS Monterey ISO image file.
- Create a new virtual machine for macOS Monterey on VirtualBox on Windows PC.
- Apply the commands to configure macOS Monterey on VirtualBox.
- Perform a clean installation of macOS Monterey on VirtualBox on Windows PC.
Here is the guide on how to convert a macOS ISO image file to a vmdk file on Windows PC.
Create a New Virtual Machine for macOS Monterey on VirtualBox on Windows PC
To create a new virtual machine for macOS Monterey simply open up the VirtualBox, then on the first welcome window click on the new option. There are two main methods of creation, the first one is the Expert mode, and the second one is the Guided mode. The Expert mode allows you the easiest way to create a virtual machine for macOS Monterey while you are using the ISO image file.
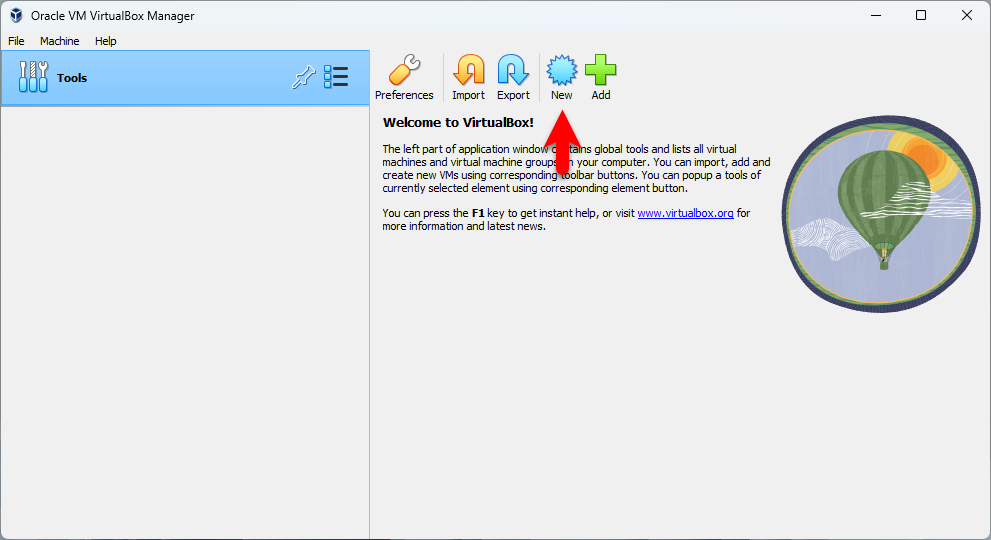
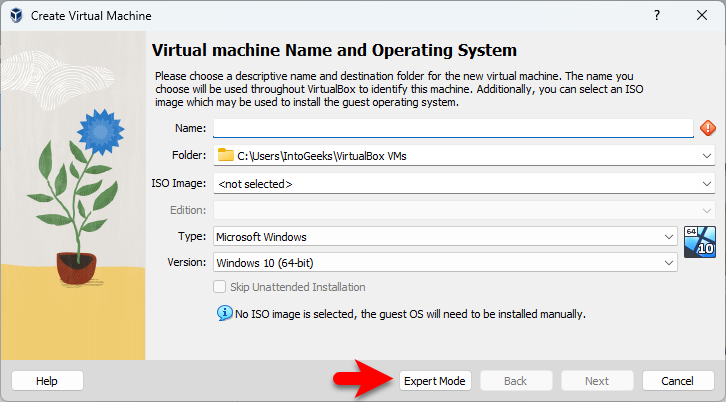
When this window opened click on the expert mode option.
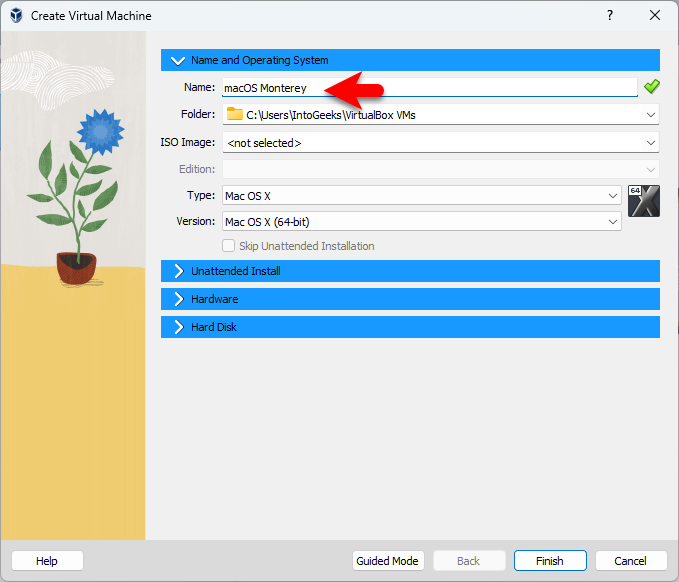
Now type the name of the guest operating system, and specify the folder where to save it. And select the Type Mac OS X, and select the version Mac OS X (64-Bit).
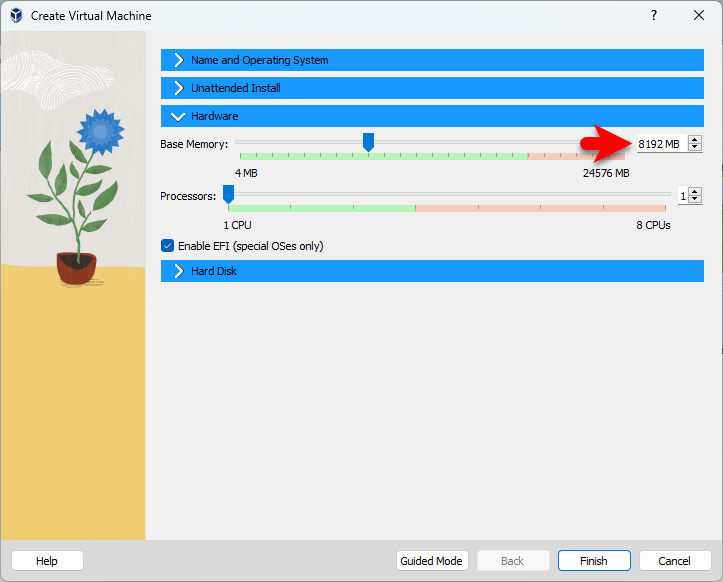
Click on the hardware option, increase the size of memory, and also you can increase the processor.
Select the hard disk option, and specify the hard disk file size and location. Select the hard disk file type VHD (Virtual Hard disk), then click on finish to create the virtual machine.

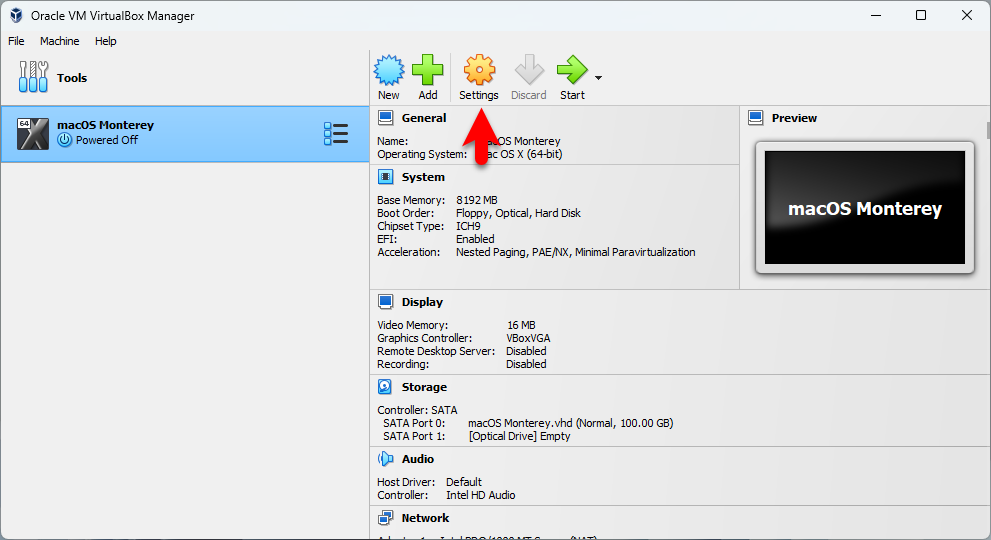
Edit macOS Monterey Virtual Machine Settings for Better Performance
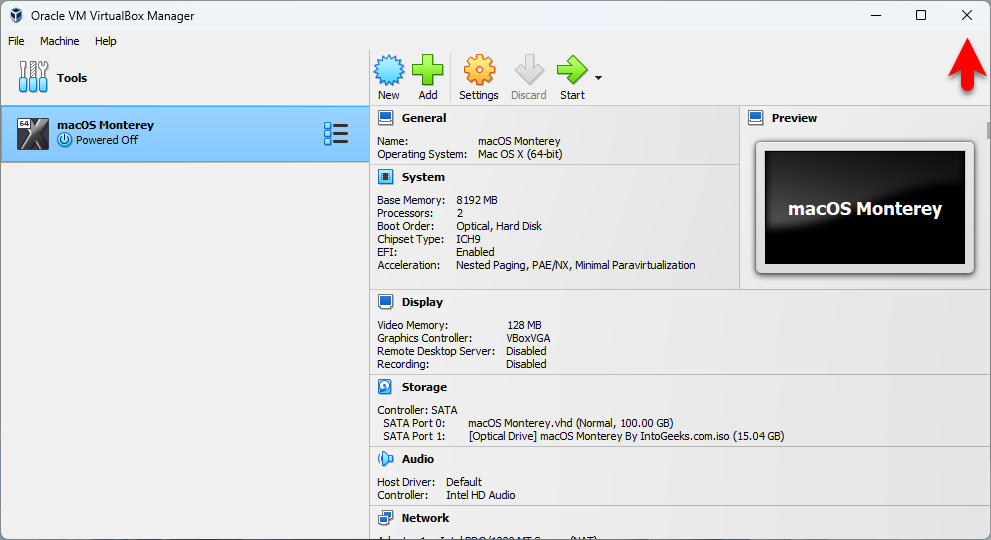
After that, you successfully created the virtual machine for macOS Monterey. So, therefore, for better performance, you need to edit some settings. Simply click on the Settings option to edit the settings.
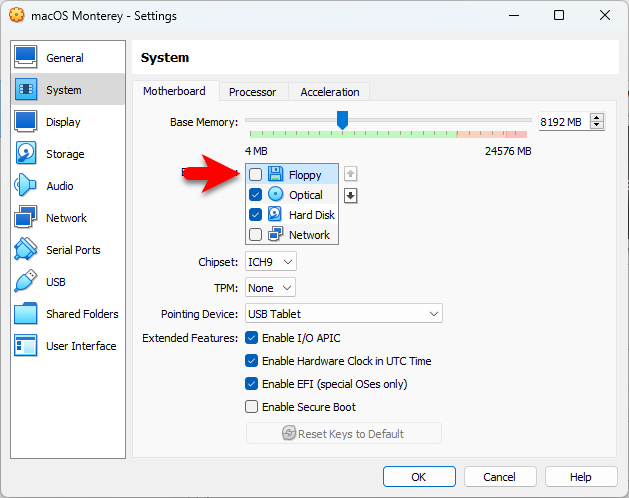
When the settings window opened, from the left-handed window side select the system tab>on the motherboard category and uncheck the floppy disk.
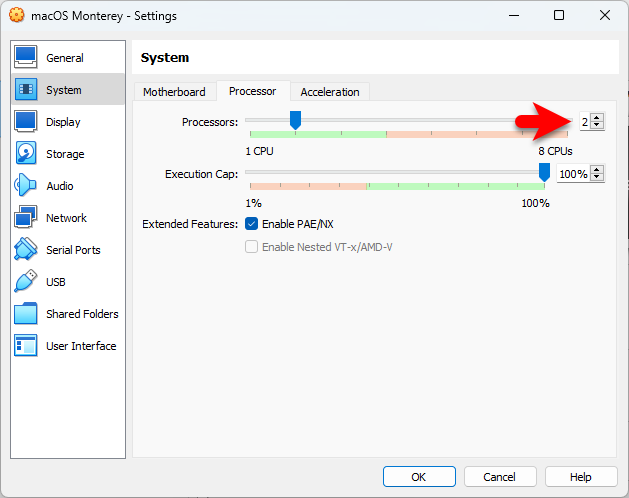
Select the processor tab, and increase the number of processors.
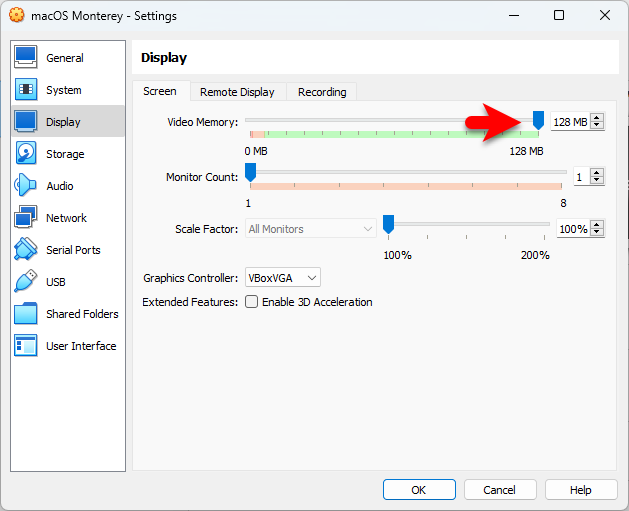
Select the display tab, and increase the video memory up to 128MB.
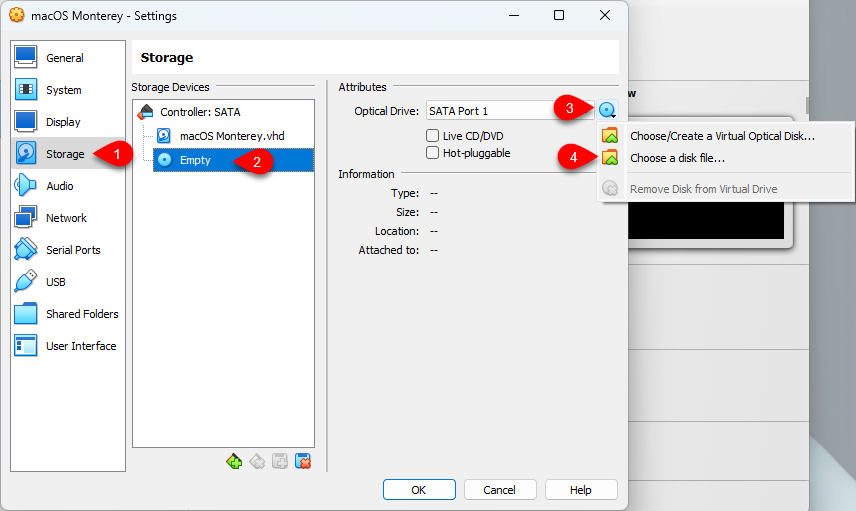
Choose the storage tab, click on the empty disc icon, then click on the disc icon, and click on Choose a disk file.
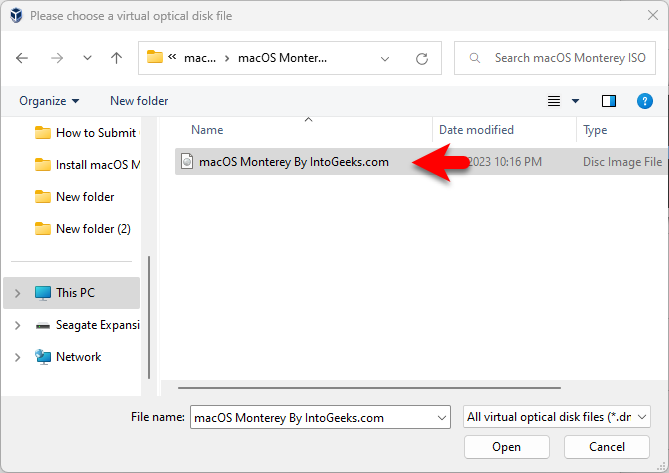
Now go to the place where you saved the macOS Monterey ISO image file, select the file, and click open.
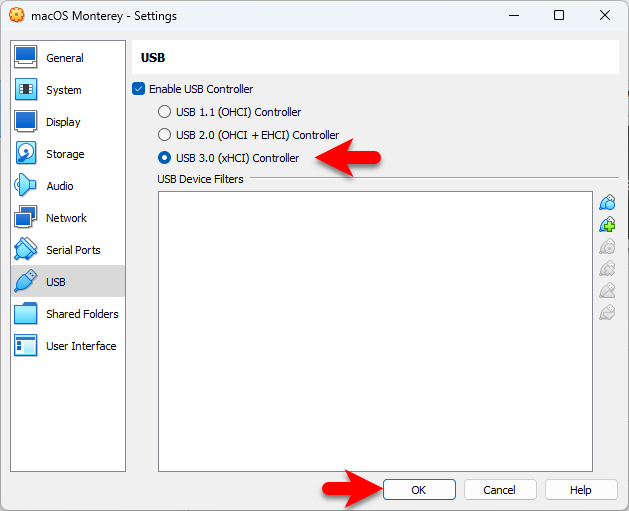
Select the USB tab, select the USB 3.0 Controller option, then finally click on OK to save the changes.
Apply The VirtualBox Commands With CMD
VirtualBox commands are the important factor that allows you to install the macOS operating systems on VirtualBox on Windows PC. Since the VirtualBox won’t have the ability to allow you directly to have the installation of macOS on it. Also, the important commands that are called macOS directory configuration play an important role in installing the macOS on VirtualBox on Widnows PC. Remember that if you applied the commands wrong then the insulation will remain in loop mode. Or if you don’t apply the commands you won’t be able to continue to proceed to the installation of macOS on a Windows PC.
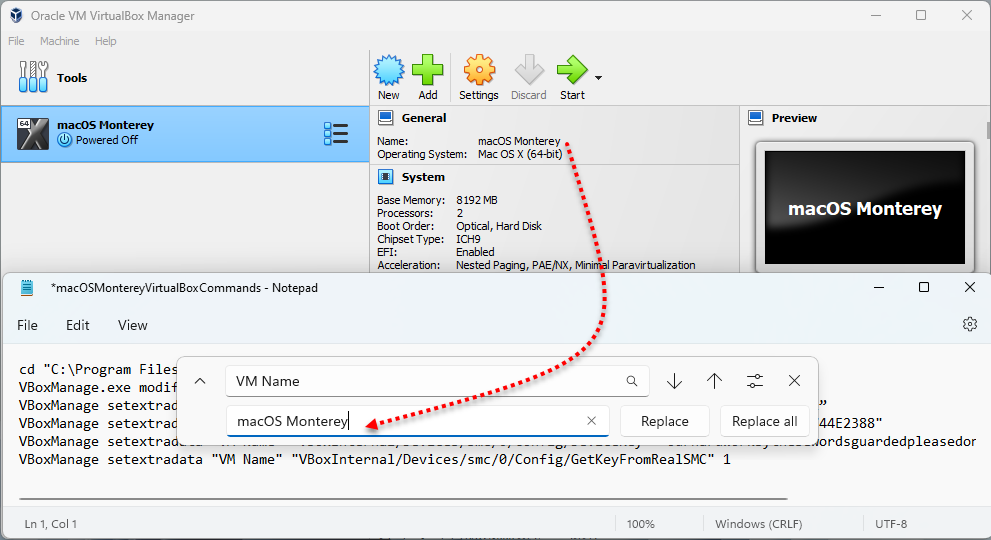
Before editing the commands be sure that the VirtualBox is completely closed from the background.
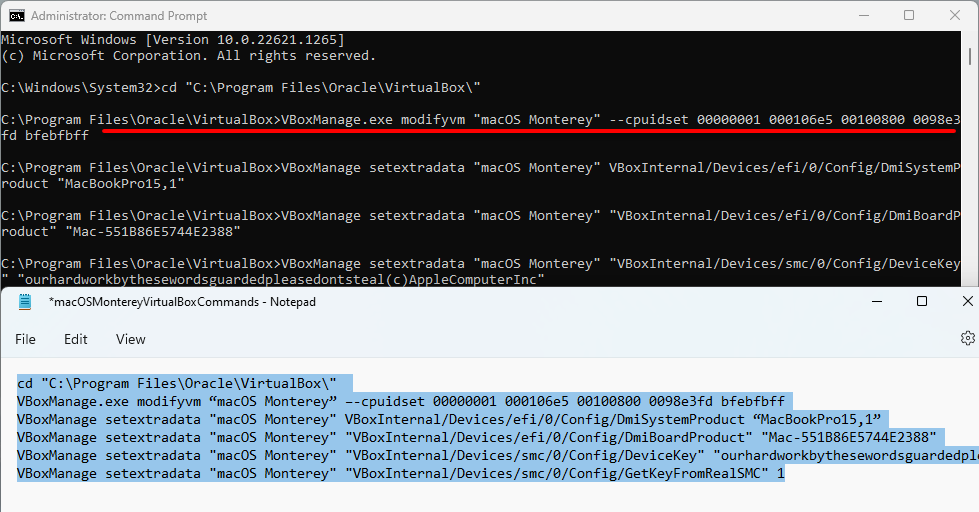
Once the VirtualBox is closed, therefore, open up your notepad then copy and paste the below commands into the notepad window. And replace the VM Name with the name of macOS Monterey Virtual Machine.
cd "C:\Program Files\Oracle\VirtualBox\"
VBoxManage.exe modifyvm "VM Name" --cpuidset 00000001 000106e5 00100800 0098e3fd bfebfbff
VBoxManage setextradata "VM Name" "VBoxInternal/Devices/efi/0/Config/DmiSystemProduct" "iMac19,1"
VBoxManage setextradata "VM Name" "VBoxInternal/Devices/efi/0/Config/DmiSystemVersion" "1.0"
VBoxManage setextradata "VM Name" "VBoxInternal/Devices/efi/0/Config/DmiBoardProduct" "Mac-AA95B1DDAB278B95"
VBoxManage setextradata "VM Name" "VBoxInternal/Devices/smc/0/Config/DeviceKey" "ourhardworkbythesewordsguardedpleasedontsteal(c)AppleComputerInc"
VBoxManage setextradata "VM Name" "VBoxInternal/Devices/smc/0/Config/GetKeyFromRealSMC" 1
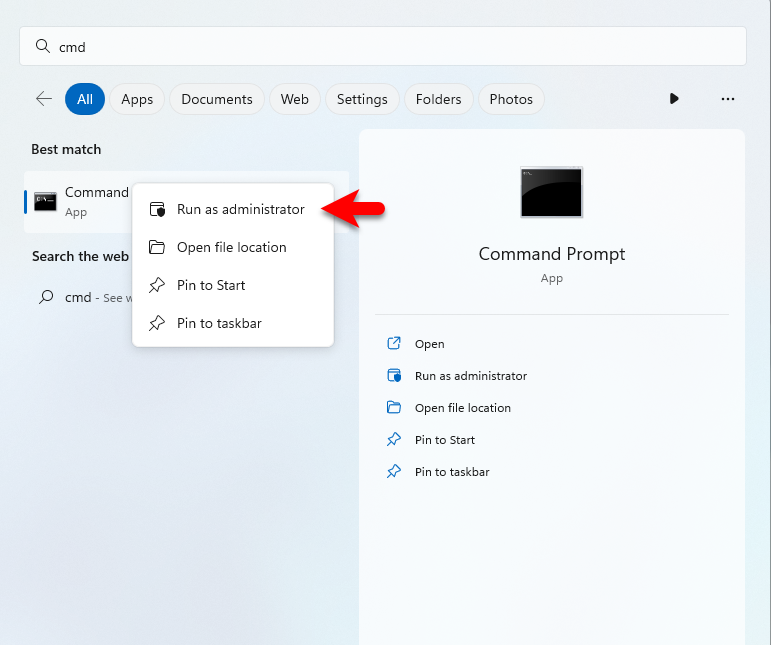
Now go to the Windows start menu, then run the command prompt with Administrator.
When the commands prompt window opened, copy the commands line by line and hit enter to apply the changes. Remember that if you entered any of the lines incorrectly then you will face the error while installing the macOS Monterey.
Perform a Clean Installation of macOS Monterey Final on VirtualBox on Windows PC
Once you have completed the pre-required files for the installation of macOS Monterey on VirtualBox on a Windows PC. Such, as installing the VirtualBox + Its extensions pack, creating a new virtual machine, editing the virtual machine settings, then applying the commands for configuration. And finally, it’s time to install macOS Monterey on VirtualBox on Windows PC. Simply, open up the VirtualBox and click on the Start option.

macOS Monterey Won’t Start: Failed to Query SMC Value From the Host (VERR_INVALID_HANDLE)
If you encountered the above error on VirtualBox then follow up on the below downlink and fix it.
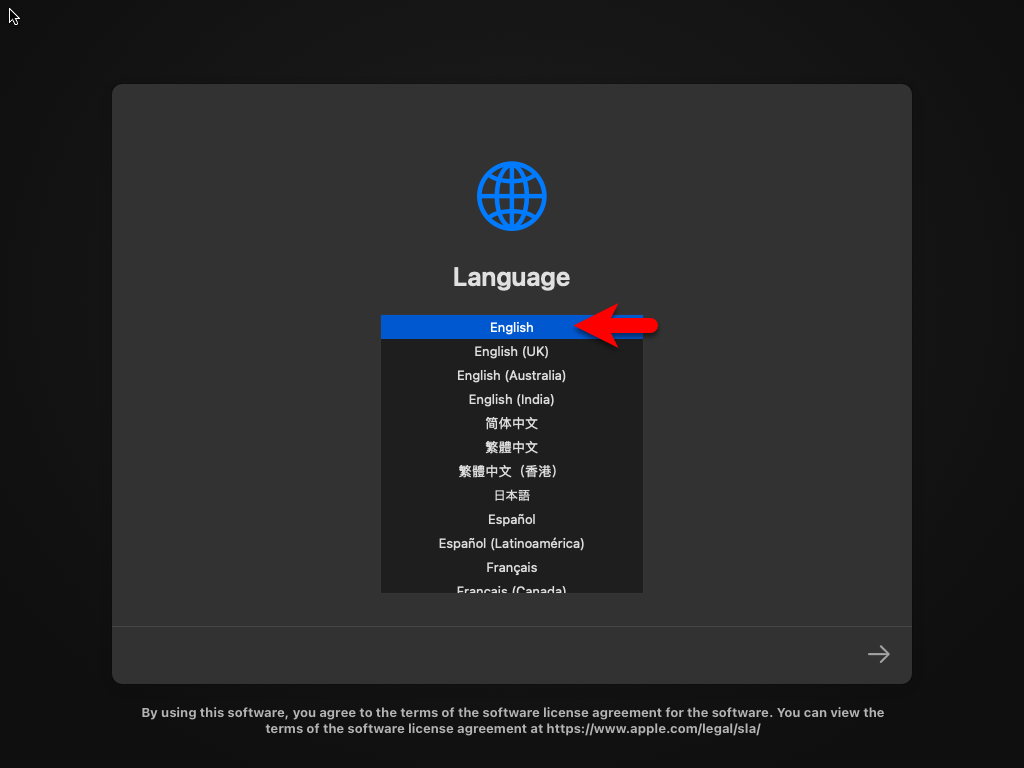
When the installation successfully launched on the first window select your language and click continue.
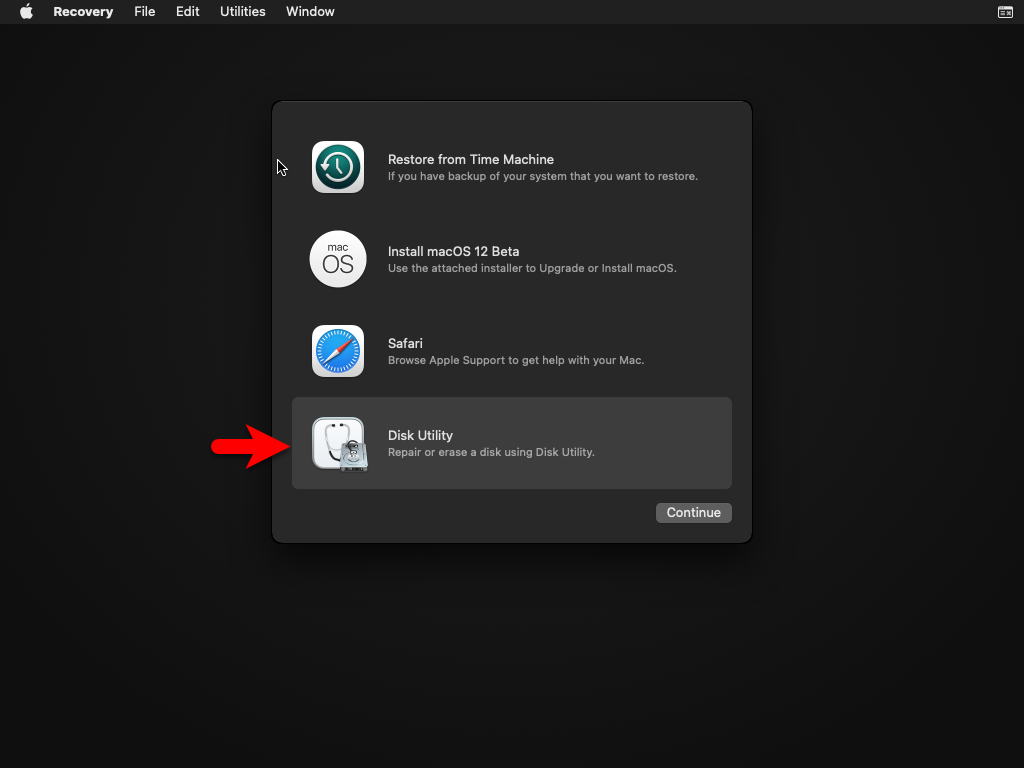
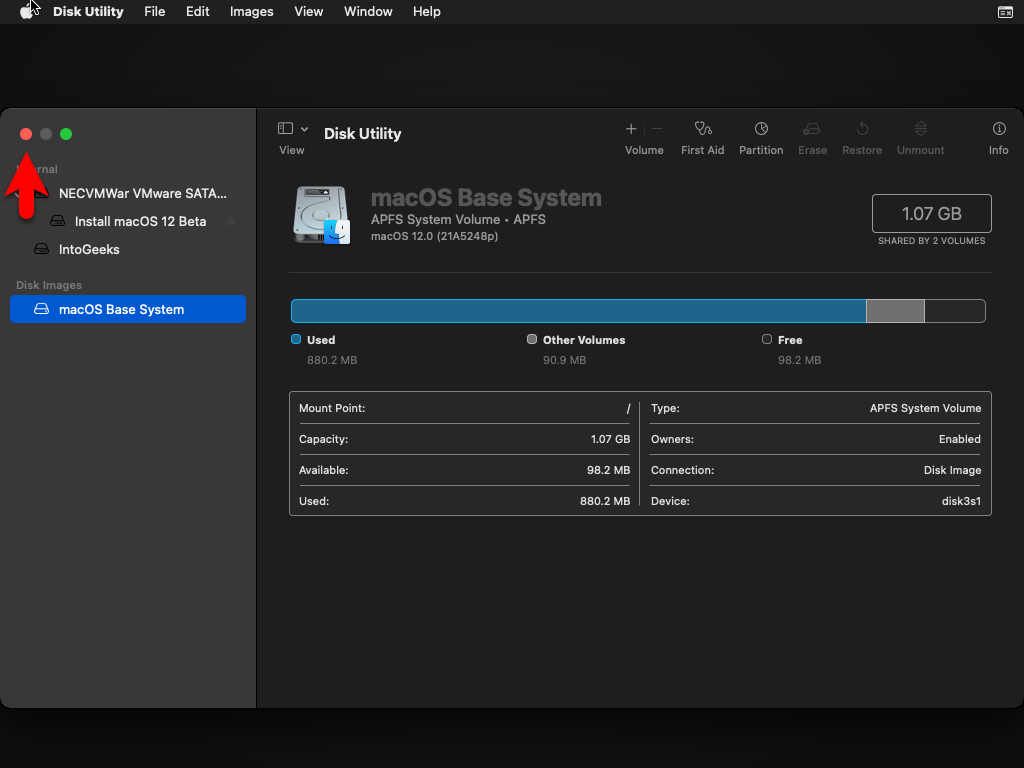
On the recovery, window selects the disk utility option and click on the continue option.
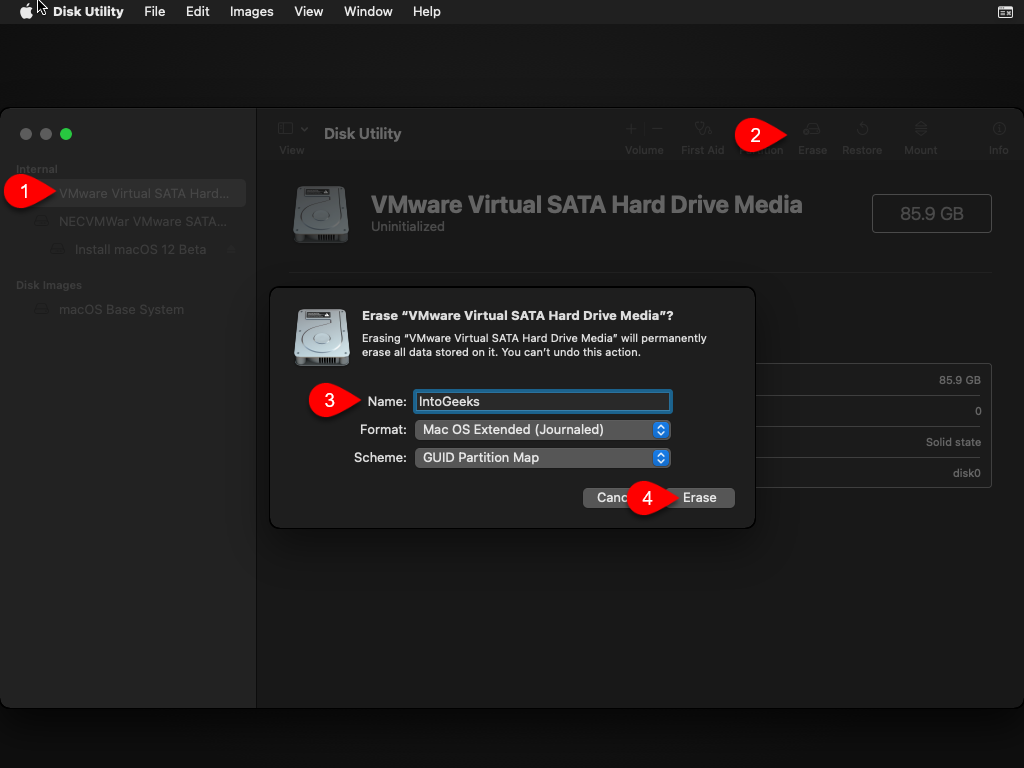
From the left-handed window, the side selects the VBOX Virtual Hard disk option, clicks on erase option, and formats the disk with the following parameters.
- Name: Optional
- Format: Mac OS X Extended (Journaled)
- Scheme: GUID Partition Map
When the disk is erased click on the done option.
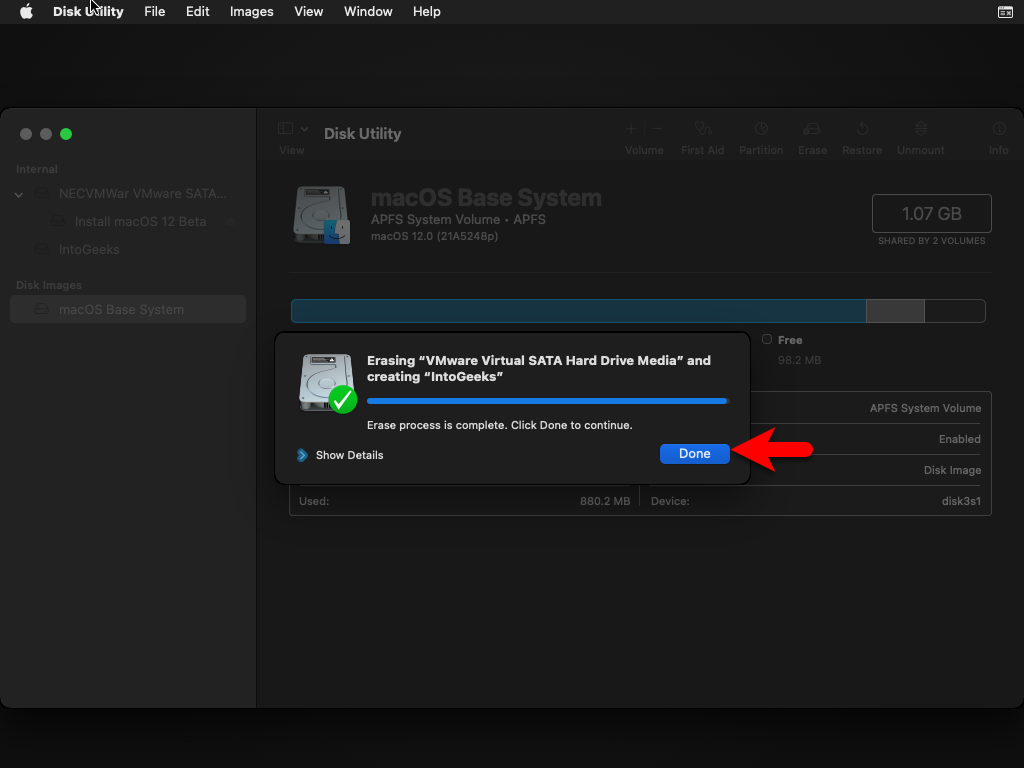
After the disk is successfully erased simply close the disk utility window.
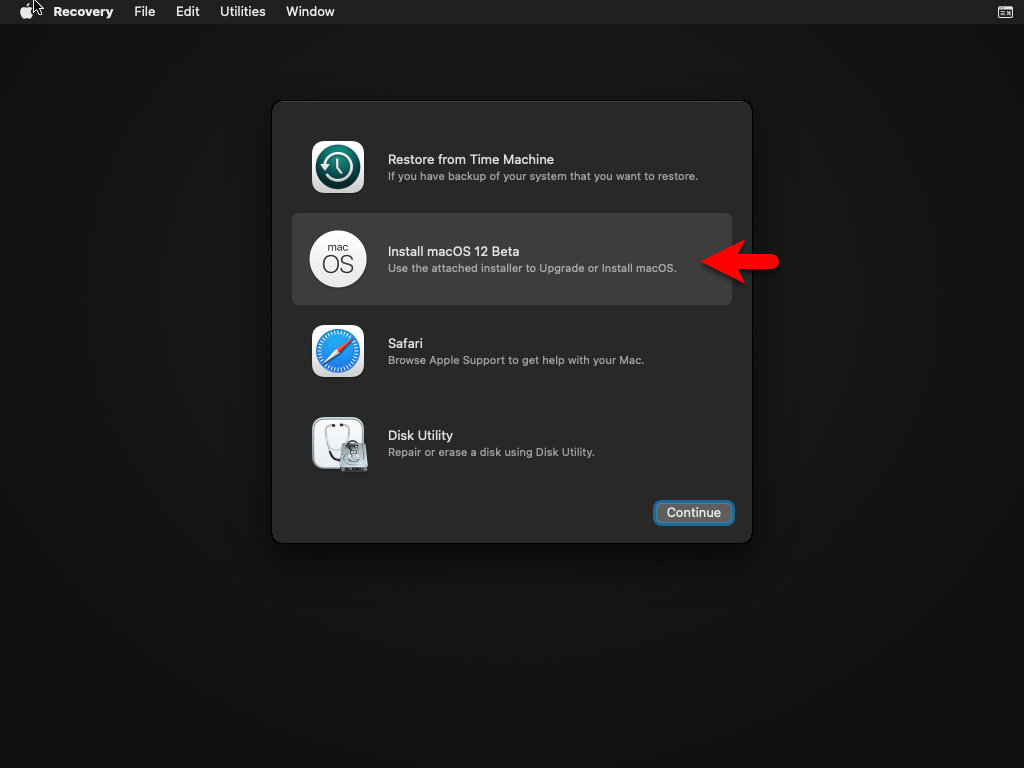
Now select install macOS Moneterey and click continue.
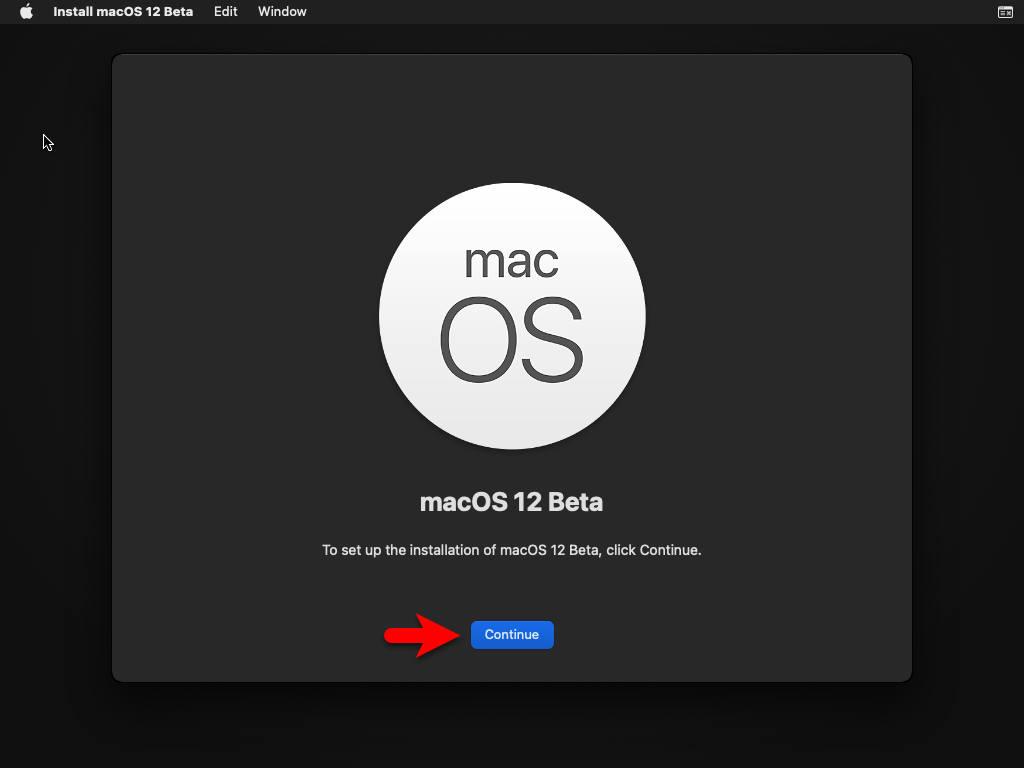
To set up the installation of macOS Monterey click continue.
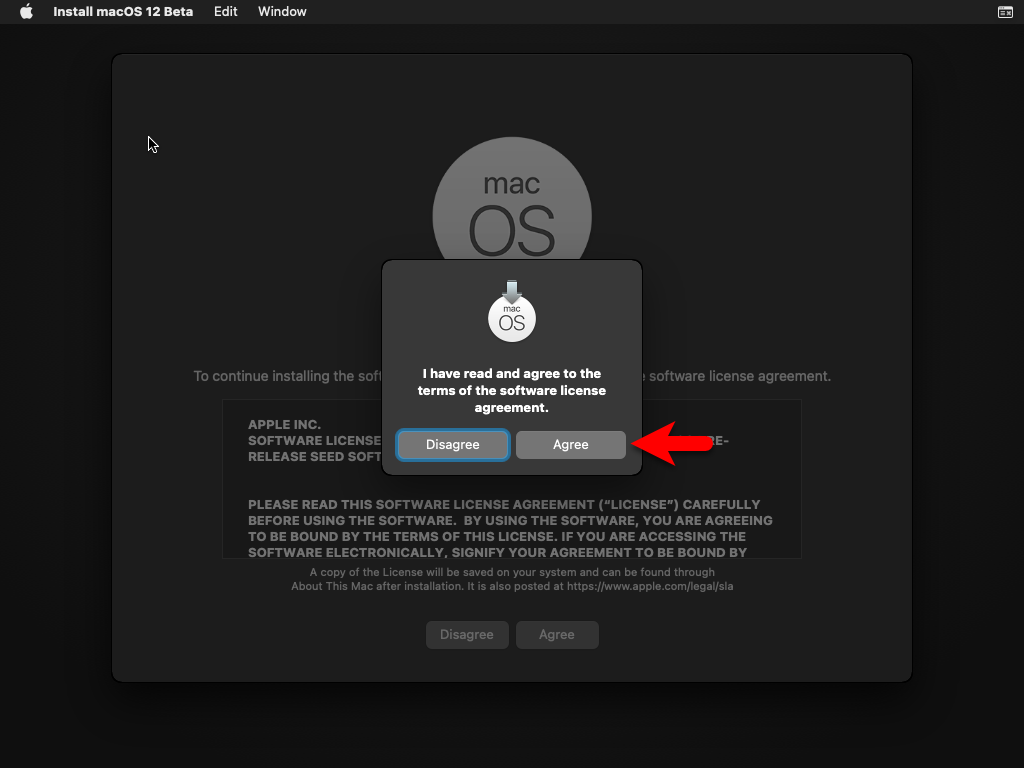
Agree with the terms and conditions of macOS Monterey.
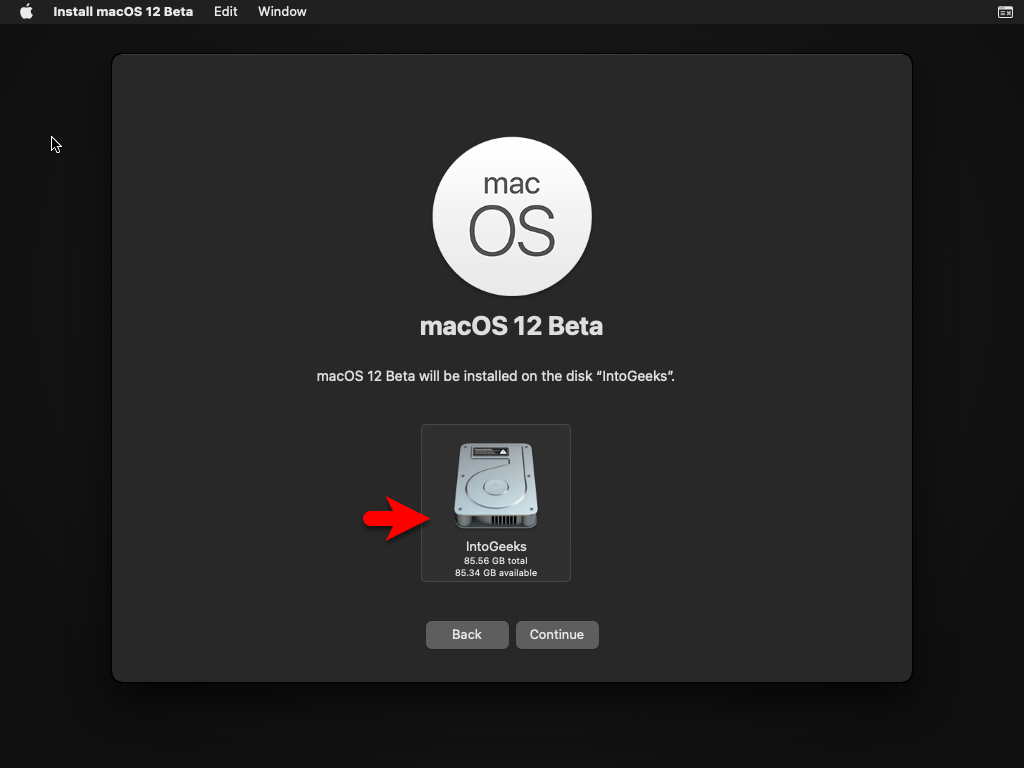
Select the disk that you want to install macOS Monterey, the disk that you have formatted in the disk utility window. Simply, select the disk and click continue.
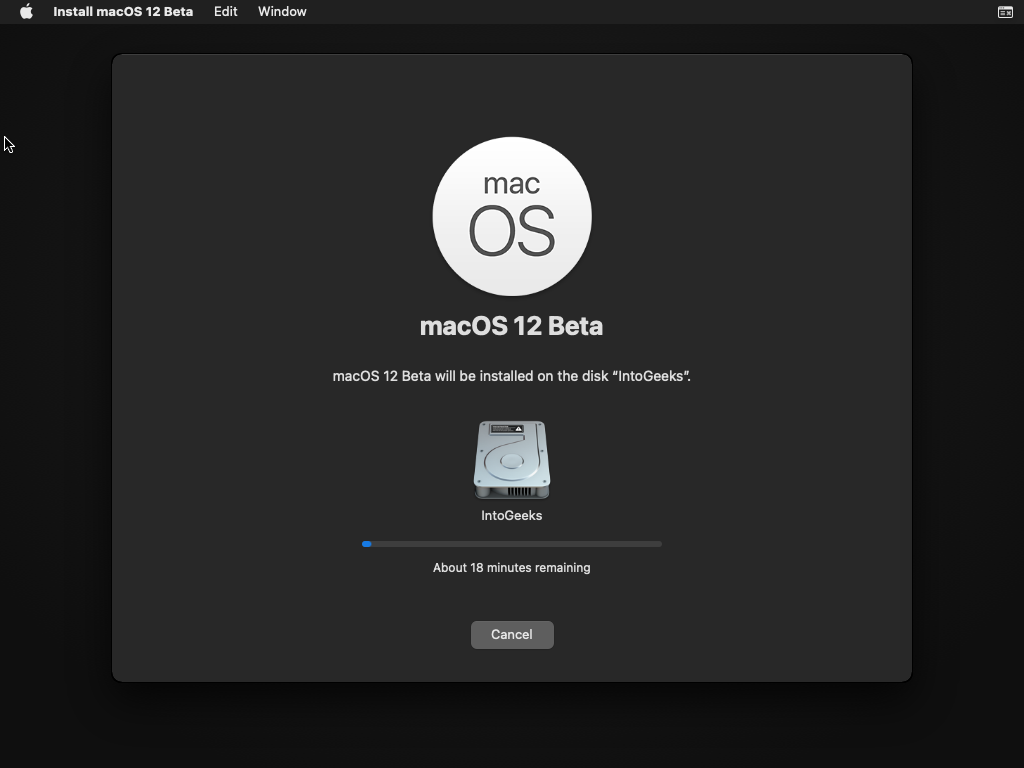
And now it begins installing macOS Monterey on VirtualBox on Windows PC. So, the installation may take time, also during the installation the virtual machine will restart several times.
Complete the Basic Settings of macOS Monterey For the First Use
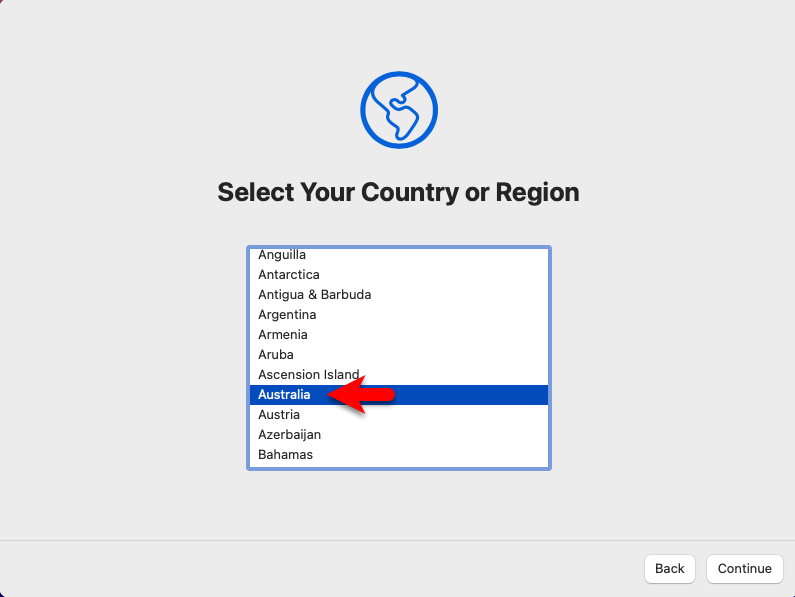
After the installation is successfully completed, then you have to complete the basic settings of macOS Monterey for the first use. In this case, on the first window select the country where you live and click continue.
Select your written and spoken language and click continue.

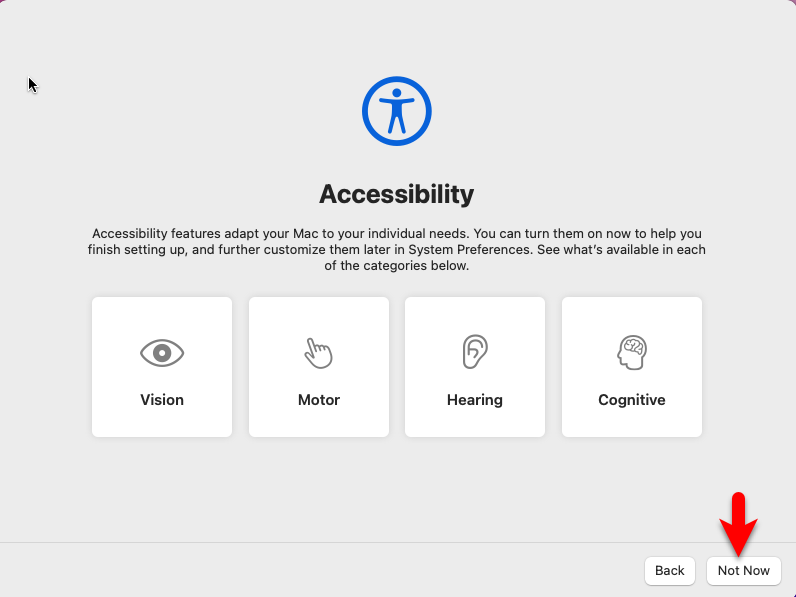
On the accessibility window simply click continue.
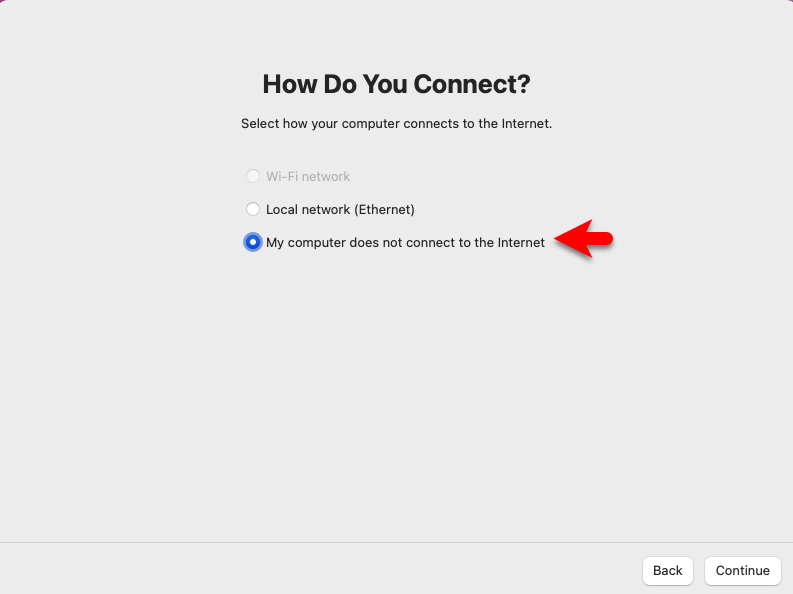
Select the option my computer does not connect to the internet and click continue, again on the next window click to continue to proceed.
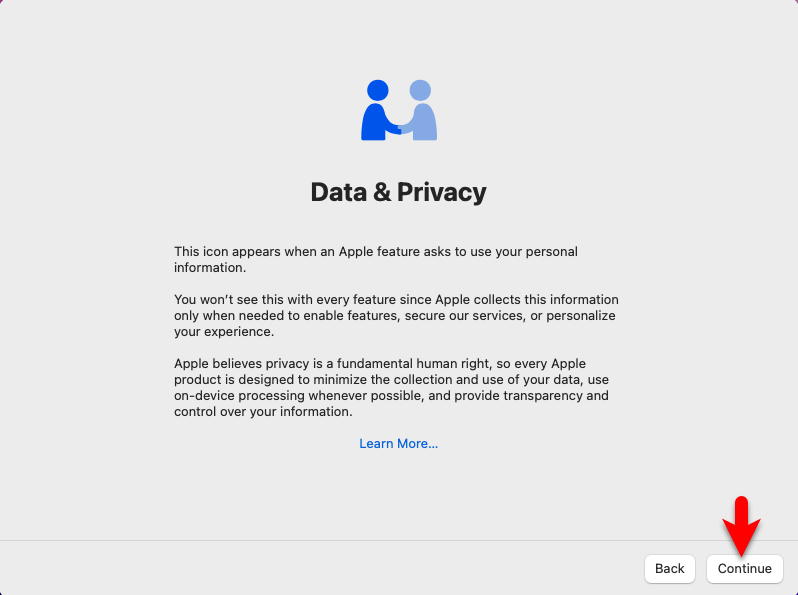
On the Data & Privacy window simply click continue.
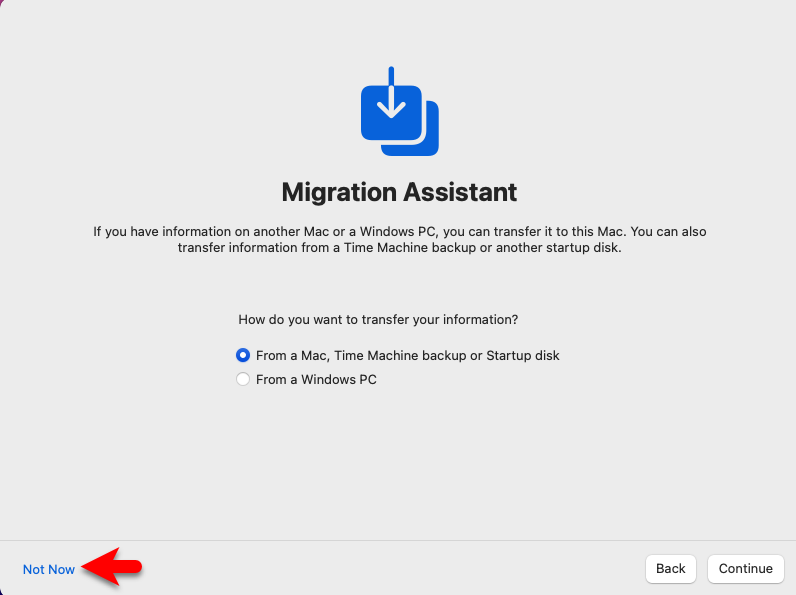
On the migration assistant window simply click continue.
Agree with the terms and conditions of macOS Monterey.

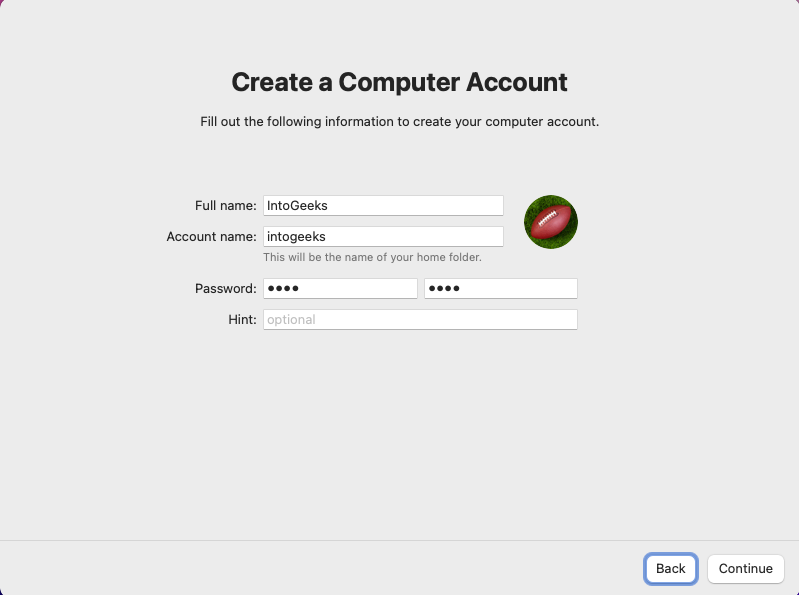
Create your computer account, enter your full name, account name, and password, re-type the password, and click continue.
In this step, you can customize the settings of location services and device analytics. If you don’t want to make any changes simply click continue.

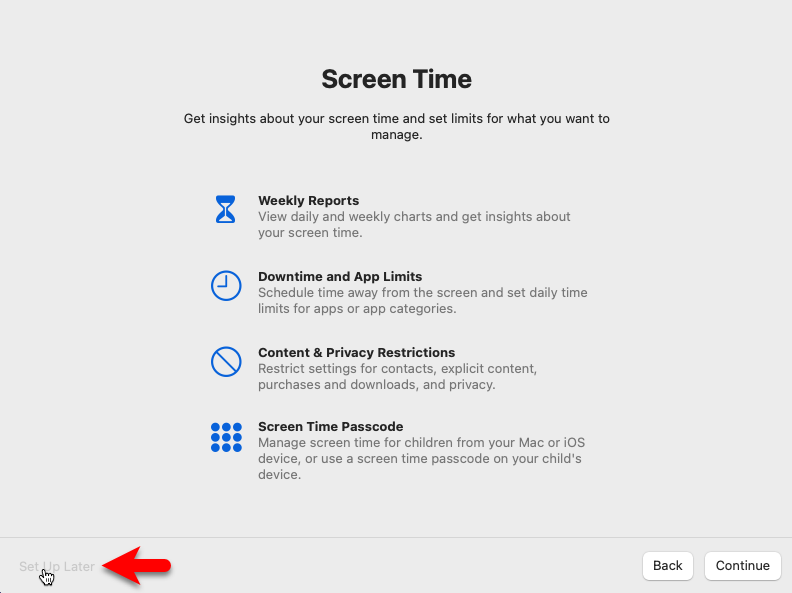
On the screen-time window click on set up later.
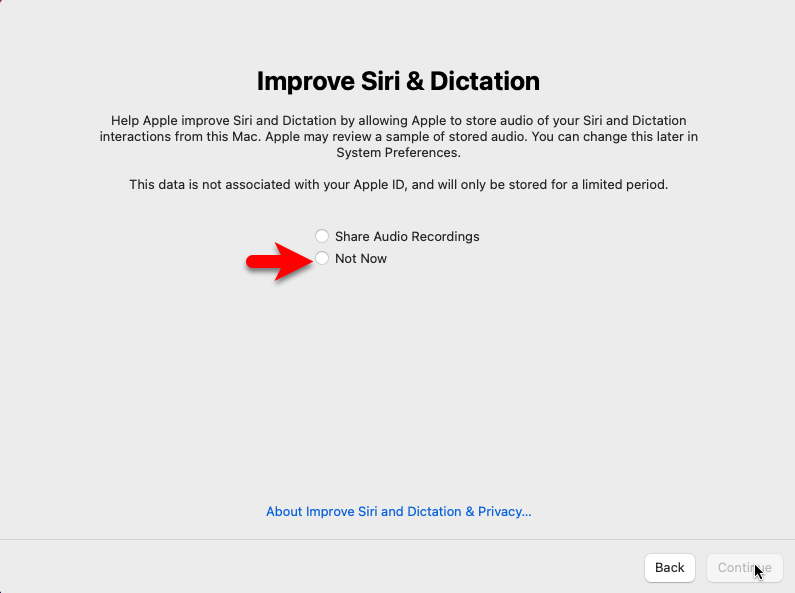
Click on the not now option and click continue.
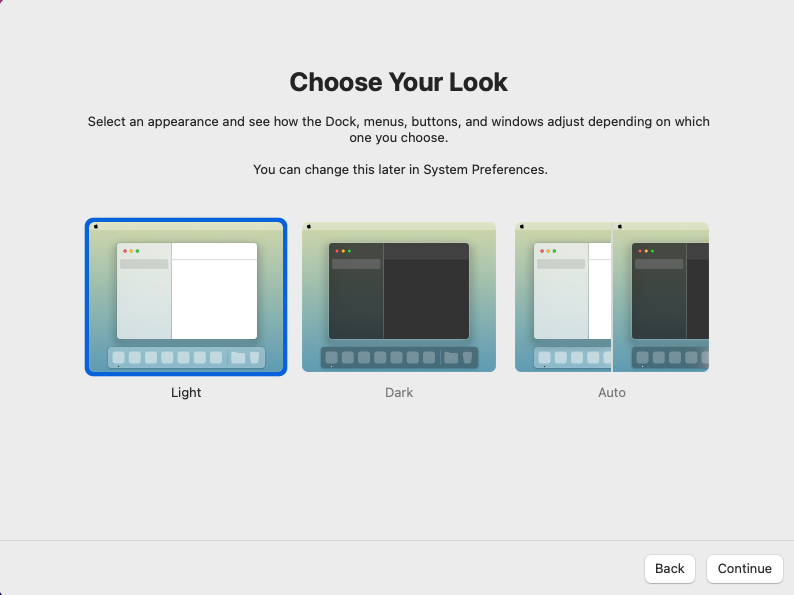
Choose your look for macOS Monterey on VirtualBox on Windows PC and click continue.
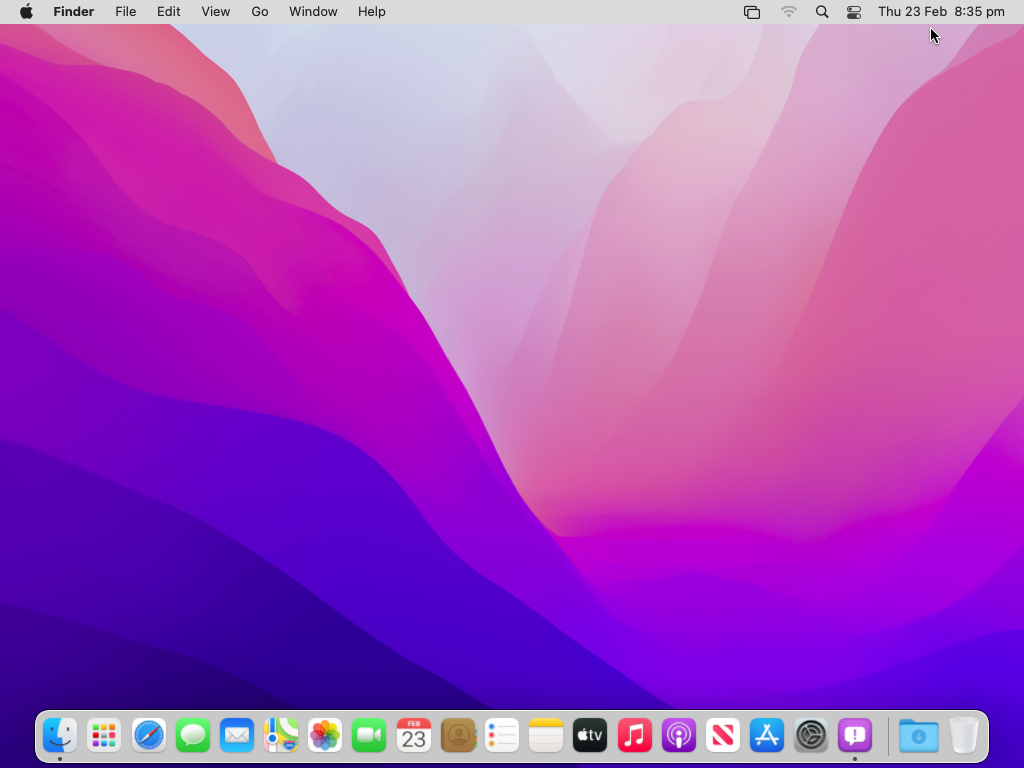
And finally, macOS Monterey is successfully installed on VirtualBox on Windows PC.
Conclusion
Finally, macOS Monterey is successfully installed on VirtualBox on Windows PC without any issues or errors. The only thing that remained is to enter the macOS Monterey full-screen mode on VirtualBox on Windows PC. That is pretty much easy you can do that by entering a few other small commands on the command prompt window.


14 Comments