How to Install macOS Big Sur Final on VirtualBox on Windows PC?
How to Install macOS Big Sur Final on VirtualBox on Windows PC?
macOS Big Sur 11.7.4 is the latest version of Apple’s desktop operating system, released in January 2022. This update includes various improvements and bug fixes to enhance the overall user experience.
One of the notable improvements in this update is related to the security of the operating system. Apple has fixed several security vulnerabilities that could potentially allow attackers to gain unauthorized access to a user’s device. The update also includes new security features that enhance the overall security of the system.
Another notable improvement is related to the stability and performance of the operating system. Apple has addressed several bugs that could cause the system to crash or freeze, improving the overall stability of the system. Additionally, Apple has improved the performance of some of the system’s features, including the Finder app and the Safari web browser.
The update also includes some new features and enhancements to existing features. For example, Apple has added support for AirPods Pro spatial audio on Macs with M1 processors. There are also improvements to the Apple Music app, including the ability to share lyrics and see what friends are listening to.
Overall, macOS Big Sur 11.7.4 is a stable and reliable operating system that provides a secure and efficient user experience. It is highly recommended for all Mac users update to this version to take advantage of the various improvements and bug fixes.
So, through this guide, you will learn a step-by-step guide on how to install macOS Big Sur on VirtualBox on Windows PC. As, we have tried several macOS operating systems on VirtualBox & VMware, which you can check in the links below down.
- Related: How to Install macOS Big Sur Final on VMware on Windows PC?
- How to Install macOS Ventura 13 on VMware on Windows PC?
- How to Install macOS Ventura 13 on VirtualBox on Windows PC?
- How to Install macOS Monterey Final on VirtualBox on Windows PC?
- How to Install macOS Monterey Final on VMware on Windows PC?
What is VirtualBox?
When it comes to the world of virtualization testing software, then VirtualBox is one of the software that allows you to install multiple operating systems on a single physical machine. VirtualBox is a free and open-source software for Windows, macOS, and Linux to install more than one software at the same time. So, VirtualBox currently has the best features for Windows 11/10. So, if you have a Windows PC, but want to test the macOS operating system on your Windows PC. Then I recommend you the best solution, and that is VirtualBox. Here is the below down guide step-by-step on how to install VirtualBox+Extensions Pack on Windows PC.
How to Install macOS Big Sur Final on VirtualBox on Windows PC?
So, to install macOS Big Sur on VirtualBox on Windows PC, firstly you need to prepare the requirements. The first thing is you have to download and install the VirtualBox on your Windows PC, plus its extensions Pack. And the next thing is you have to enable the Virtualization technology from the BIOS of your computer.
- Download & Install VirtualBox on your Windows PC
- Enable the Virtualization Technology from the BIOS
- Download the macOS Big Sur ISO file
- Download the macOS Big Sur vmdk file
- Create a new virtual machine for macOS Big Sur
- Run the commands to configure the virtual machine of macOS Big Sur on VirtualBox on Windows PC
- Start the Virtual Machine to install the macOS Big Sur
- Complete the basic settings of macOS Big Sur
Here is the guide on how to convert a macOS ISO image file to a vmdk file on Windows PC.
Also, for the installation of macOS Big Sur on VirtualBox on Windows PC. The first thing that is too much important is to enable the virtualization technology from the BIOS. The next thing is you need to have at least 4GB of RAM and Windows 64-Bit. And macOS Big Sur’s latest version needs at least 30GB of disk space. Also, for the installation of macOS Big Sur on a Windows PC, the SSD is recommended because SSD is much faster than HDD.
Create a New Virtual Machine For macOS Big Sur
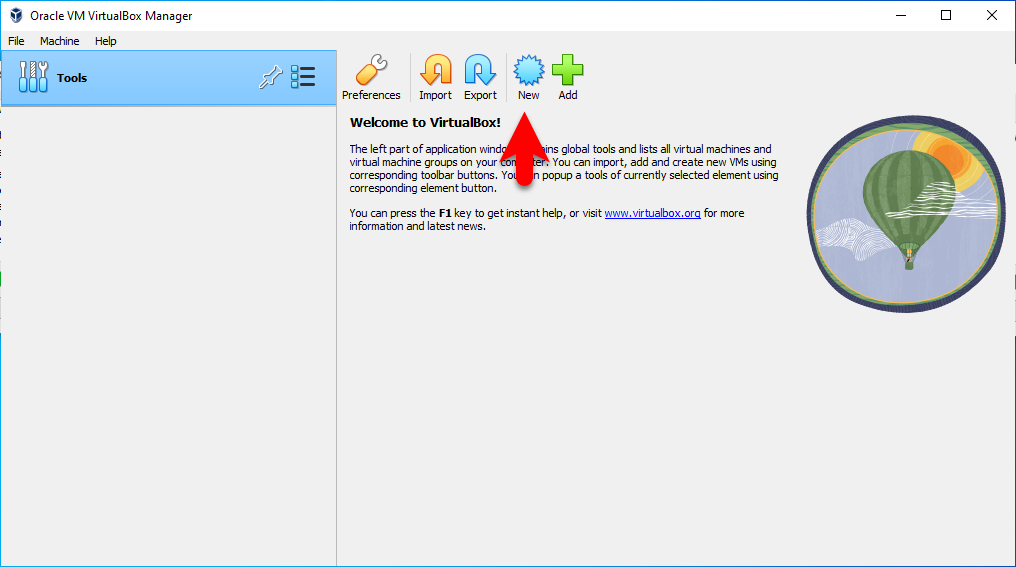
Now let’s begin with the first, which is to create a new virtual machine for macOS Big Sur on VirtualBox on Windows PC. So, to create a virtual machine simply open up the VirtualBox and click on the new option.
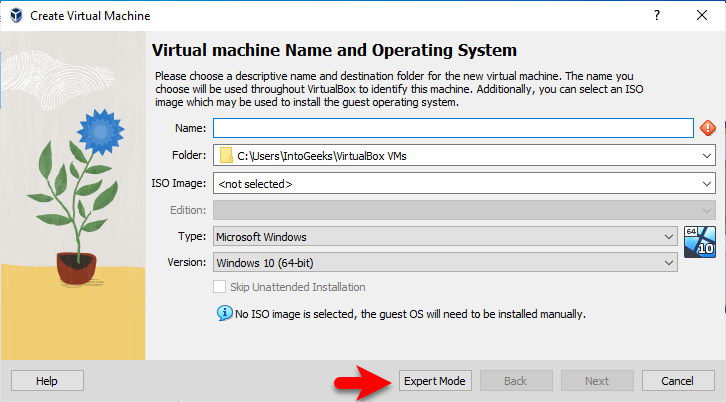
When this window appeared click on the expert mode option.
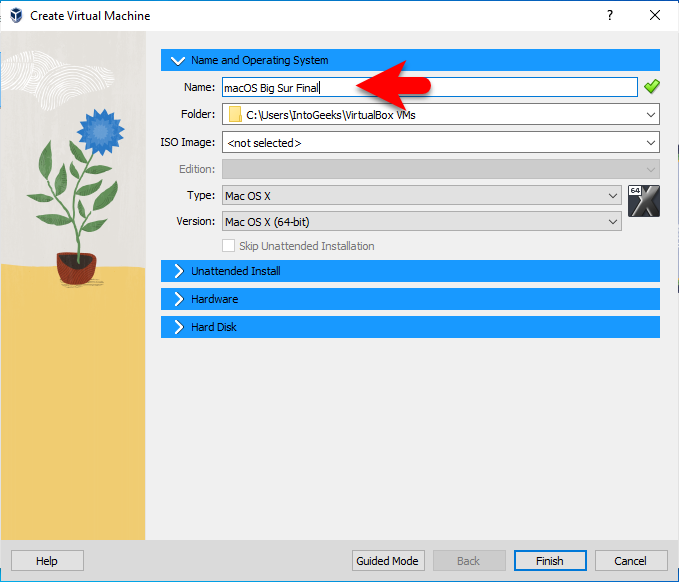
Once the next window is opened name the virtual machine of macOS Big Sur and continue the rest of things according to the below down.
- Name macOS Big Sur
- Folder different folder is recommended for installation
- ISO Image is not recommended to select in this step
- Type Mac OS X
- Version Mac OS X (64-Bit)
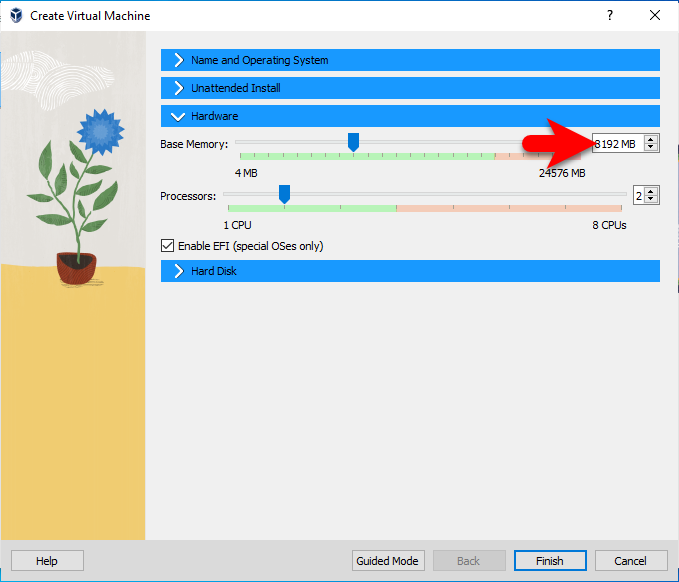
Click on the hardware tab, increase the base memory, and increase the processor.
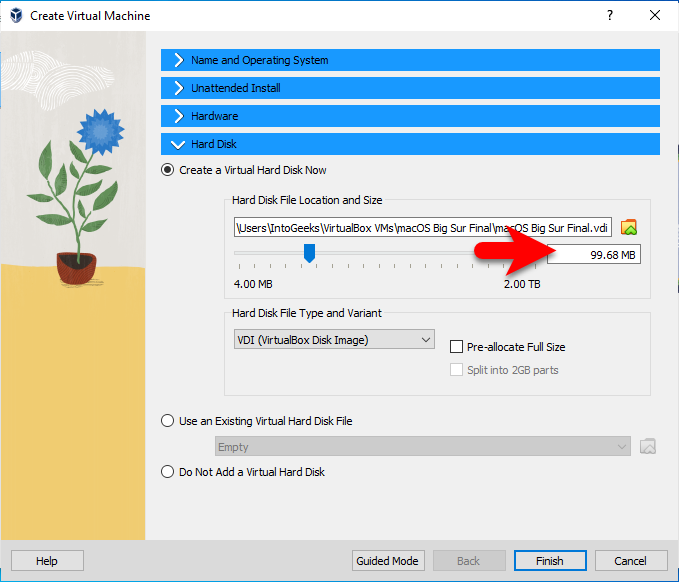
Click on the hard disk tab, select the location, and specify the disk size for macOS Big Sur. Also, select the hard disk file type (VDI VirtualBox disk image) and click on Finish to create the virtual machine.
Edit the Virtual Machine of macOS Big Sur
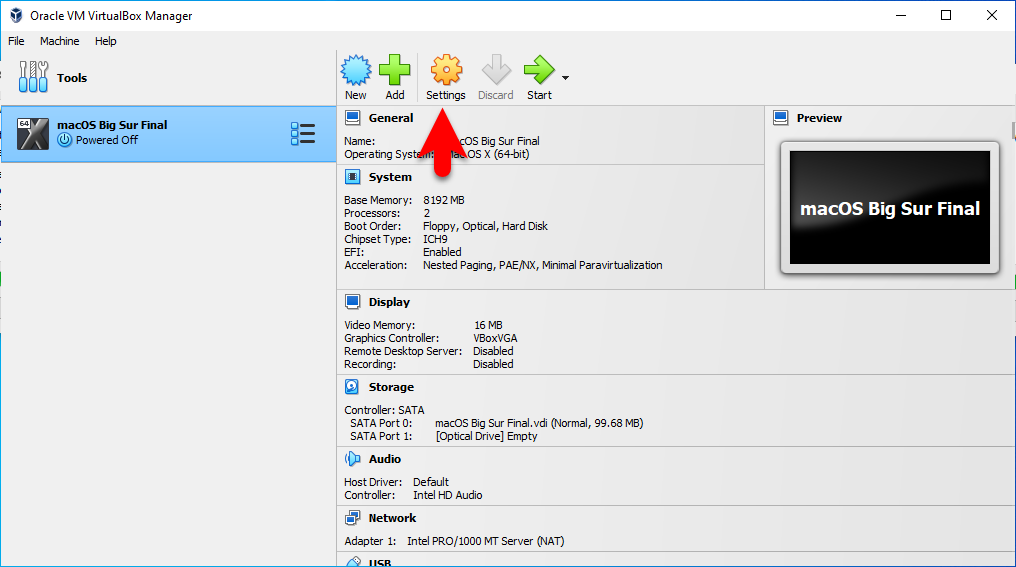
After the virtual machine is successfully created for macOS Big Sur, so there are some other settings to edit it for better performance. So, simply click on the Settings option.
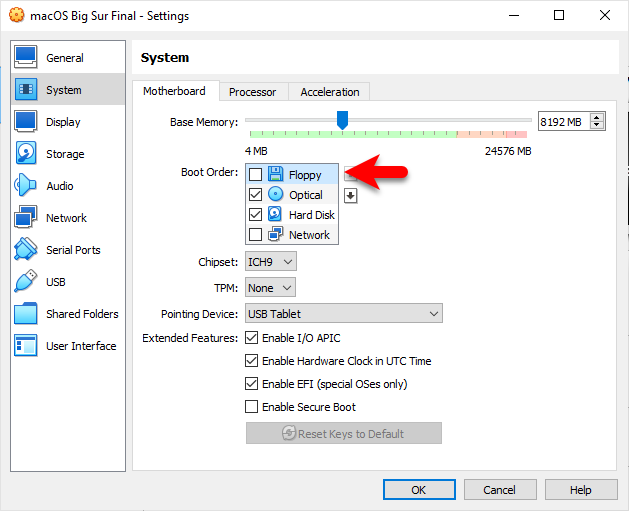
When the settings window opened from the left-handed window side select the system tab, on the motherboard tab uncheck the floppy disk.
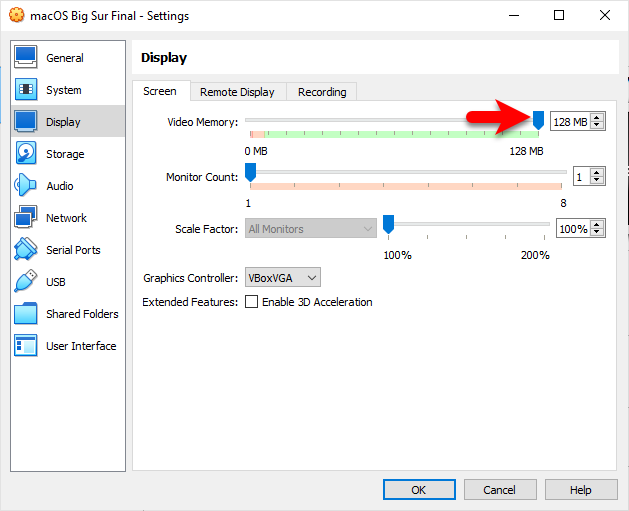
Select the display tab, and on the screen tab, increase the video memory up to 128MB.
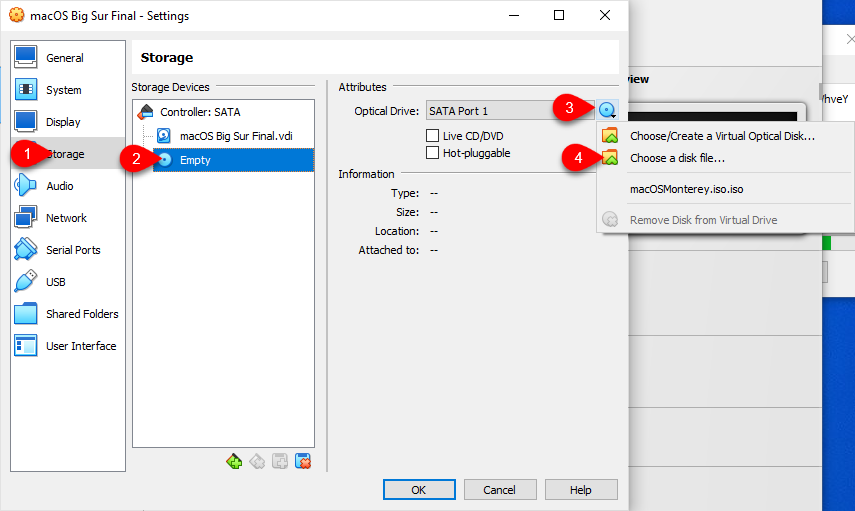
Click on the storage tab, select the empty disc icon, click on the disc icon, and click on Choose a disk file.
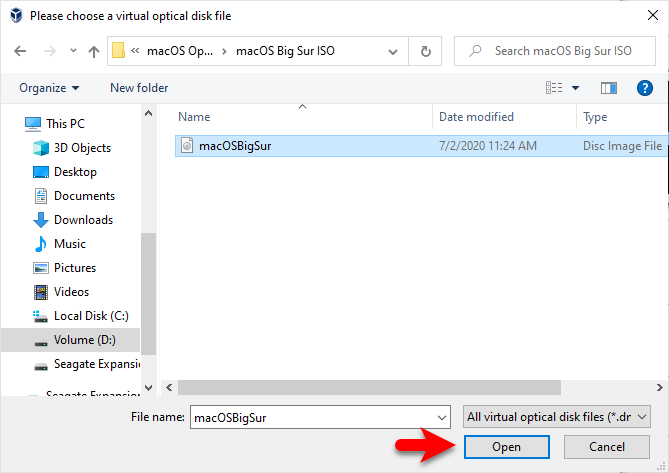
Now select the macOS Big Sur ISO image file and click on open.
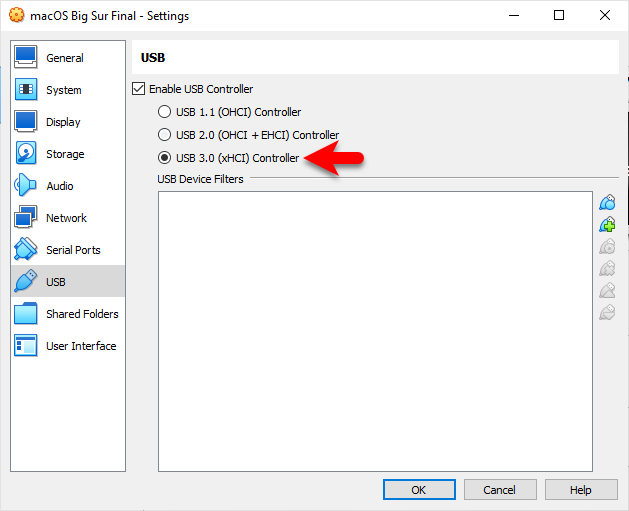
Choose the USB tab, then select the (USB 3.0 (XHCi) Controller) option and click OK to save the changes.
Apply the Commands to Configure the macOS Big Sur on VirtualBox
After that, the virtual machine is successfully created for macOS Big Sur, the settings are edited. And now it’s time to edit some commands and apply them to the Virtual Machine of macOS Big Sur to configure it. Don’t forget that this command configures the macOS Big Sur Virtual Machine. If you enter any part of the commands wrong then you will face an error during the installation.
To Apply the commands imply close the VirtualBox, then copy & paste the below commands into the notepad window. Then replace the VM Name with the name of the macOS Big Sur Virtual Machine.
cd "C:\Program Files\Oracle\VirtualBox\"
VBoxManage.exe modifyvm "VM Name" --cpuidset 00000001 000106e5 00100800 0098e3fd bfebfbff
VBoxManage setextradata "VM Name" "VBoxInternal/Devices/efi/0/Config/DmiSystemProduct" "iMac19,1"
VBoxManage setextradata "VM Name" "VBoxInternal/Devices/efi/0/Config/DmiSystemVersion" "1.0"
VBoxManage setextradata "VM Name" "VBoxInternal/Devices/efi/0/Config/DmiBoardProduct" "Mac-AA95B1DDAB278B95"
VBoxManage setextradata "VM Name" "VBoxInternal/Devices/smc/0/Config/DeviceKey" "ourhardworkbythesewordsguardedpleasedontsteal(c)AppleComputerInc"
VBoxManage setextradata "VM Name" "VBoxInternal/Devices/smc/0/Config/GetKeyFromRealSMC" 1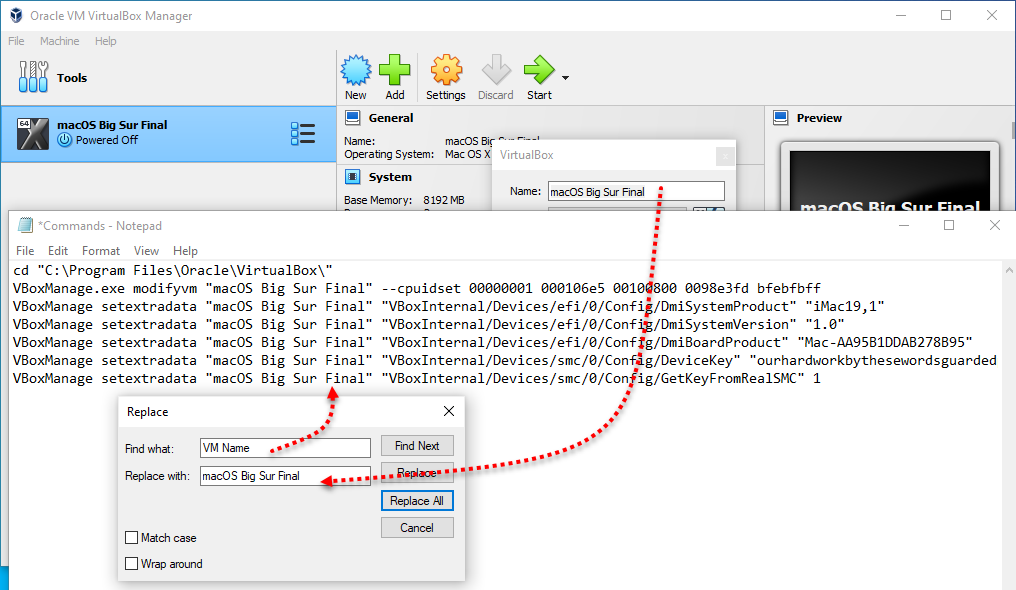
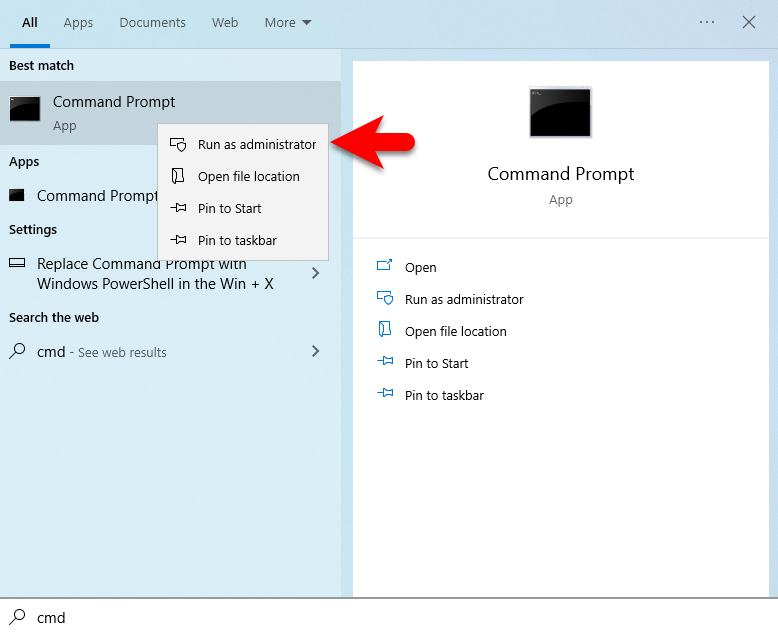
Once the VM Name changed, navigate to the Windows start menu and search for commands prompt when the command prompt appeared right-click and run as administrator.
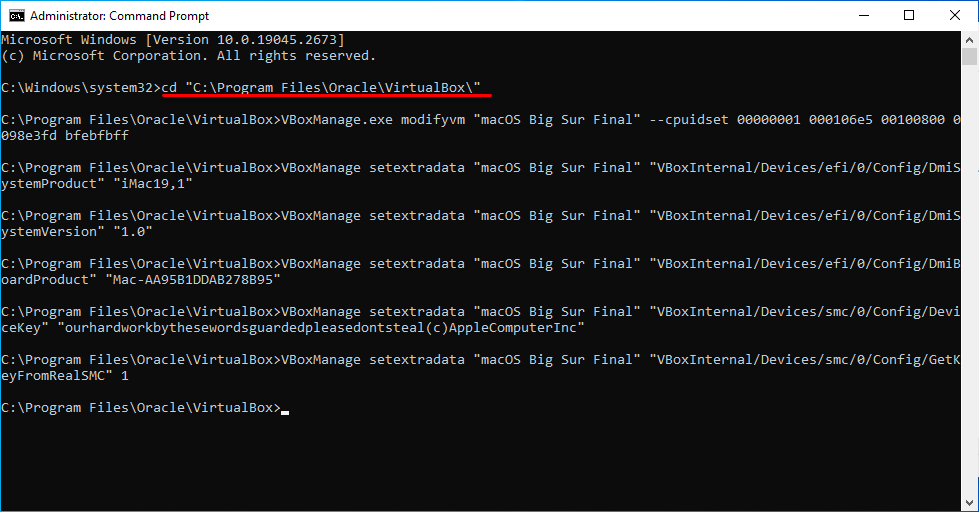
Once the command prompt window opened line by line copy-paste the commands and hit enter.
Perform a Clean Installation of macOS Big Sur on VirtualBox
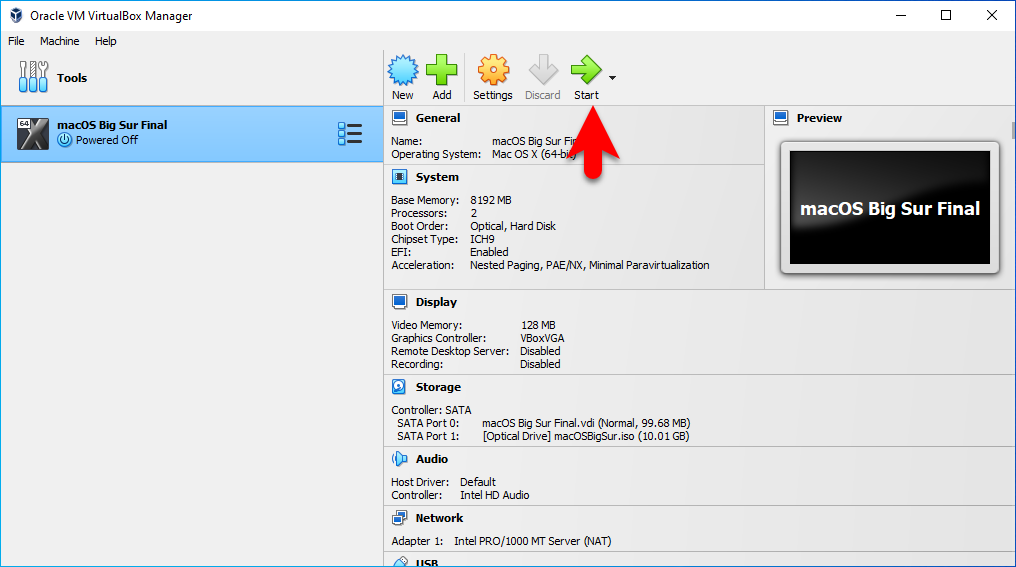
When the virtual machine is successfully created for macOS Big Sur on VirtualBox on Windows PC. And finally, it’s time to perform a clean installation of macOS Big Sur on VirtualBox on a Windows PC. So, simply again navigate to VirtualBox and open it. On the main click on the start button to start the installation process.
Once the installation is launched on the first window select your language and click continue.

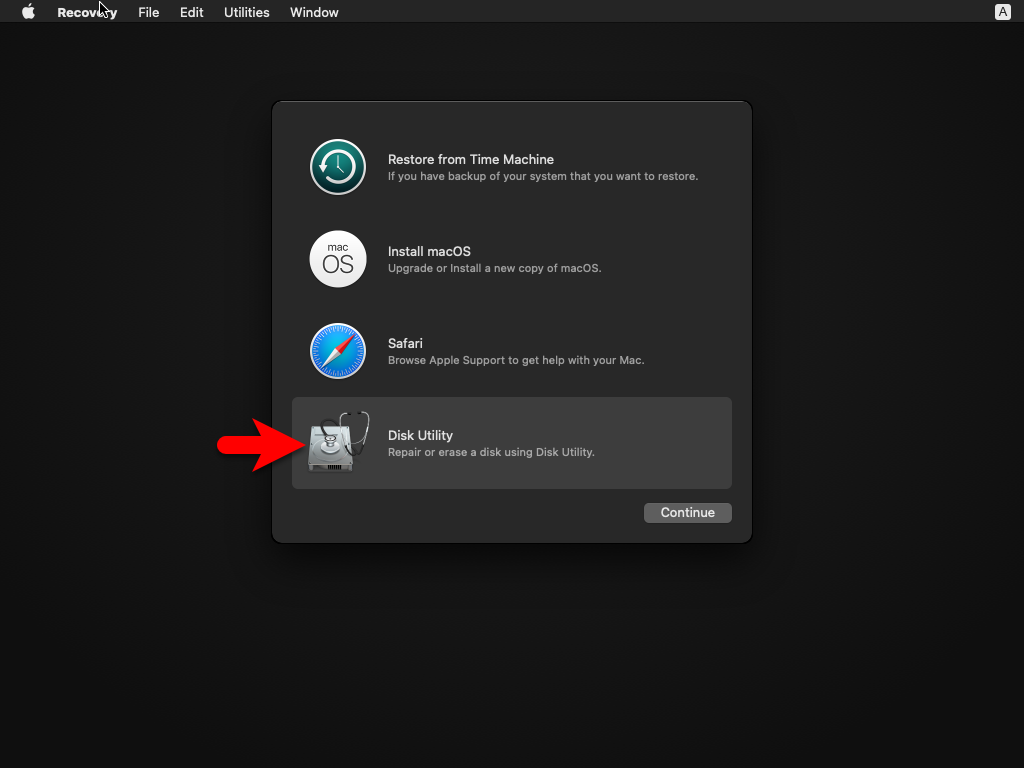
On the recovery window, select the Disk Utility option and click continue.
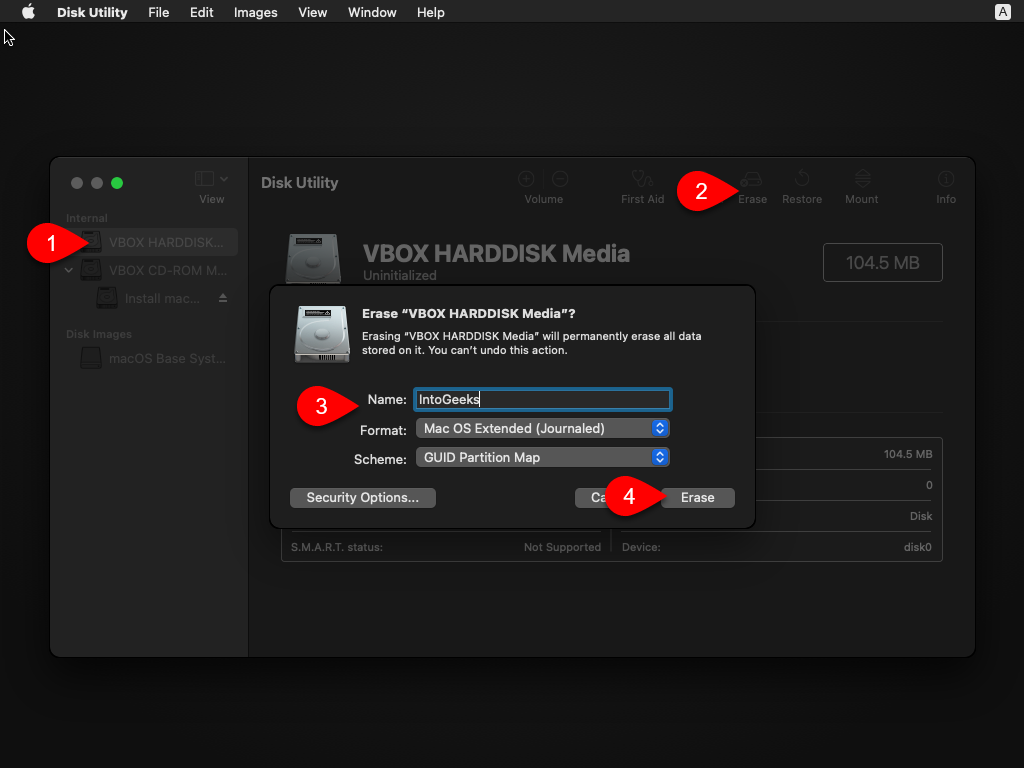
When the disk utility window opened, from the left-handed window side select the VBOX Harddisk option, then click on erase. And format the hard disk with the below-down parameters.
- Name: optional
- Format: Mac OS X Extended (Journaled)
- Scheme: GUID Partition Map
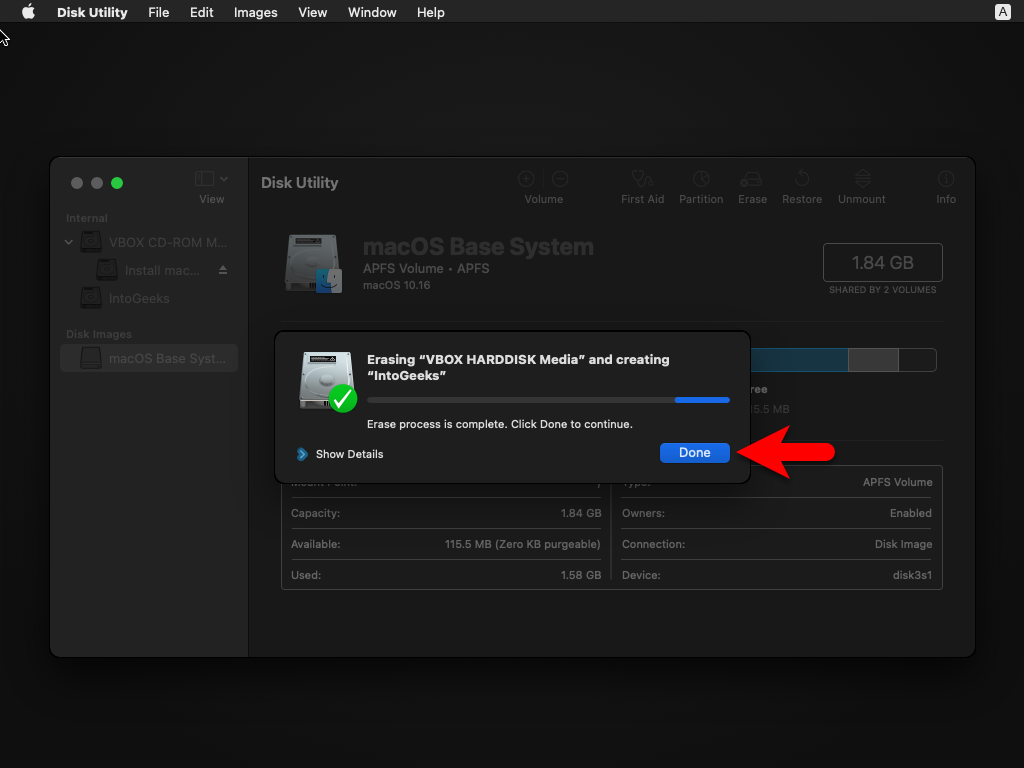
Once the disk is erased successfully click on the done option.
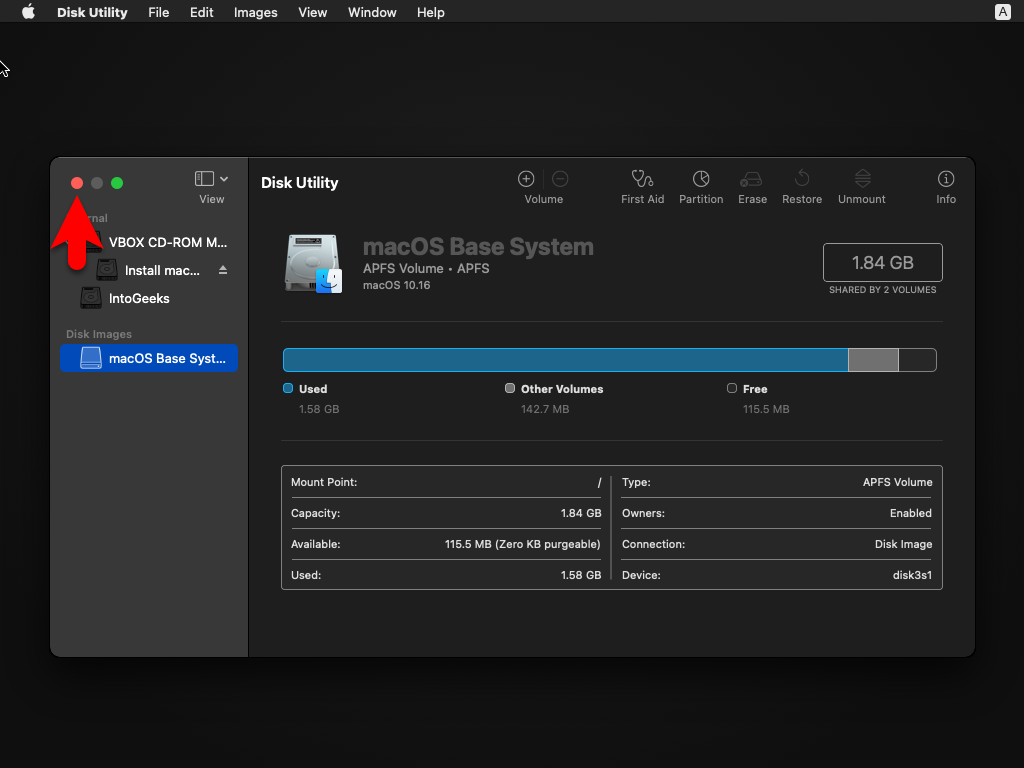
Now close the disk utility.
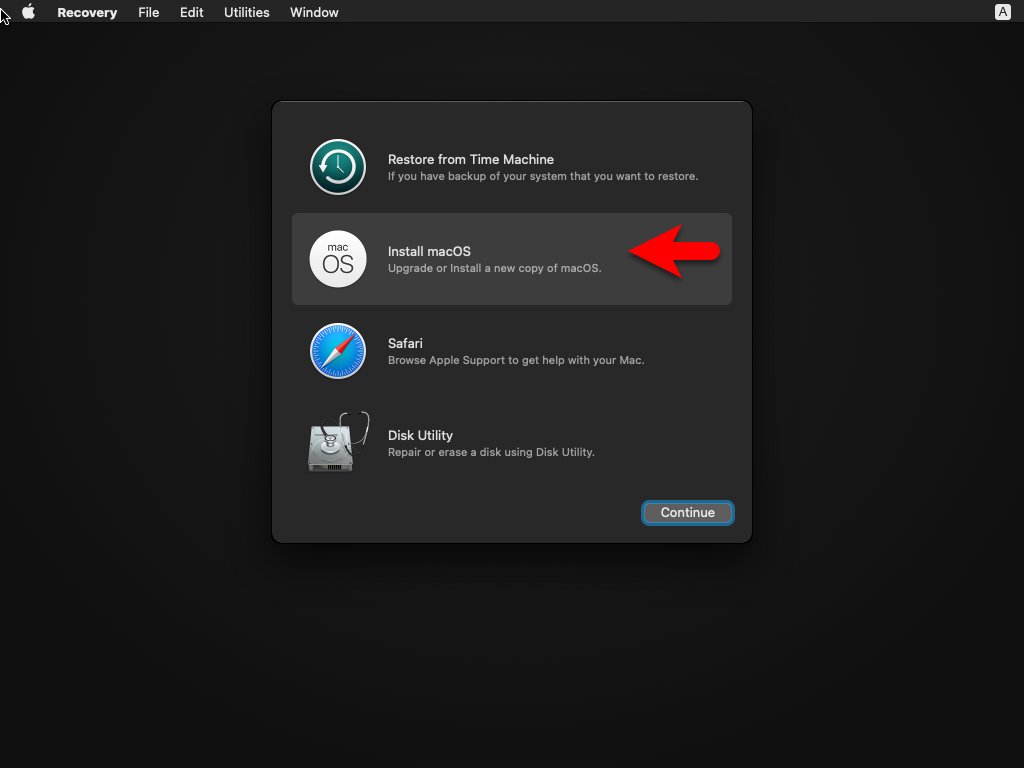
Again on the recovery window option, select install macOS Big Sur and click continue.
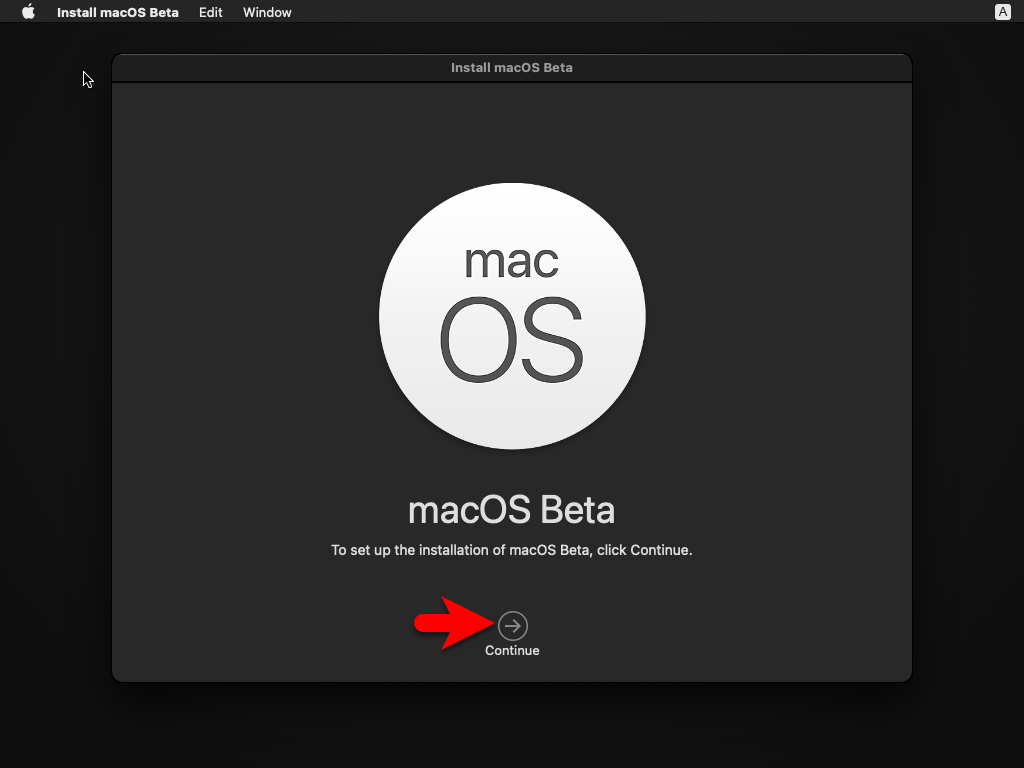
To set up the installation of macOS Big Sur click continue.
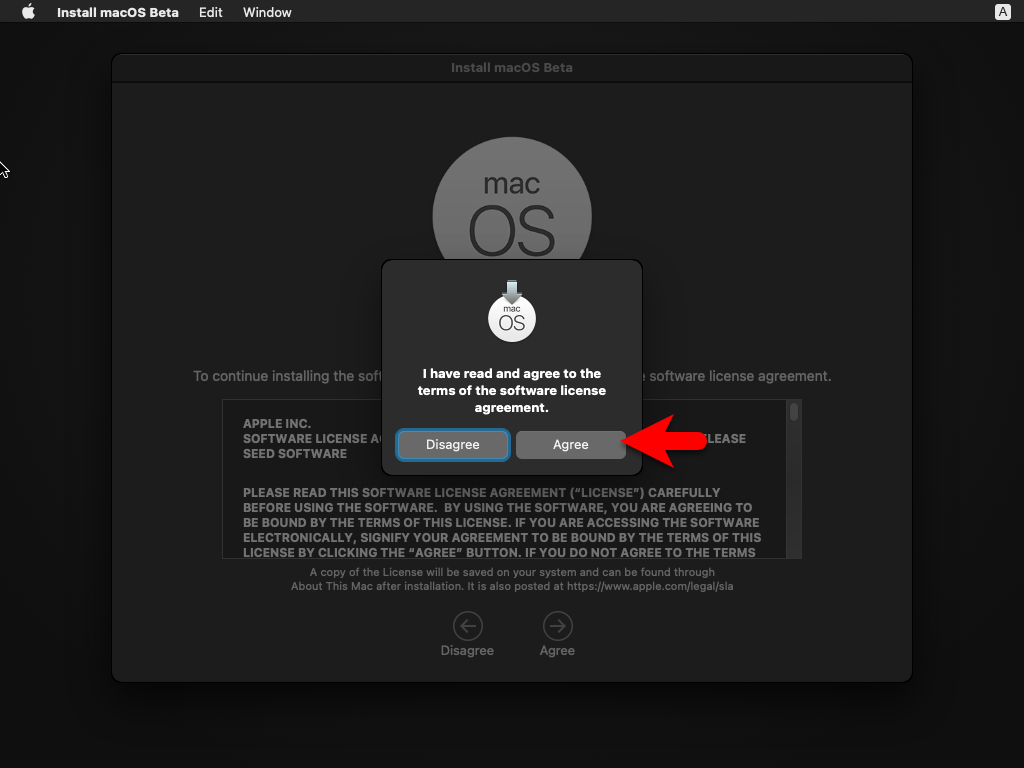
Agree with the terms and conditions of macOS Big Sur.
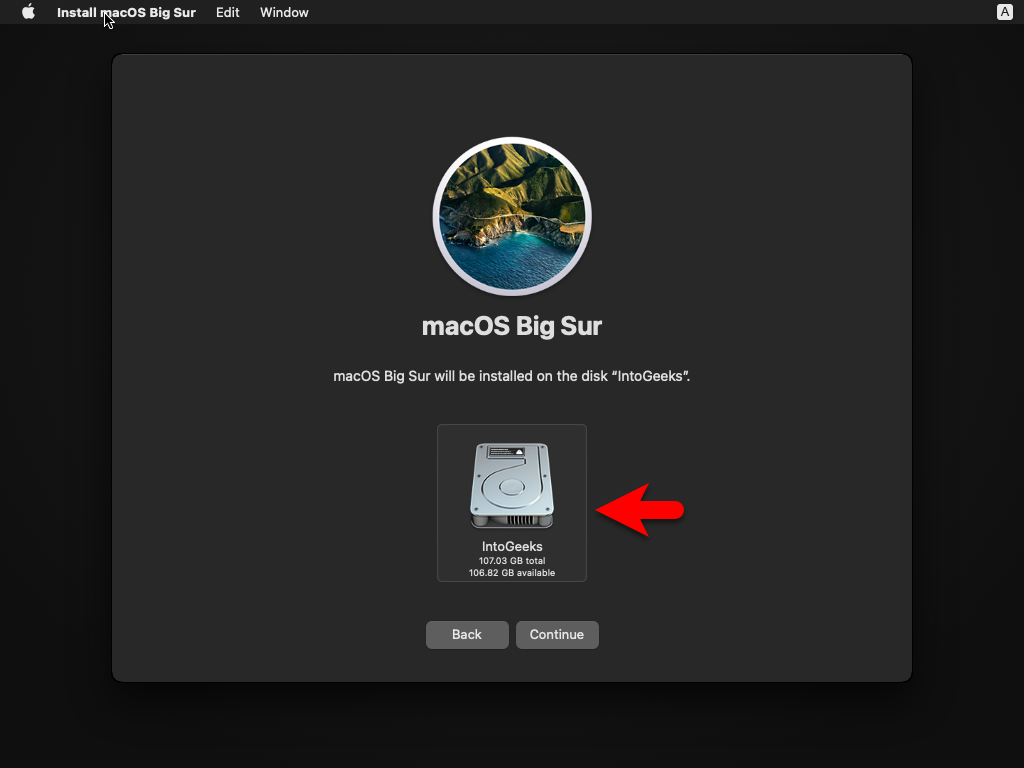
Now select the disk to install the macOS Big Sur, this disk is formatted in the disk utility window in the previous step.
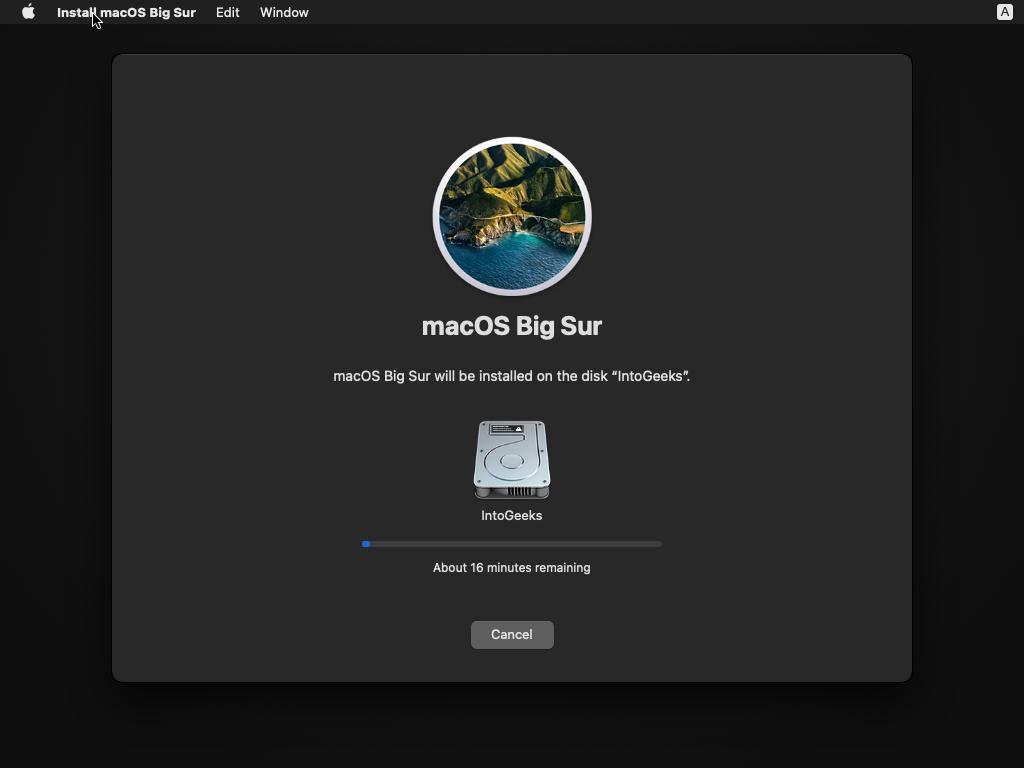
Now the installation will start installing macOS Big Sur on VirtualBox. So, the installation process may take time, wait for the installation that it should be complete. Also, during the installation, the virtual machine will restart several times.
Complete the Basic Settings of macOS Big Sur
When the installation of macOS Big Sur is completed on VirtualBox on Windows PC. So, there are a few basic settings for the use of macOS Big Sur on VirtualBox on a Windows PC.
- Select your country and click continue
- Choose a keyboard layout and click continue. If you want to customize the keyboard layout, to add any other language you can add that by clicking on customize settings.
- You can turn on the accessibility options feature on macOS Big Sur. There are multiple options for accessibility such as Vision, Motor, Hearing, and Cognitive. So if you don’t want to use this feature click on the Not now option.
- Read the Data & Privacy then click continue.
- On the migration assistant page simply click on the not now option.
- You can enter the Apple ID on this window, So, there is no need to enter the Apple ID simply continue by clicking on the Set up later option.
- Click agree to agree with the terms and conditions of macOS Big Sur.
- If you want to use the express setup, so if you don’t want simply click continue.
- On the Analytics window simply click continue.
- On the Screen-time window click to set up later.
- Enable Siri and click continue.
- On the improve Siri & Dictation click on the not now option.
- Select the look for macOS Big Sur on VMware on Windows PC.
- And finally, the macOS Big Su is successfully installed on VMware on Windows PC.


Check the below link on how to Fix the macOS Big Sur screen Resolution on VirtualBox on Windows.
Conclusion
After that, the macOS Big Sur is successfully installed on VirtualBox on Windows PC. The only thing is remaining to use the macOS Big Sur full-screen mode on VirtualBox on Windows PC. That is easy there are some commands which you can find in the above description to apply the full-screen mode of macOS Big Sur on VirtualBox on a Windows PC.


14 Comments