How to Install Android on VirtualBox on Windows PC?
How to Install Android on VirtualBox on Windows PC?
In the previous article, I described everything about Android x86. And also guide the way to install Android on VMware on Windows PC using its ISO image file. Again in this article, I will guide the steps on how to install Android on VirtualBox on Windows PC. Android is the mobile operating system based on a modified Linux kernel and other open-source software. Android is designed for the smartphones such as touchscreen mobiles and tablets. The Android operating system copyright belongs to Google, and because of the copyright over 70 percent of users are downloading and installing Apps and games from Google Play.
And if we talk about Google Play Store over 3 million Apps and games are registered and available. And most of the Apps and games are not compatible with Windows PCs. As you know at the time of Windows 11 the Microsoft store launched new features, as most of the important Applications are available in it. And most of the Games and Apps are not available on Microsoft Store. So, there are no worries you can install the Apps and Games through an emulator.
There are famous emulators like Bluestack, LDPlayer, and NoxPlayer, that are available for Windows PCs. You can use any of them to install Android Apps and Games. But the installation process may take lots of time and disk space, as I recommend you to have the access to Android x86 on VirtualBox on Windows PC. In addition, if you want to check or test the Android features, then I recommend you to use the Virtual machines.
How to Install Android on VirtualBox on Windows PC?
Android x86 is not the same as the other Android versions, this Android x86 is an operating system that is designed only for ARM chips and can’t run on x86 chips. This Android operating system was launched in 2009 as an open-source project. It’s only targeted for x86 processors instead of RISC-based ARM chips.
To install Android x86 on VirtualBox on Windows PC, you need to prepare the below-down requirements.
- Android x86 IOS Image file
- Install VirtualBox on Windows PC + Extension Pack
- Create a new virtual machine
- Edit some settings for better performance
- 4GB of RAM is recommended
- 15GB of disk recommended
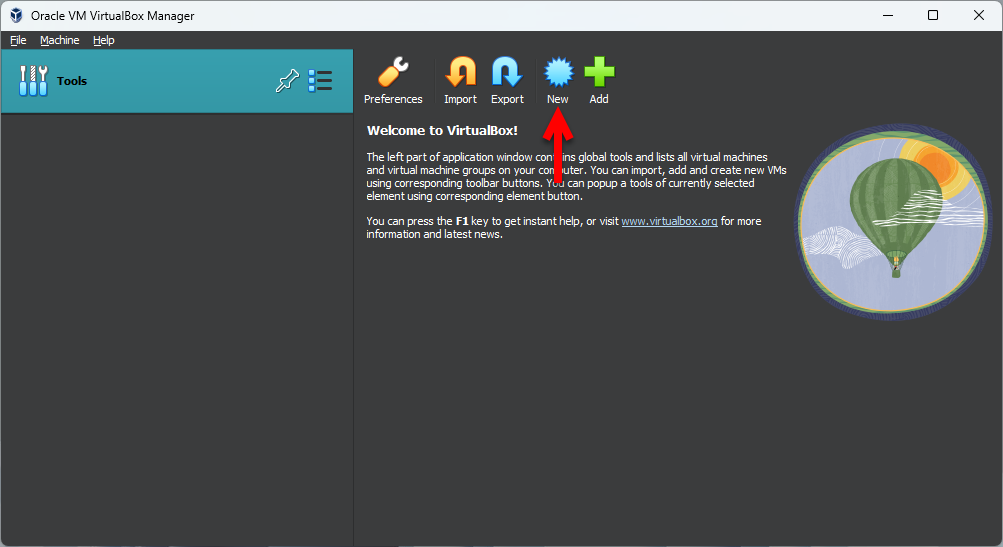
Now go to VirtualBox open it, and on the main window click on the New option.
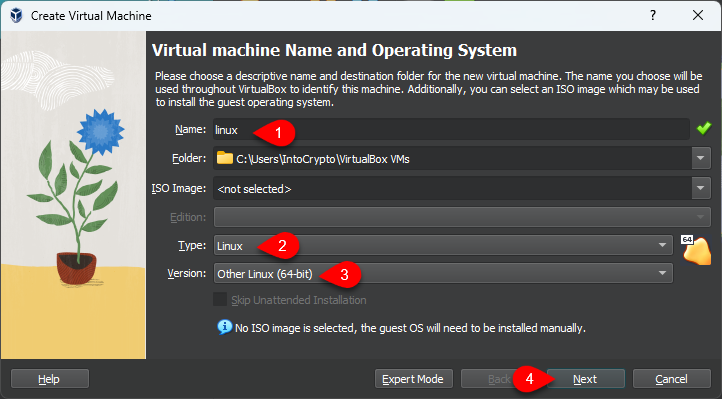
In this step, type Linux, select the folder, on the type option select Linux, then on the version select Other Linux (64-bit) and click next.
Increase the memory size, increase the processor, and click next.

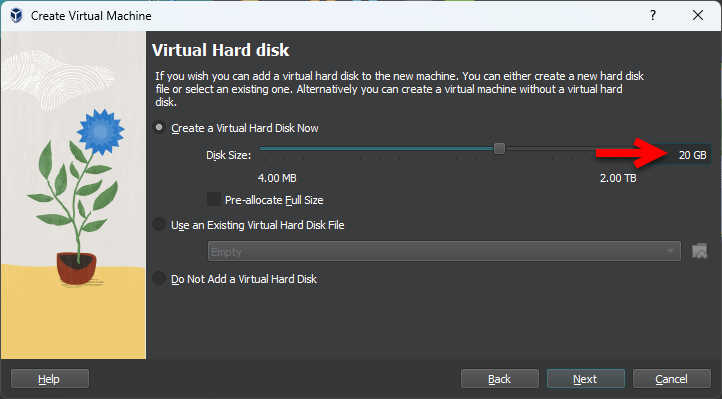
Select the option (Crate a Virtual Hard Disk), select the disk space size for Android, and click next.
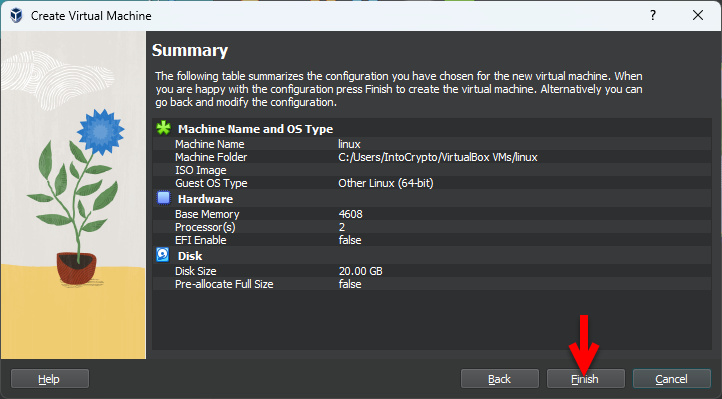
And on the final step click on Finish to create the virtual machine for Android.
Edit the Virtual Machine for Android
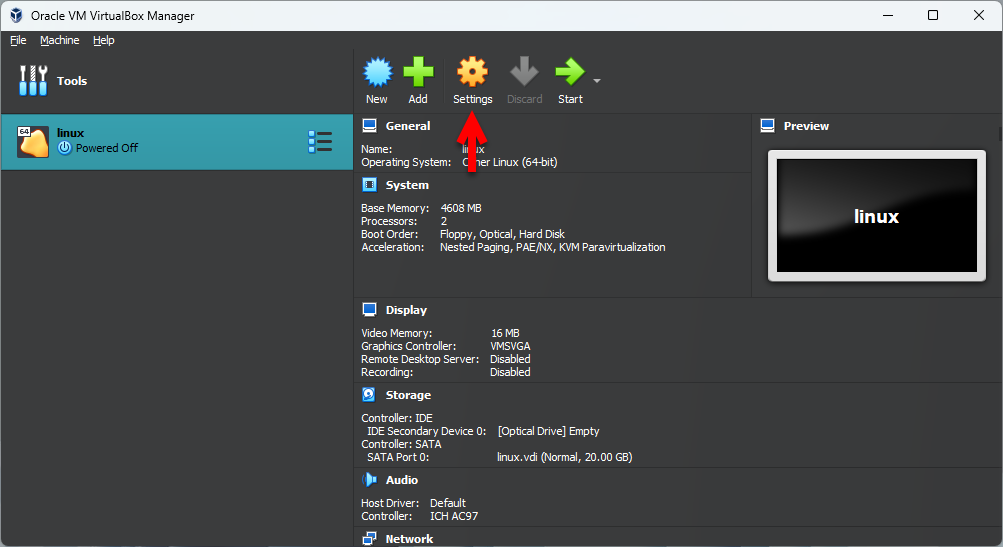
Once the virtual machine is successfully created for Android on VirtualBox. Now you have to edit some settings to have better performance for Android. To edit the setting simply click on settings.
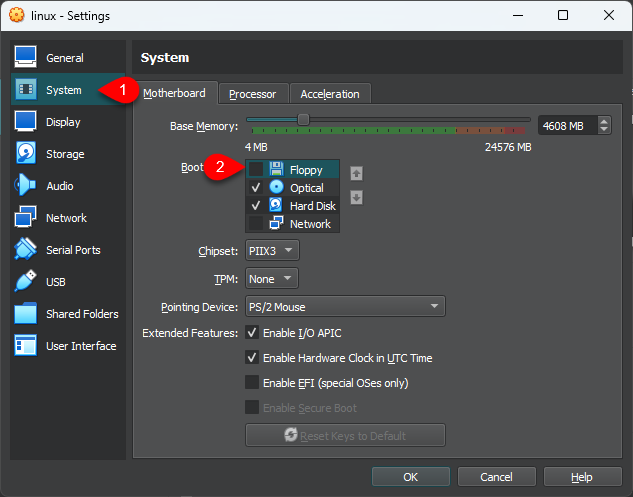
When the settings window opened, from the left-handed window side select the System tab. Then select the motherboard tab and uncheck the floppy disk.
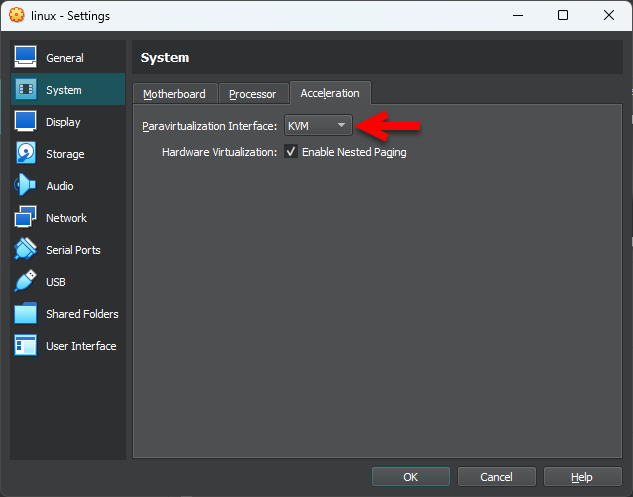
Select the acceleration tab, then on the Paravirtualization interface select the (KVM) option.
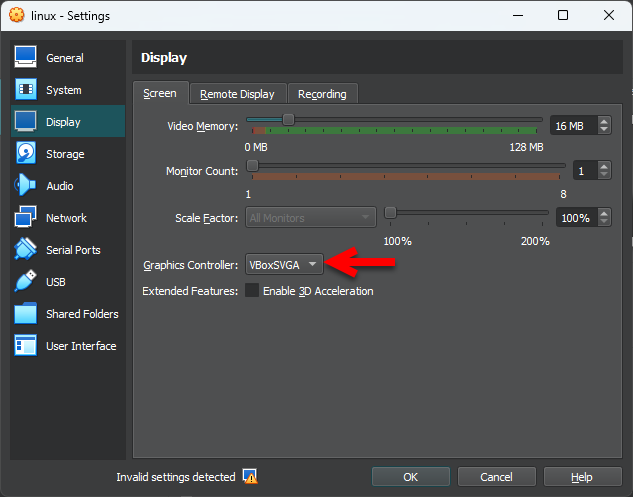
Choose the Display tab, on the screen tab increase the video memory, and on the below down on the graphics controller tab, select the VBoxSVGA.
Select the storage tab, select the empty disc icon, then click on the optical drive and click on choose a disk file.
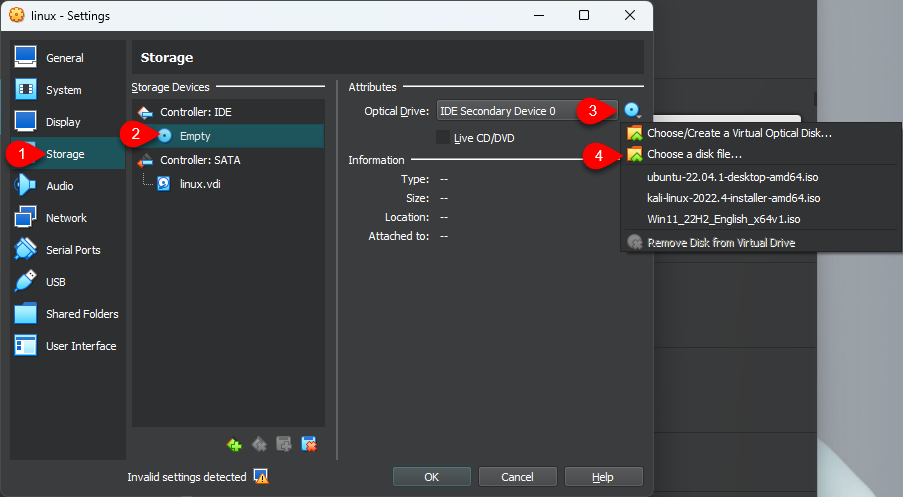
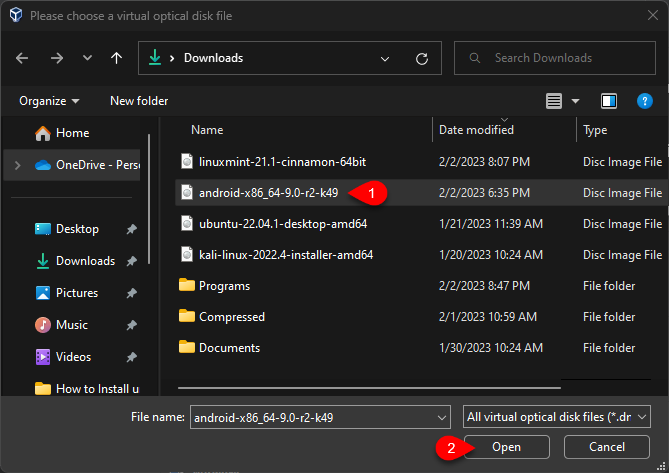
Now go to the place where you saved the Android ISO image file, select the ISO file, and click open.
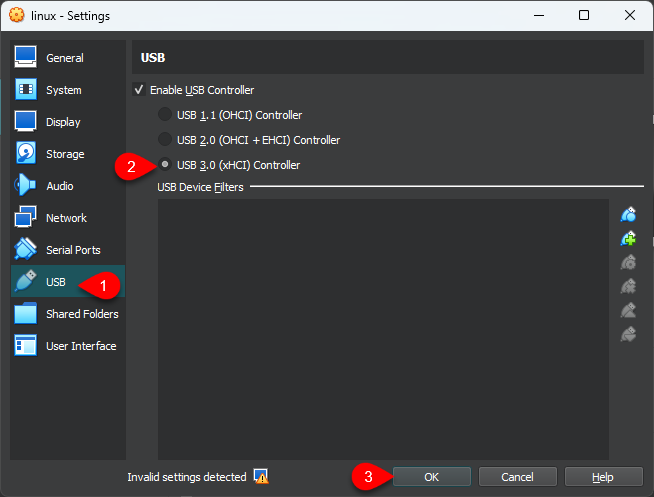
Go to the USB tab, then select USB 3.0 (xHCI) Controller and click on OK to save the changes.
Perform a Clean Installation of Android on VirtualBox on Windows PC
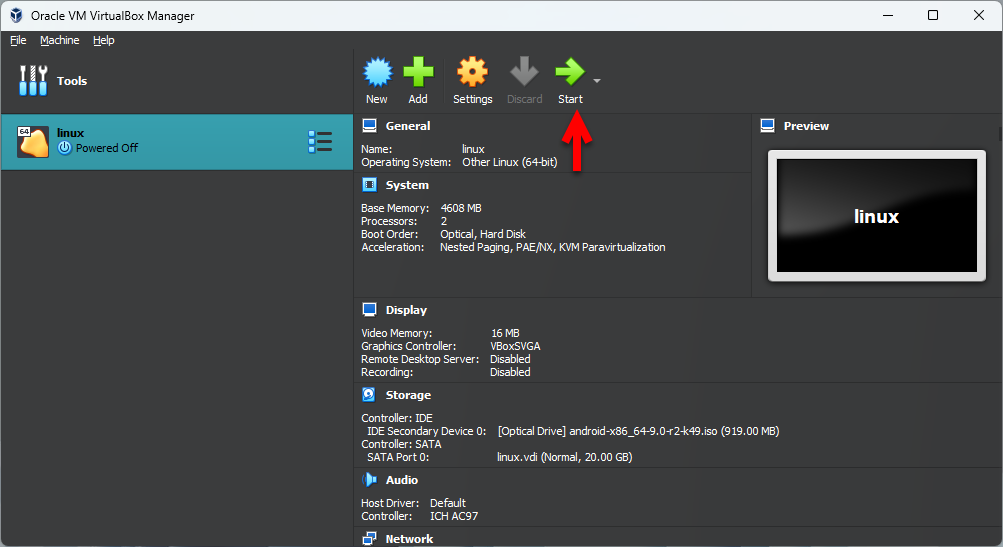
Once the virtual machine for Android is created on VirtualBox on Windows. And also you have edited the settings for better performance of the installation, then it’s time to install it. To install the Android on VirtualBox simply click on start.
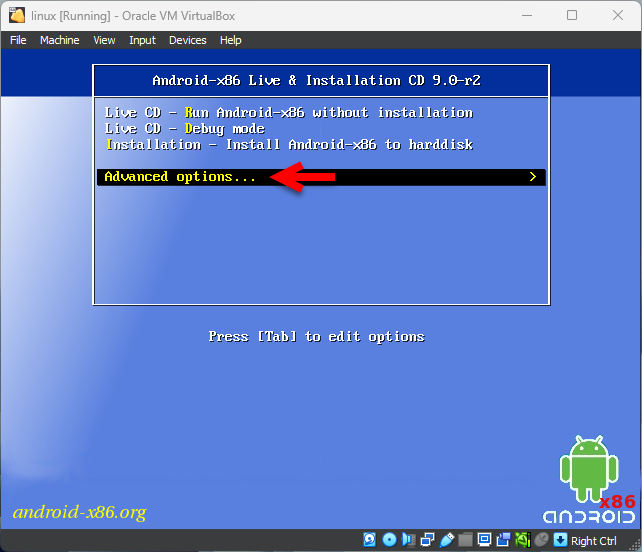
Once the installation is launched on the first welcome window use your keyboard, select the Advanced option, and hit enter.
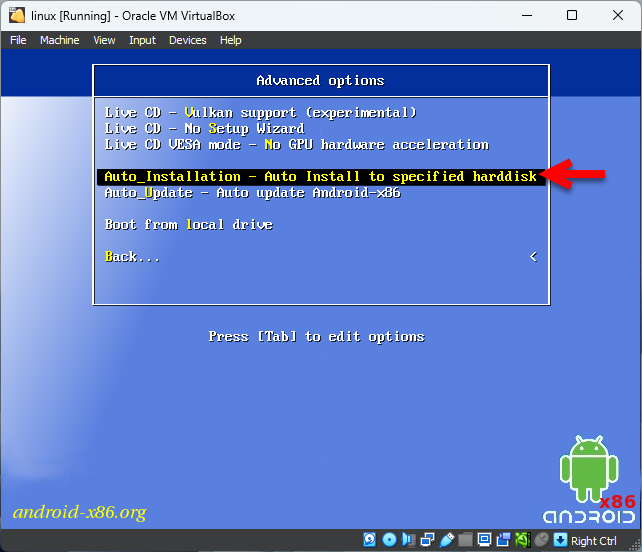
Select the Auto_installtion – Auto install to specified hard disk and hit enter.
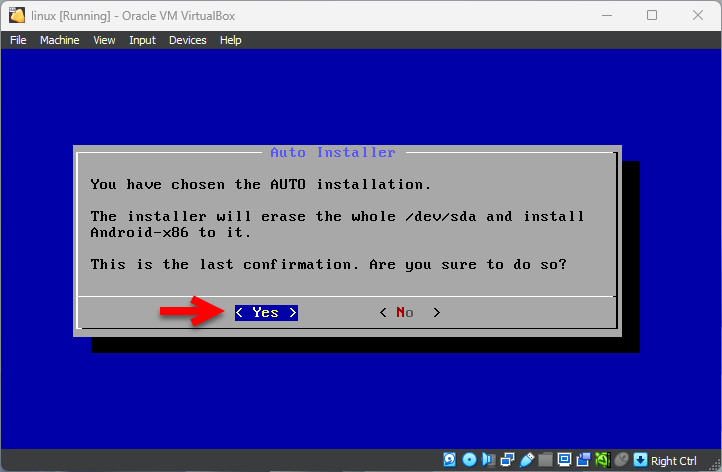
The installer will erase the whole /dev/sda and install Android-x86 to it. So, select the yes option and hit enter to erase the disk for Android.
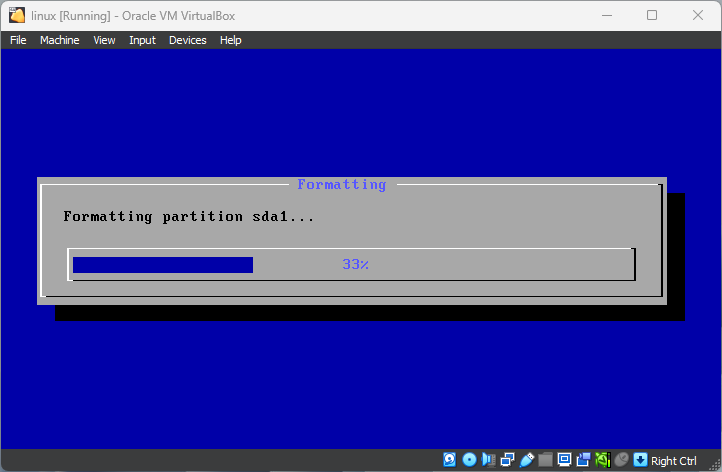
After pressing the enter key the disk will format and get ready for Android, also it will continue the installation. Wait for the installation until it should be completed.
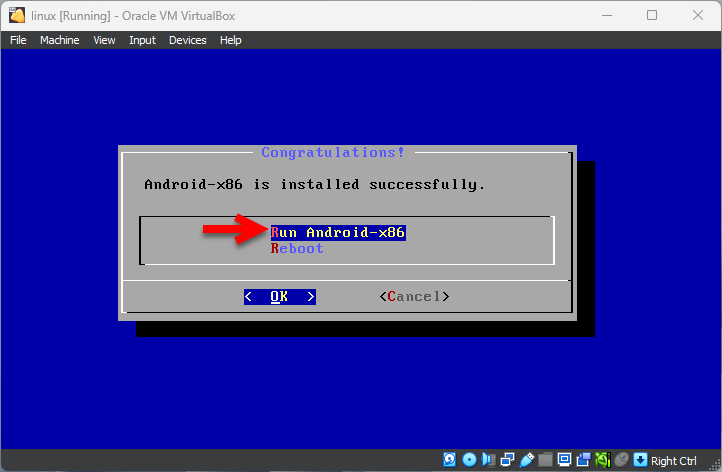
When the Android installation is successfully completed simply select the Run Android-x86 option and hit enter to continue to Android.
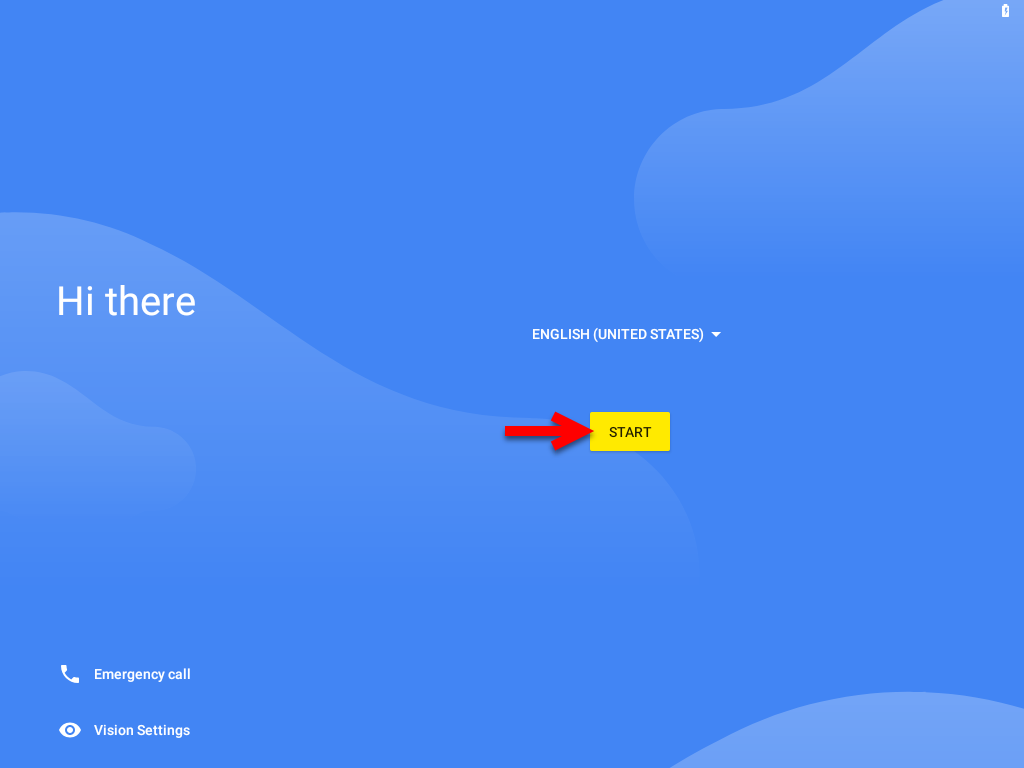
While the virtual machine successfully restarted on the first welcome wizard select your language and click start.
Now if you want to connect the Android to wifi simply enter your wifi password and connect it. If you don’t want to connect the Android to wifi simply click on Skip and click skip anyway.

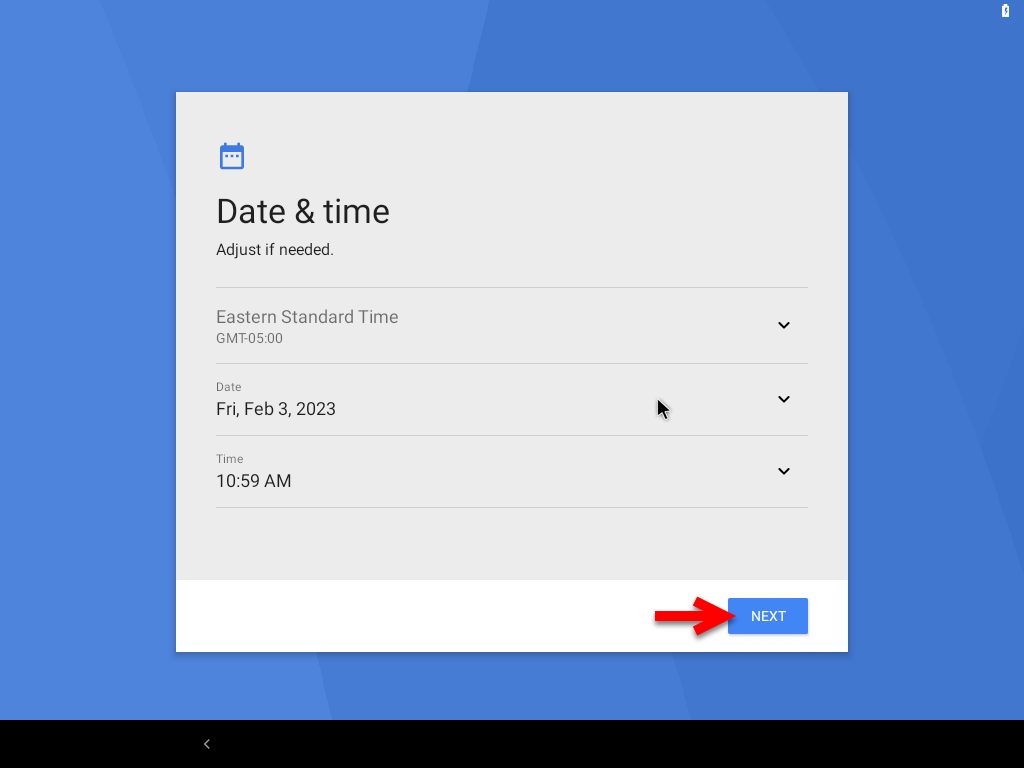
Confirm the date and time then click next.
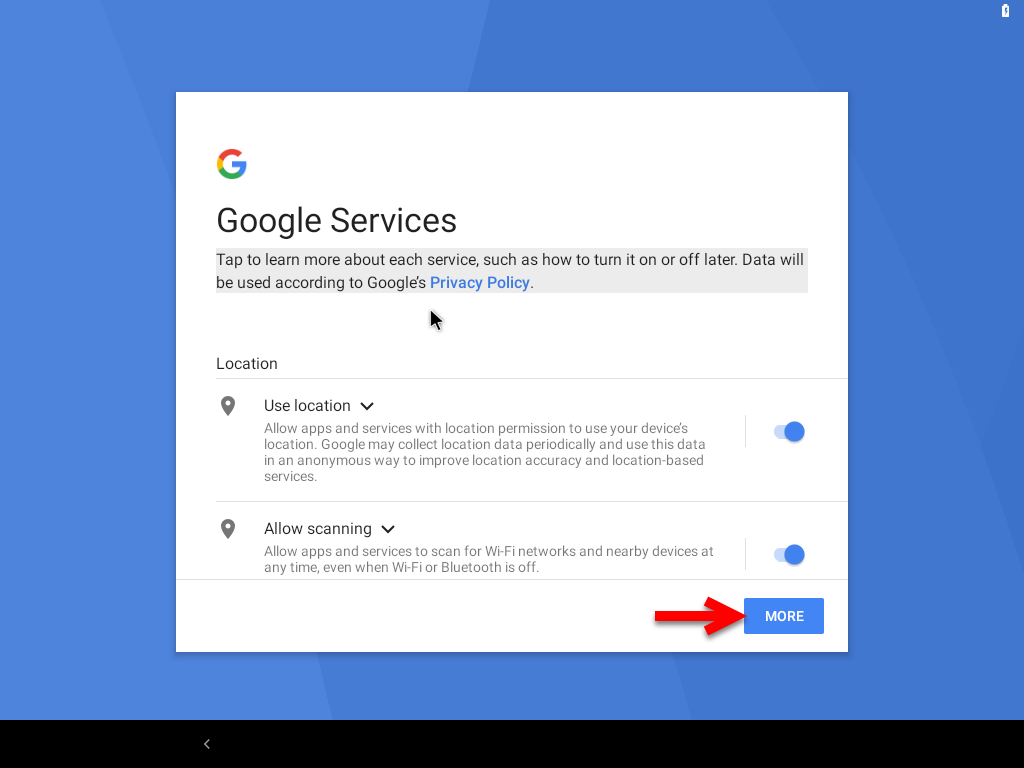
On the Google, service window click on more options.
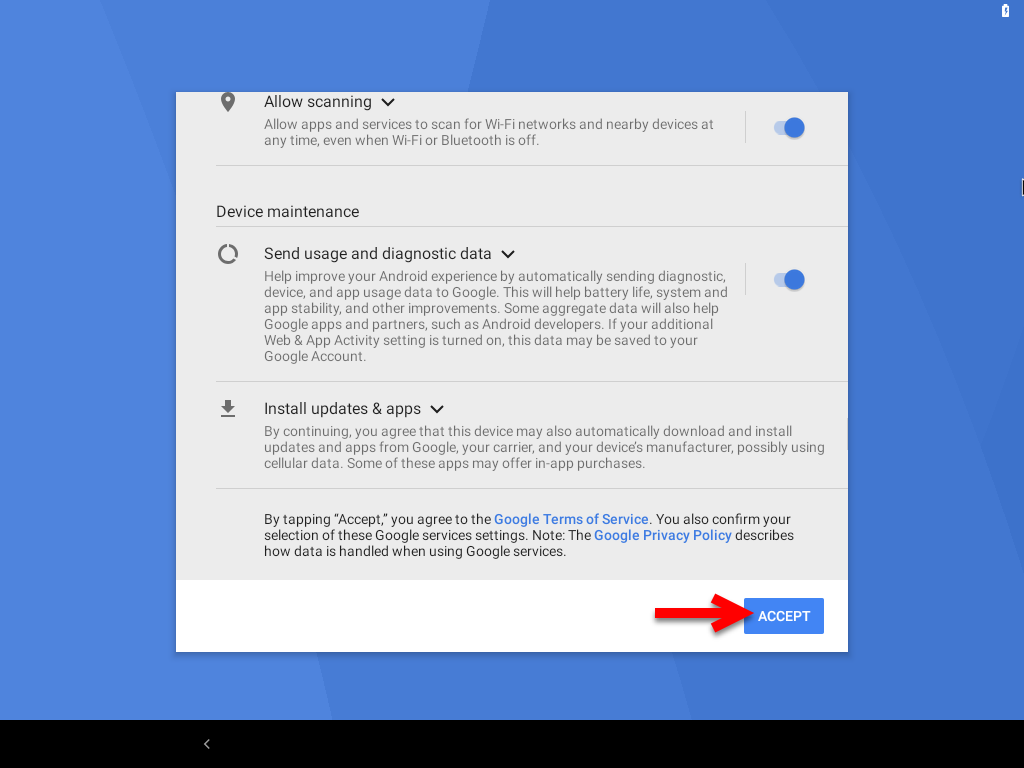
Now accept the terms and services of Android.
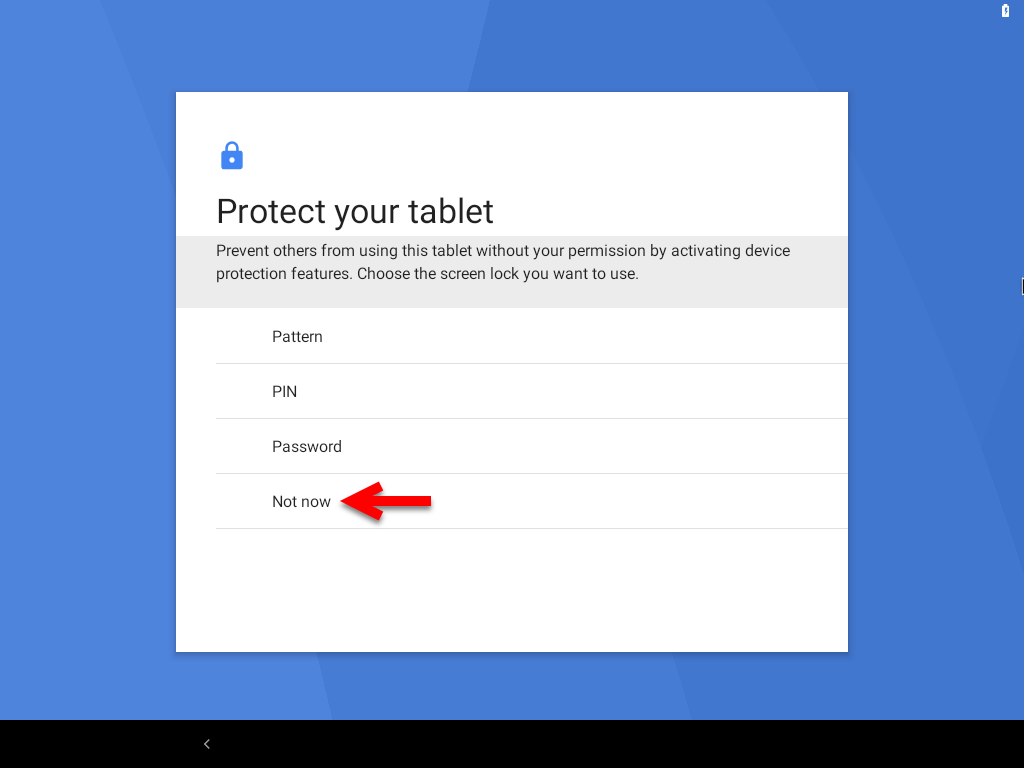
If you want to set a password for Android, simply enter any password, if you don’t want to enter any password simply click on Not now.
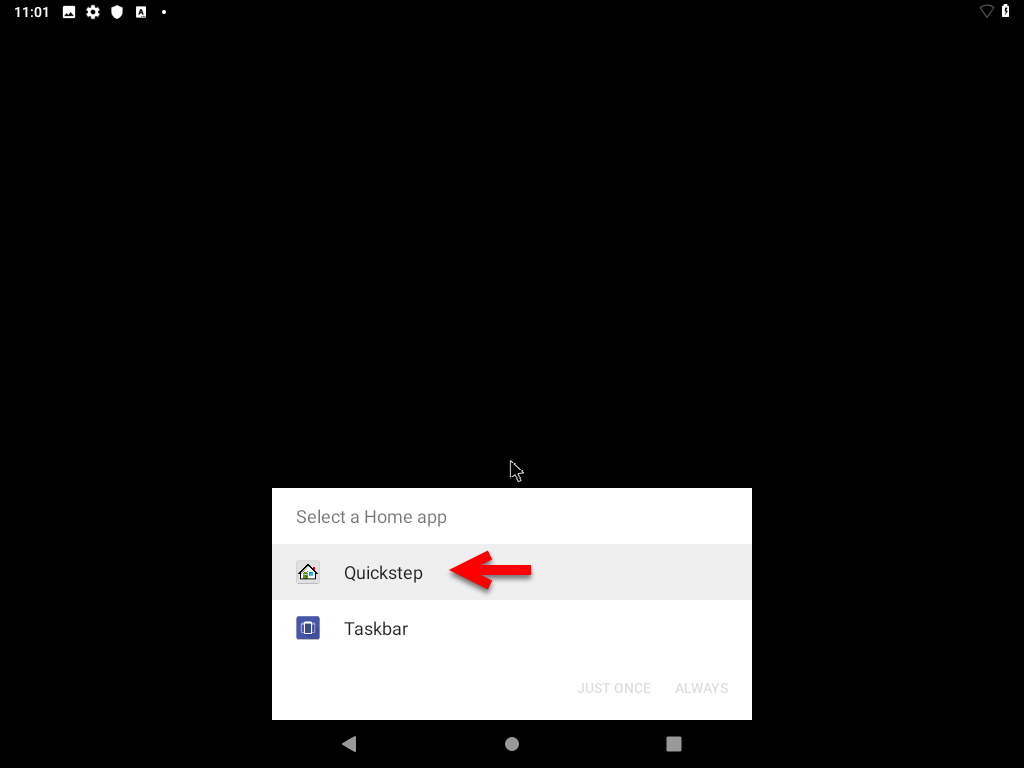
While the Android opened, therefore, you need to set up the Android for the first use on VirtualBox. So, simply click on the Quick setup option to set the Android.
And finally, Android is installed on VirtualBox on Windows PC.
Conclusion
After the installation of Android is completed you can use the Android on VirtualBox as the actual operating system. You can access the internet and other functions on VirtualBox on Windows PC. The next thing is you don’t use any emulator on your Windows PC.


One Comment