In this article, I will guide you on how to install Linux Mint on VMware on Windows PC. If you are currently using the Windows operating system on your machine, then besides your Windows you can use Linux macOS, and other different operating systems using Virtual Machine. Using the virtual machine platform, you can easily install multiple operating systems on a single physical machine. As similar, you can test Linux Mint on Windows PC on a virtual machine without any issues. With a few clicks, you can install the VMware on your Windows PC, and with a few clicks, you can install Linux Mint on it.
Related Posts:
- How to Install Android on VMware on Windows PC?
- How to Install Ubuntu 22.4 on VMware on Windows 11 PC?
- How to Install Kali Linux on VMware on Windows PC (New Update)
- How to Install Windows 11 on VMware Workstation Pro 17?
We have tested Android, Ubuntu, Kali Linux, and Windows 11 on VMware Workstation Pro 17 which is the latest version of VMware. When it comes to VMware there is VMware Workstation/Player. You can use VMware Player free of cost on your Windows PC. But if you want to use the Workstation you need to pay money for it. Both are working the same, but the Workstation is having more features than VMware Player.
Related: How to Install Linux Mint on VirtualBox on Windows PC?
What is Linux Mint? Linux is a community-driven Linux distribution operating system based on Ubuntu OS. Which is based on Debian, which comes with bundles of free open-source applications. For example, if you compare the Linux Mint with Ubuntu or Kali Linux it’s not much hard to use it. If you can’t use Kali Linux or other Linux on your machine, then you can use Linux Mint which looks similar for Windows users. There is two main easy operating system that I can recommend for you then using Kali Linux or Ubuntu, and that is Linux Mint or Zorin OS, Which looks much easy to use on your PC.
How to Install Linux Mint on VMware on Windows PC?
To install Linux Mint firstly you have to download the ISO image file of Linux mint on your Windows PC. Then secondly you need to install the VMware Workstation latest version on your Windows PC. And also,t there are some requirements before installing the Linux Mint on VMware.
- Linux Mint ISO image file
- Install VMware Workstation on Windows PC
- 2GB of RAM is required (4 is recommended)
- 30GB of Disk space
- Create a New virtual machine for Linux Mint on VMware
- Edit the settings for the best performance
- Perform a clean installation of Linux Mint on VMware
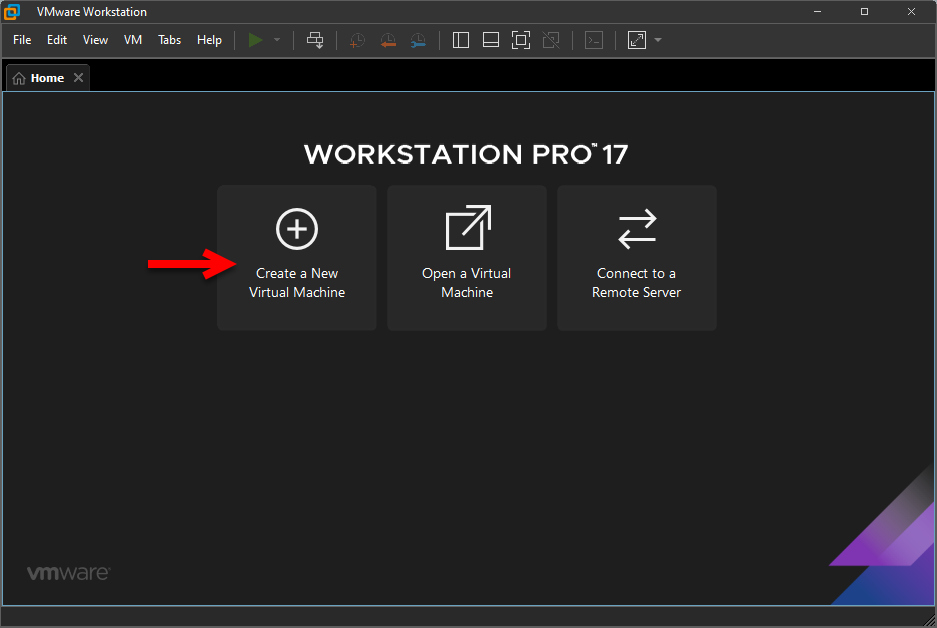
To create a new virtual machine open up the VMware Workstation, then on the first welcome window click on create a new virtual machine.
Now select the typically recommended option and click next, then select the option I will install the operating system later and click next.

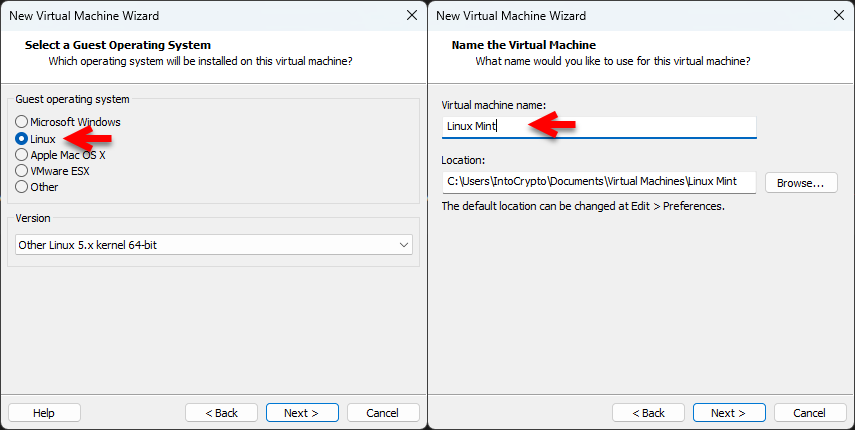
Select the guest operating system Linux, then the version (Other Linux 5.x kernel 64-bit), and click next, Type the name of the virtual machine specify the location and click next.
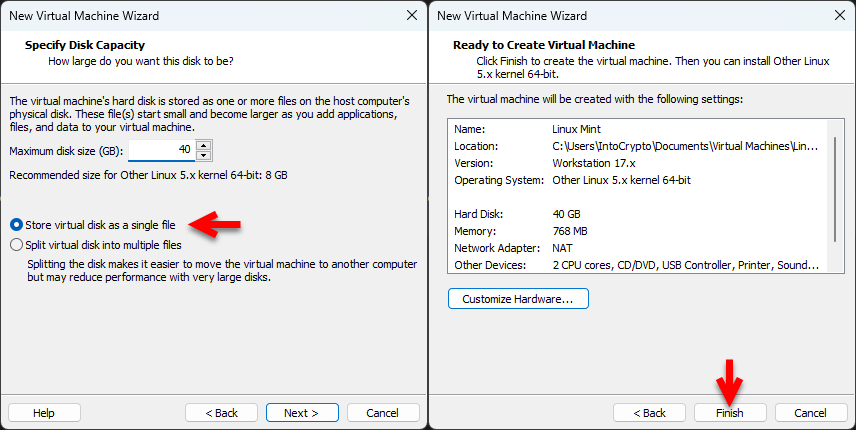
Choose the store the virtual disk as a single file and specify the disk and click next. Now you are ready to create the Liux Minut virtual machine and click finish.
Edit the virtual machine settings
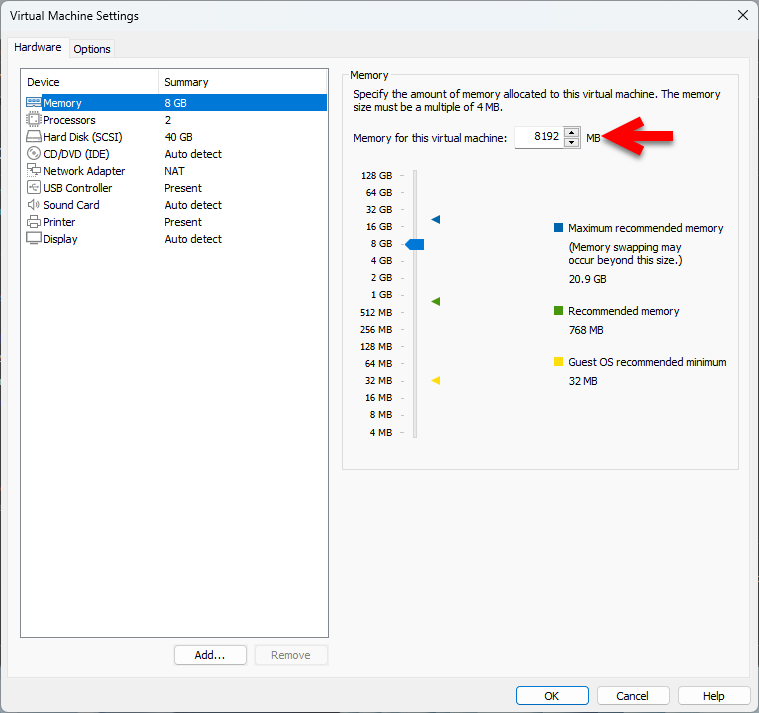
Once the virtual machine is created for Linux Mint, so you need to edit some settings for better performance. Simply click on edit virtual machine settings, when the settings window opened from the left-handed window side select the Hardware tab>Memory then increase the memory size.
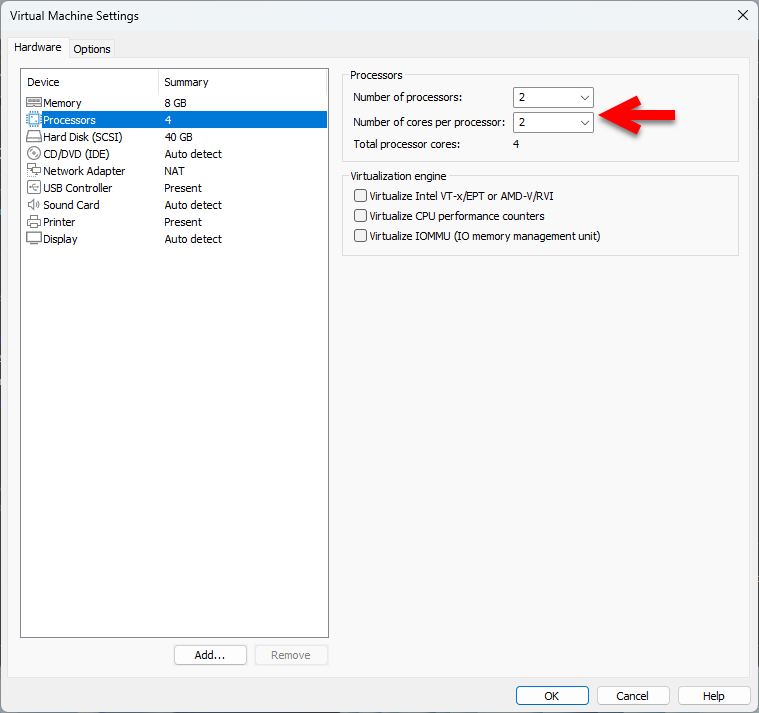
Select the processor tab, and increase the number of core processors.
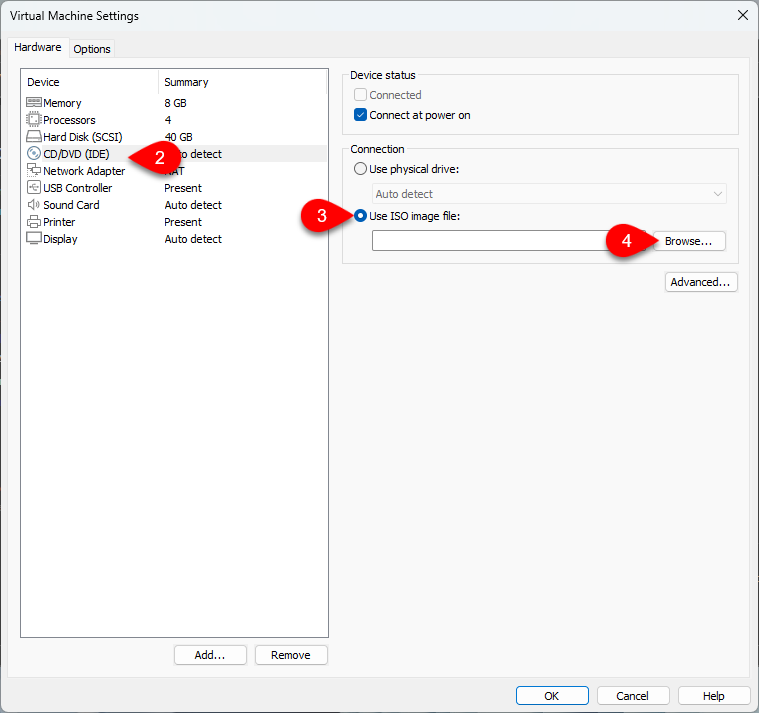
Select the CD/DVD (IDE) option, click on the Use ISO image file, and click on the browse option to insert the Linux Mint ISO file.
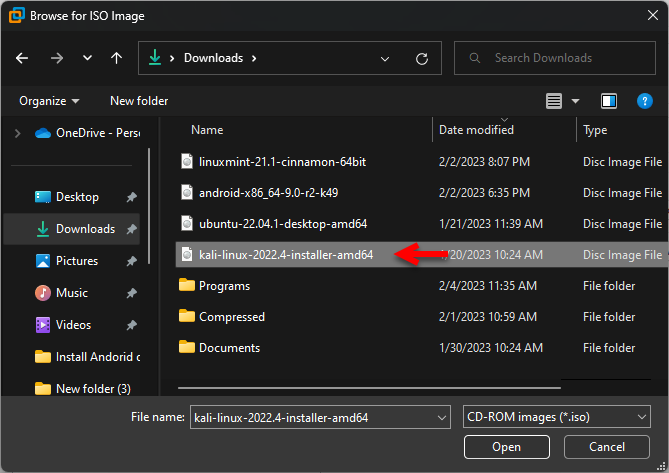
Now go to the place where you saved the ISO image file of Linux Mint, select that, and click on open.
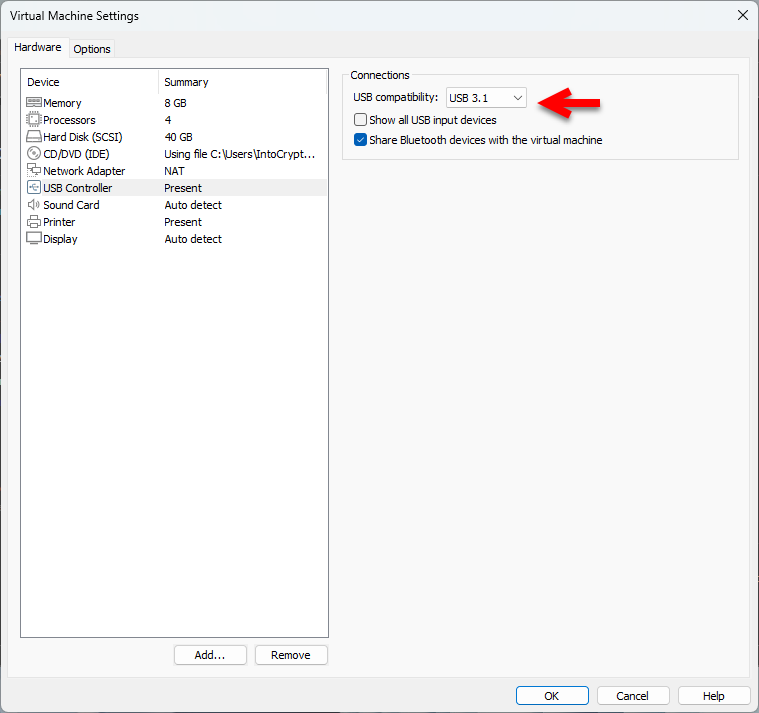
Select the USB controller tab, select USB 3.1, and click on OK to save the changes.
Perform a Clean Installation of Linux Mint on VMware on Windows PC
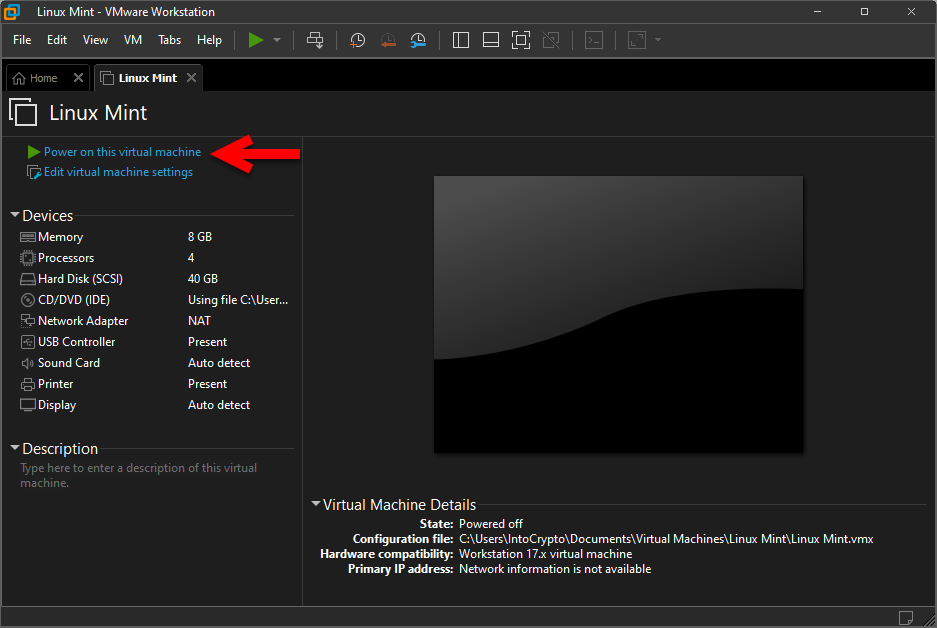
Once you have created the virtual machine for Linux Mint and edited the settings for better performance then you need to start eh installation. So, to install the Linux Mint click on power on this virtual machine to start the installation.
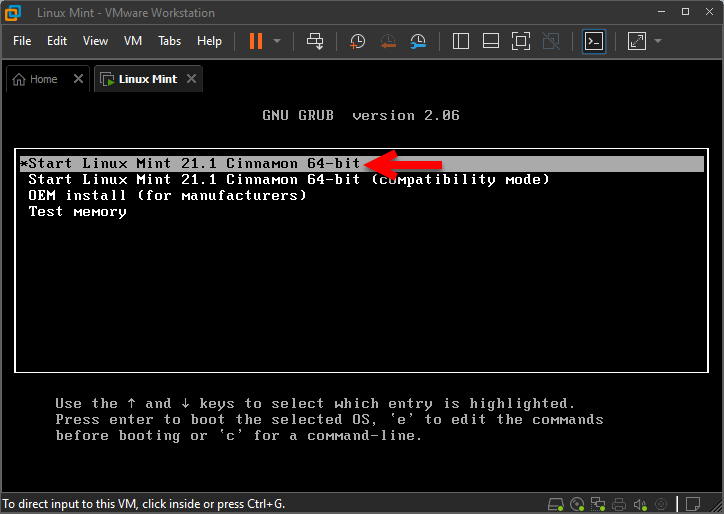
Now select the “Start Linux Mint 21.1 Cinnamon 64-Bit” and hit enter to boot into the installation process.
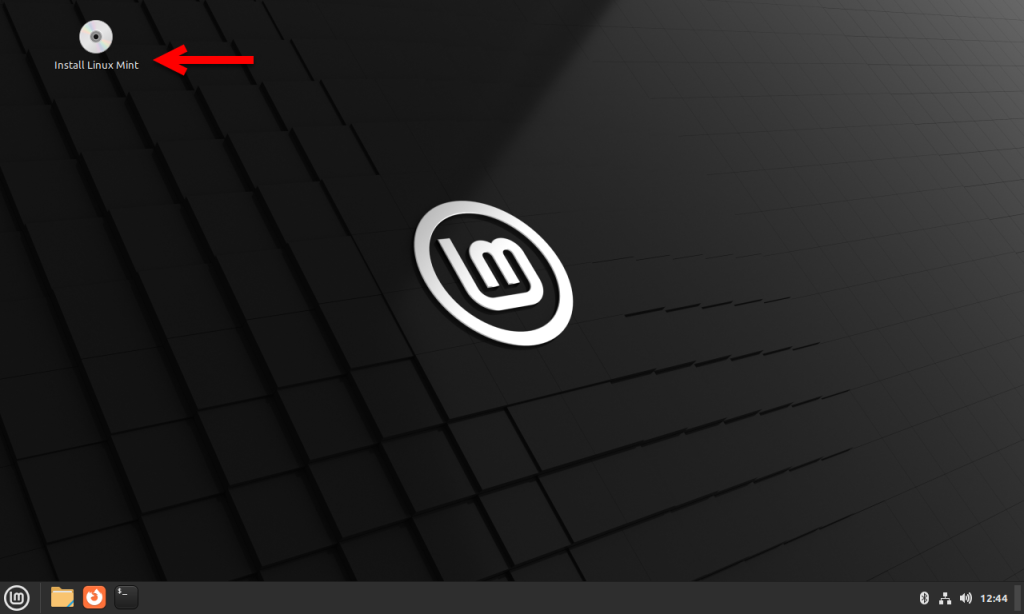
When the installation launches on the main welcome window, double-click on Install Linux Mint to launch the installation.
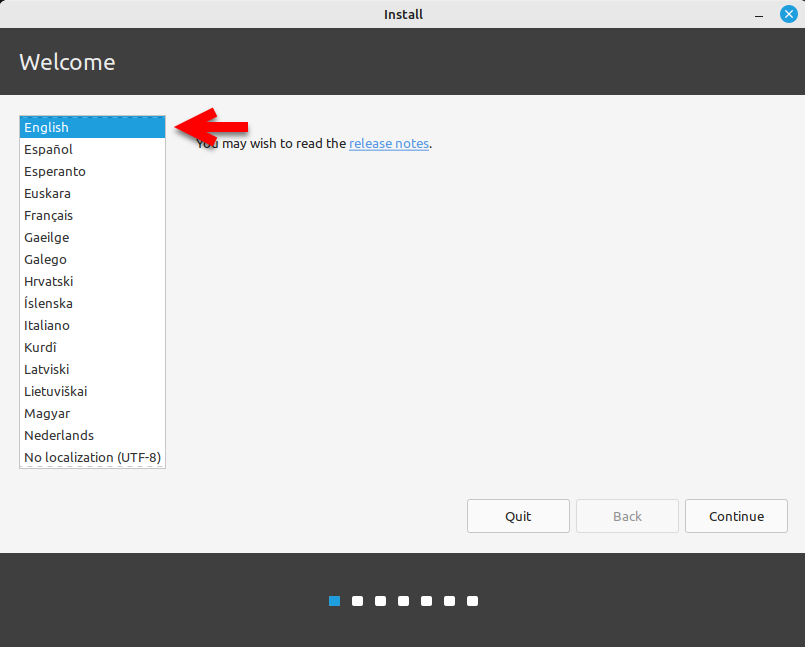
Now select your language for Linux Mint and click continue.
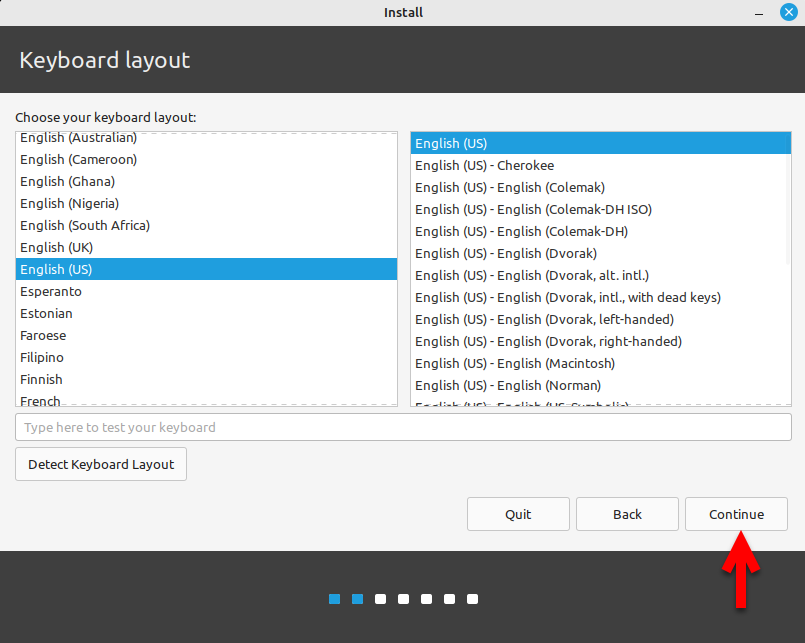
Choose your keyboard layout for Linux Minut and click next.
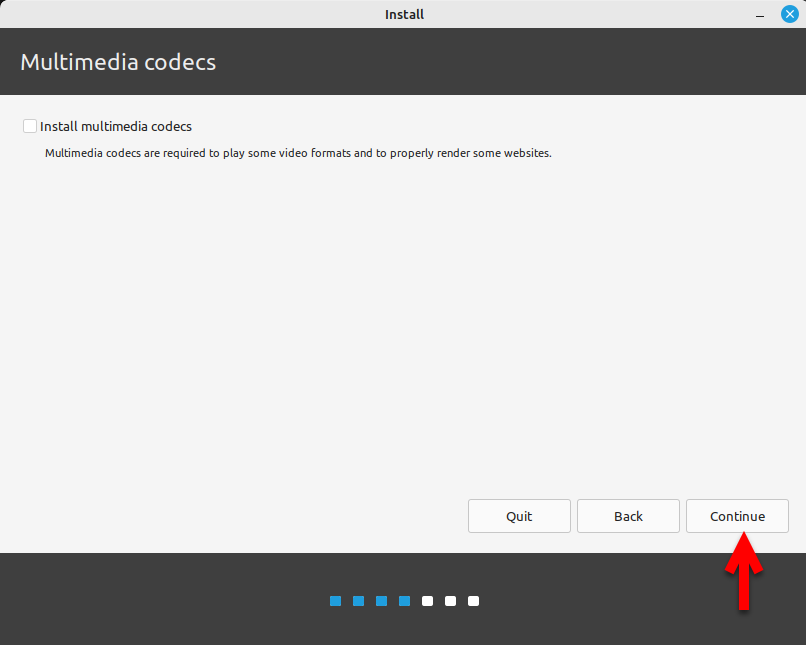
You can check the box of Install multimedia codes too, but I leave it as default, simply click on the continue option.
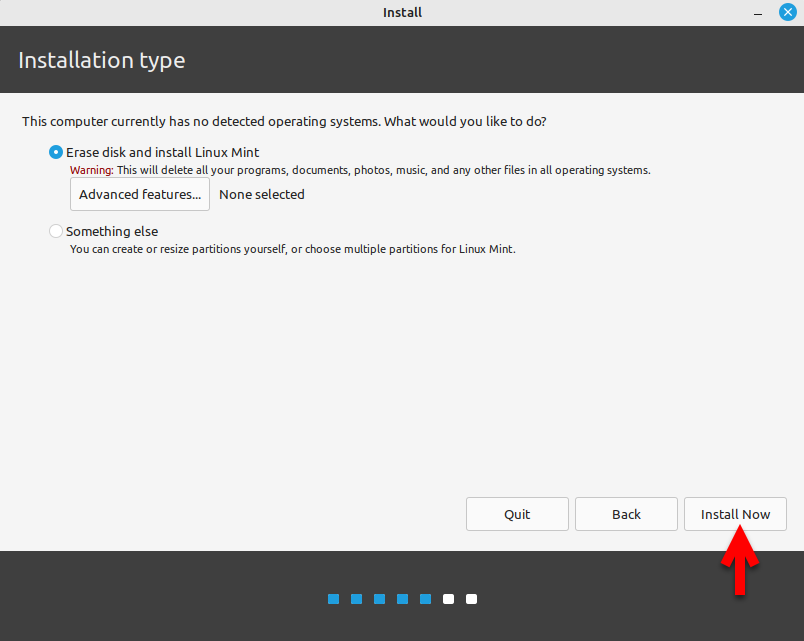
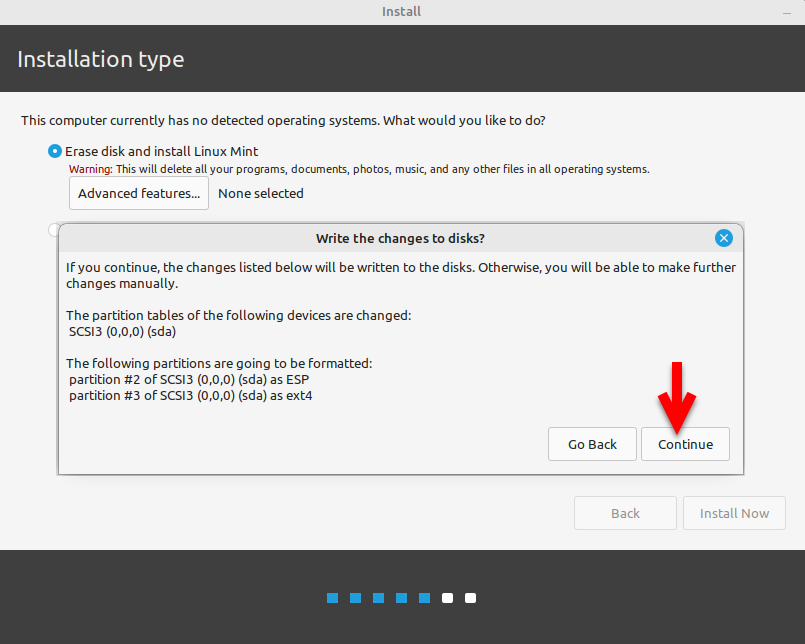
This computer currently has no detected operating systems, what would you like to do? So, simply select “Erase disk and install Linux Mint” and click continue.
If you continue, the changes listed below will be written to the disks. You will be able to make further changes manually. Simply click on the continue option to erase the disk and make the disk ready for installation.
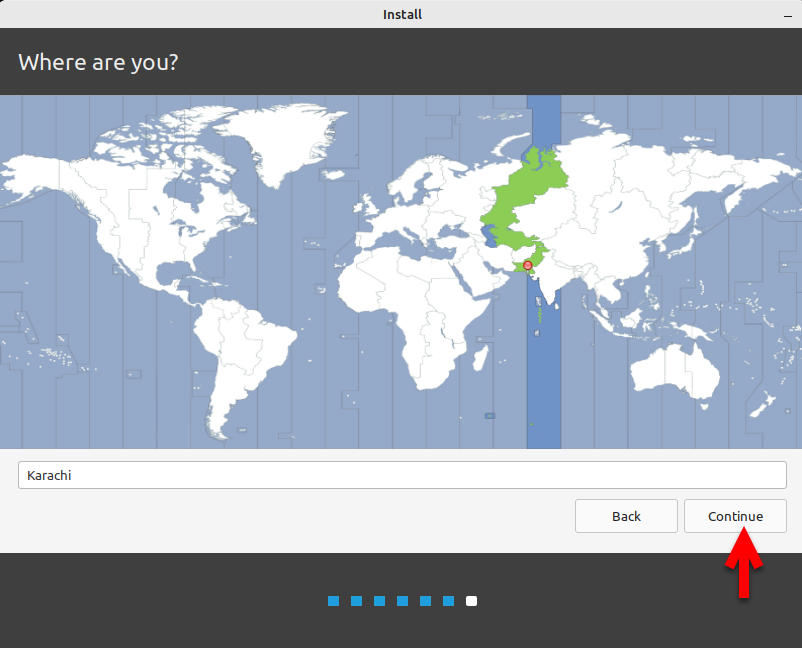
After the disk is erased you have to select the location where you live and click continue.
Now you have to enter your username, and your computer’s name, pick a username, choose your password, confirm your password, and click continue.

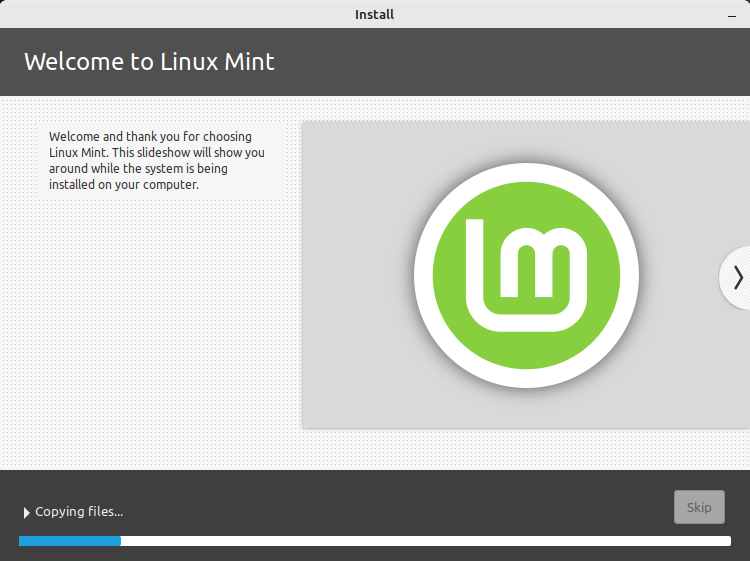
After confirming the username and password, the installation will start copying the necessary files. So, wait until the file should copy.
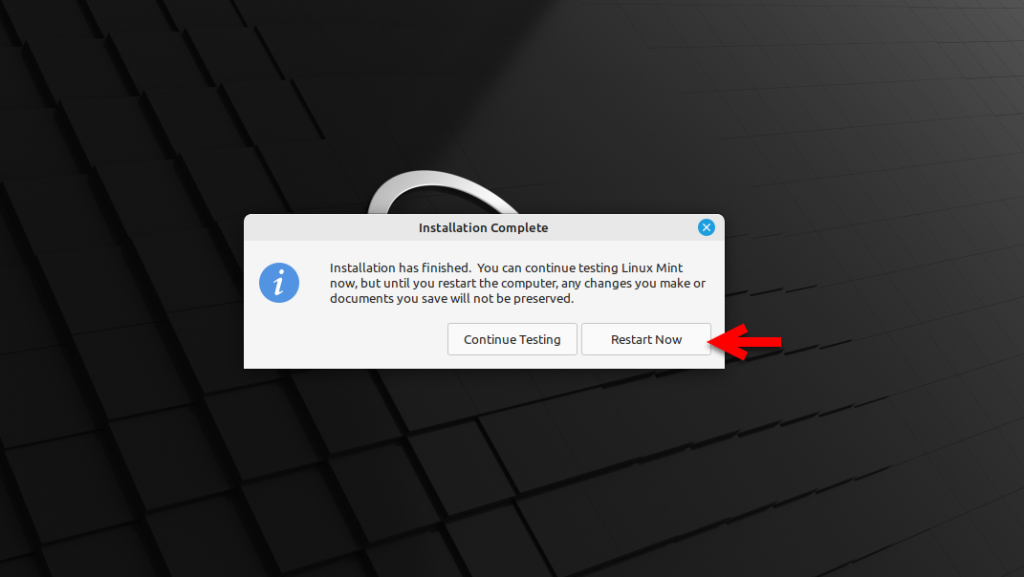
When the installation is completed you will be required to restart the virtual machine, so simply click on Restart now option.
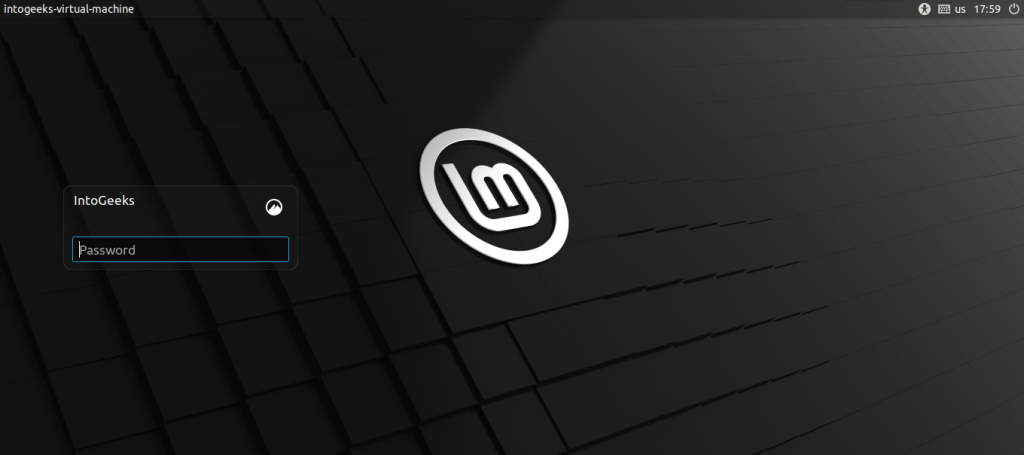
And the Linux Mint is successfully installed on VMware on Windows PC, after the restarting you have to enter your password and hit enter to log in to Linux Mint.
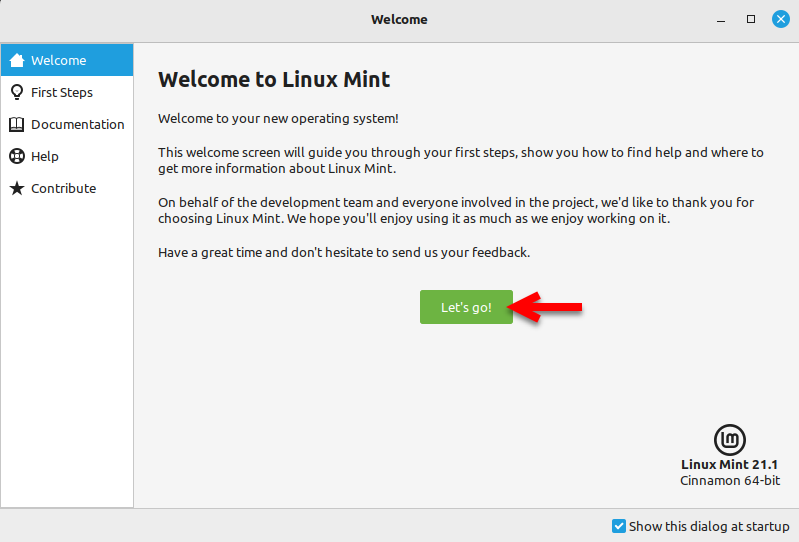
Now you have to complete the basic settings for Linux Mint on VMware, by clicking on the Let’s go option.
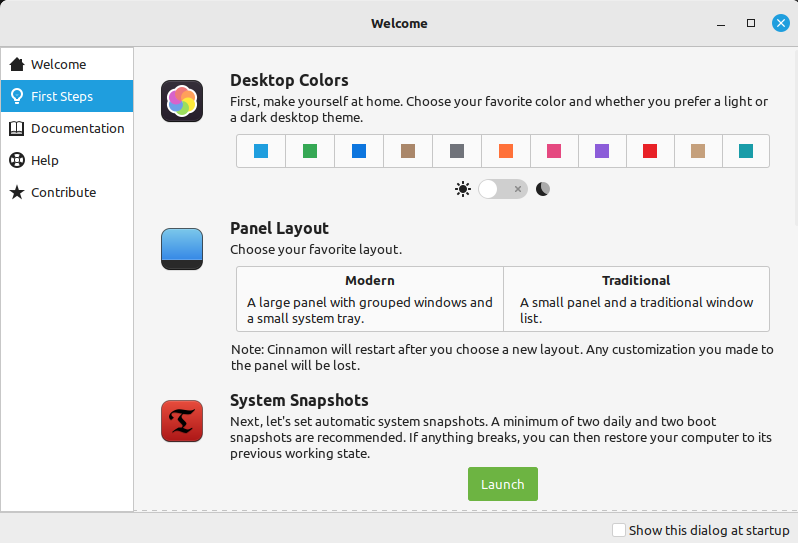
Here you can customize the colors for Linux Mint uses.
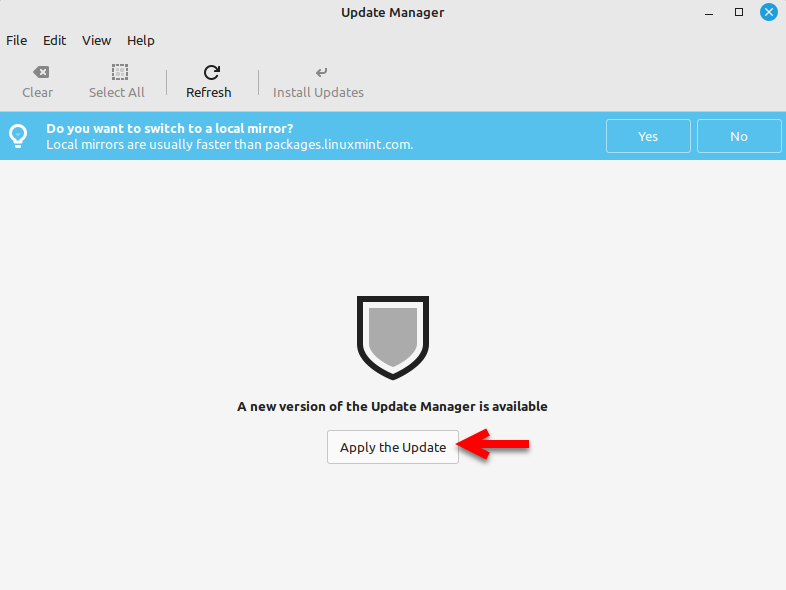
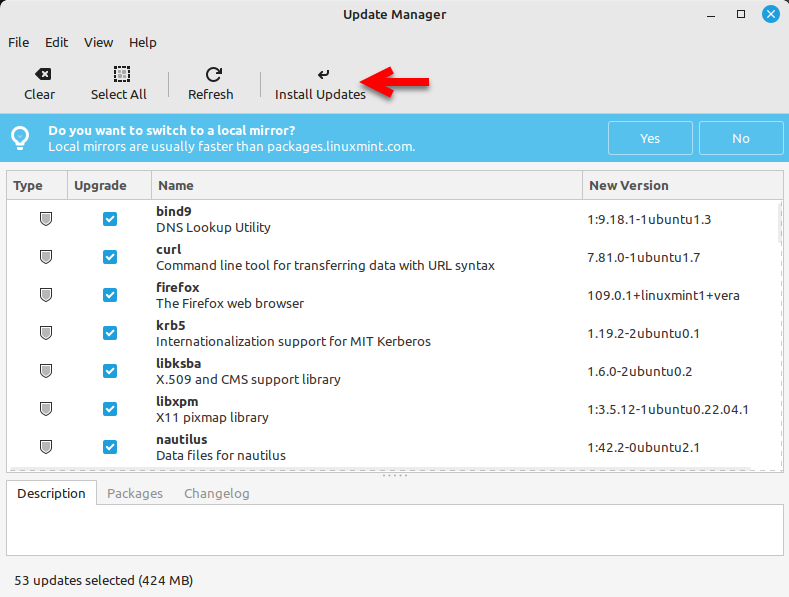
You can check for the latest update of Linux Mint, also you can update some other required updates, by simply clicking on Apply the update.
Once the updates appeared select the update you want to install, then click on Install updates.
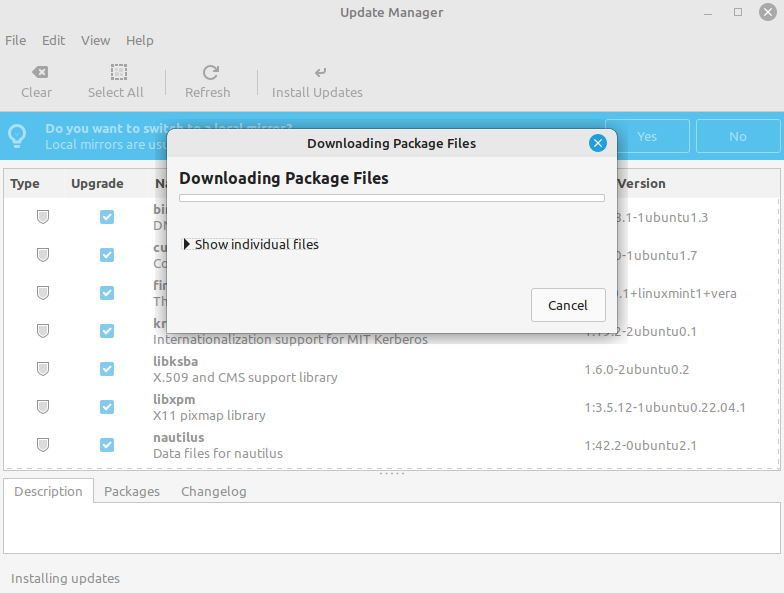
After installing the update it will unpack the packages to install the updates. So the updates may take several minutes, wait until it should be completed.
Conclusion
The Linux Mint is successfully installed on VMware on Windows 11 PC perfectly, you can perform the tasks that you can do on the actual PC. But you have complete access to a virtual machine on Linux Minut. Also, once the update is done you can more access to the features.


One Comment