
When it comes to the world of technology, technology develops currently more. The technology gives you more flexibility, usability, and probability. With the introduction of cross-platform technology like virtualization and remote computing, any program can be run on it. Hardware virtualization will allow you to create a completely working virtual machine on any platform. VMware Workstation is one such hardware virtualization platform available in the market to run several operating systems on it. So, through this post, I will guide you step by step on how to install Ubuntu 14.1 LTS latest version on VMware Workstation on Windows PC.
What is Ubuntu? is a Linux distribution based on Debian and composed mostly of free open-source software. Ubuntu was officially released in three editions desktop server and Core. These versions of Ubuntu can run on a computer or Virtual Machines. Usually, Ubuntu and Kali Linux are used for the distribution of ethical hacking and programming.
Related: How to Install Ubuntu 22.4 on VirtualBox on Windows 11 PC?
What is VMware Workstation? VMware Workstation is developed to run multiple operating systems at the same time on a single physical machine such as Windows, macOS, Linux, and other operating systems. Also, there are two different versions of VMware, the first one is VMware Workstation Player which comes with limited features freely. And the second version comes with the full and enterprise version with lots of features. And now the latest version of VMware Workstation Pro 17 is available on its official website which has stunning features. VMware 17 has DirectX 11, and OpenGL 4.3 3D, this features accelerate the graphic support, and dark mode for Windows 11 PC. And the VCTL CLI for running building Containers And Kubernetes Clusters. This feature is added to run VMware Workstation smoothly on Windows, and Linux operating systems.
How to Install Ubuntu 22.4 on VMware on Windows 11 PC?
However, to run Ubuntu on VMware on Windows PC, you need to have the VMware Workstation, Ubuntu ISO Image file, and install the VMware Workstation on your Windows PC. Also, to run Ubuntu on VMware Workstation you need to have the below down requirements.
- 8GB of RAM for better performance
- A Quad Core CPU
- 40GB of Drive space (SSD Recommended) for better performance
Once you have downloaded the above requirement files, then you have to install the VMware Workstation Pro 17 on your Windows PC, as I have completed the procedure in the below downlinks. Simply click on the link and check the process.
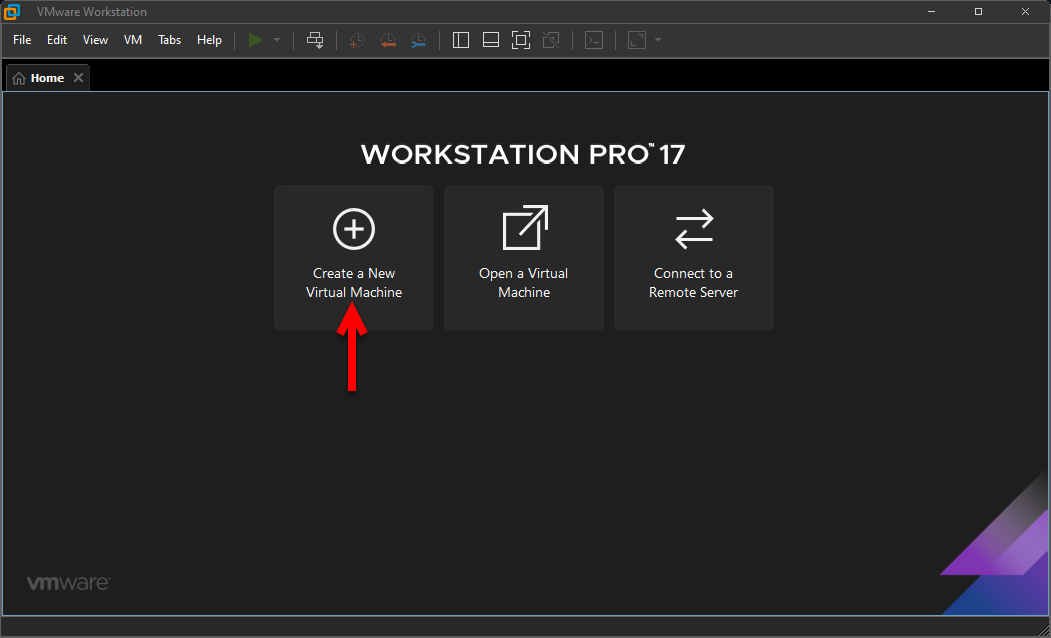
After you have installed the VMware Workstation on your Windows PC, simply open up VMware and create a new virtual machine on the first step.
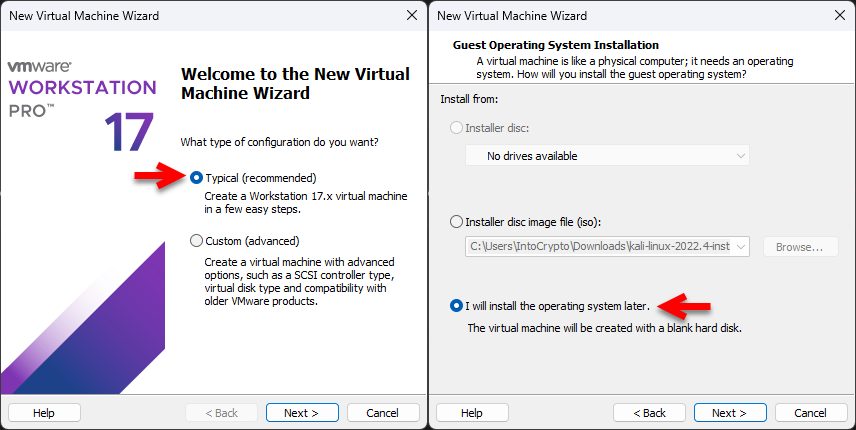
On the next window simply select the option, typically recommended, and click next. Select the option I will install the operating system later and click next.
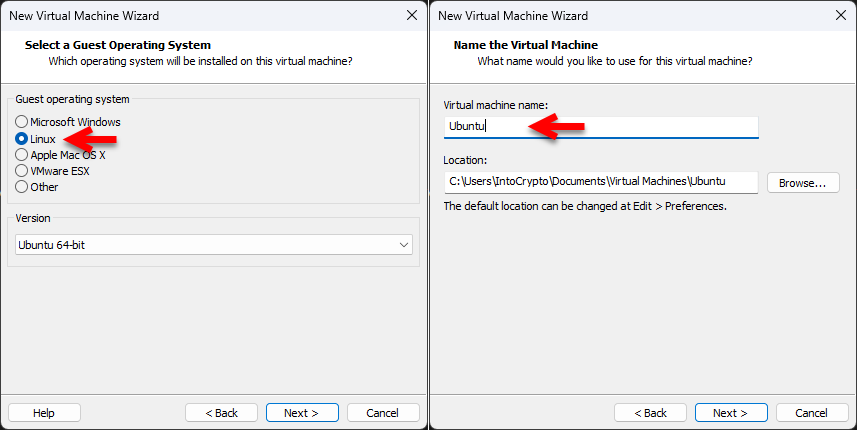
Select the Linux option, then select the version for Linux Ubuntu 64-Bit and click next. Now choose the virtual machine name and specify the location and click next.
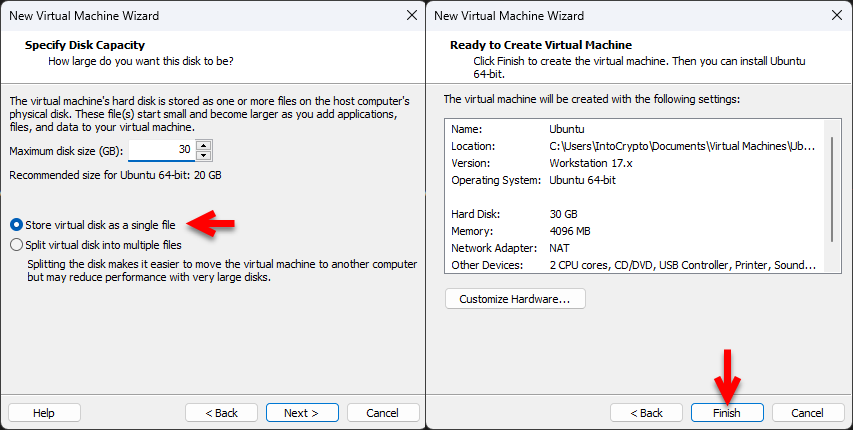
Specify the disk size then select the option (Store virtual disk as a single file) and click next. Now you are at the last step to click Finish to create the virtual machine for Ubuntu.
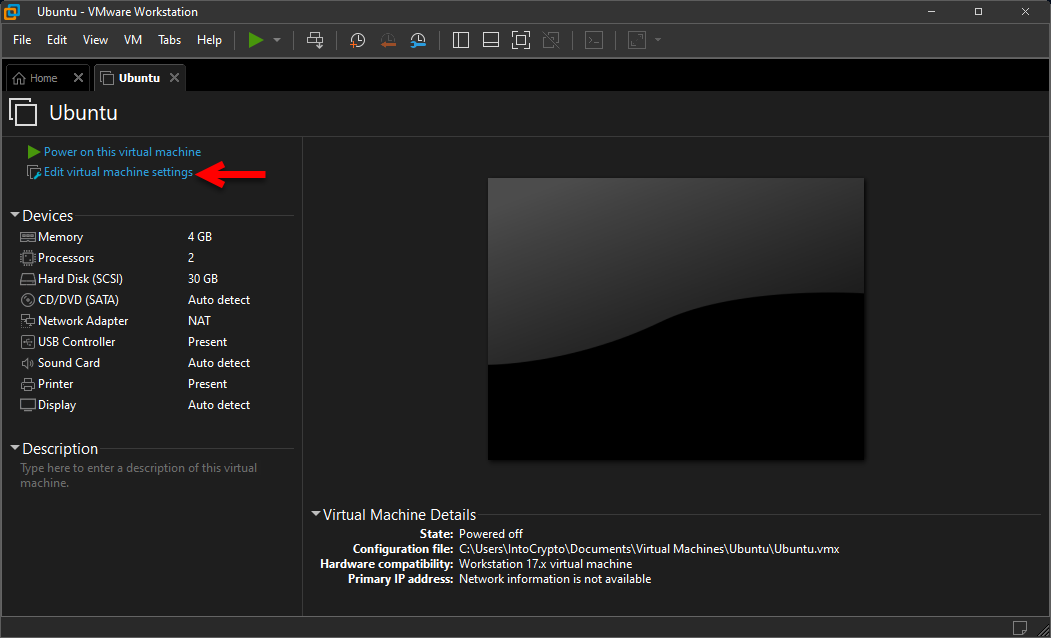
Once the virtual machine is successfully created then you have to edit some settings for it, in order to have a good performance while the installation. Simply select create a virtual machine and click on Eidt virtual machine settings.
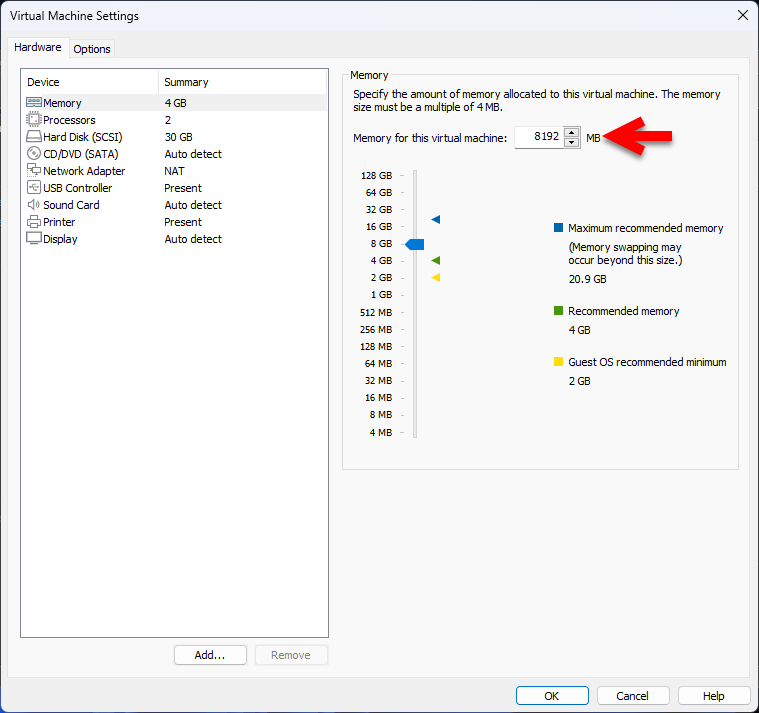
Once the settings window is opened select the hardware>Memory tab and increase the memory size for the virtual machine.
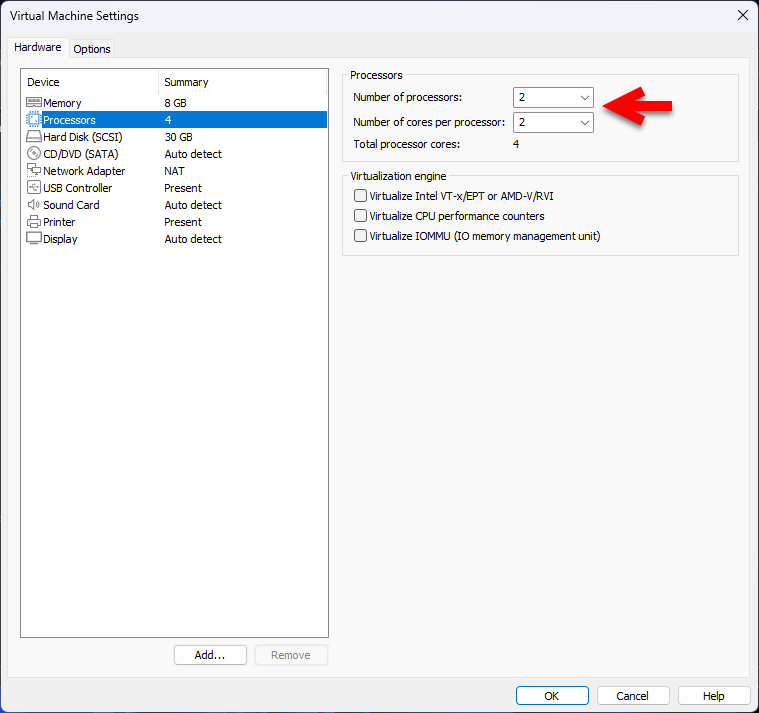
Select the processer tab and, increase the number of core processors up to 2.
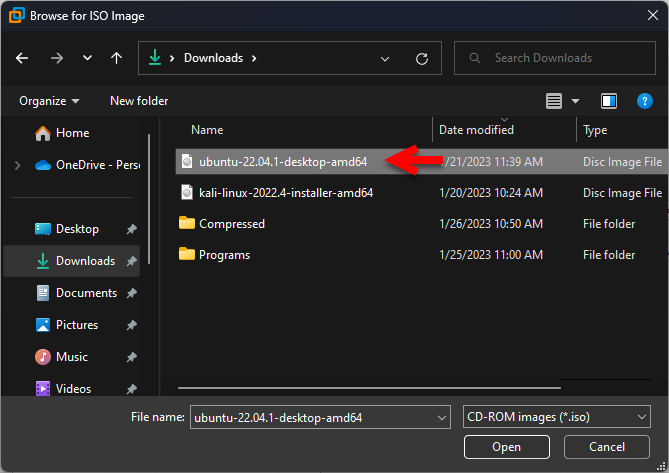
Select the CD/DVD SATA tab, then click on the Use ISO Image file option and click on the Browse option.
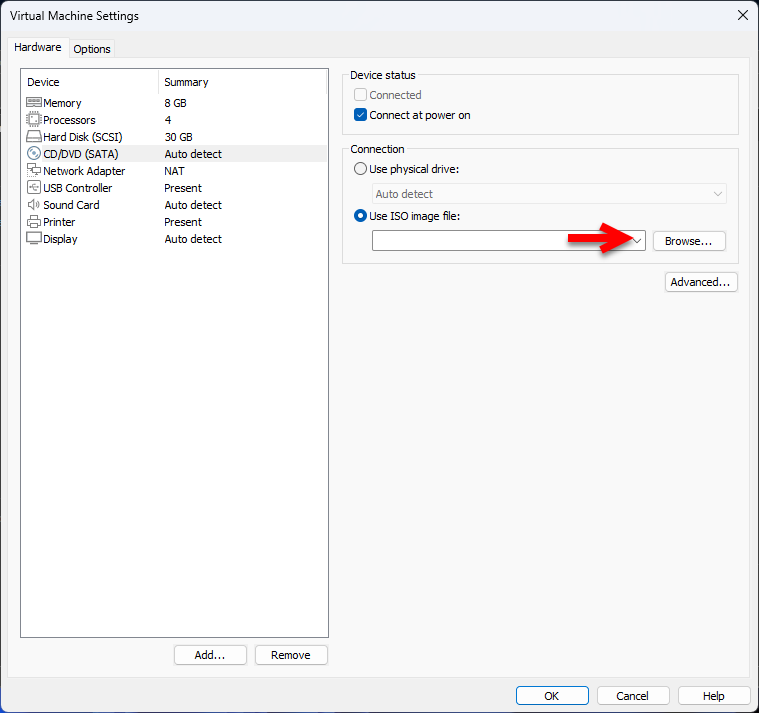
Now go to the folder where you have downloaded the Ubuntu ISO image file and click open.
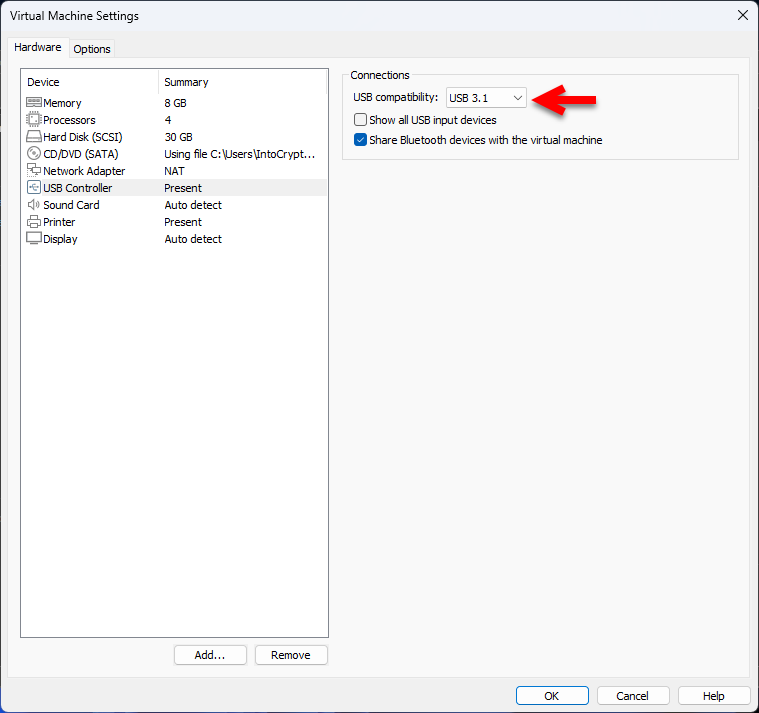
Navigate to the USB Controller tab, then select USB 3.1. Once you have done the changes to the virtual machine settings on the hardware window, then click on the OK option to make the changes to the virtual machine.
Install Ubuntu on VMware Workstation Pro 17 on Windows 11 PC
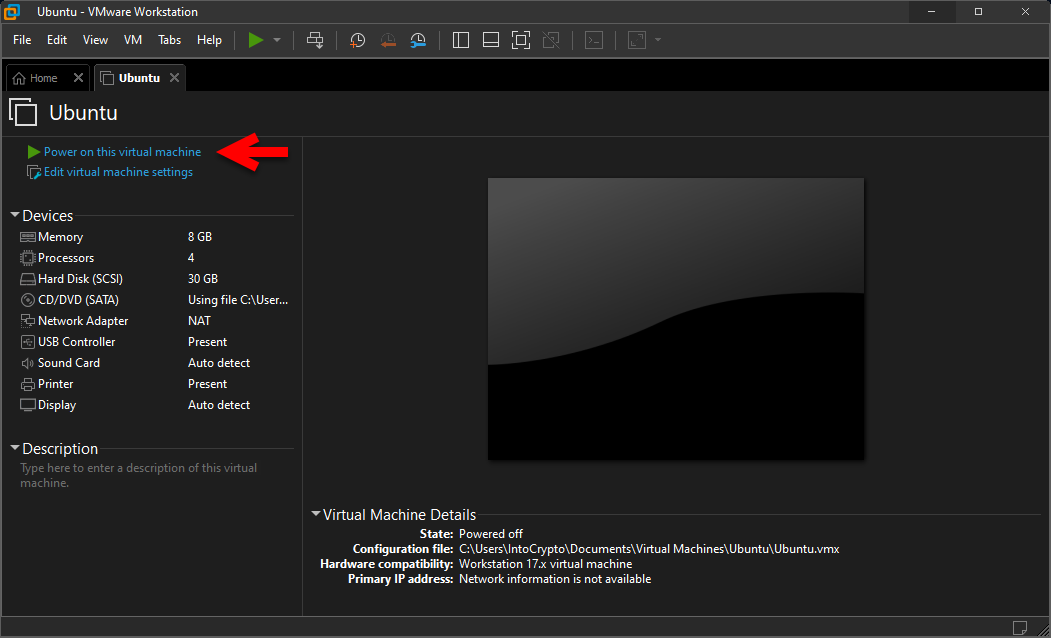
After you have created the virtual machine for Ubuntu on VMware on Windows PC and brought the changes to a virtual machine for better installation performance. So, now it’s time to install Ubuntu on VMware on Windows PC. To proceed with the installation simply click on Power on this virtual machine.
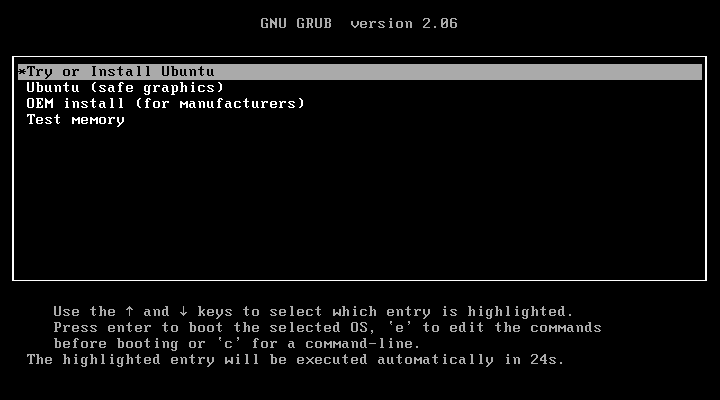
Once the installation is launched simply on the first window select the first option (try or install Ubuntu) and press enter.
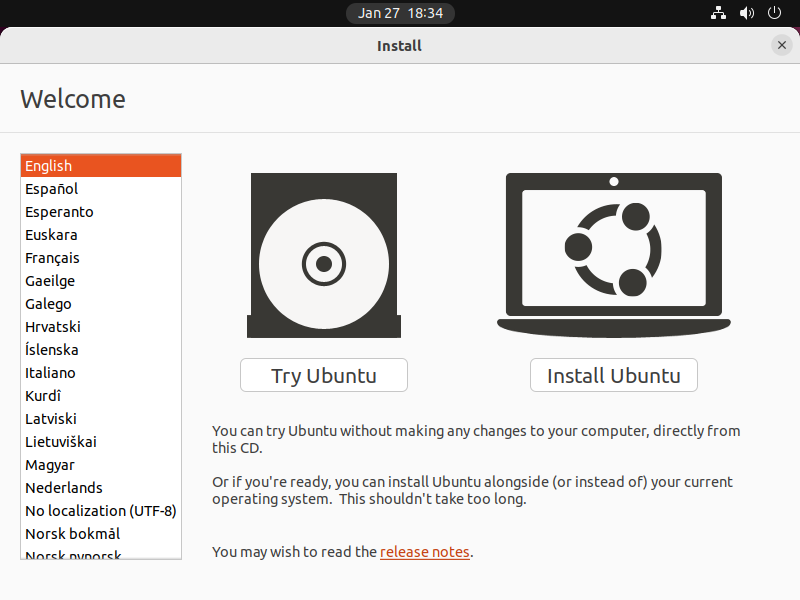
When the installation proceeds on the first welcome screen select your language then click on Install Ubuntu.
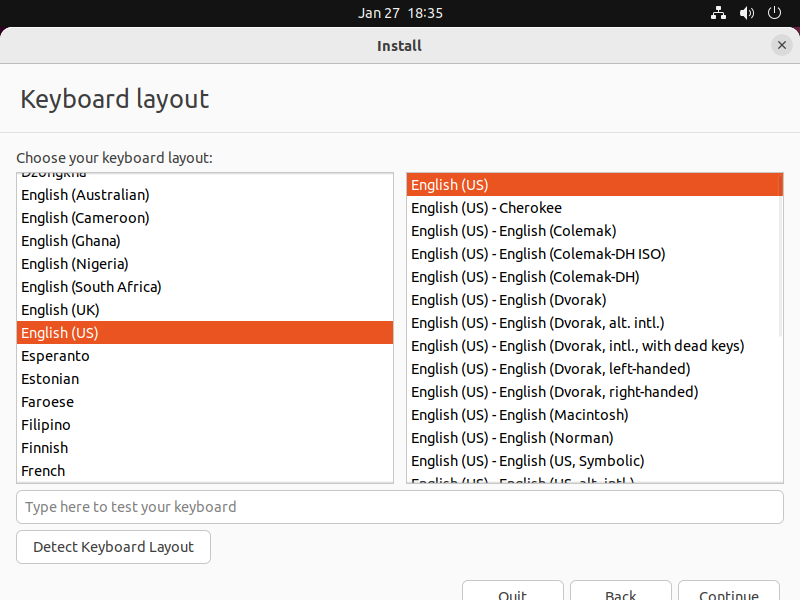
Select your keyboard layout and click continue.
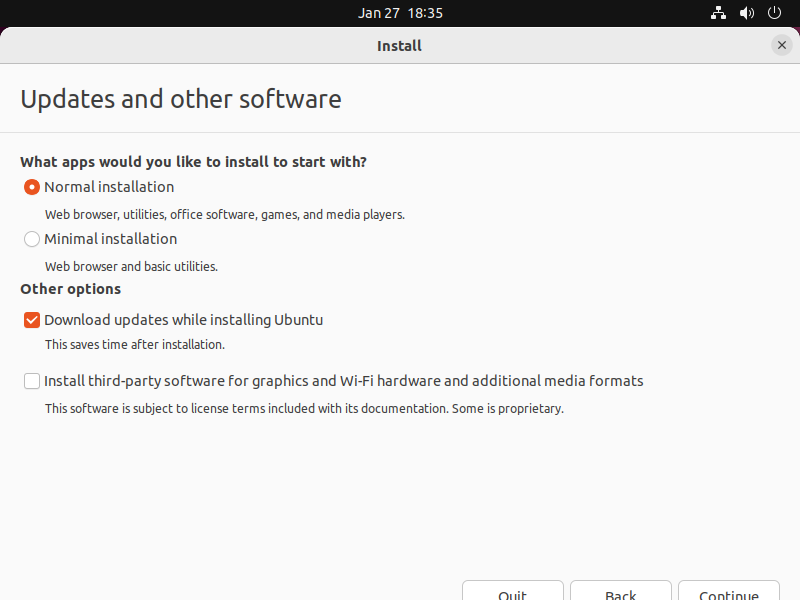
In this step you have selected the installation type for Ubuntu, there are two different options Normal installation and Minimal installation. So I recommend choosing the Normal installation, also, selecting the option download updates while installing Ubuntu.
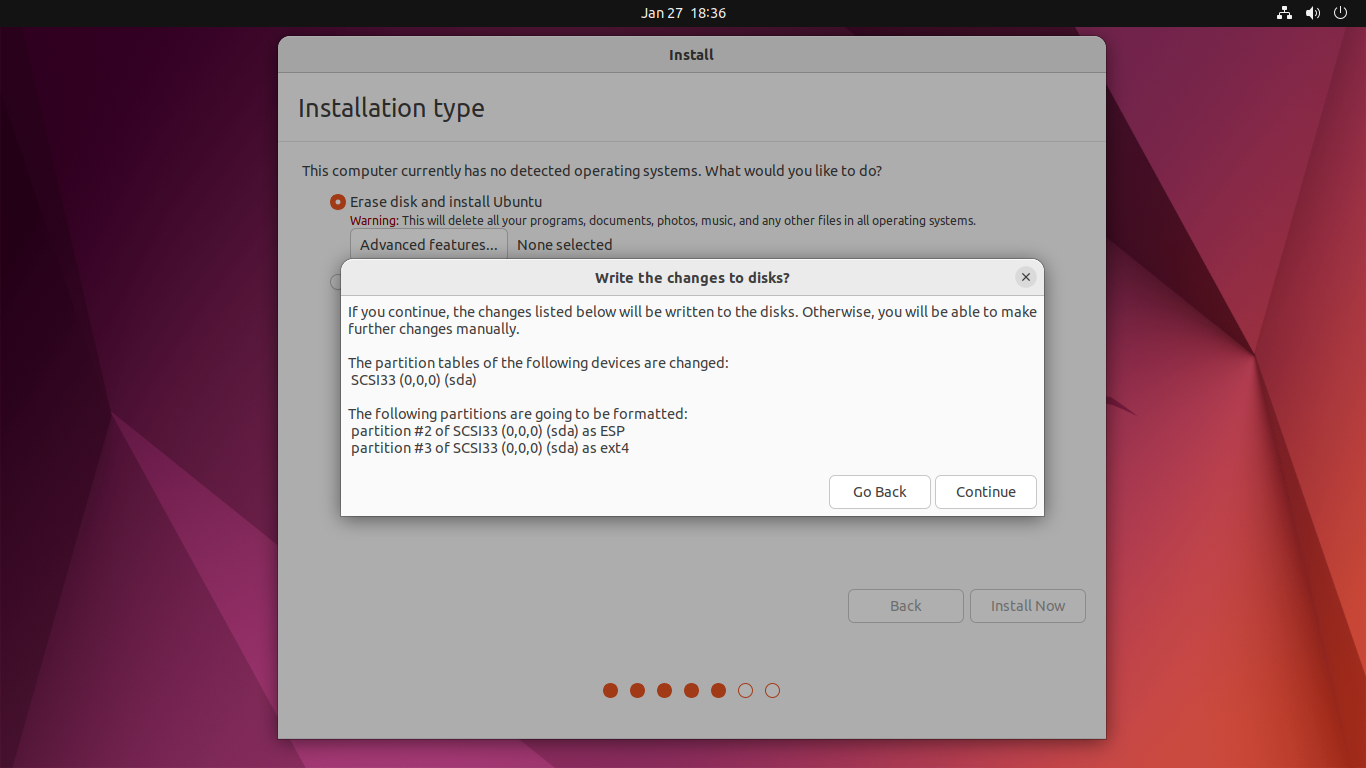
Select the option to erase the disk and install Ubuntu.

If you continue, the changes listed below will be written to the disks. Otherwise, you will be able to make further changes manually. There are no worries simply in this step you will be able to erase the disk, and you will make this partition on your virtual machine, not on your actual machine, so simply click on the continue option to proceed with the installation.
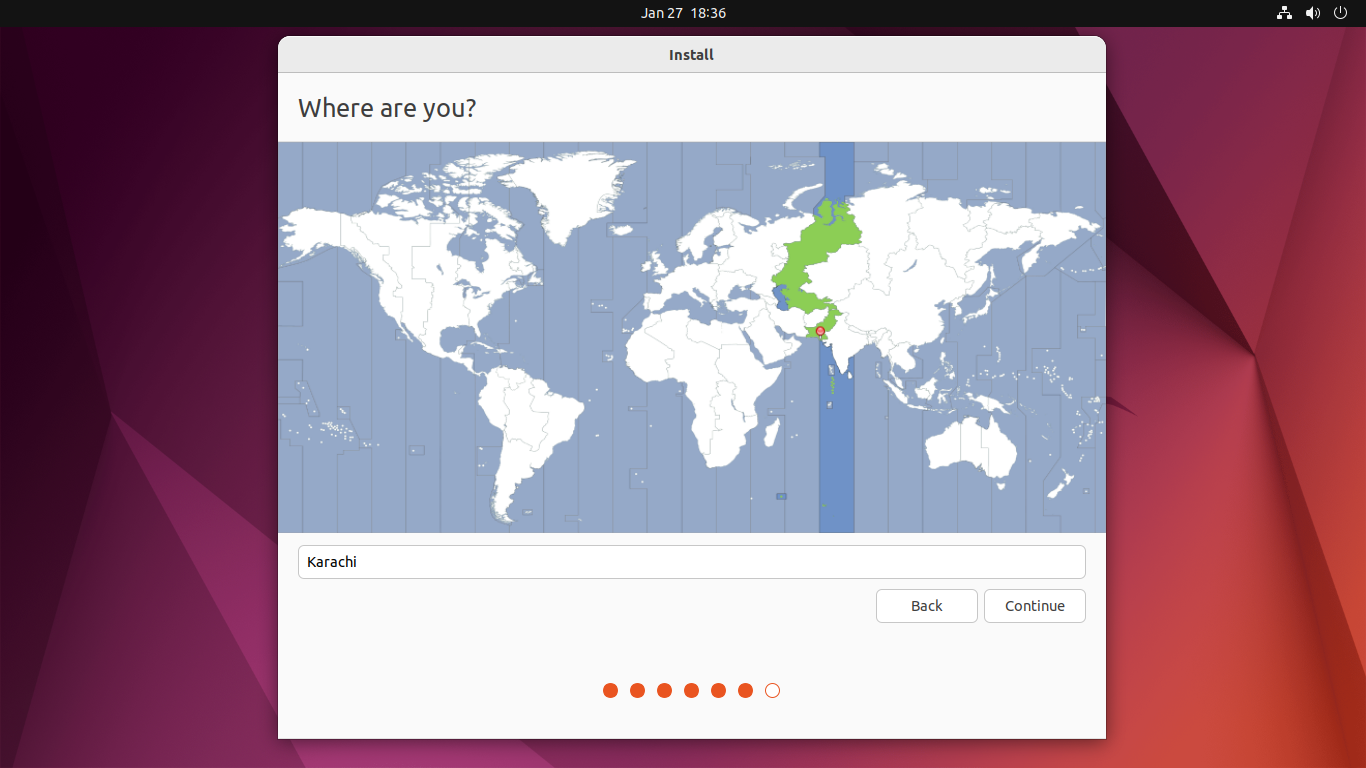
Select the location where live and click continue.
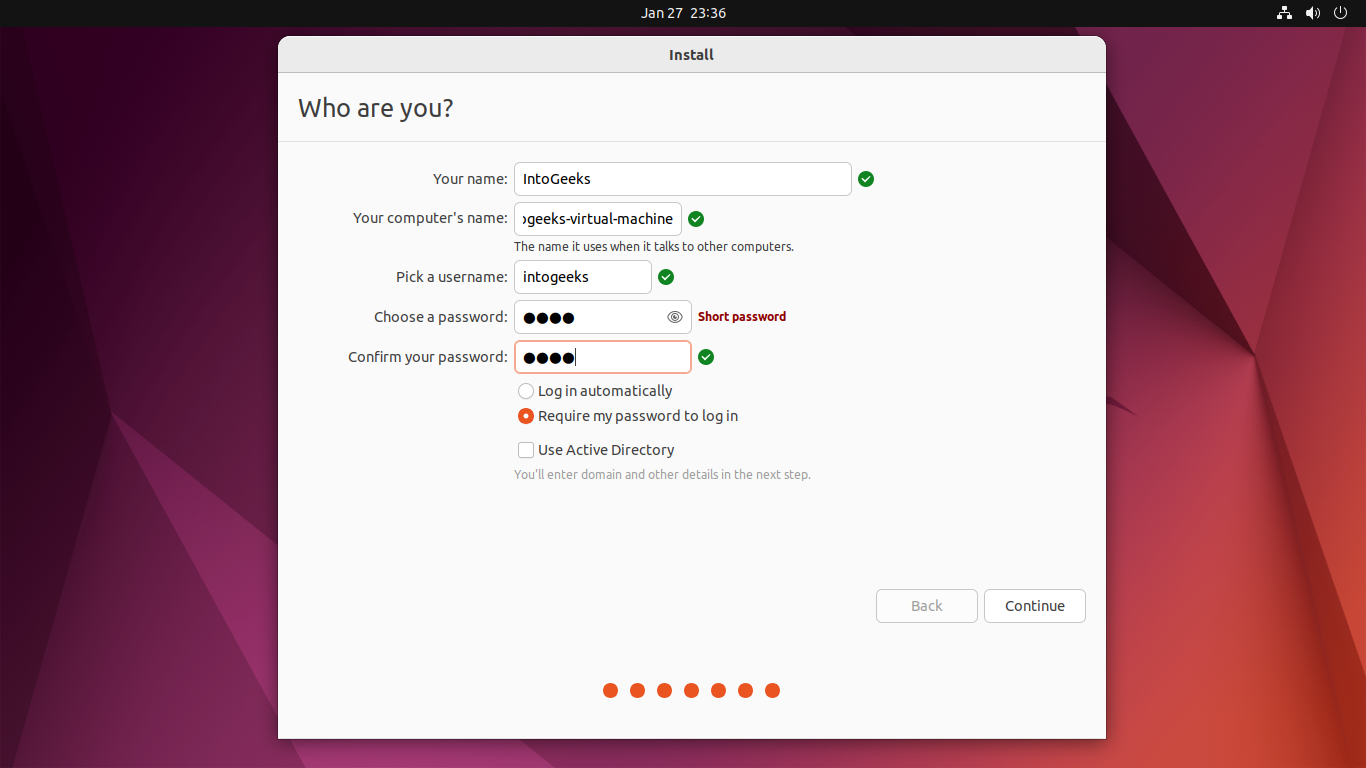
Now in this step, you have to create a username for Ubuntu by entering your full name, your computer’s name, and your username, choose a password, re-enter the password, and click login.
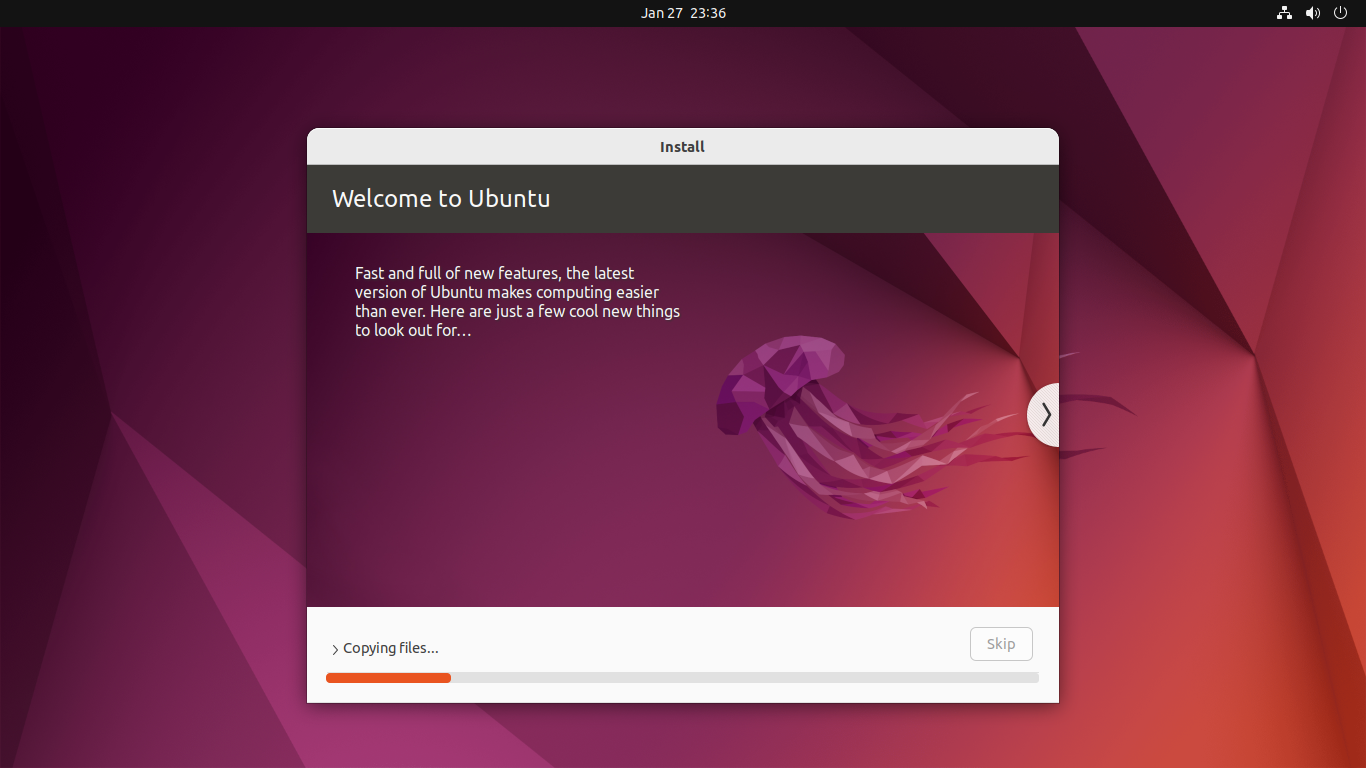
Now it will start installing Ubuntu on VMware on Windows PC, so the installation will take some time.
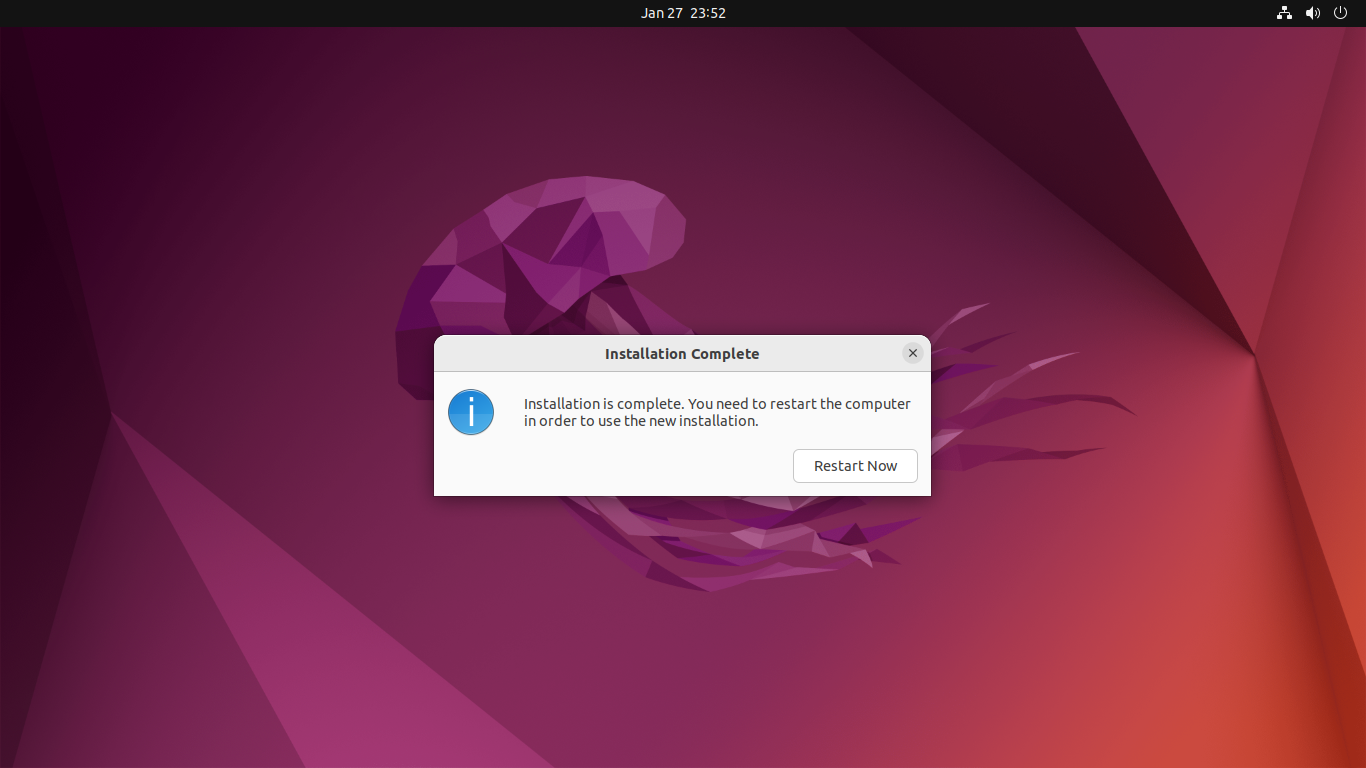
While the installation successfully completed click on the restart option to restart the virtual machine.
Once the virtual machine successfully restarted, therefore, you have to enter your username and your password and hit enter to log in.
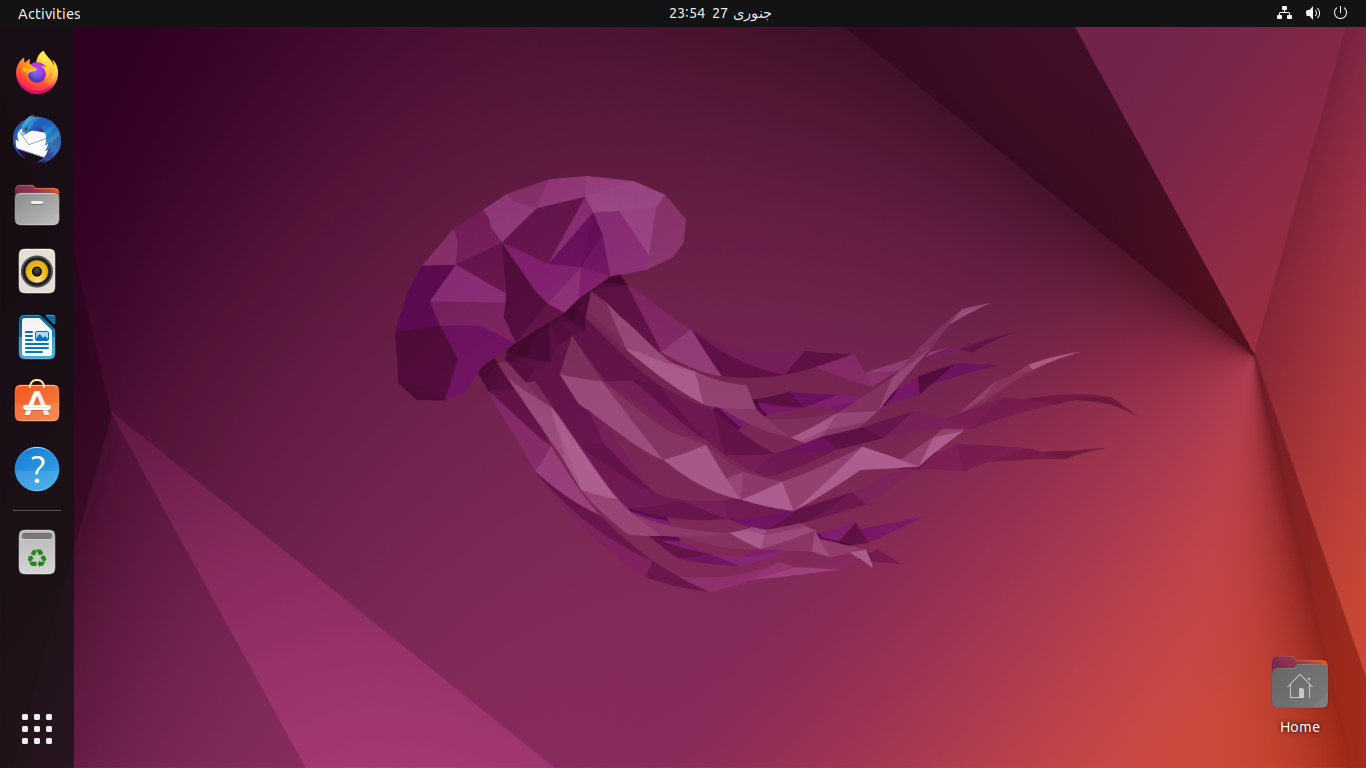
And finally, the Ubuntu latest version is successfully installed on VMware Workstation Pro 17 on Windows 11 PC.
Conclusion
After Ubunut 22.4 was successfully installed on VMware on Windows PC, therefore, there are some features to enable it on VMware by installing the guest OS tool on VMware on Windows PC. Also, to use the full-screen mode of Ubuntu on VMware simply navigate to the top bar click on View>and the full-screen option.


2 Comments