How to Install Ubuntu 22.4 on VirtualBox on Windows 11 PC?
How to Install Ubuntu 22.4 on VirtualBox on Windows 11 PC?
Ubuntu is one of the most popular and advanced Linux operating systems inside Linux operating systems. So, Ubuntu after Kali Linux is the best Linux distribution operating system for ethical hacking and programming, which helps you to do your task easily. Also, Ubuntu is a free open-source Linux distribution-based Debian Linux operating system, accordingly every six months the Ubuntu updates are available in your hand with new features. Also, the LTS version will available every two years. As the latest version of LTS in 2020 was 22.04 LTS and right now the latest version of Ubuntu LTS is 22.4.1. There are some benefits to using the Ubuntu operating system which is more attractive, highly having the best performance, is fully customizable, more secure, and commands a lined base.
However, guys through this article I will guide you step by step on how to install Ubuntu on VirtualBox on Windows 11 PC. As we have tested Ubuntu’s latest version on VMware Workstation Pro 17 which you have checked in the installation guide in the below downlink.
As you know that Oracle VirtualBox is an open-source Virtualization platform that allows users to test multiple operating systems on a single physical machine. The VirtualBox technology is developed by Oracle Corporation which has the best features. The users can install eh VirtualBox on Windows, macOS, Linux, Solaris, and OpenSolaris. The VirtualBox support and allows the users to install the VirtualBox on their actual machine. And create a virtual machine for every operating system and run the installation on it. Like the Guest, Additions tools are developed separately to install it on the operating system. Besides that VirtualBox can install its Extension pack to exclude the features of a mouse and keyboard and other features.
- How to Install Ubuntu 22.4 on VMware on Windows 11 PC?
- How to Install VirtualBox on Windows 11 PC (New Guide)
How to Install Ubuntu 22.4 on VirtualBox on Windows 11 PC?
To install Ubuntu on VirtualBox on Windows 11 PC, firstly you have to fulfill the requirements such as Ubuntu ISO image file, and VirtualBox.
- Install the VirtualBox on Windows 11 PC.
- Virtualization Technology is enabled on the BIOS menu.
- Windows 11/10 64-Bit operating system.
- 4GB of RAM recommended
- 30GB of Disk Space recommended
- Best internet connection for Ubuntu software installation on VirtualBox
Steps to Create a New Virtual Machine for Ubuntu on VirtualBox
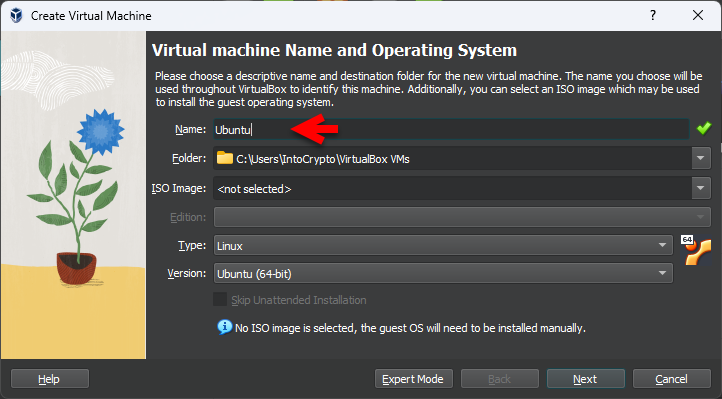
Now open up the VirtualBox then on the first window on the top bar click on the New option.
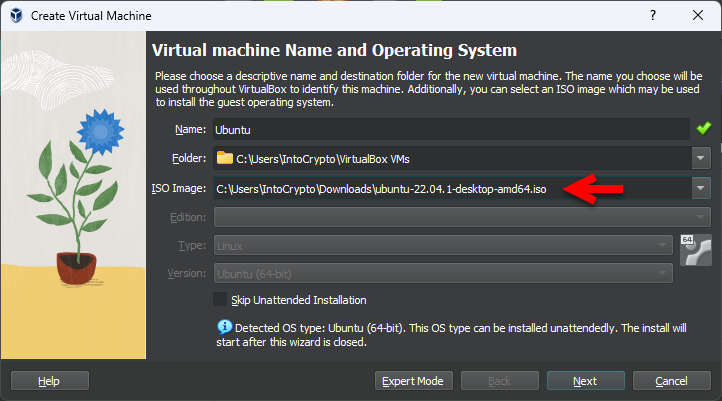
Once the next window appeared type the name of the Virtual machine “Ubuntu”, then specify the location.
On the ISO Image portion simply click on the arrow down option, and click on the other option.
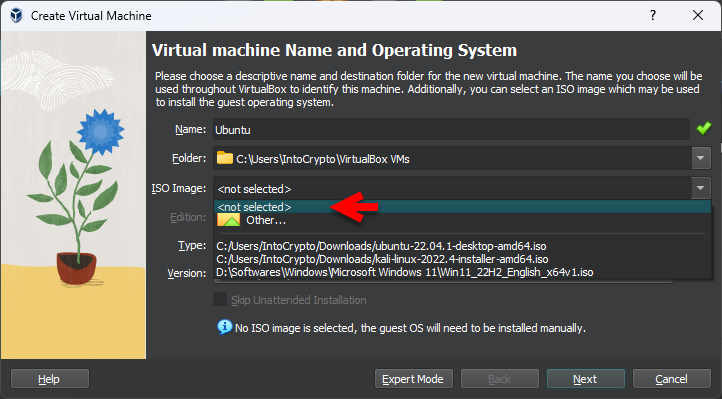
Navigate to the place where you saved the Ubuntu ISO image file and click on Open. After you successfully inserted the ISO image file of Ubuntu simply click on the next option.
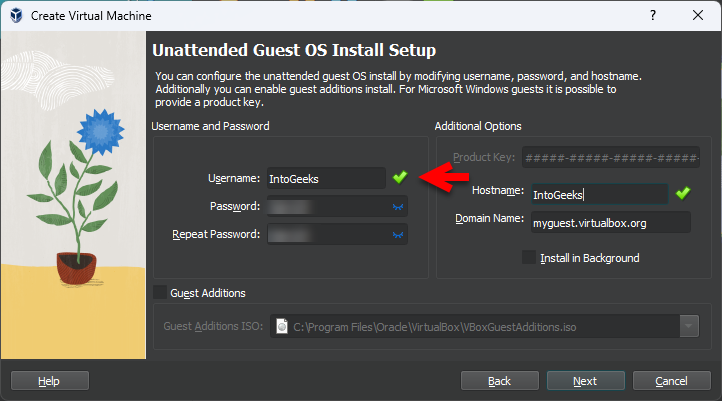
Now you have to type the username, password, repeat the password, and type the hostname, then click next.
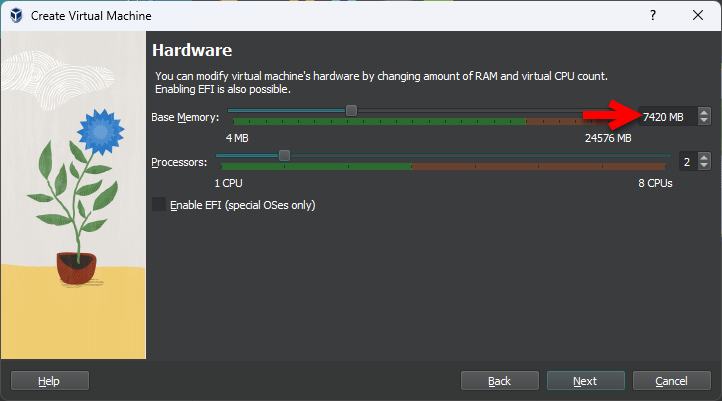
Increase the base memory and processors then click next.
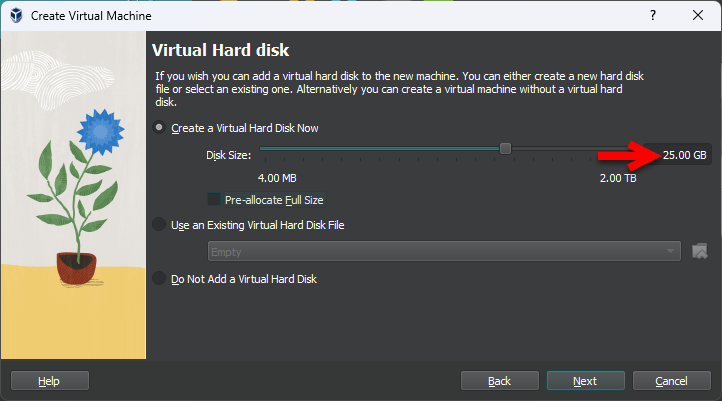
Select the option Create a hard disk drive now option, then specify the disk size for Ubuntu and click next.
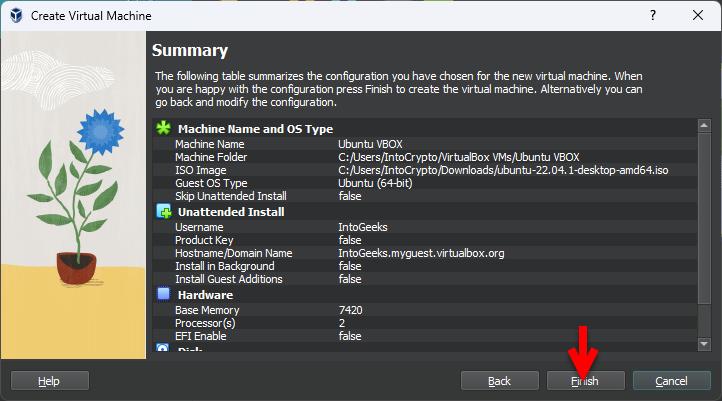
And finally, you are in the final step simply click on Finish to create the virtual machine.
Steps to Perform a Clean Installation of Ubuntu on VirtualBox on a Windows PC
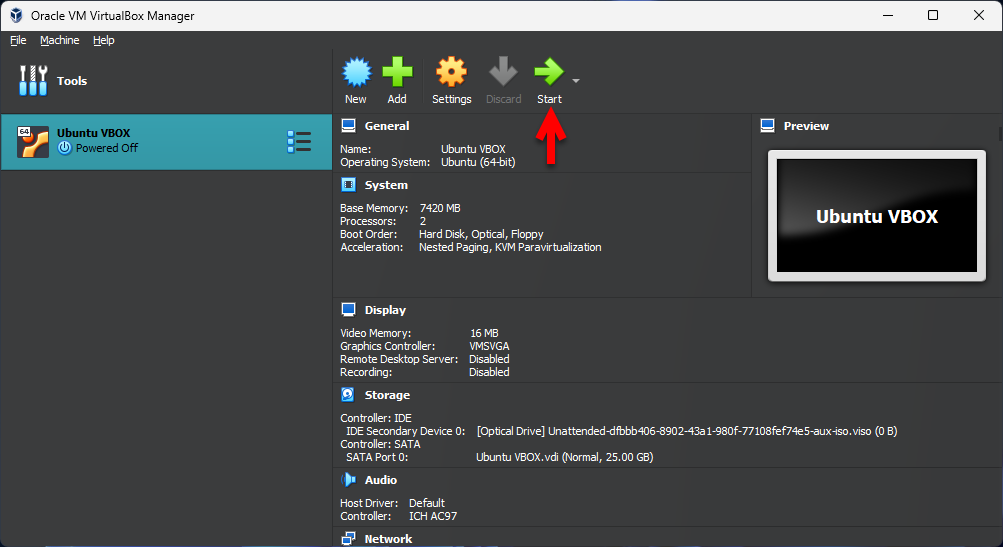
After that, you successfully created the virtual machine of Ubuntu on VirtualBox on Windows PC. So finally, it’s time to install and complete the process of Ubuntu installation on VirtualBox. On the VirtualBox window select the Ubuntu Virtual machine and click Start.
Once the Ubuntu installation launched on the first window select the first option “Try or Install Ubuntu” and hit enter.

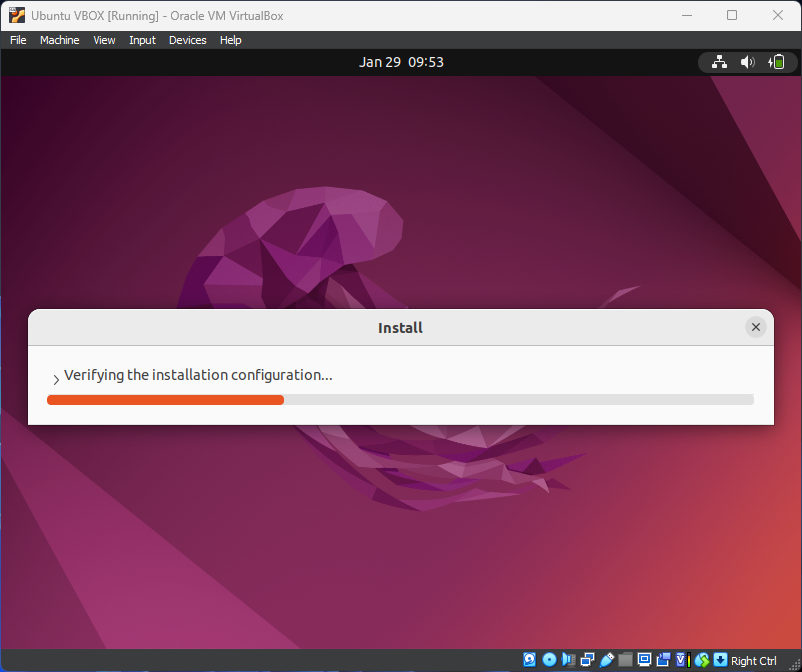
Also, there is something that you will not be required to select the installation language, location, and Keyboard layout, on the installation of Ubuntu on VirtualBox. But the method is changed on installing Ubuntu on VMware Workstation Pro. Here after selecting the first option directly you will proceed to the installation window. So, wait for it until it should be completed.
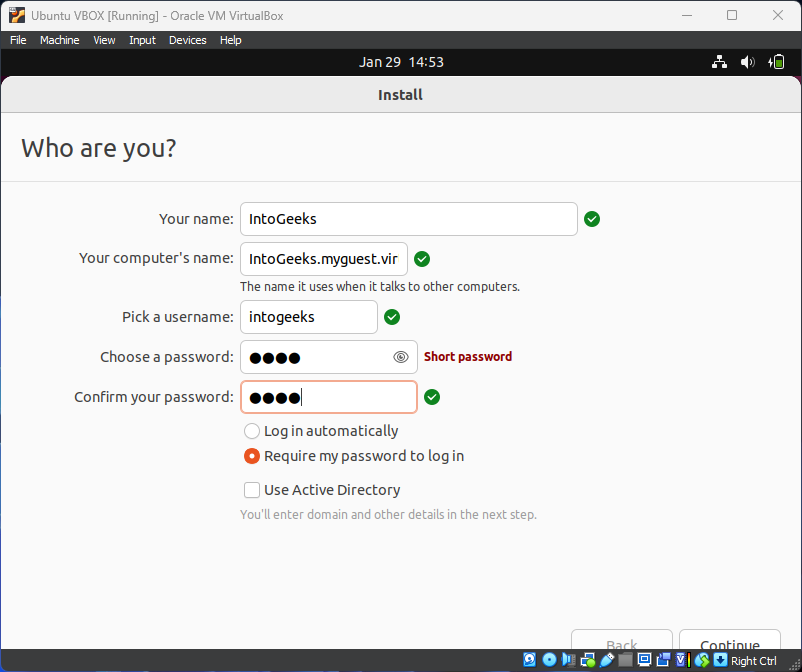
After the installation is completed here you will be asked to enter your username, Your’s computer name, Username, password, and re-enter the password, then click continue.
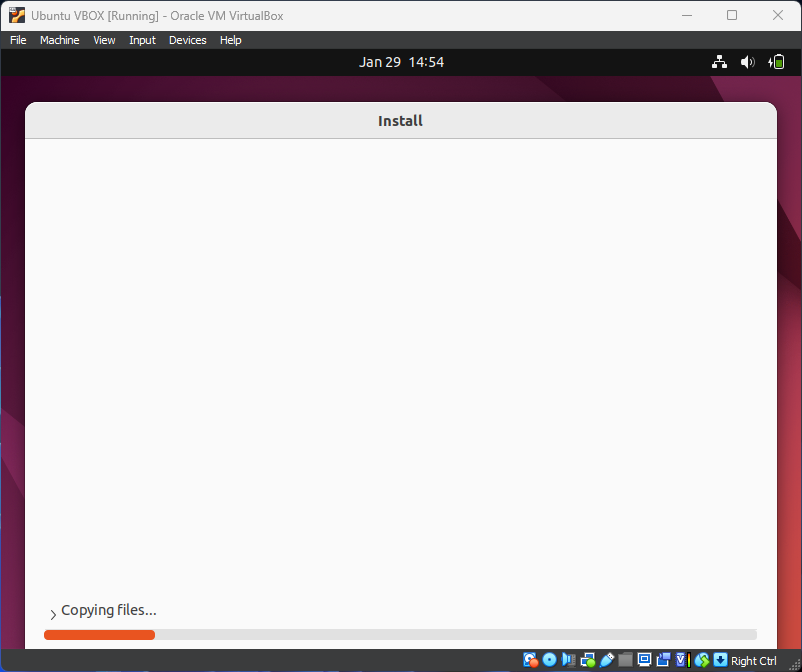
Now it will copy the installation file of Ubuntu, so this process may take some time.
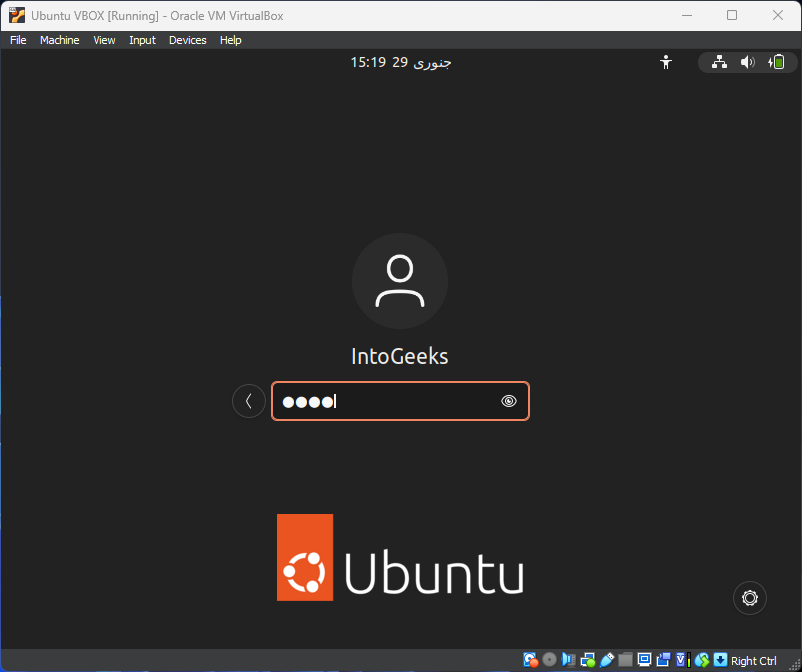
After the installation is completed your virtual machine will restart automatically, so don’t do anything. And you will automatically navigate to the login window simply enter your username and password and hit enter.
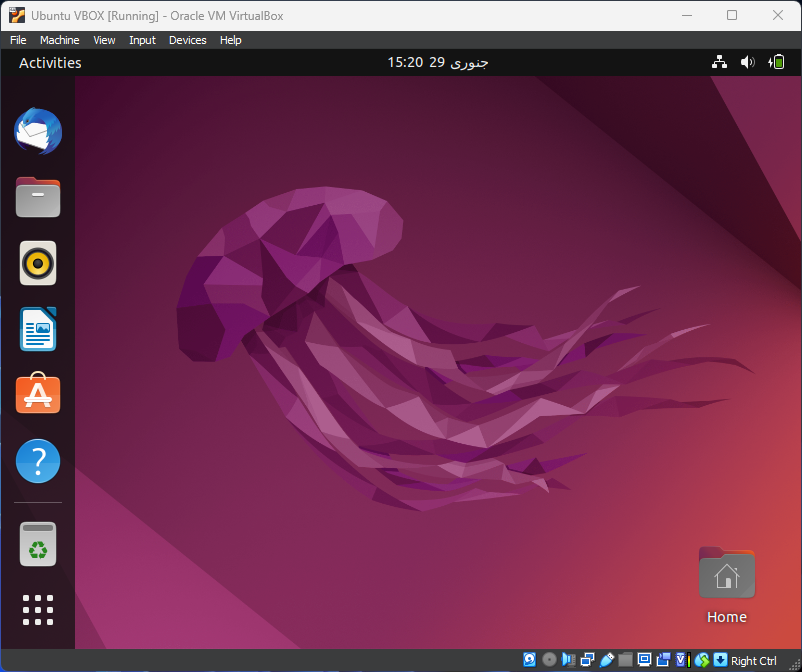
And finally, Ubuntu is being installed on VirtualBox on Windows 11 PC.
Conclusion
Finally, Ubuntu is successfully installed on VirtualBox on Windows 11 PC without any error or issue. So, the only thing remaining is Guest Tool Additions for Ubuntu for VirtualBox. After installing the Guest Tool Additions on VirtualBox on Ubuntu you will be able to get the full-screen features and others.


One Comment