Microsoft released one of the biggest versions of the Windows operating system called Windows 11. Now it’s been a year since Windows 11 and its beautiful features are in our hands, and most people are using Windows 11 with its handy features. Overall experiencing one year of the Windows 11 operating system is pretty interesting including bunches of interesting features and interfaces. On the other hand, at the beginning of using the Windows 11 operating system, most people were facing errors and issues. Like the first update of Windows 11 as I remember the refresh button was not enabled on Windows 11. And the second issue was that people won’t be able to install it on their machines because of TPM 2.0 support.
The new start menu in Windows 11 is quite similar to Windows 10x tested on Windows 10 PC. Microsoft was working too much on the interface of Windows 10X on Windows 10 PC to look much more friendly, as their final decision was to make and create Windows 10X to Windows 11 build-in. Therefore, inside Windows 10 you will be able to use Windows 10X as functioning as a dual-screen monitor.
Windows 11
Finally, Windows 11 the latest update is in our hands right now and looks very beautiful, having its start menu in the center of Windows. And the round curved edge similar to macOS Ventura is much more interesting. Overall, if have a deep glance at to start menu, task manager, Taskbar settings, Control Panel, and another corner of Windows 11 settings we can see many changes.
Related: How to Create Windows 11 ISO Image File (Free)
Also, in the first update of Windows 11, there were lots of bugs to fix. As I told you the refresh button has not appeared. As per the complaints of the users by the release of the second update, the refresh button appeared and was enabled. And right now Windows 11 just released its latest update (Version 22H2 (OS Build 22621. 1105) to the market of updates.
Also read:
- How to Install Windows 11 on VirtualBox on Windows PC?
- How to Install Windows 11 on Hyper-V on Windows PC?
Windows 11 Latest Features Updates
- Windows 11 widgets
- Windows 11 snap layouts
- Updates Defaults Apps in Windows 11
- A redesigned Settings App
- Multiple Desktops in Windows 11
- Teams Are Integral in Windows 11
- Windows 11 Tablet mode and docking
- A better App Store in Windows 11
- New sounds in Windows 11
- Gaming gets a boost in Windows 11
- Performance and security
- The new taskbar, Start menu, and search bar
- Improved touch controls
- Fresh new sounds
- Dark mode
- Round corner Curved edges
How to Install Windows 11 on VMware Workstation Pro 17?
VMware Workstation is a virtualization software that allows you to run multiple operating systems on a single physical machine without adding any hardware requirements. So, for installing VMware Workstation Pro 17 on your Windows PC, you need to have at least Windows 10/11 with 16GB of RAM, and 10GB of disk space. For better speed, SSD is recommended. If you don’t know how to install VMware Workstation Pro 17 on your Windows PC then check the below downlink.
Create a New Virtual Machine for Windows 11 on VMware Workstation Pro 17
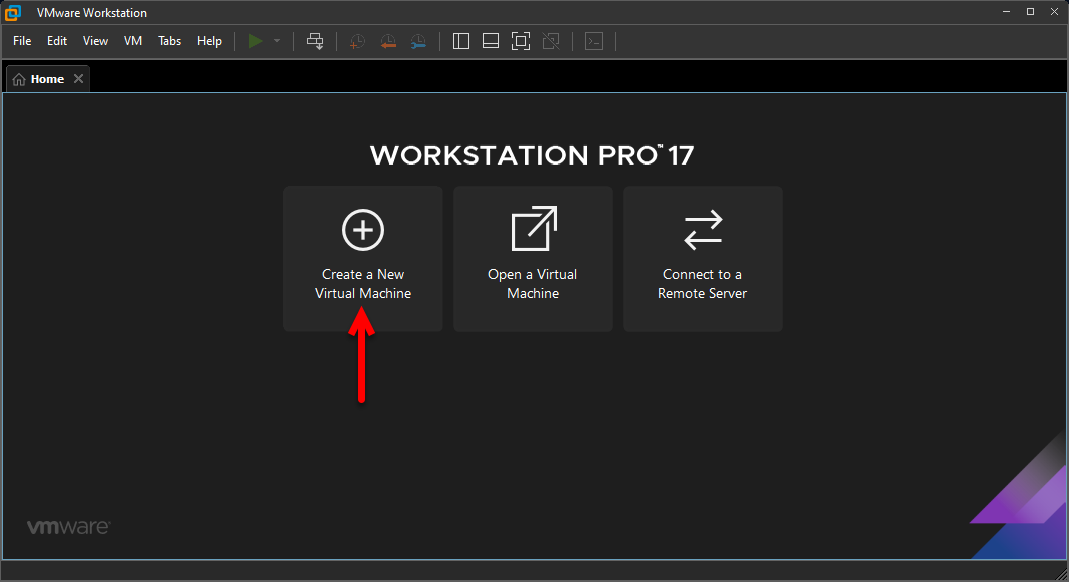
For Creating a new latest virtual machine for Windows 11 on Windows PC, simply open up the VMware Workstation or VMware Player. On the main screen, you will see the create a new virtual machine option. Simply click on that to proceed.
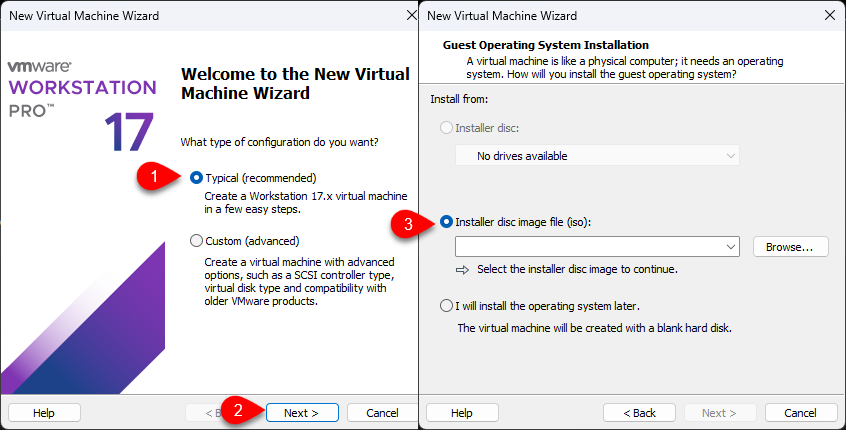
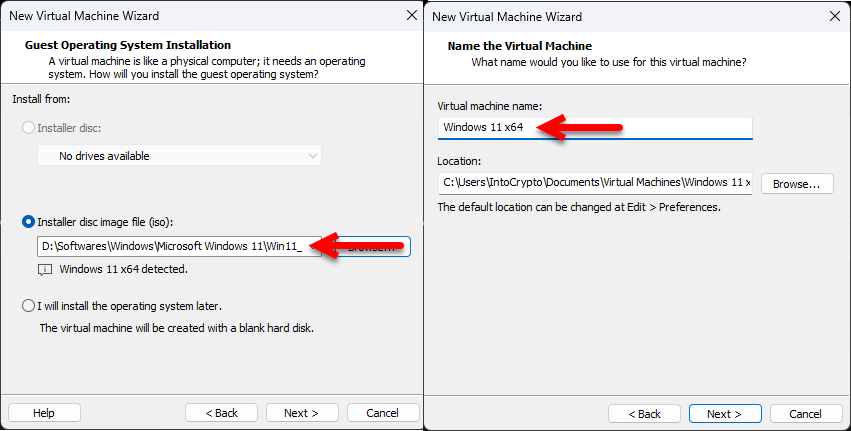
When the next window appeared select the option Typical (Recommended) and click next. On the next window select the option (Installer disk image file (ISO), and click on the Browse option.
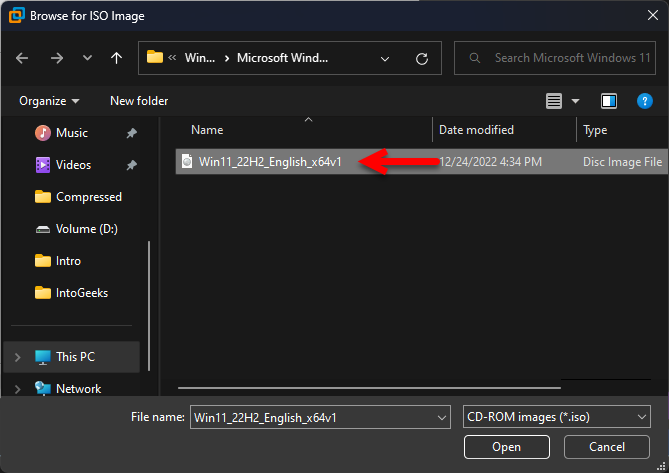
Now go to the folder where you have downloaded the Windows 11 ISO image file and click on open.
Once you added the Windows 11 ISO image file you will see the changes like the below down screenshot, so simply click on the next option. Then on the next screen choose a virtual machine name, specify the location and click on the next option.
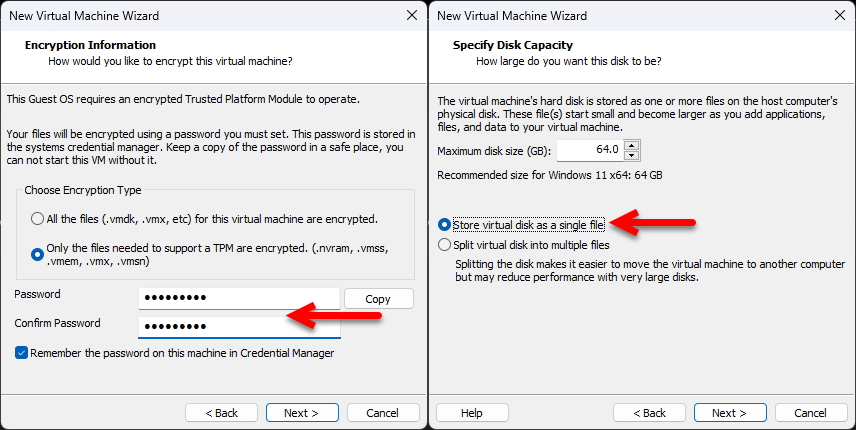
As the VMware Workstation Pro 17 brought some few changes, then you have to select the Encryption Information option (Only the files needed to support a TPM are encrypted (.nvram, .vmss, .vmem, .vmx, .vmsn), then type your password and click next. Now select the maximum disk size and select the option (Store Virtual disk as a single file) and click next.
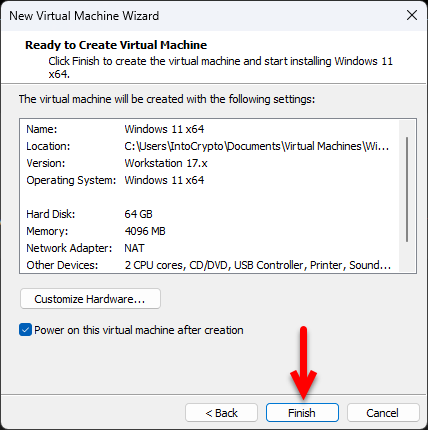
Now you are ready to create a new virtual machine for Windows 11 PC on VMware Workstation Pro 17 on Windows PC, so simply click on Create option to create it.
Edit the Virtual Machine For Better Performance (Recommended)
To install any guest OS on VMware Workstation or VirtualBox, after creating the virtual machine you have to edit a few settings to have a better performance. Like after creating the latest virtual machine for Windows 11 PC, I will bring a few changes to the settings to have a better performance during the installation and after the installation. So, for editing the virtual machine simply select the virtual machine and click on Edit the Virtual machine settings.
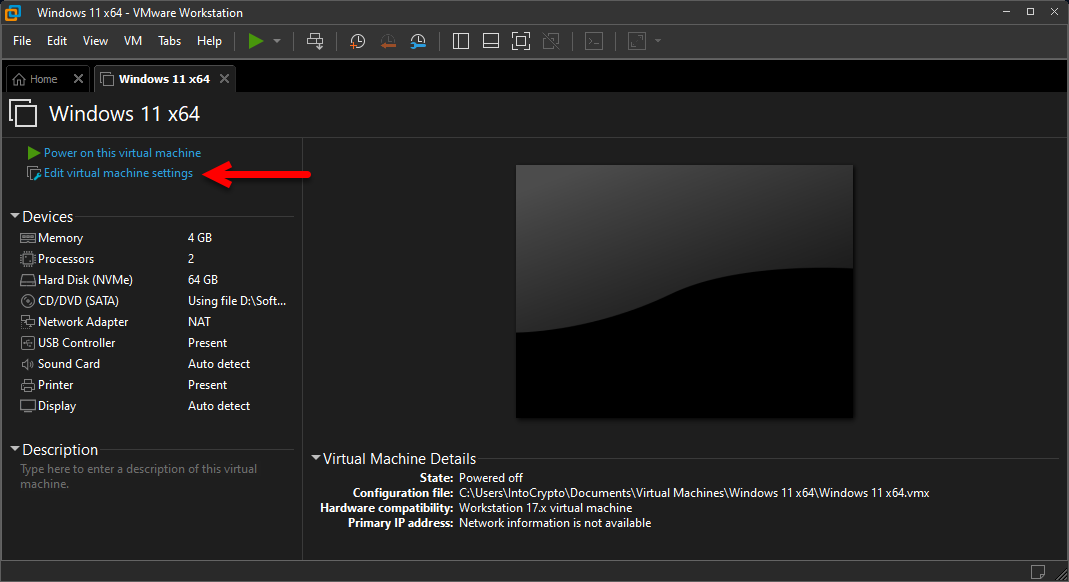
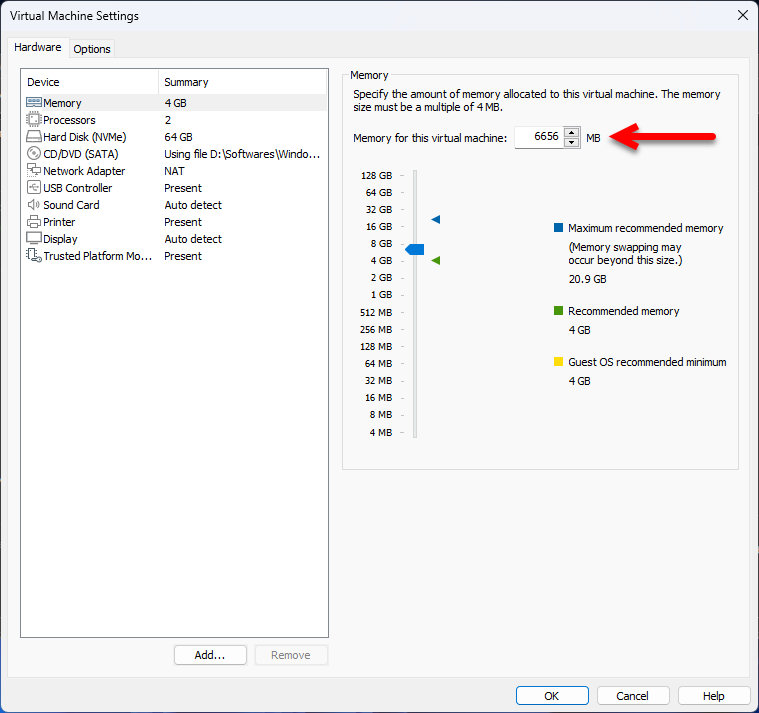
When the settings window opened on the left-hand corner up the side select the hardware tab, select the memory tab then increase the memory size.
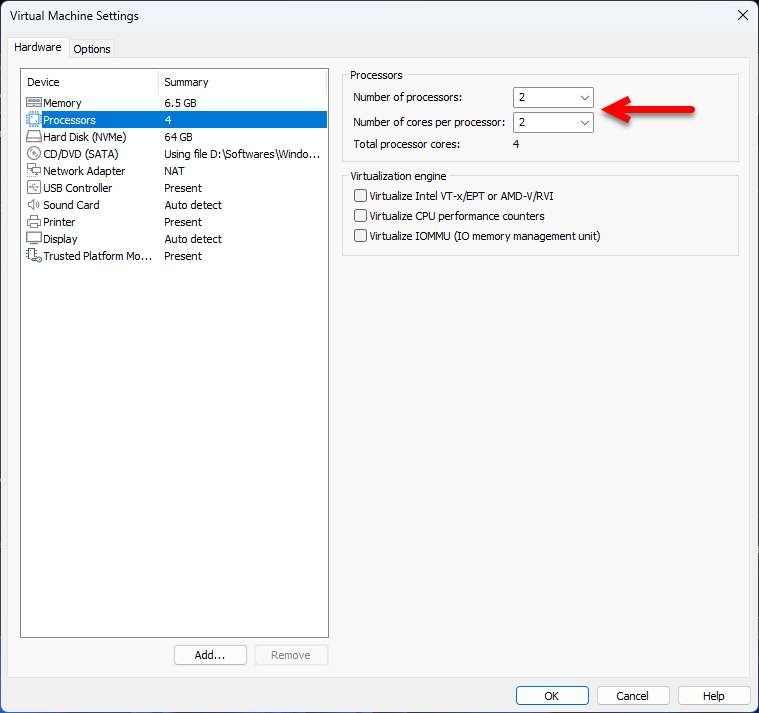
Now select the processors tab, and increase the number of core processors up to 2. Once you made the changes simply click on the OK option to make the changes to your Virtual Machine.
Perform A Clean Installation on Windows 11 PC on VMware Workstation Pro 17
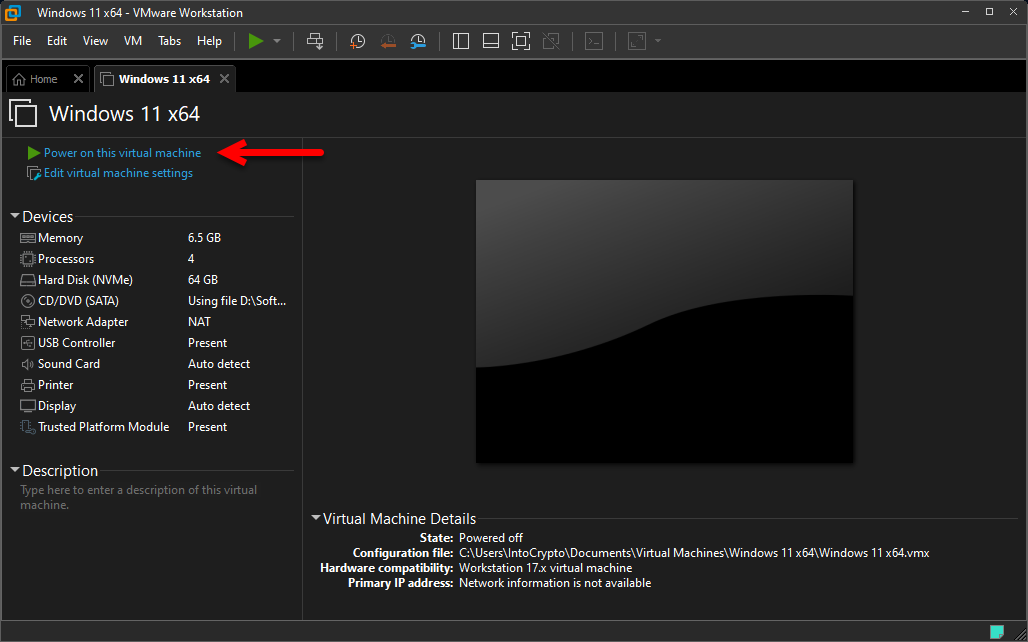
Once you get everything ready you need to start the installation, as before installation you are required to edit the virtual machine settings. So, in this step also you will need to start the virtual machine to continue the installation of Windows 11 on VMware. So, for installing simply click on (Power on this virtual Machine).
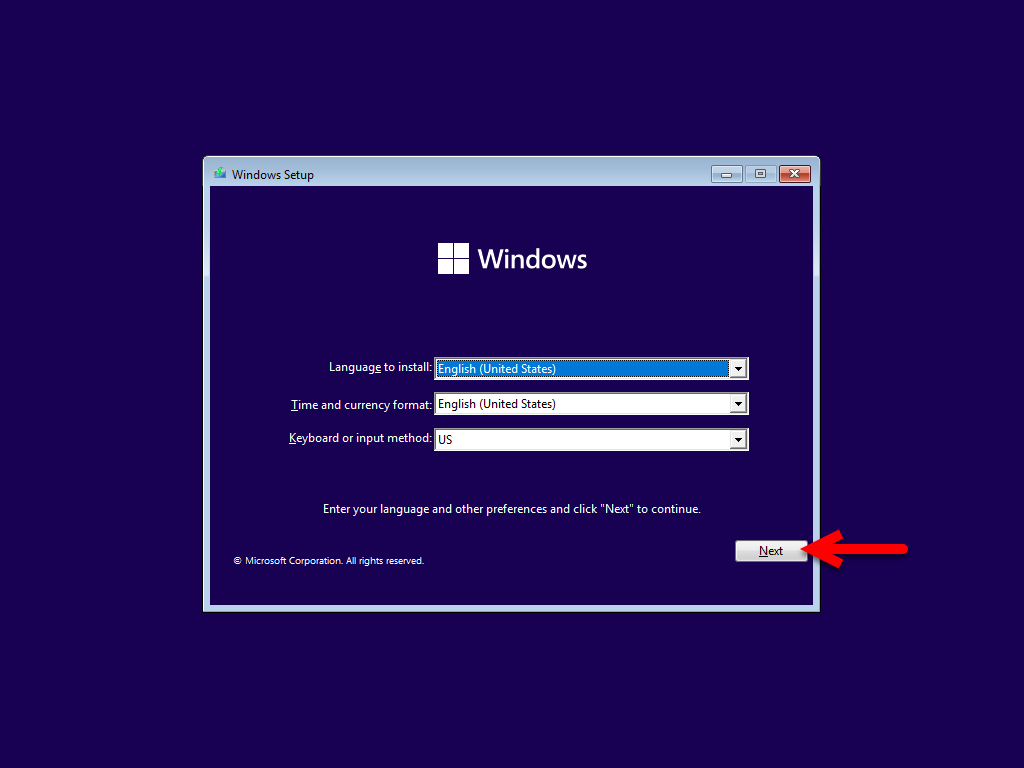
Note: Once the installation is launched quickly press any key to boot into Windows 11. On the first welcome screen select your language to install, time and currency format, keyboard or input method, then click on the next option.
Now click on the Install button to proceed with the installation.

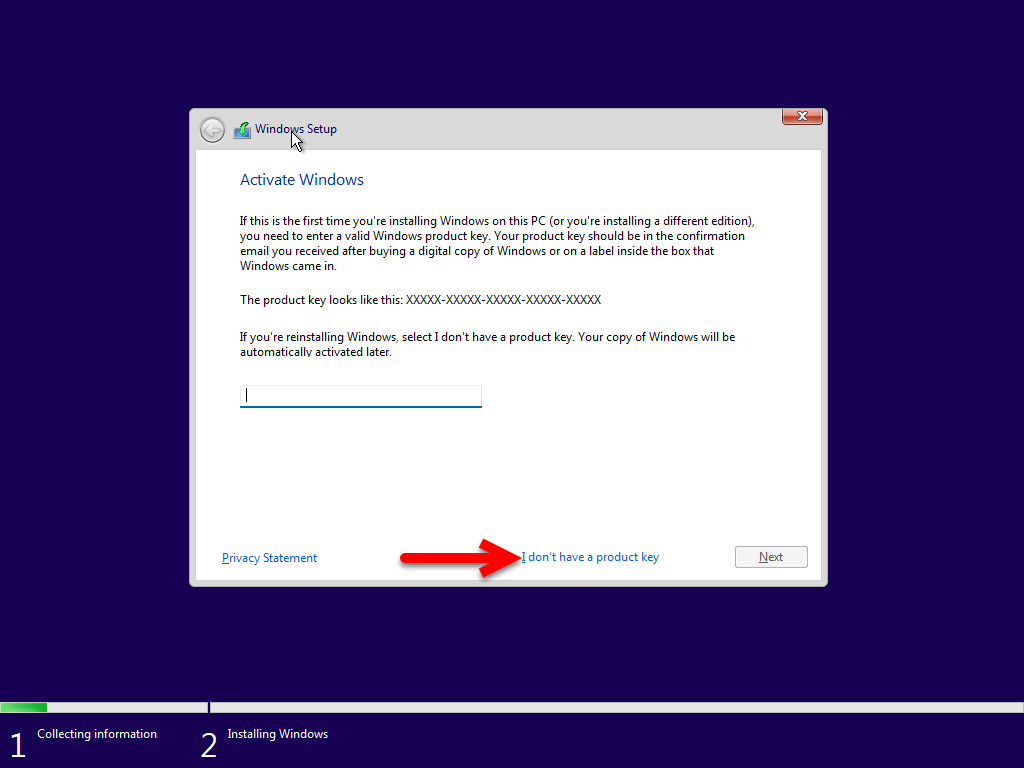
When you reached this window simply click on the option (I don’t have any product key).
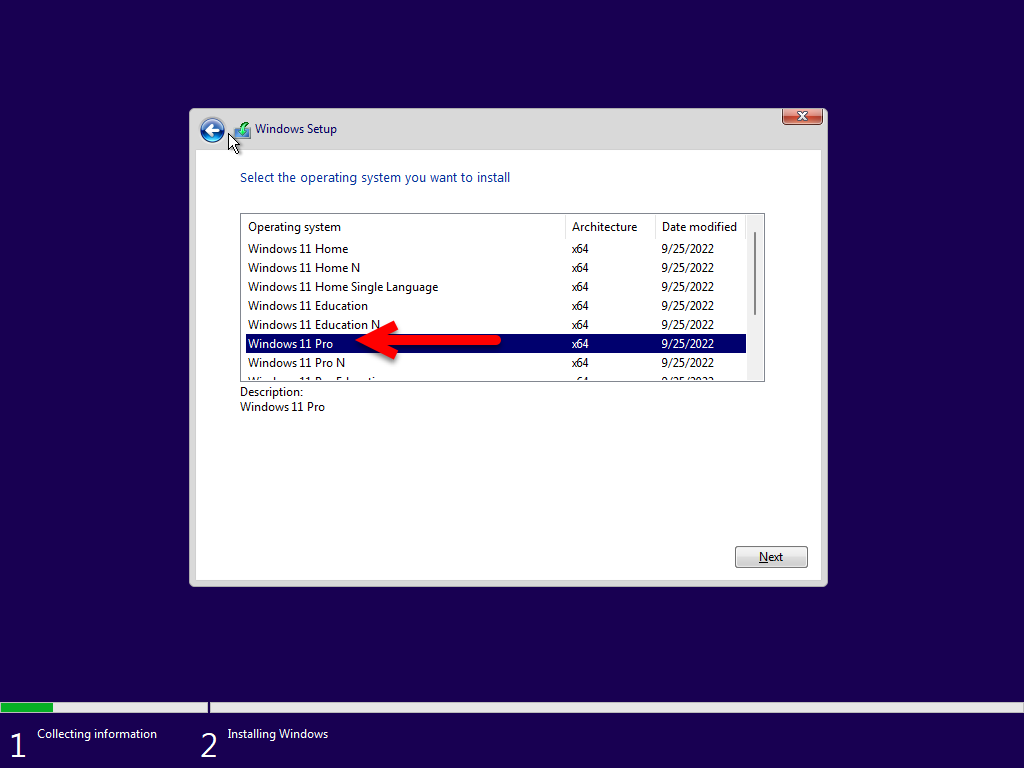
Now select the version of the operating system which you want to install and click on next.
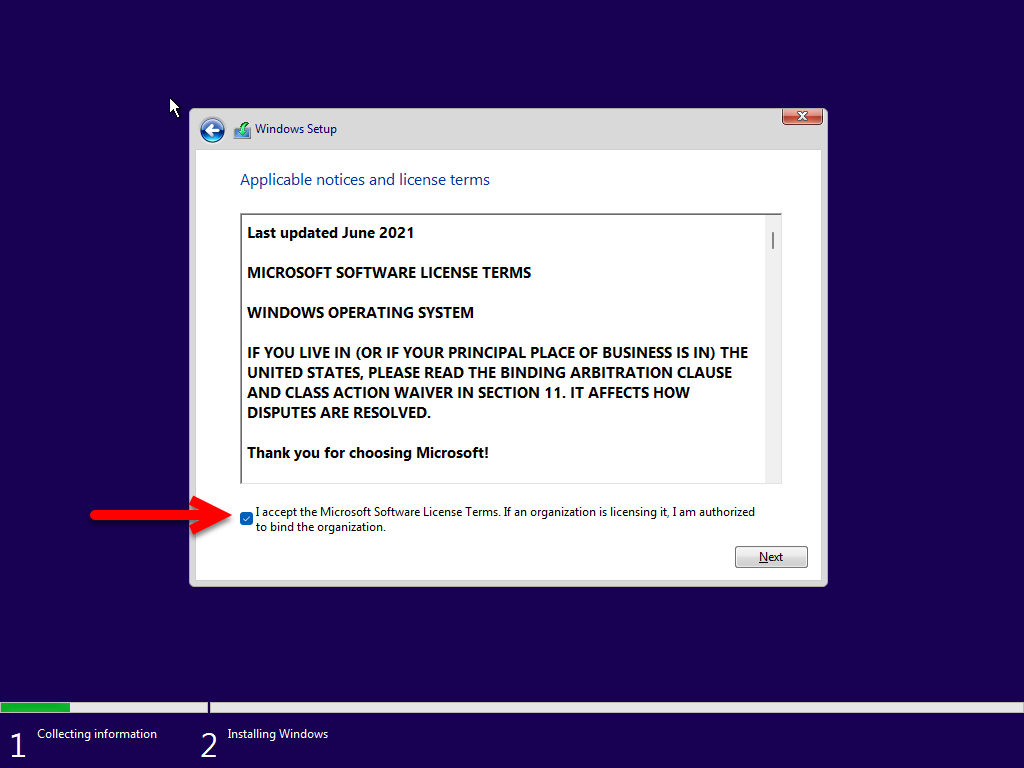
Agree with the terms and conditions of Windows 11, and click on the next option.
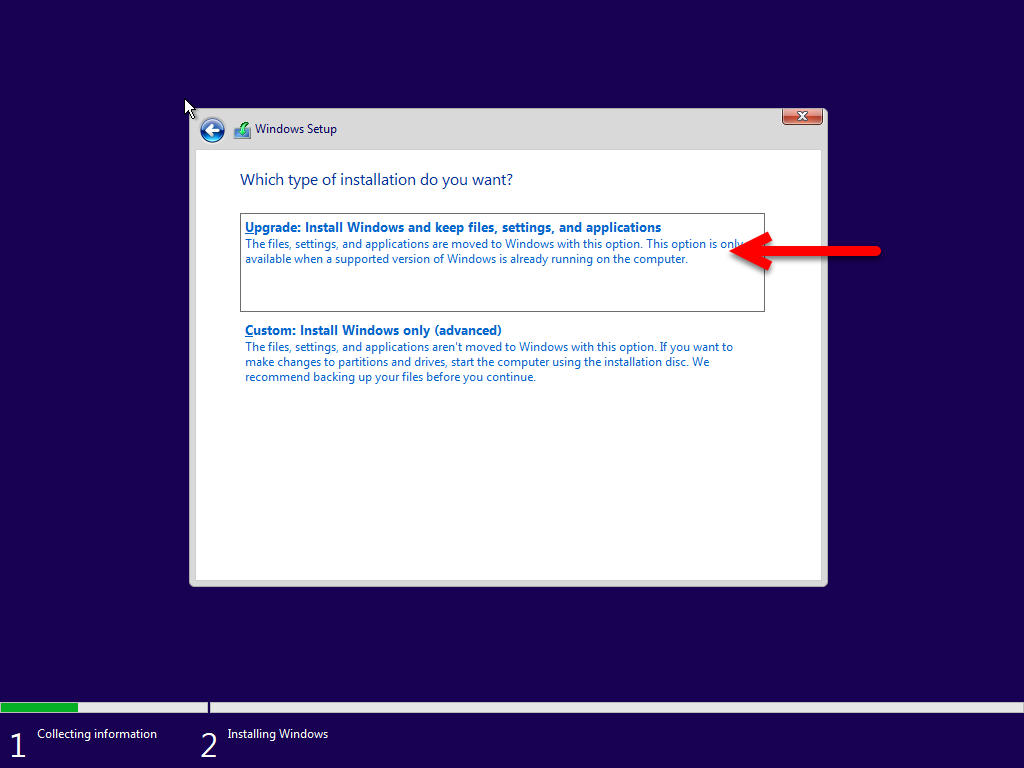
Select the option (Upgrade: Install Windows and keep files, settings, and applications. These files, settings, and applications are moved to Windows with the option. This is only available when the support of Windows is already running on the computer.)
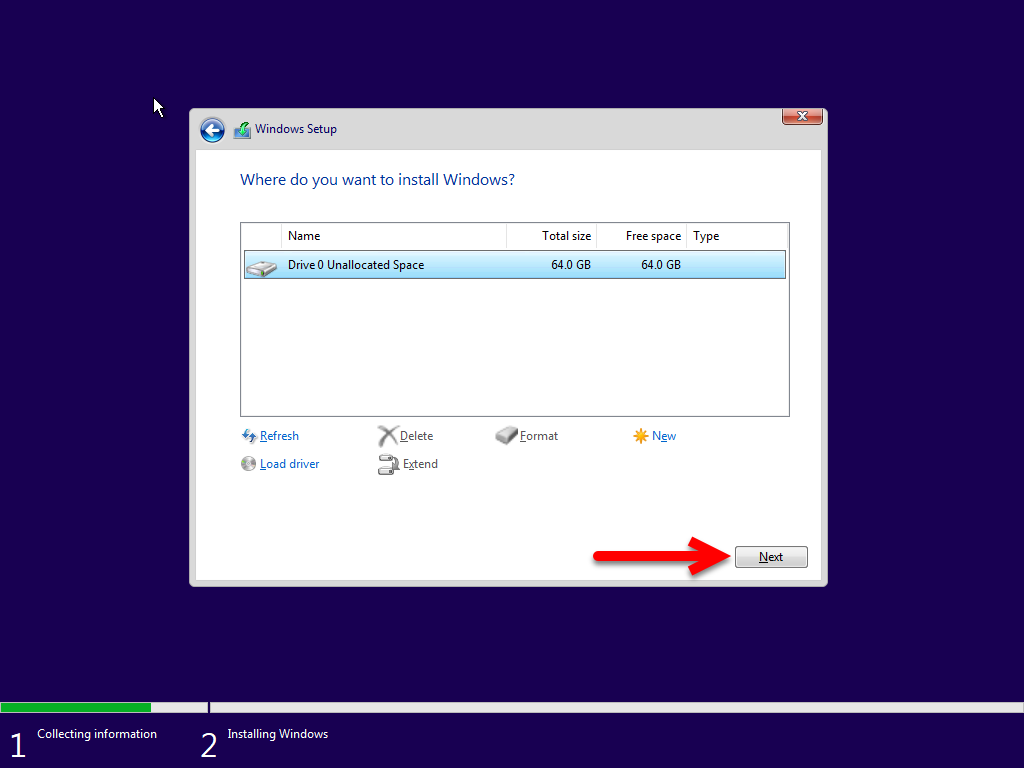
As you can see that the drive is created as an unallocated drive, so it means that you don’t need to create any other drive right now inside the VMware Workstation for Windows 11 installation. Simply, click on the next option to continue the installation.
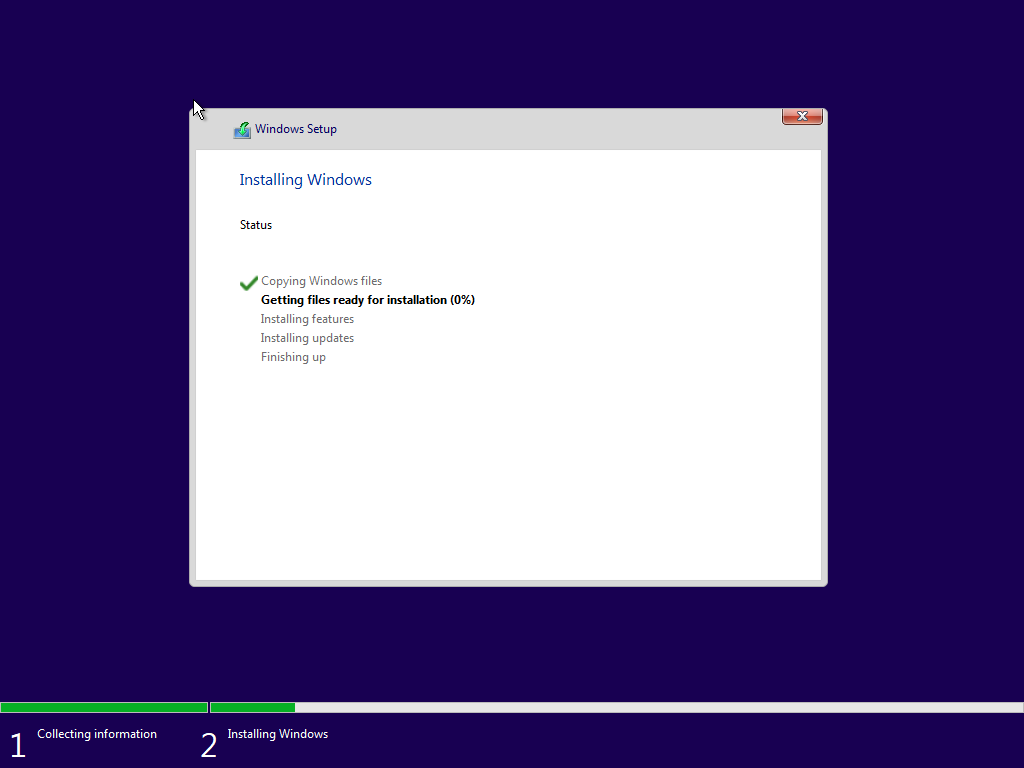
Now the installation is successfully started so the installation of Windows 11 inside the actual machine, and Virtual machine is the same. Previously if you installed Windows 11 on your actual machine the process is the same. So, it may take sometimes have patience and wait for it.
Complete the Basic Settings of Windows 11 for the First Use
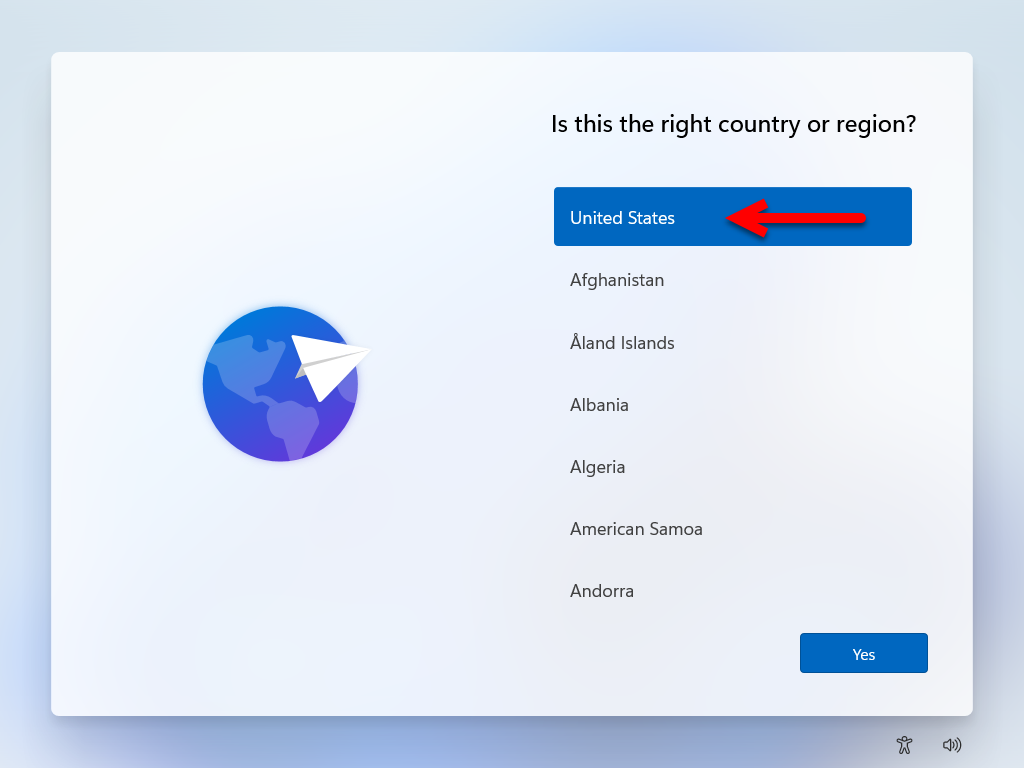
Finally, once the installation is completed the virtual machine will restart. After the restating, you will be able to get ready to complete the first settings of Windows 11 for the first use. So, simply once again virtual machine will restart. And there you don’t need to touch the virtual machine during the installation. Simply, on the first window select the location and click Yes.
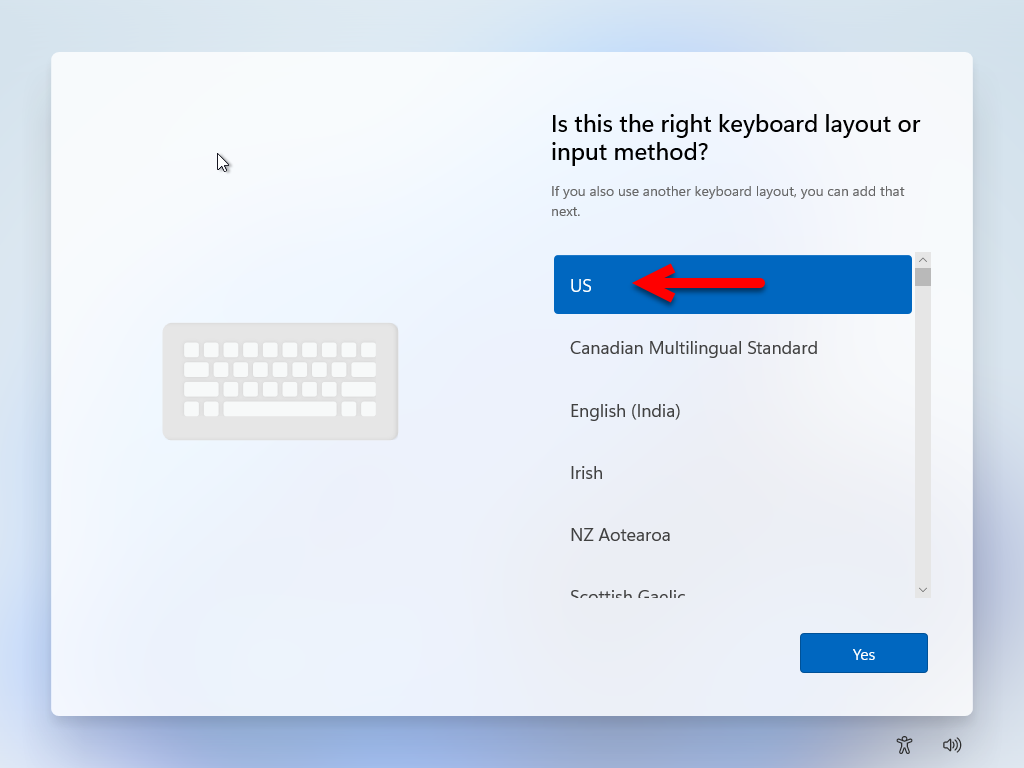
Select your keyboard layout or language for Windows 11 and click Yes.
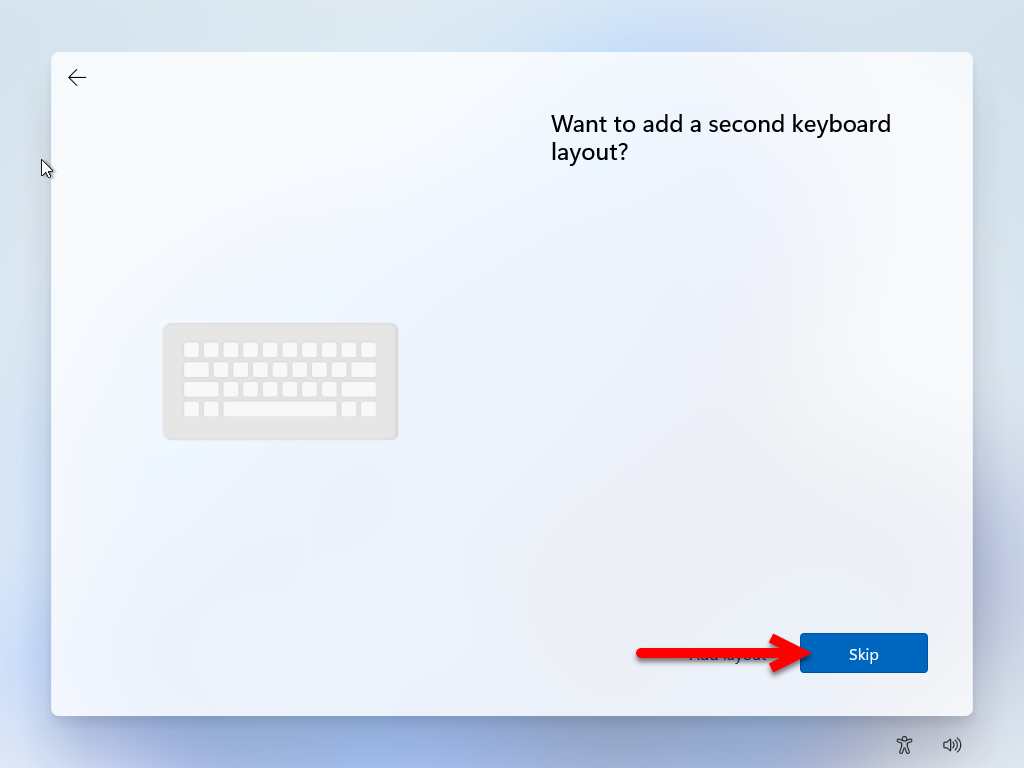
Now if you want to add any secondary keyboard, so click on the add keyboard layout. If you don’t want to add any other keyboard layout simply click on the Skip option.
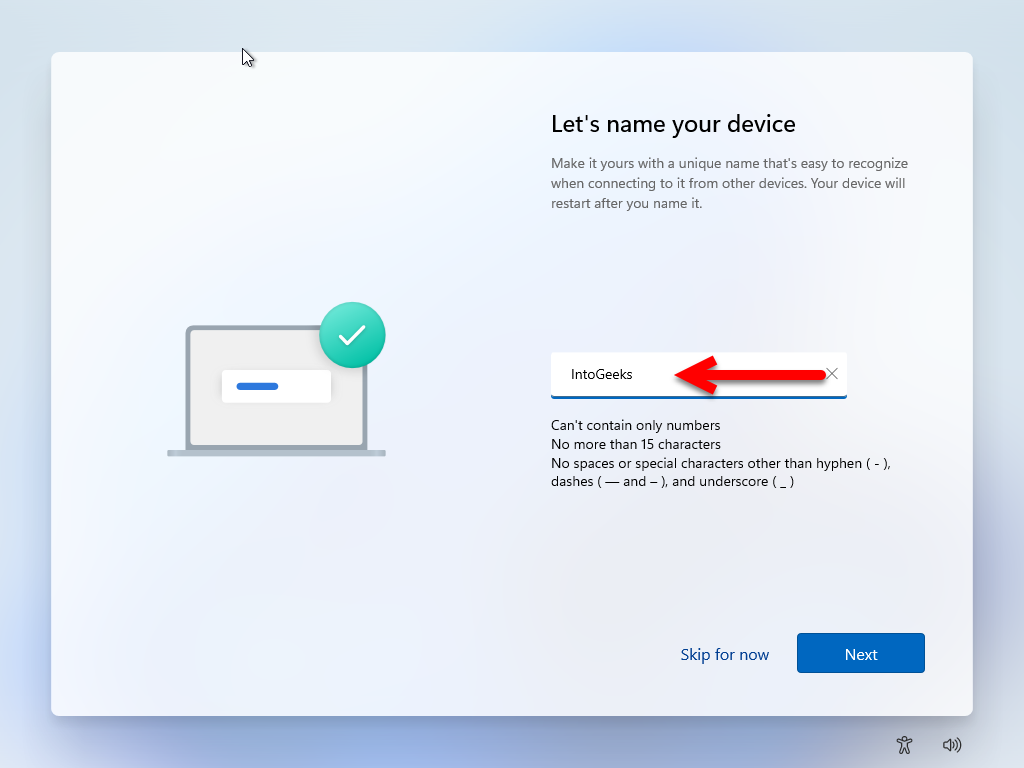
Now create a name for Windows 11 on VMware Workstation, and click next.
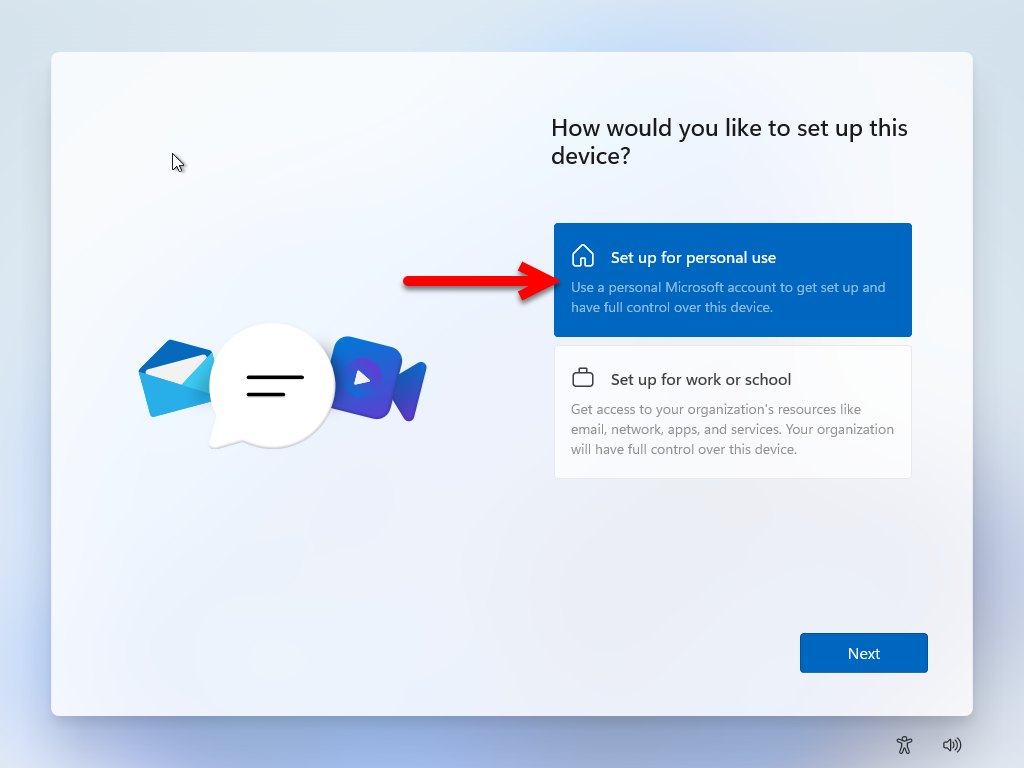
In this step, you will see two different options, the first one is you can set up Windows 11 for (Personal use), and the second option is you can set up Windows 11 for (Work or school use), so it depends on you. Simply select any of the options and click on the next option.
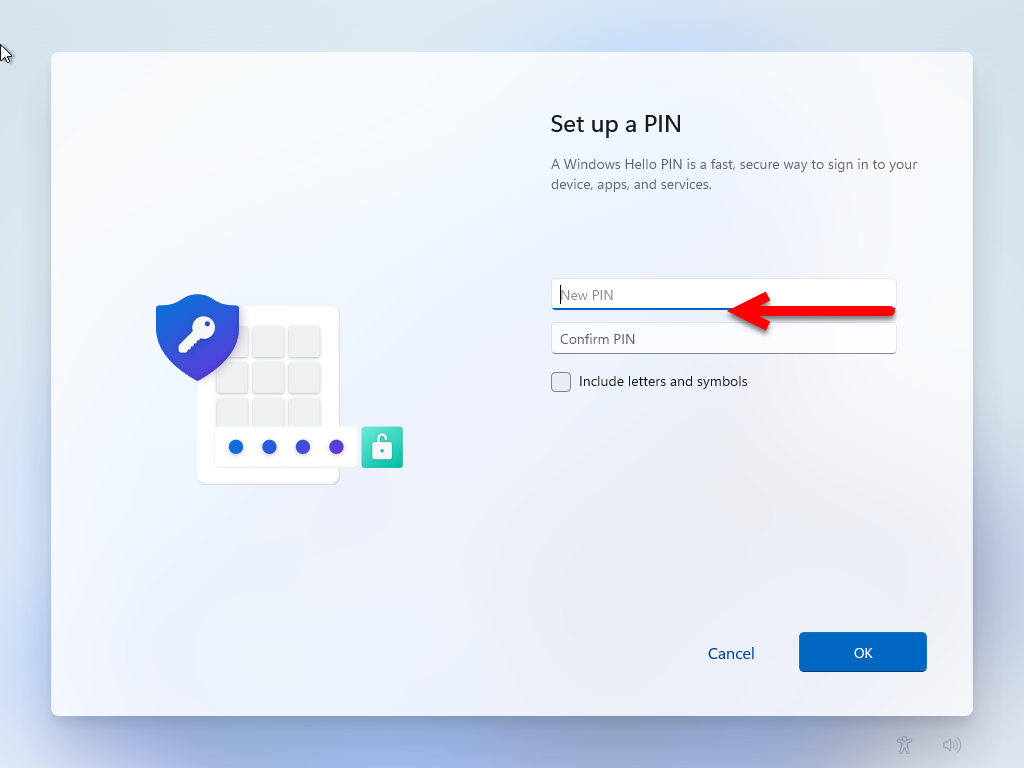
Create a PIN for Windows 11 on VMware Workstation if you want, and click on next.
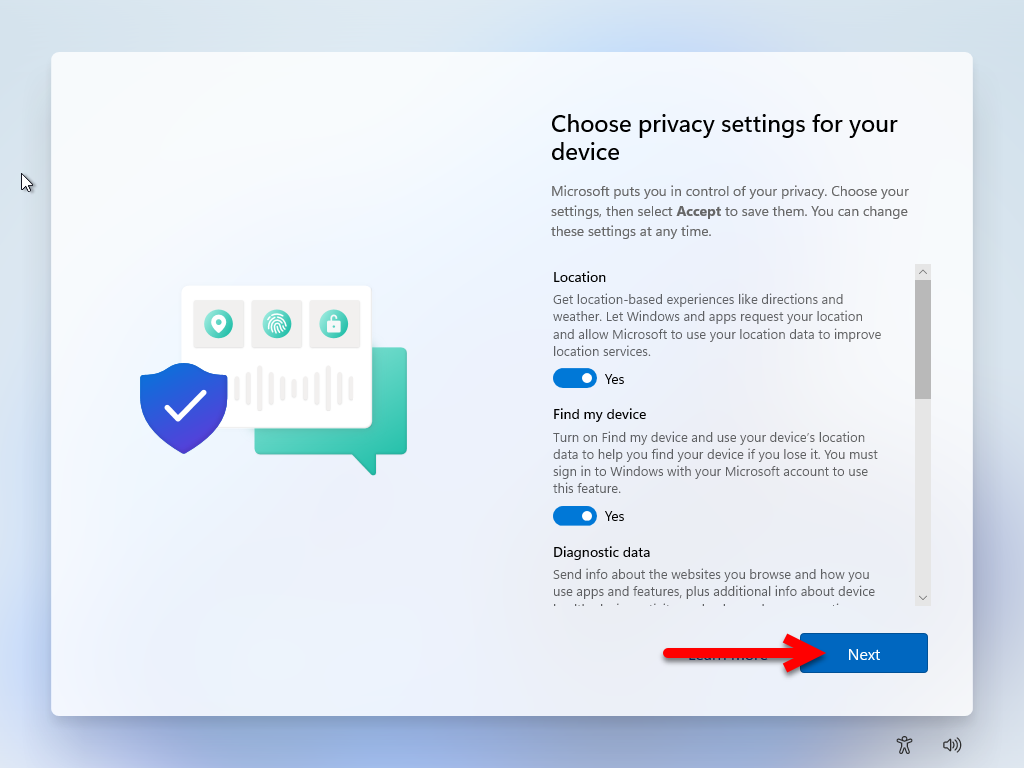
Now in this step of Privacy Settings, you have to click three times on the next option, to proceed to the next window.
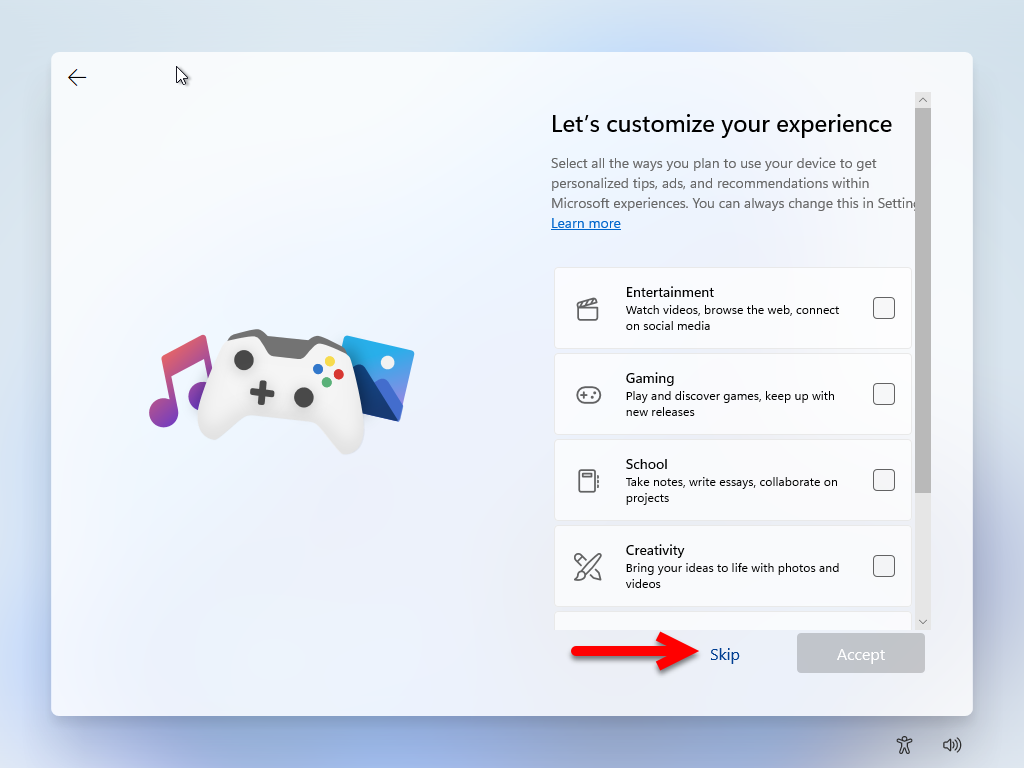
Windows 11 provides you with the best customization window, so if you want to customize your Windows 11 on VMware Workstation you can do it without any issue. On the other hand, if you don’t want simply click on the Skip option.
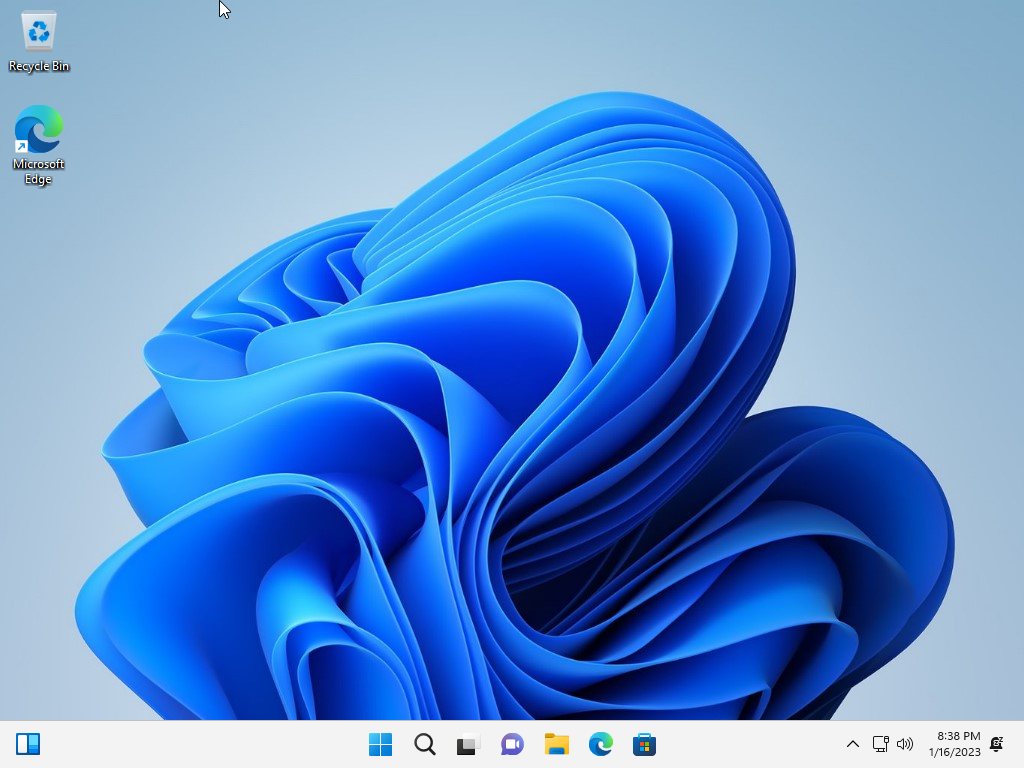
After the customization, you will be able to get ready for Windows 11 for the first use of VMware Workstation Pro 17 on a Windows PC. Therefore, getting ready for Windows 11 for the first user may take some time. After that, you will see the Windows 11 beautiful wallpaper inside VMware Workstation.
Conclusion
Testing Windows 11 on VMware Workstation Pro 17 was much more interesting than testing it on an old version of VMware Workstation. So, you can get complete access to Windows 11 on VMware Workstation like your actual machine. After the installation, you will be able to get the full features, after updating to its latest version of Windows OS through the update option bar. Also, if you should use Windows 11 daily on the VMware Workstation for any other purpose easily you can have full access to its advanced features.
4 Comments