How to Install Linux Mint on VirtualBox on Windows PC?
How to Install Linux Mint on VirtualBox on Windows PC?
Using another operating system on our actual machine looks interesting, thanks to that era of virtualization technology that allows us to install and test several and multiple operating systems on a signal physical device. Whenever you are using Windows PC or macOS, the virtual machine technology gives the best opportunity to run Windows on a macOS machine, and macOS on a Windows machine. Overall, virtualization is the best choice to test multiple operating systems and their features on a signal device, like the virtual machine allows you to try Windows, macOS, Linux, Ubuntu, and Kali Linux, on one machine.
In our previous post, we wrote about installing Linux Mint on VMware Workstation on Windows PC. Also, through this post, you will learn step-by-step how to install Linux Mint on VirtualBox on Windows PC with a free method.
Read Also: How to Install Linux Mint on VMware on Windows 11 PC?
What is VirtualBox? VirtualBox is a free open-source virtualization machine to test several operating systems at the same time on a single machine. Also, the VirtualBox called Oracle VM VirtualBox is a type of 2 hypervisor for x86 virtualization, the VirtualBox is developed by Oracle Corporation. Officially the VirtualBox software was developed in 2008, and till now VirtualBox has brought lots of changes to the VirtualBox interface and features. You can install the VirtualBox software on Windows, macOS, Linux, Solaris, and OpenSolaris. Completely the VirtualBox is an open-source machine where you can have full access to its all features on any operating system.
Also, if you want to migrate from your Windows to any Linux or Ubuntu operating system, then the Linux Mint is the best choice to use it as your daily operating system. Linux Mint is also an Ubuntu-based operating system that has a simple interface look, which is pretty much easy for Windows users.
How to Install Linux Mint on VirtualBox on Windows PC?
To install Linux Mint on VirtualBox on Windows PC, firstly you need to full fill the below-down requirements.
- Linux Mint ISO image file
- Install VirtualBox on Windows PC
- Create a new Virtual machine for Linux Mint on Windows PC.
- 2GB of RAM (4GB is recommended)
- 40GB of Disk is required
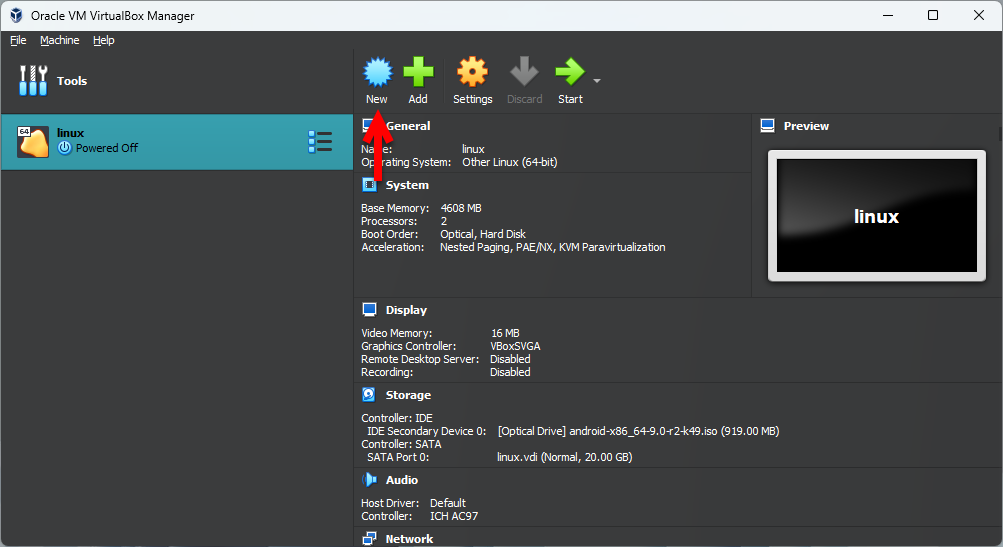
Once you have completely installed the VirtualBox on Windows PC, then you need to create a new virtual machine for Linux Mint. To create a new virtual machine open up VirtualBox and click on the new option.
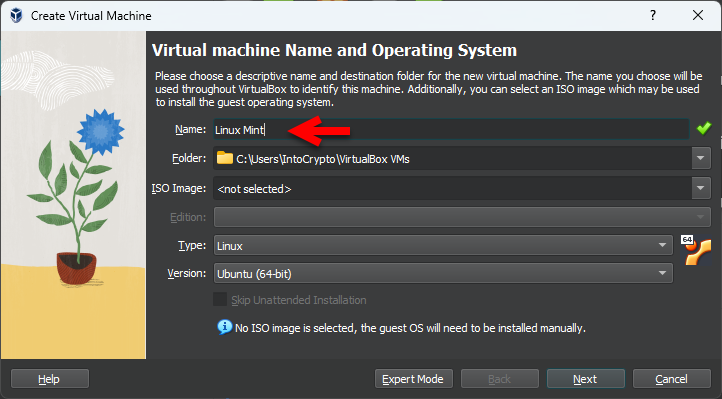
Now you have to type the name of the virtual machine Linux Mint, choose the type and its version Ubuntu then click next.
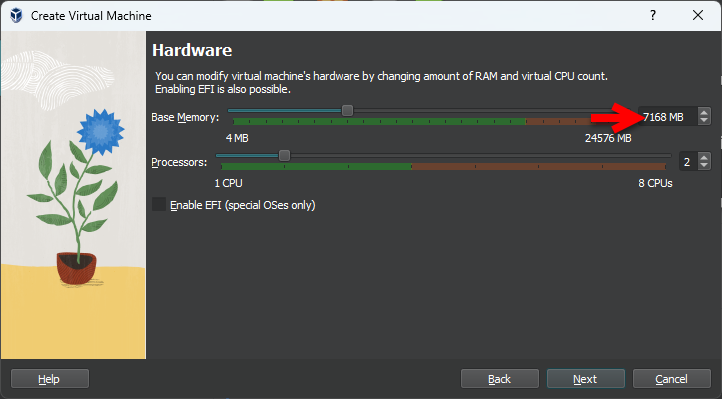
Increase the base memory and processor then click next.
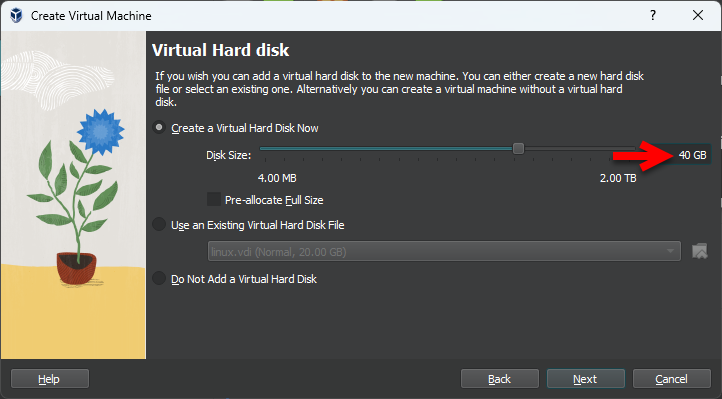
Choose the option, create a virtual hard disk and specify the disk size for Linux Mint then click next.
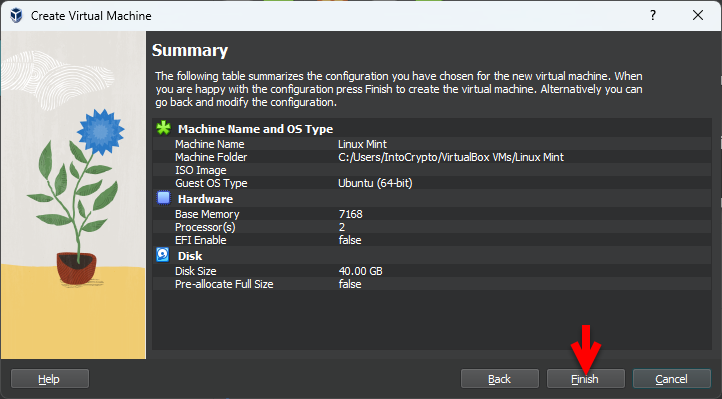
Now you are ready to create the virtual machine for Linux Mint, simply click on Finish to create it.
Edit the Virtual Machine for Linux Mint for Better Performance
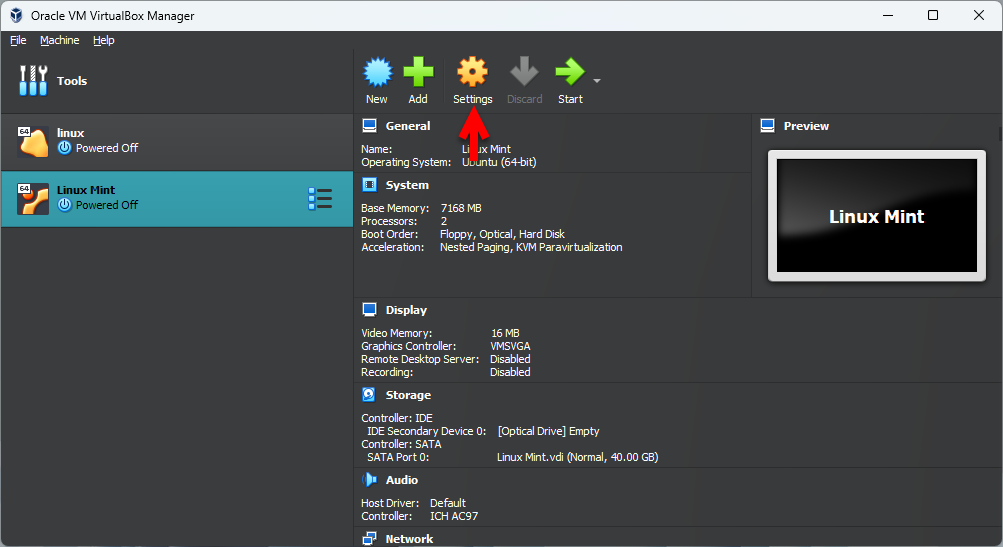
Once the Linux Mint virtual machine is successfully created you need to edit the Virtual machine settings to have better performance while installing it. To edit the virtual machine settings simply click on the Settings option.
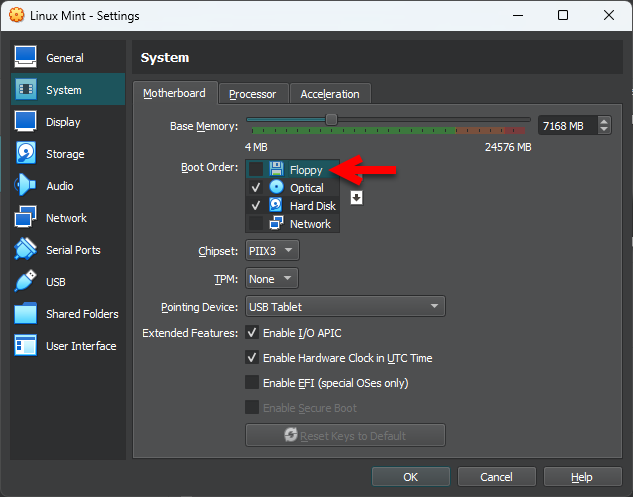
When the setting window opened from the left-handed window side select the System tab>Motherboard>Uncheck the floppy disk.
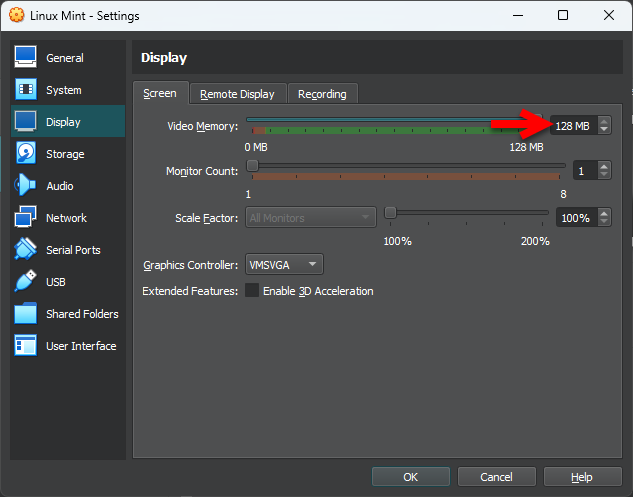
Choose the display tab>Screen>then increase the size of Video Memory.
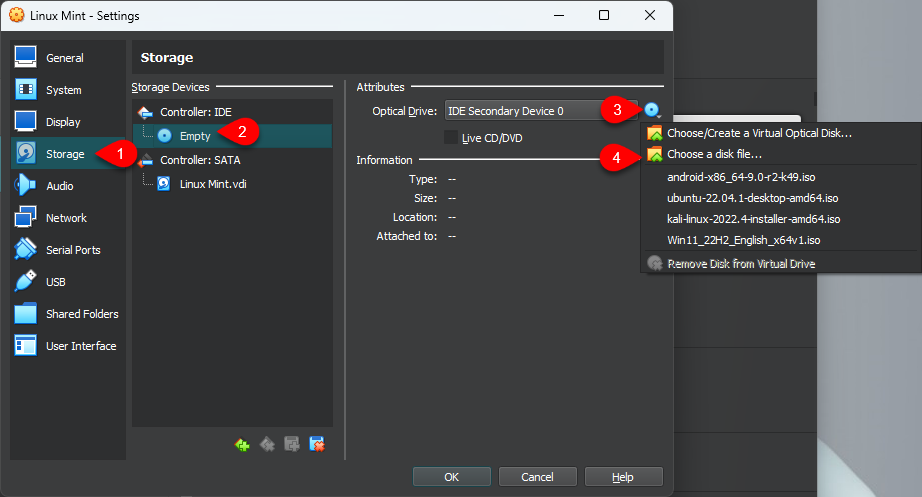
Select the Storage tab>Empty>Disk icon>Choose a disk file, to insert the ISO image file of Linux Mint. And go to the place where you saved the ISO image file, and click on open.
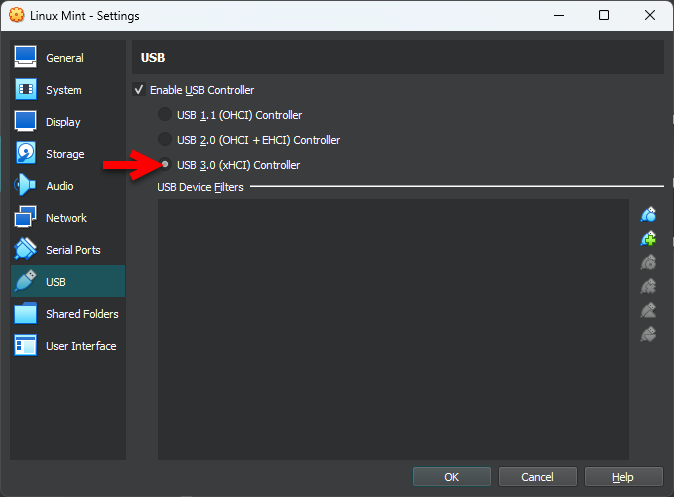
Select the USB tab, then choose the USB 3.0 (xHCI) controller option, and finally click on the OK option to save the changes.
Perform a Clean Installation of Linux Mint on VirtualBox on Windows PC
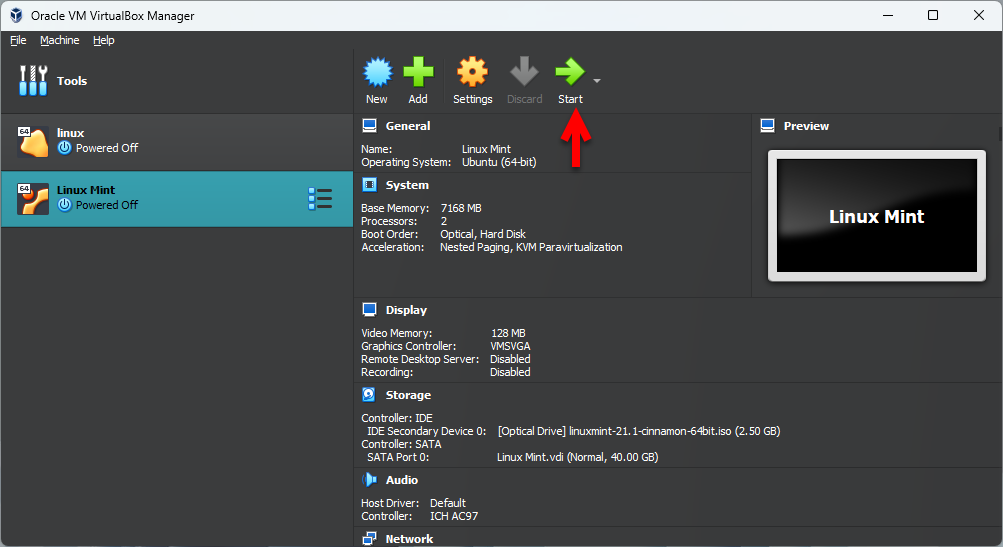
Once the virtual machine is created for Linux Mint, and you have done the editing of the Virtual machine settings. So, it’s time to install a clean installation on VirtualBox on Windows PC. Simply select the Linux Mint Virtual machine and click on the Start option.
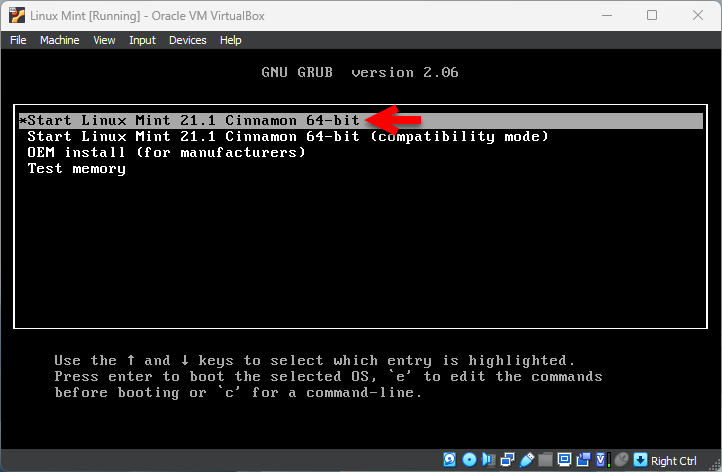
When the installation launches, select the first option “Start Linux Mint 2.1 Cinnamon 64-Bit” and hit enter.
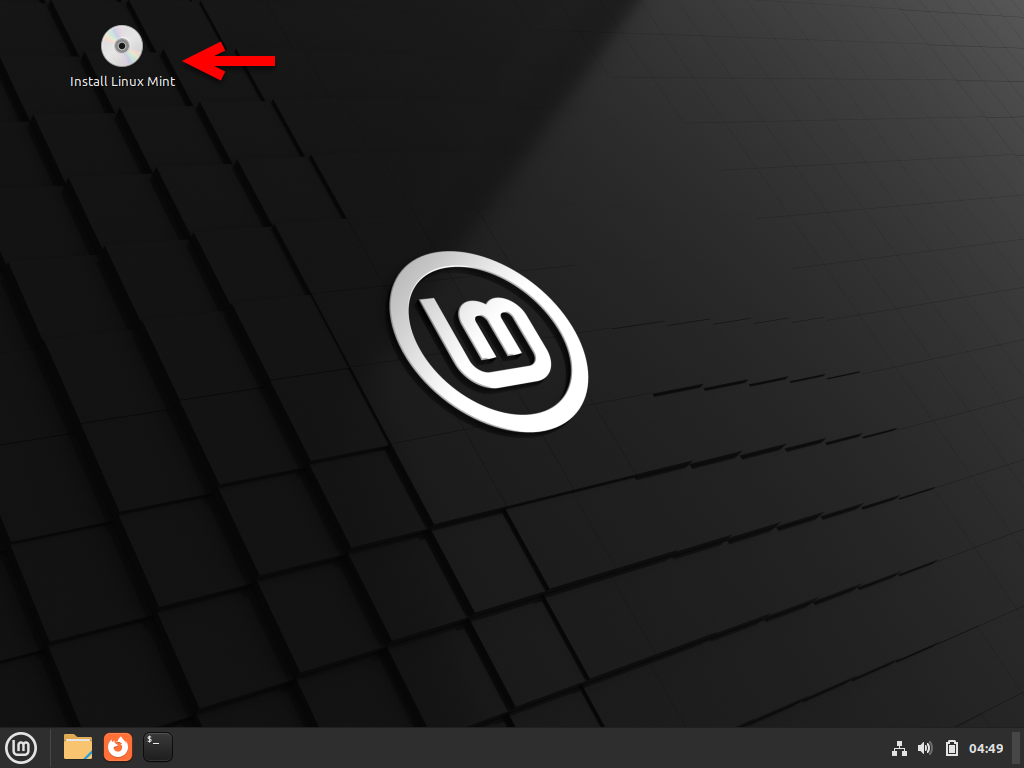
While the installation is launched on the Linux Mint window, double-click on Install Linx Mint.
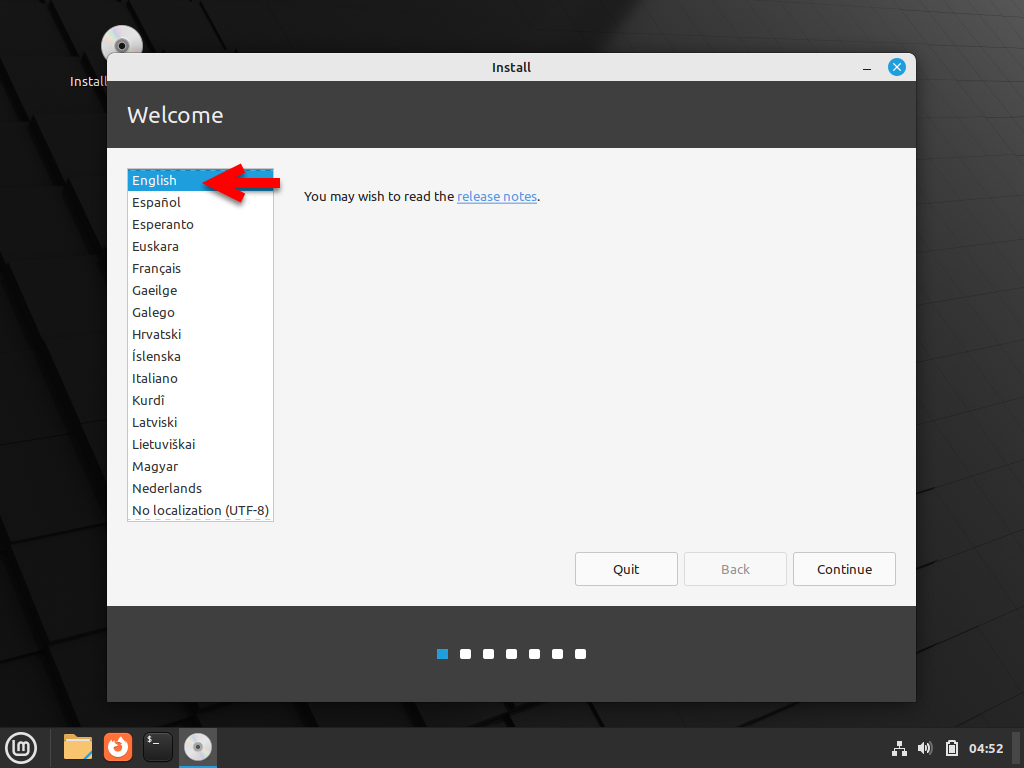
Select your language for Linux Mint and click continue.
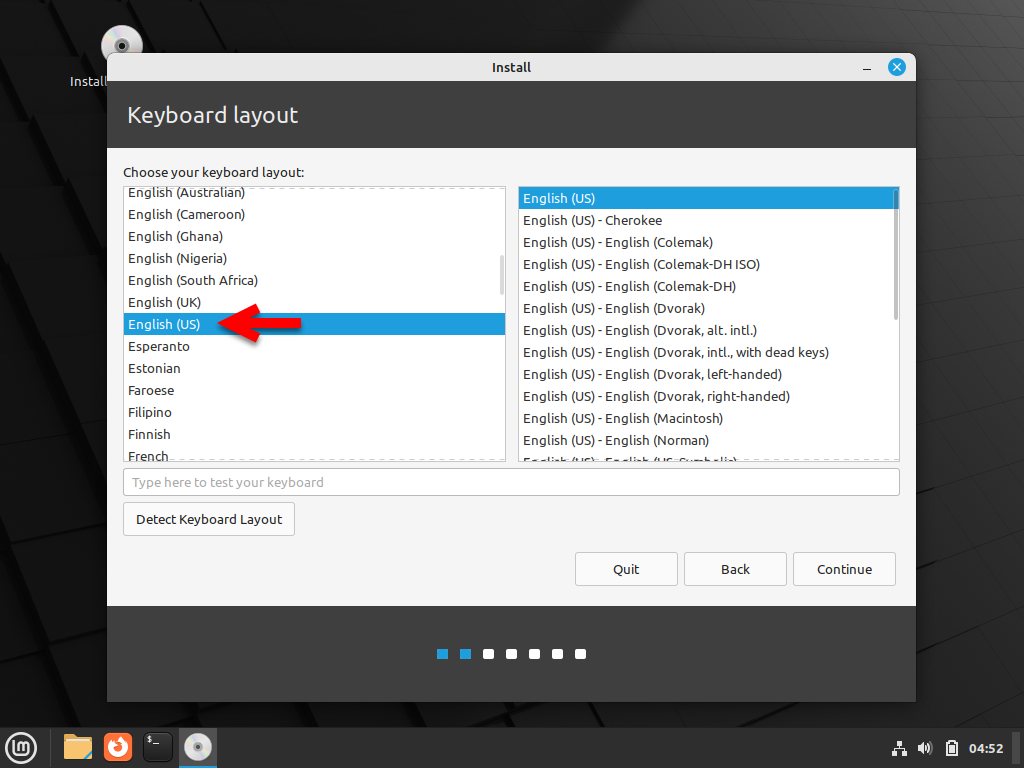
Choose your keyboard layout and click continue.
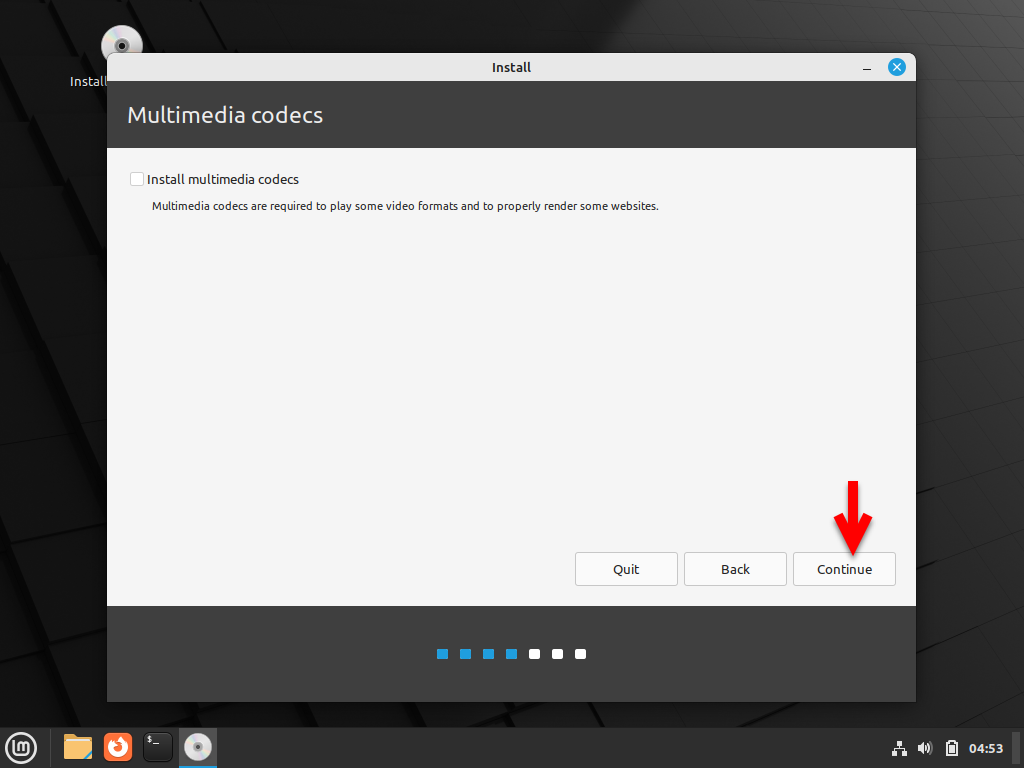
On the multimedia codes window there is nothing to do, simply click continue to proceed with the installation.
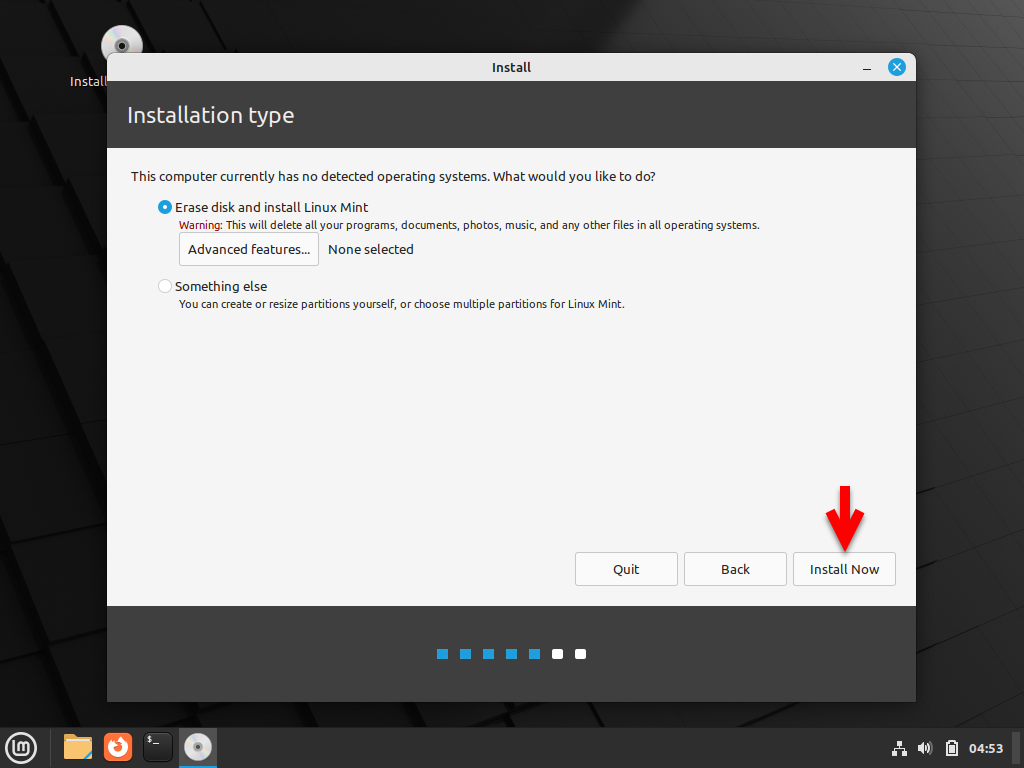
In this step, you need to format the disk to continue the Linx Minut installation, so simply select the first option “Erase disk and install Linux Mint” and click continue.
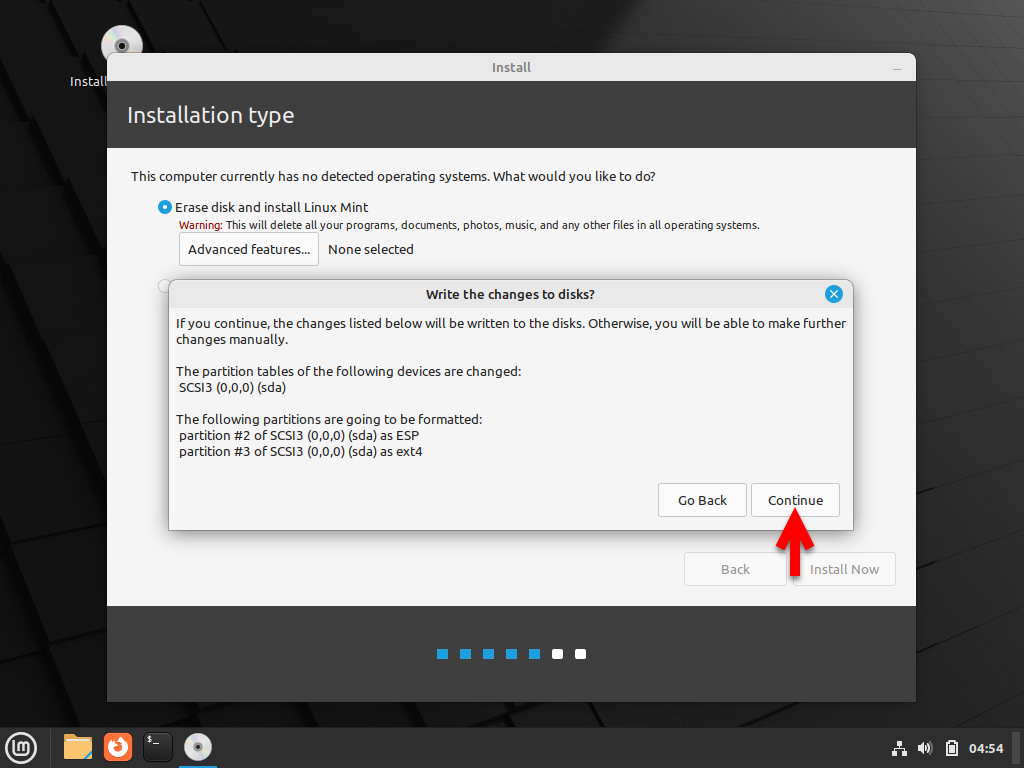
If you continue, the changes listed below will be written to the disks. Otherwise, you will be able to make further changes manually. So, click on the continue option to erase the disk and continue the installation.
When the disk is successfully erased there you have to select your location.

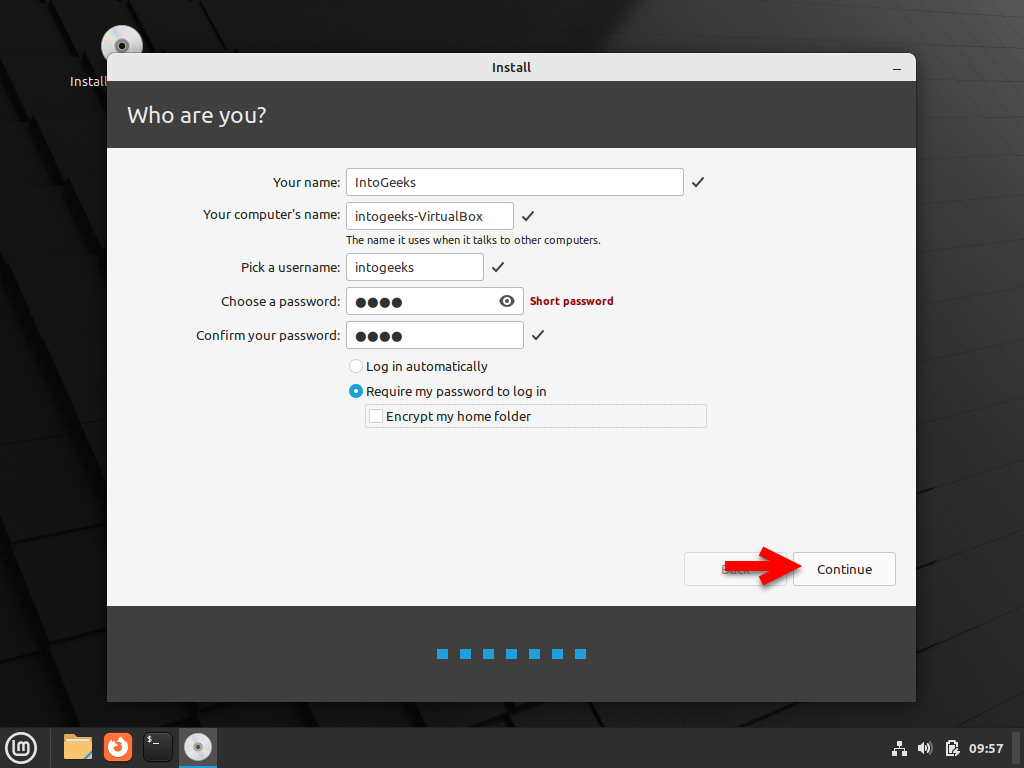
Type your full name, and your computer’s name, pick a username, choose a password, confirm your password, and click continue.
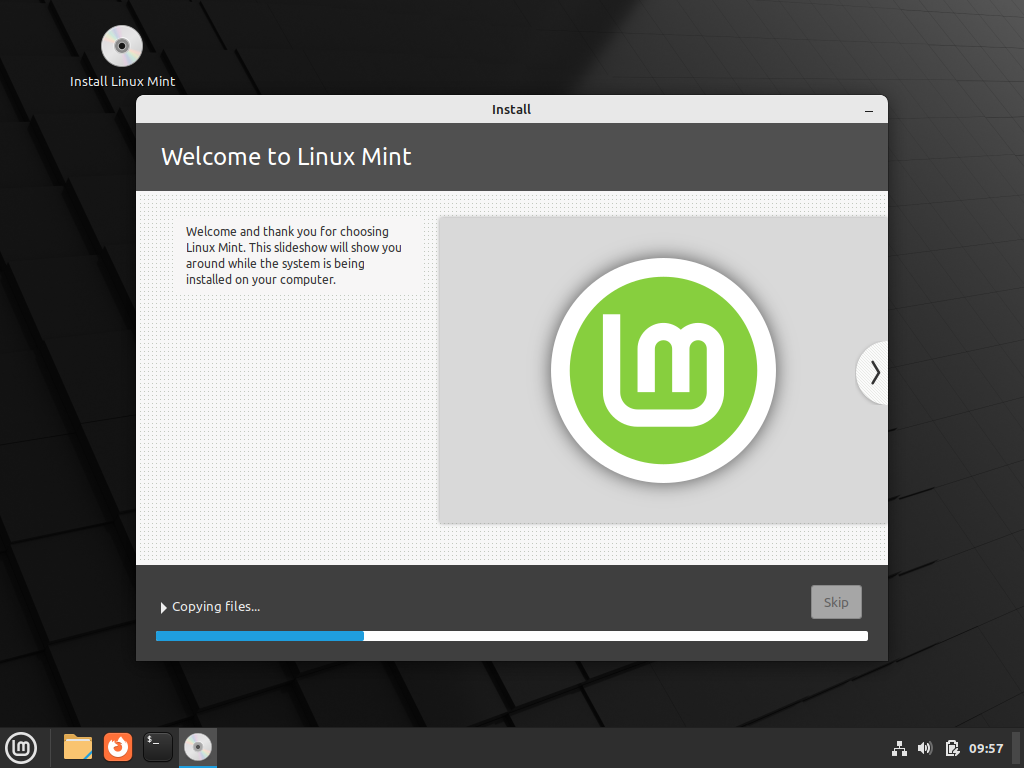
Once the username and password are done, the installation will start copying the files, so it may take time to wait for it until it should be complete.
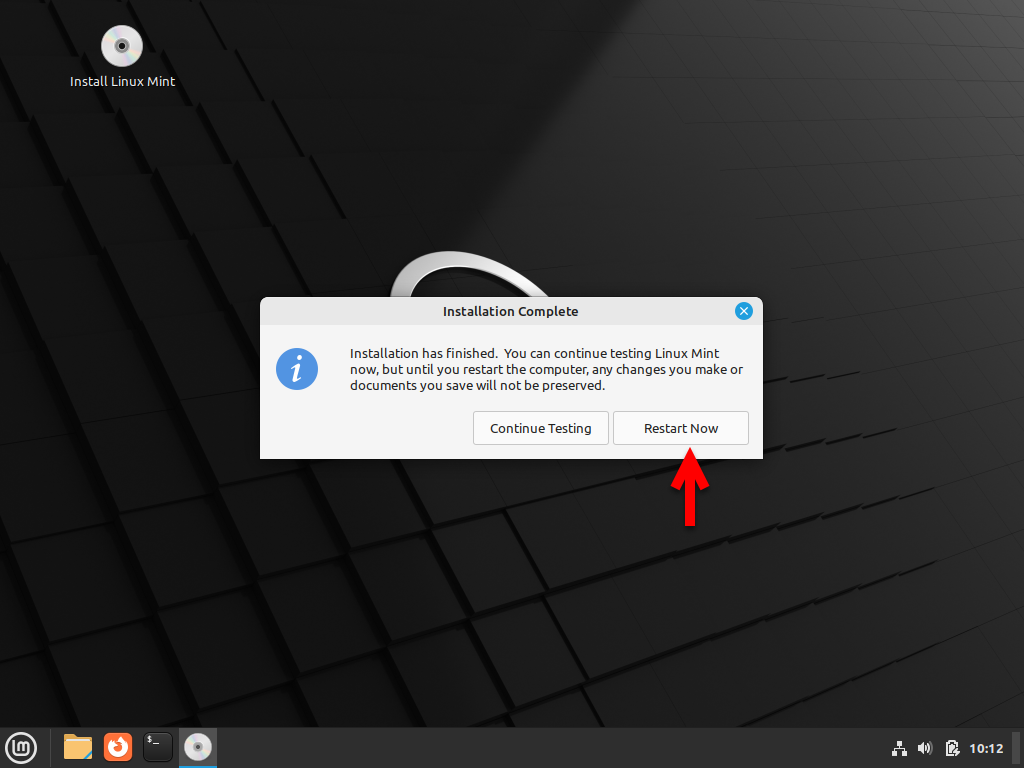
While the installation is completed, you will be required to restart your computer, so simply click on restart now.
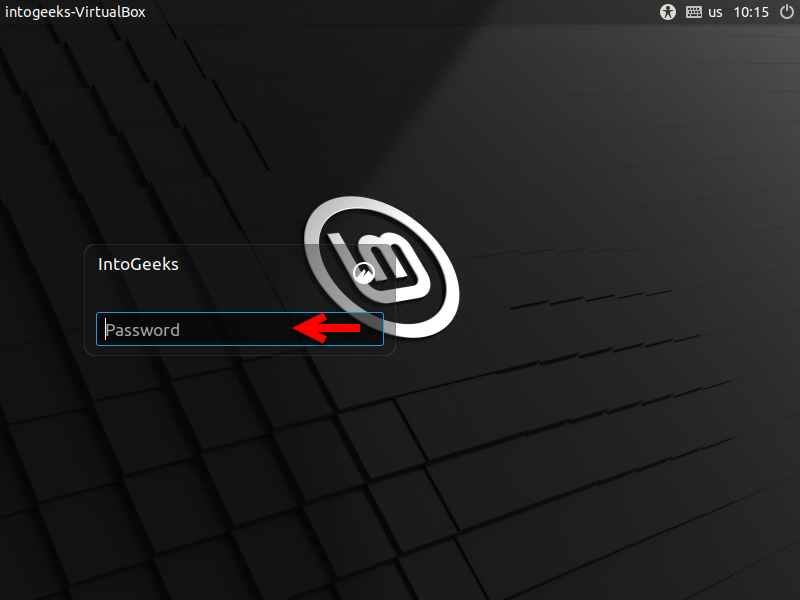
When the virtual machine is restarted on the main welcome window enter your password and hit enter to log in to Linux Mint.
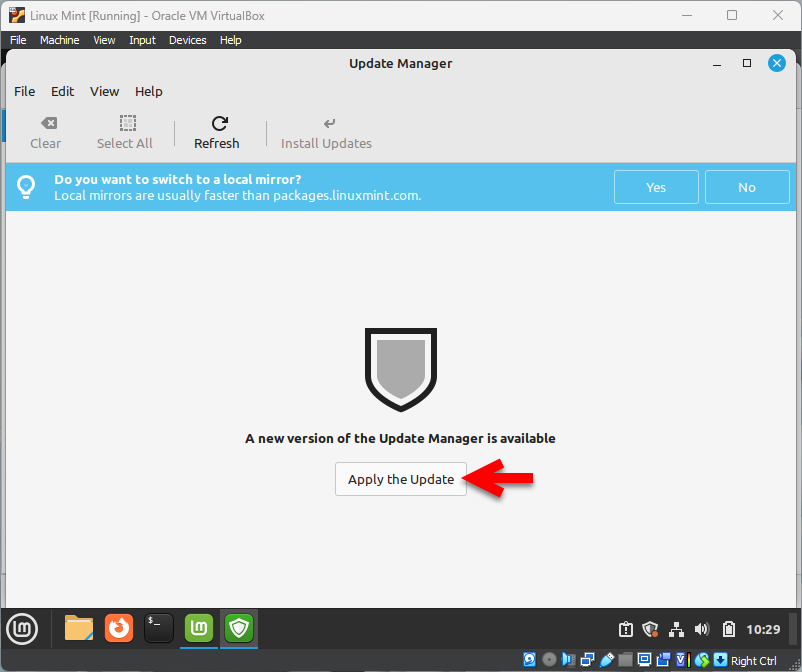
Now you will be asked to complete a few settings of Linux Mint for the first use, simply click on the Let’s go option to proceed. Then on the next window, you have to click on Apply to updates, to search for Linux Mint updates. Simply, enter your password and hit enter it will automatically search for the updates, which is required.
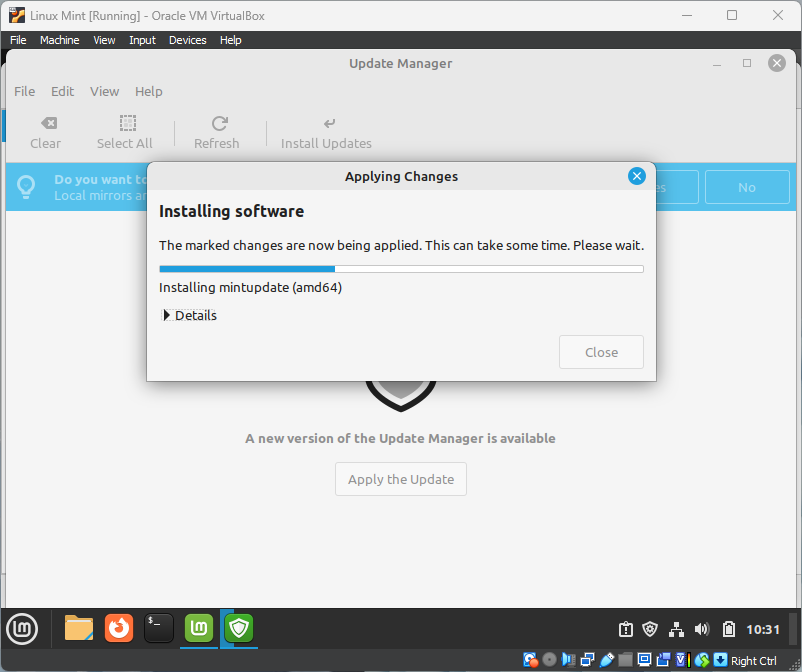
The updates to download it will take a few minutes and the installation process also. Once the update is completed simply you have to restart the virtual machine, to apply the changes of updates.
Conclusion
After the installation of Linux Mint is completed on VirtualBox on Windows PC, you need to install the guest additions tool also. If you want to use the complete feature of Linux Mint then it’s important to make changes to it by installing the guest addition tool.