How to Install Kali Linux on VirtualBox on Windows 11 (New Guide)
How to Install Kali Linux on VirtualBox on Windows 11 (New Guide)
In this article, step by step you will learn how to install Kali Linux 2022.4 on VirtualBox on Windows 11 PC. Kali Linux 2022.4 is the latest version of the popular open-source penetration testing and ethical hacking platform. It is based on Debian and is designed for digital forensics and penetration testing. One of the main features of Kali Linux is its extensive collection of tools for information gathering, vulnerability analysis, and exploitation.
The 2022.4 release includes several new features and improvements. One of the major changes is the introduction of the ZSH shell as the default shell, replacing Bash. ZSH is a powerful shell that offers many customization options and improved productivity for users. Another significant change is the update of the kernel to version 5.12, which brings improved hardware support and performance enhancements. In terms of tools, the 2022.4 release includes updates to popular tools such as Metasploit, Nmap, and Burp Suite. Additionally, it also includes new tools such as the BlueMaho Bluetooth pen-testing tool. And the BloodHoundAD tool for Active Directory reconnaissance.
Kali Linux 2022.4 also includes improvements to the user interface, including new themes and icons, as well as a new system installer. The installer has been redesigned to make it easier to use and understand, with better support for different hardware configurations. Overall, Kali Linux 2022.4 is a powerful and versatile platform that provides a wide range of tools and features for penetration testing and ethical hacking. Its new features and improvements make it an even more valuable tool for security professionals and researchers.
How to Install Kali Linux 2022.4 on VirtualBox on Windows PC?
For installing Kali Linux on VirtualBox on Windows 11 PC, you need to have the below requirements to install Kali Linux on your Windows PC. In this case, for better performance more RAM and SSD drive are recommended plus a Graphic card.
- 4GB of RAM (8 Recommended)
- 10 GB of Disk space
- Solid Drive SSD is recommended
- Kali Linux ISO image file
- VirtualBox + its extension pack
- Virtualization Technology should be enabled in the BIOS
The below down guide will show you how to install VirtualBox on Windows 11 PC. And also how to install Kali Linux on VMware on Windows PC.
- How to Install Kali Linux on VMware on Windows PC (New Update)
- How to Install VirtualBox on Windows 11 PC (New Guide)
Steps To: Create a New Virtual Machine For Kali Linux on VirtualBox
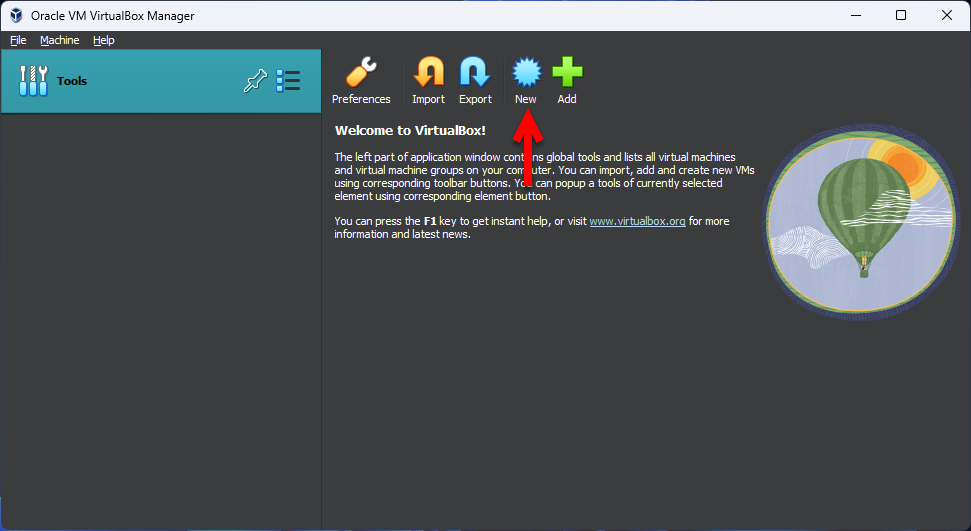
Once you get ready everything for installing Kali Linux on VirtualBox on Windows PC, then navigate to VirtualBox and open it. On the main window, the wizard clicks on the New option to proceed with creating a new virtual machine for Kali Linux.
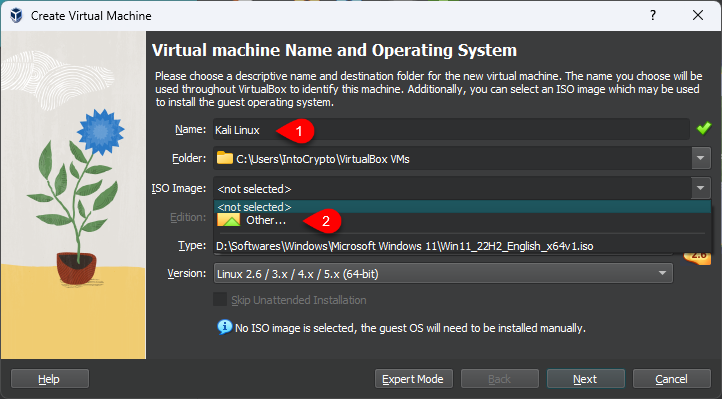
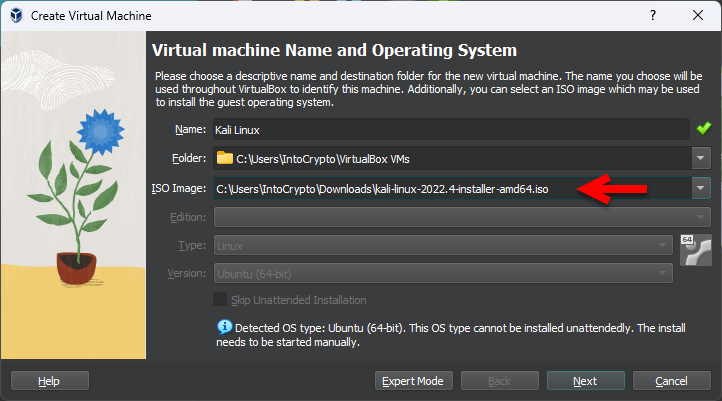
Once this window is opened type Kali Linux and, then on the ISO Image portion click on the arrow down option and click on the (Other) option.
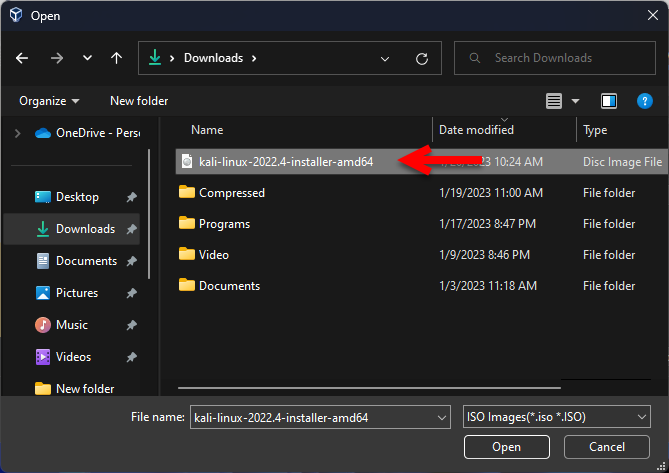
Navigate to the place where you have downloaded and stored the Kali Linux ISO image file and click on the Open option.
Now you will see that the Kali Linux ISO image file is successfully inserted in VirtualBox, so simply click on the next option to proceed to the next step.
Here increase the Base memory and processors and click next.

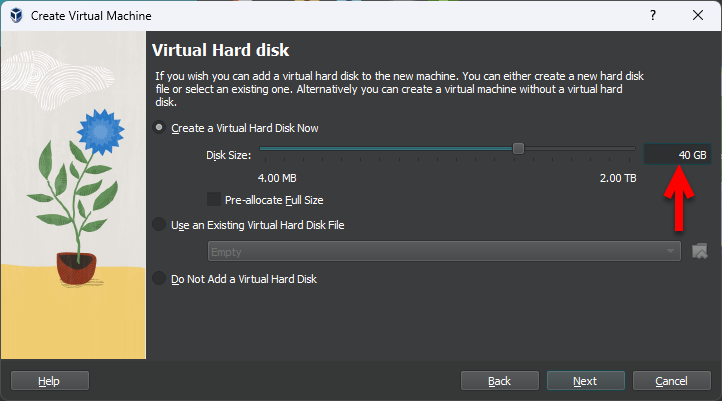
In this step select the option (Create a Virtual Hard Disk) option and increase the Hard Disk size for Kali Linux and click next.
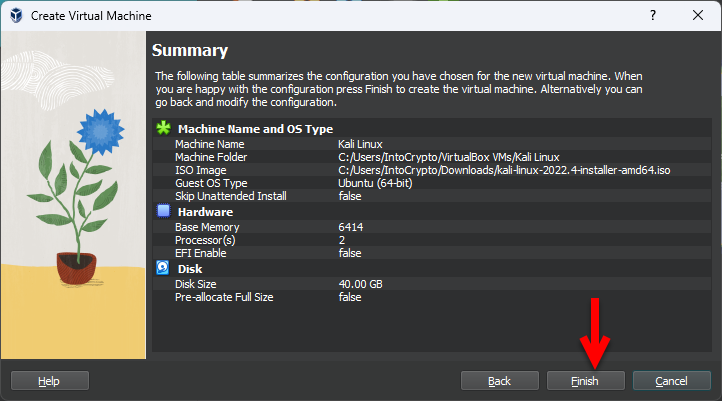
And finally, you are ready to create a new virtual machine for Kali Linux on VirtualBox on Windows PC, so simply click on the Finish option to finalize.
Edit the Kali Linux Virtual Machine For A Better Performance
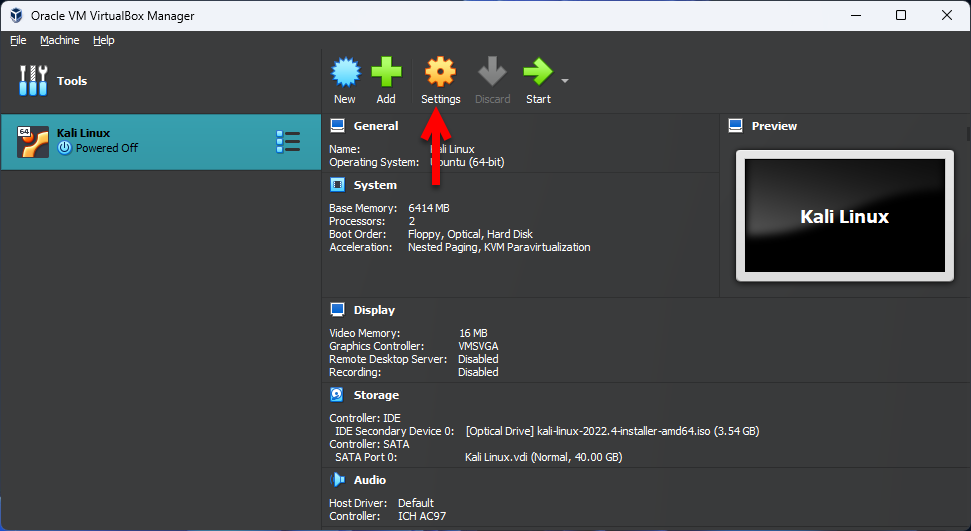
Once the Virtual machine is successfully created on VirtualBox on Windows 11 PC. So, simply select the created virtual machine and click on the Settings option. If want a better performance you have to edit the virtual machine settings on VirtualBox on Windows PC. You might face the performance during the installation, or after you installed the Kali Linux.
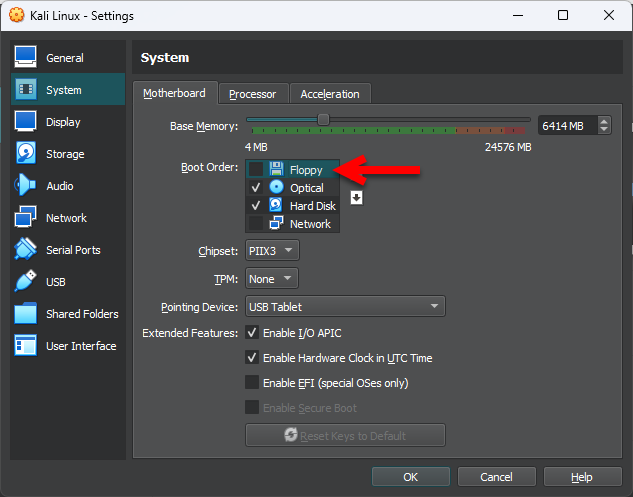
Once the settings window opened from the left-handed bar select the system tab>Motherboard, and uncheck the Floppy disk.
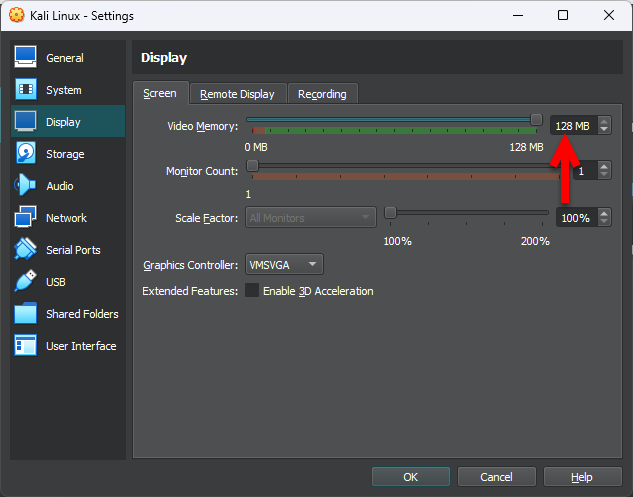
Select the Display tab>Screen and increase the Video Memory up to 128MB.
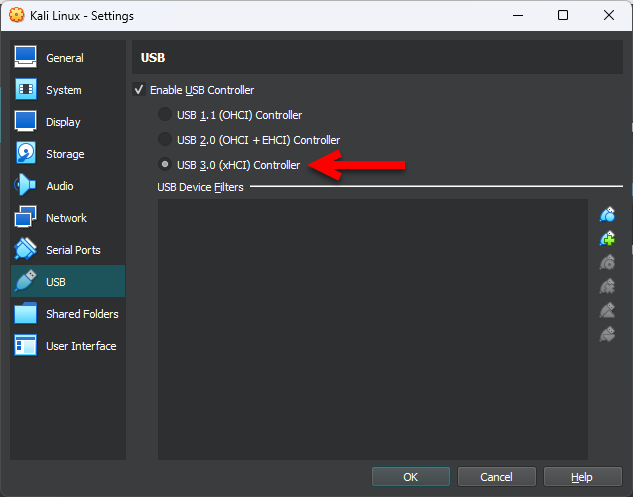
Select the USB tab> and select the USB 3.0 (xHCI) Controller option and click on the OK option to make the changes.
Performa A Clean Installation of Kali Linux on VirtualBox on a Windows PC
Once you have created a new virtual machine for Kali Linux on VirtualBox on Windows PC, make the changes to the Virtual machine for better performance. Now it’s time to install the Kali Linux on VirtualBox on Windows PC, without any issues. Also, don’t forget that the installation process may take some time. So, to install Kali Linux on VirtualBox on Windows PC simply select the virtual machine of Kali Linux and click on the start option.

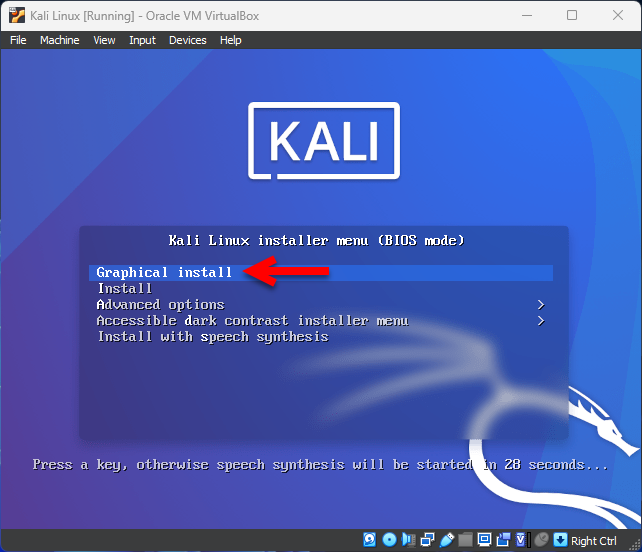
When the Kali Linux successfully boots, simply select the graphical install and press enter.
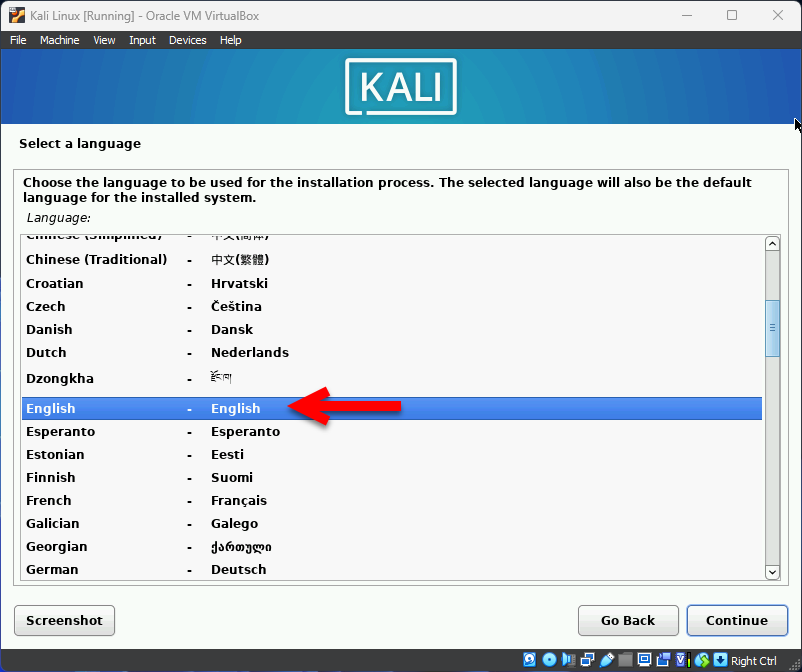
In this step, Select the language for Kali Linux that you want to install on VirtualBox, and click continue.
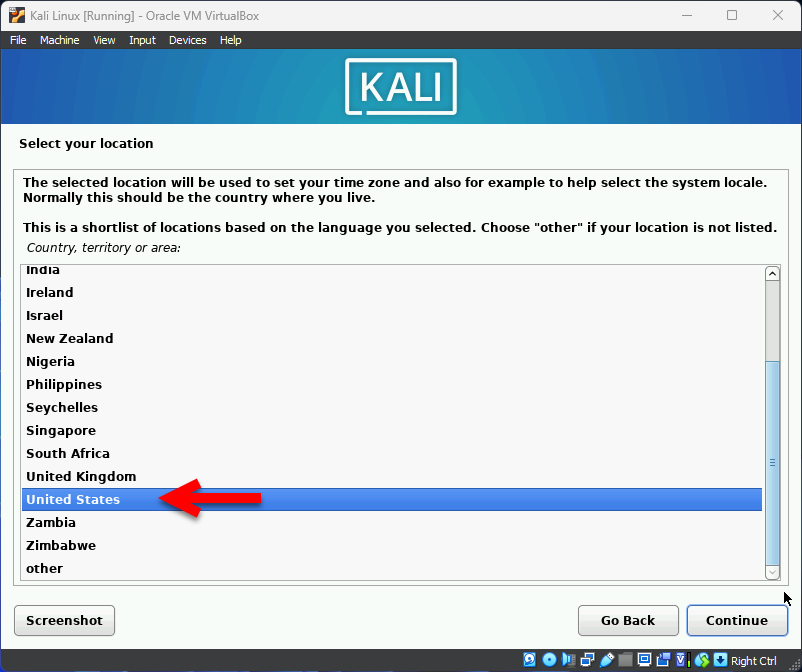
Select your location, the selected location will be used to set up your time zone and also for example to help select the system locale. Normally this should be the country where you live. Simply select the location where you live and click continue.
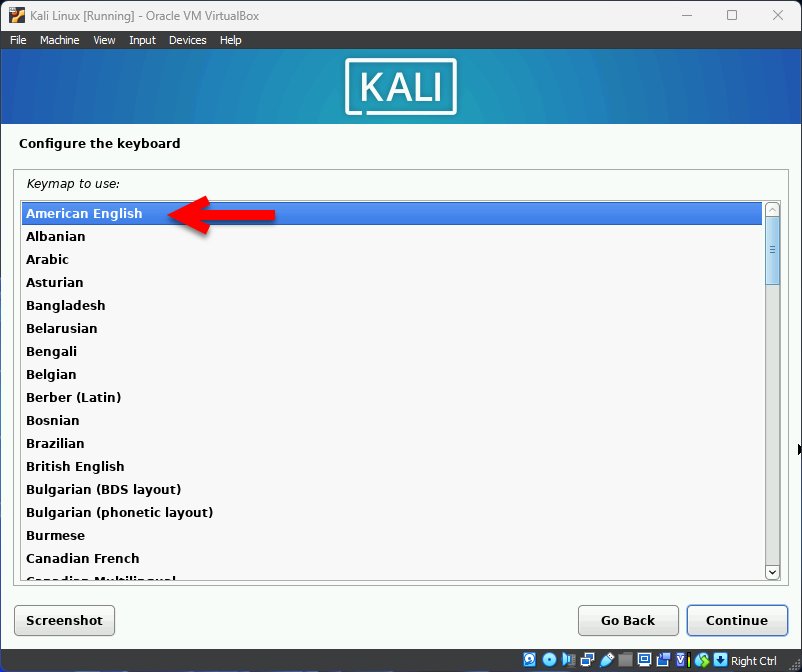
In this step Select the keyboard configuration for Kali Linux and click continue.
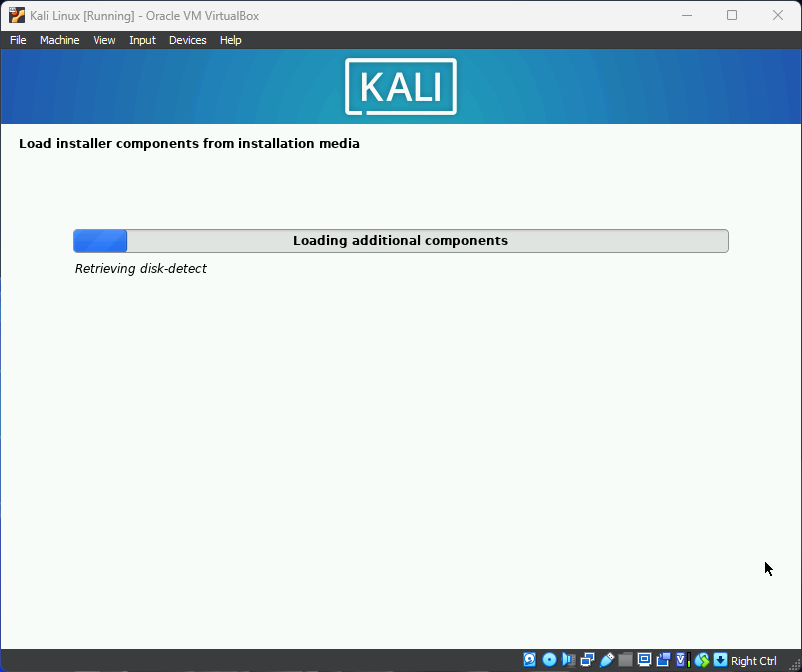
Now the installation will load the installation media wait until the process should complete.
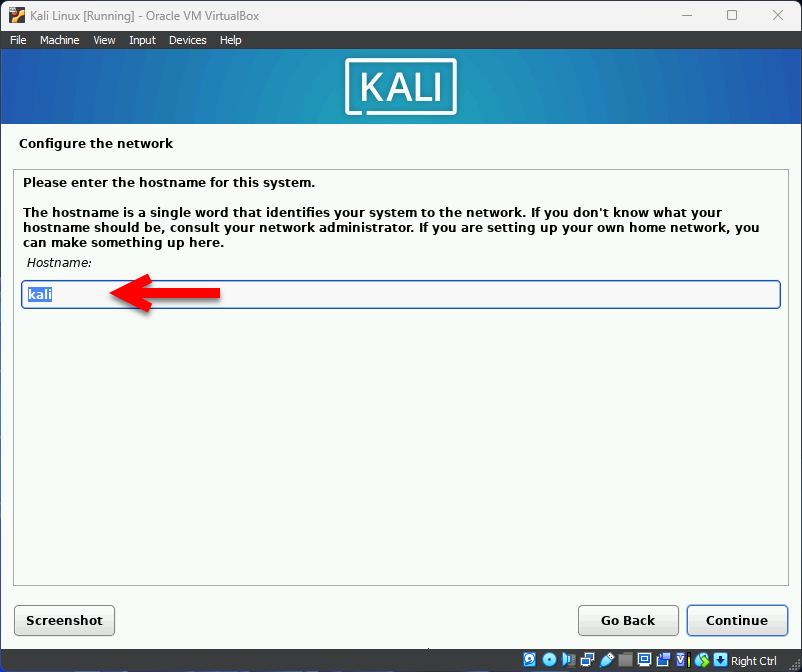
Configure the network, please the hostname for this system. The hostname is a single word that identifies your system to the network. If you don’t know what your hostname should be, consult your network administrator. If you are setting up your home network, you can make something up there. So there is no need to enter any separate hostname simply click on continue.
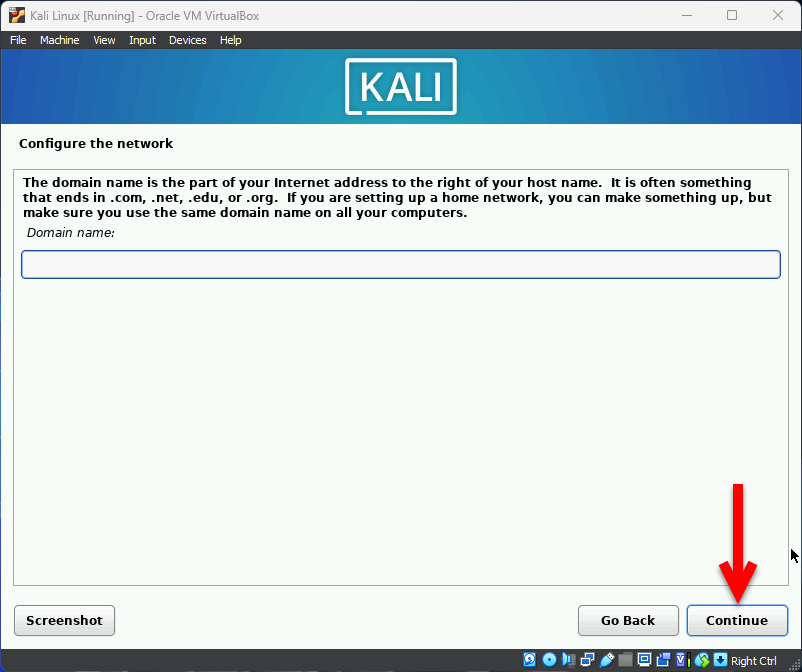
Configure the network, The domain name is the part of your internet address to the right of your hostname. It is often something that ends in .com .net, .edu, .org. If you are setting up a home network, you can make something up, but make sure you are the same domain name on all your computers. Leave the domain name as default and click continue.
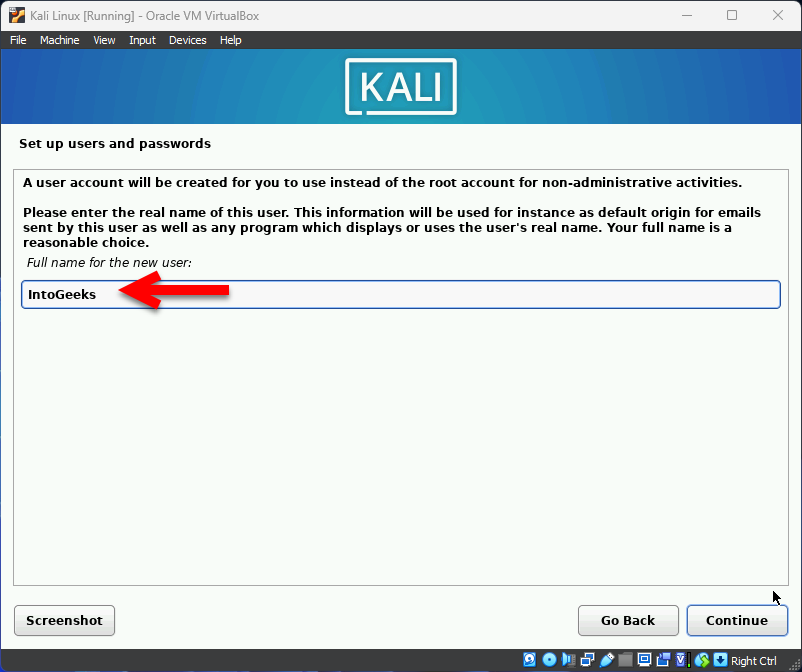
Set up users and passwords, A user account will be created for you to use instead of the root account for non-administrative activities. Please enter the real name of this user. This information will be used for instance as the default origin for emails sent by these users as well as any program which displays or uses the user’s real name. Your full name is a reasonable choice. Simply enter any user name for Kali Linux and click continue.
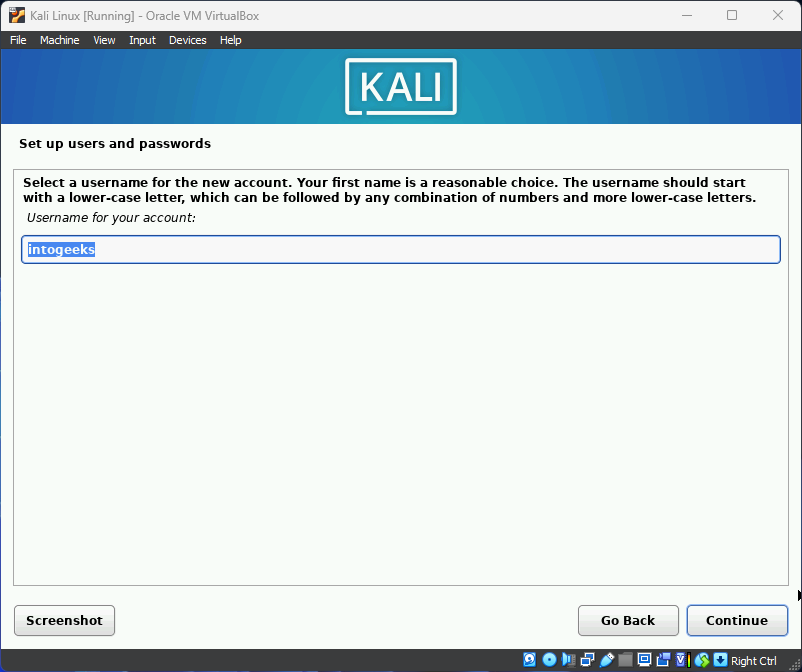
Set up users and passwords, Select the username for the new account. Your first name is a reasonable choice. The username should start with a lower-case letter, which can be followed by any combination of numbers and more lower-case letters. So in this step, again you have to leave each and everything as a default.
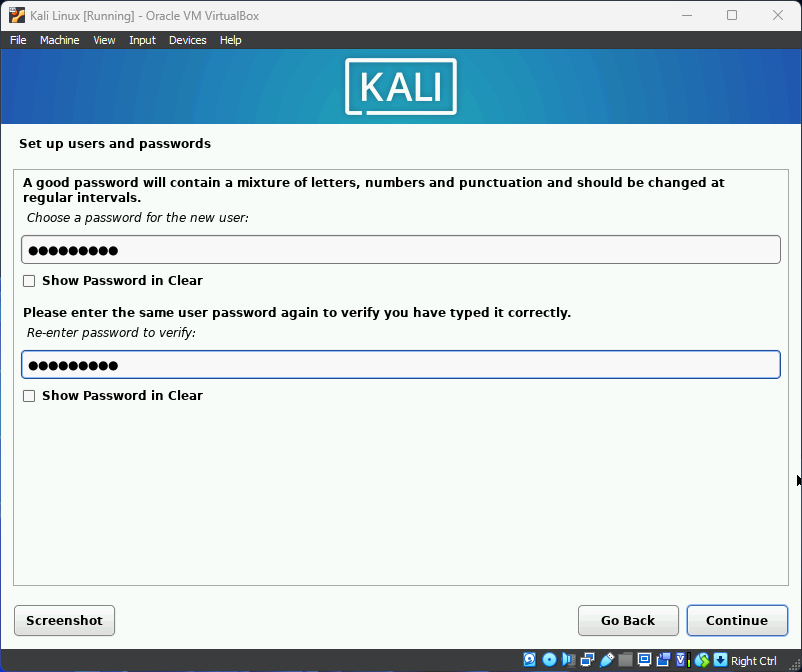
Set up passwords, A good password will contain a mixture of letters, numbers, and punctuation and should be changed at regular intervals. Simply the password for your Kali Linux use on VirtualBox and click continue.
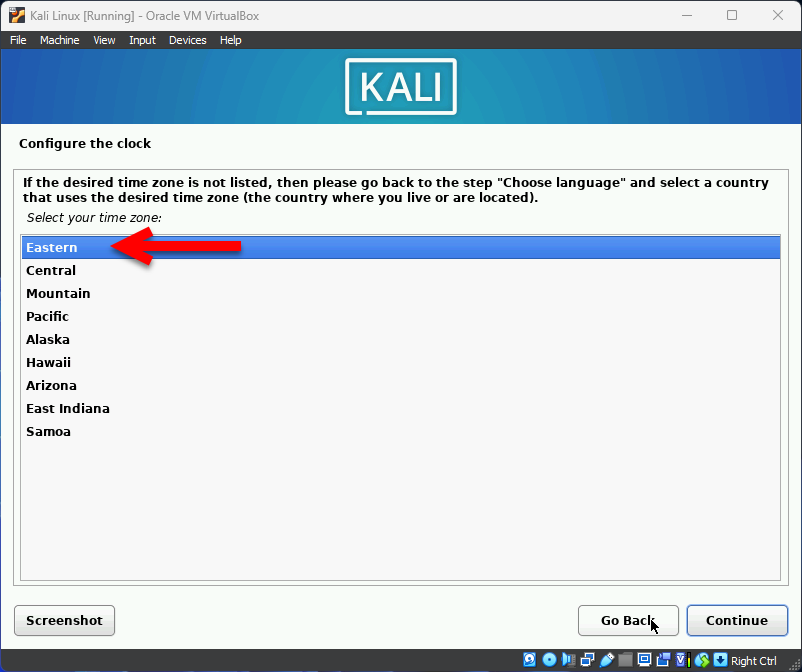
Once you entered the password for Kali Linux, therefore, you have to choose the time zone for the clock and click continue.
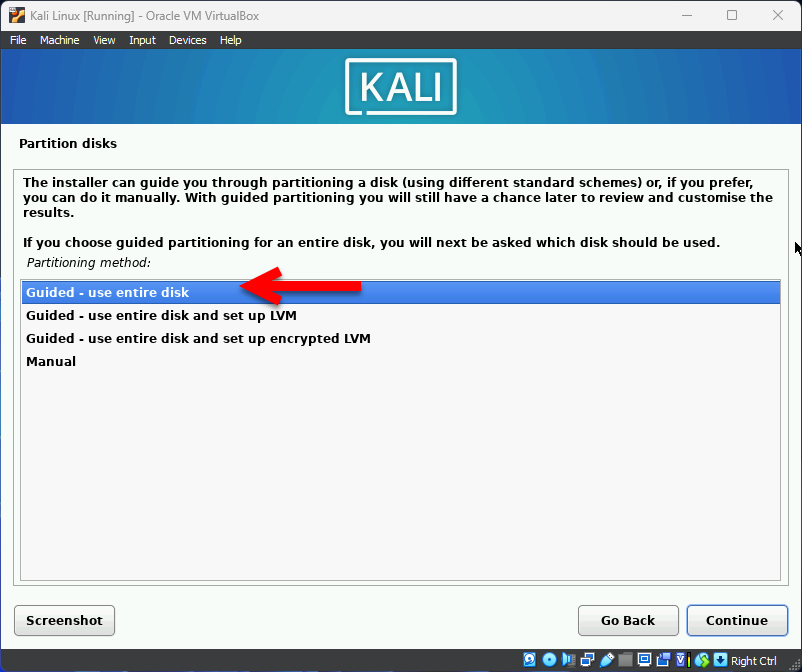
For partition disks, the installer can guide you through partitioning a disk, (using different standard schemes) or, if you prefer, you can do it manually. With guided partitioning, you will still have a chance later to review and customize the results. So, simply select the option (Guided – use entire disk) and click continue.
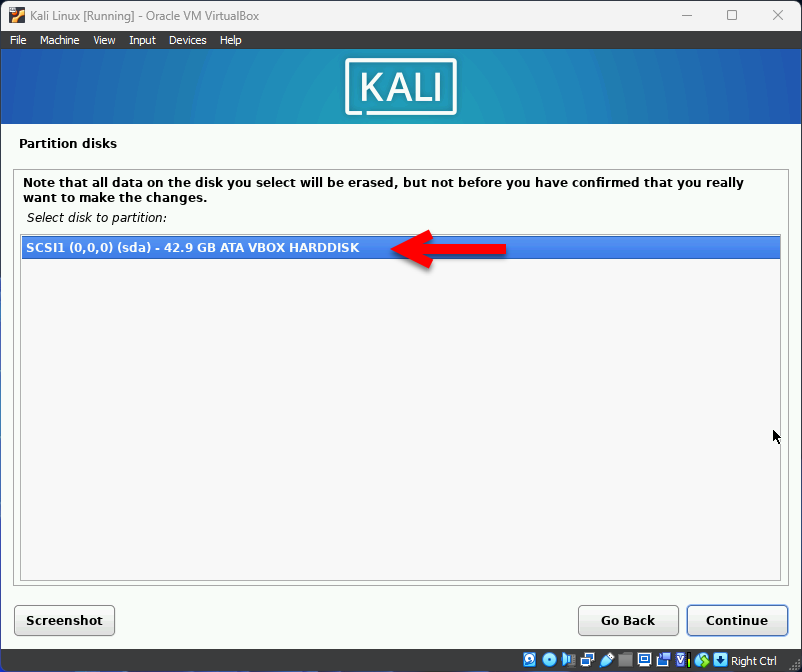
Note that all data on the disk you select will be erased, but not before you have confirmed that you want to make the changes. Select the option (SCSI1 (0,0,0) (sda) – 42.9 GB ATA VBOX HARDDISK) and click continue.
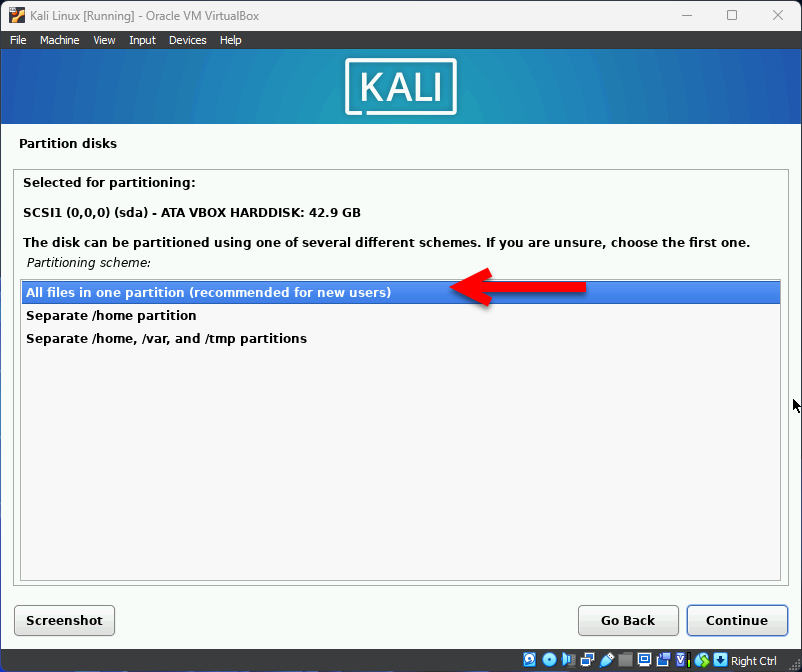
Select the partition, the disk can be partitioned using one of the several different schemes. If you are unsure, choose the first one. Simply, select the first option (All files in one partition (recommended for new users) and click continue.
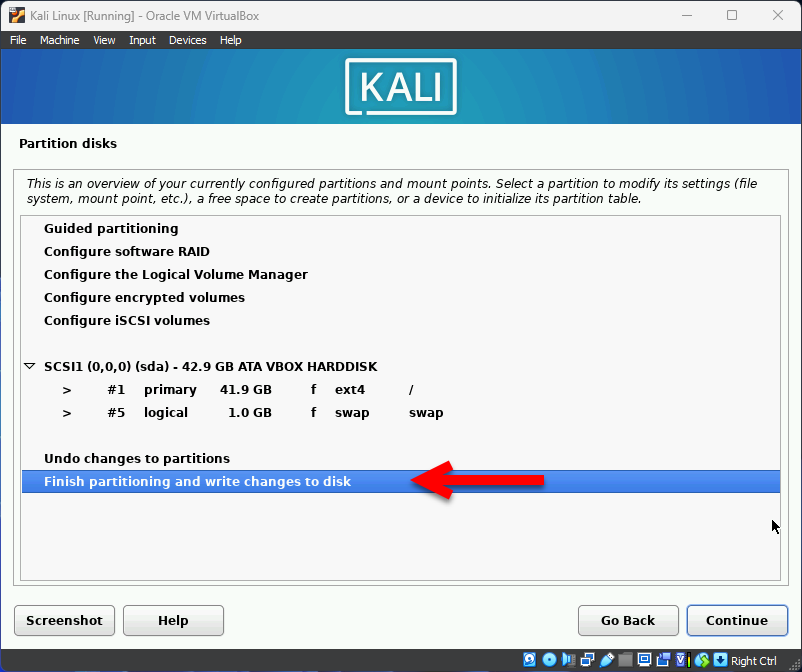
This is an overview of your currently configured partitions and mount points, select a partition to modify its settings (file system, mount point, etc) a free space to create partitions, or a device to initialize its partitions table. Select the option (Finish partitioning and write changes to disk) and click continue.
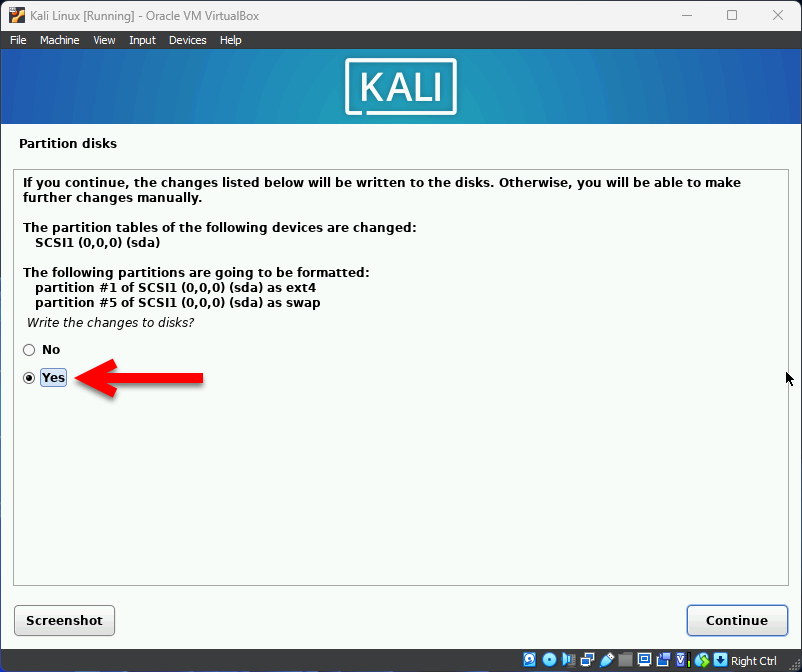
If you continue, the below changes will be written to the disks. Otherwise, you will be able to make further changes manually. Select the Yes option and click continue.
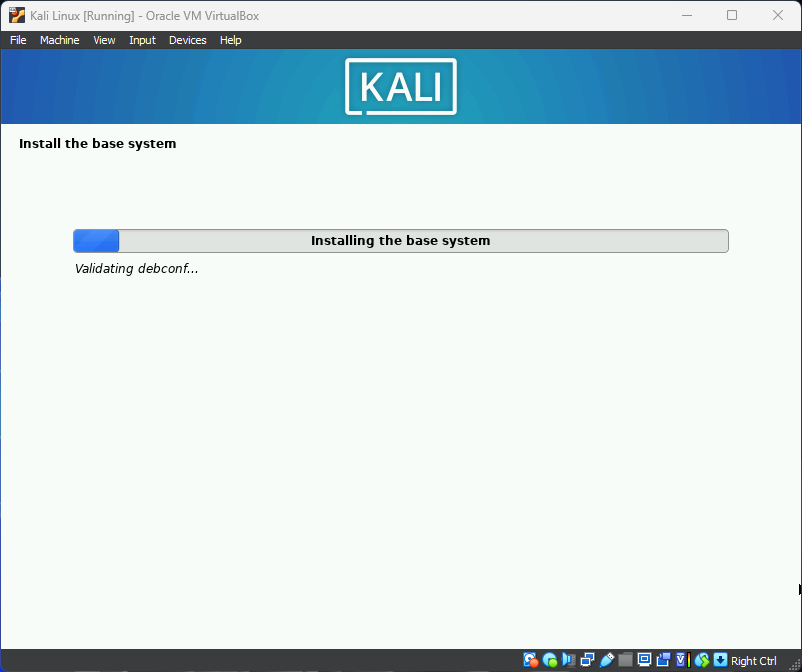
After you partitioned the disk, you will be able to install the Kali Linux on VirtualBox on a Windows PC system. So the installation process may take time to wait for it until it should be complete.
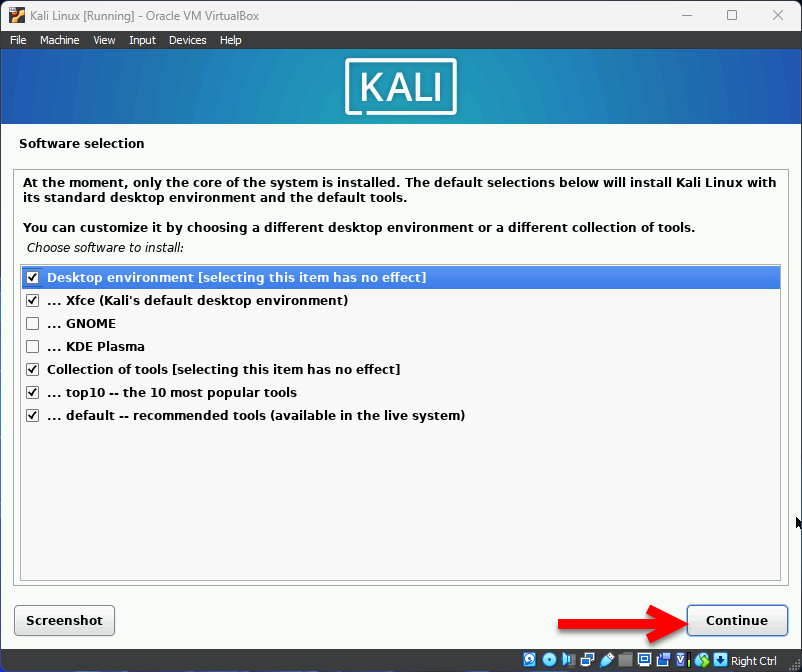
Software Selection, at the moment, only the core of the system is installed. The default sections below will install Kali Linux with its standard desktop environment and the default tools. So, select the software which you want to install with Kali Linux on VirtualBox and click continue.
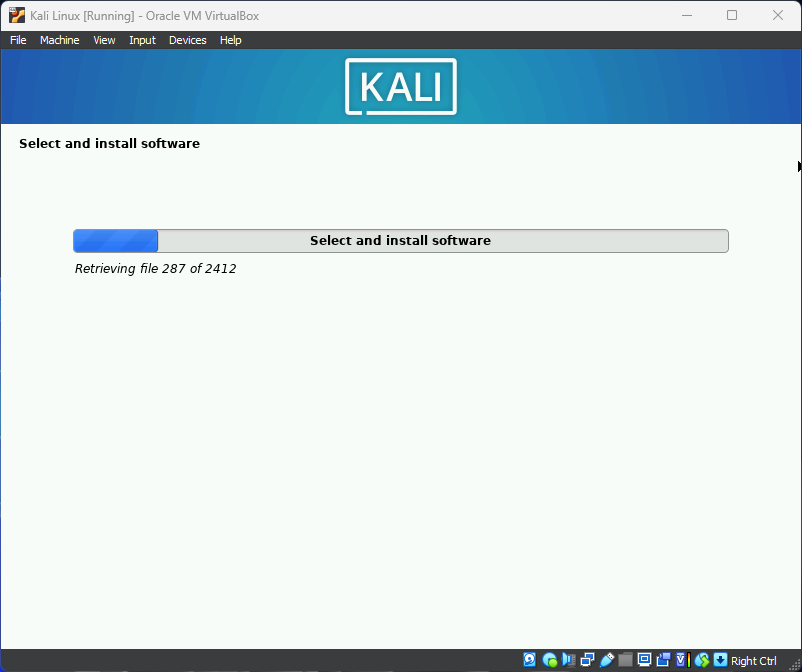
Now, please wait for it until the software should install, which you have selected in the previous step.
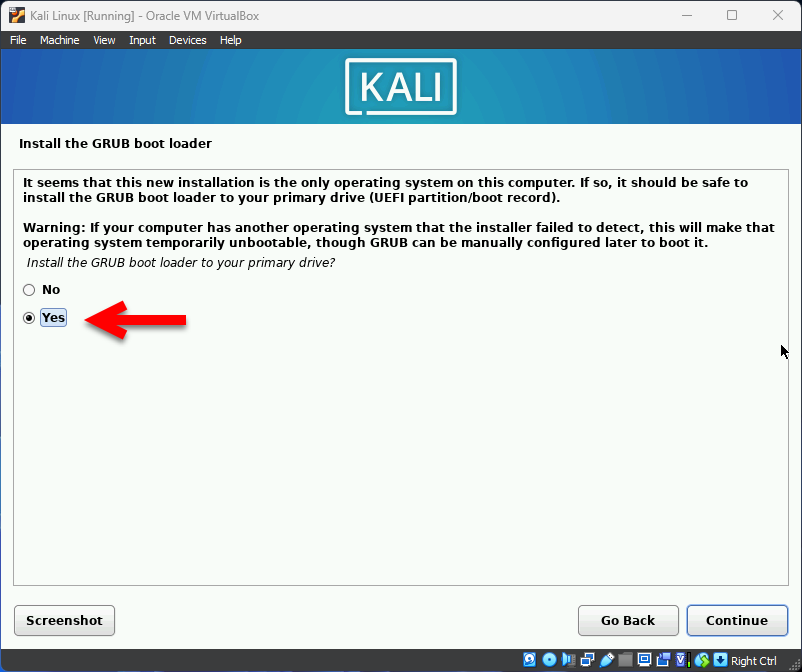
Install the GRUN Boot Loader, It seems that this new installation is the only operating system on this computer. If so, it should be safe to install the GRUB Boot Loader to your computer’s primary drive (UEFI Partition/boot record). Warning: If your computer has another operating system that the installer failed to detect, this will make that operating system temporarily unbootable, though GRUB can be manually configured later to boot it. So, simply select the Yes option for GRUB Boot Loader installation and click continue.
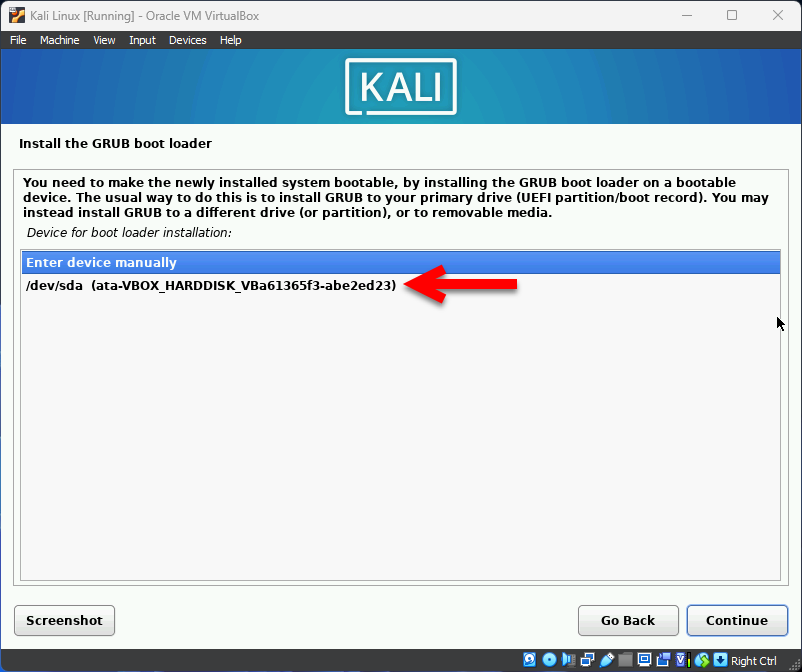
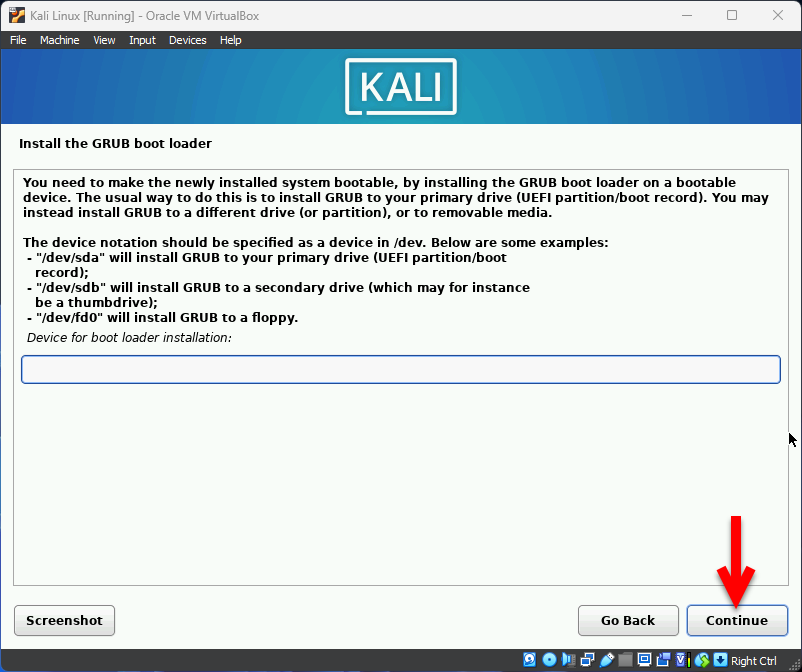
It would help if you made the newly installed system bootable, by installing GRUB Boot Loader on a bootable device. The usual way to do this is to install GRUB to your primary drive (UEFI partition/boot record). You may instead install GRUB to a different drive (or partition), or removable media. Now select the option (/dev/sda (ata-VBOX_HARDDISK_VBa61365f3-abe2ed23) and click continue.
It would help if you made the newly installed system bootable, by installing the GRUB boot loader on a bootable device. The usual way to do this is to install GRUB to your primary drive (UEFI partition/boot record). You may instead install GRUB to a different drive (or Partition), or removable media. In this step, there is nothing to do simply click on the continue option.
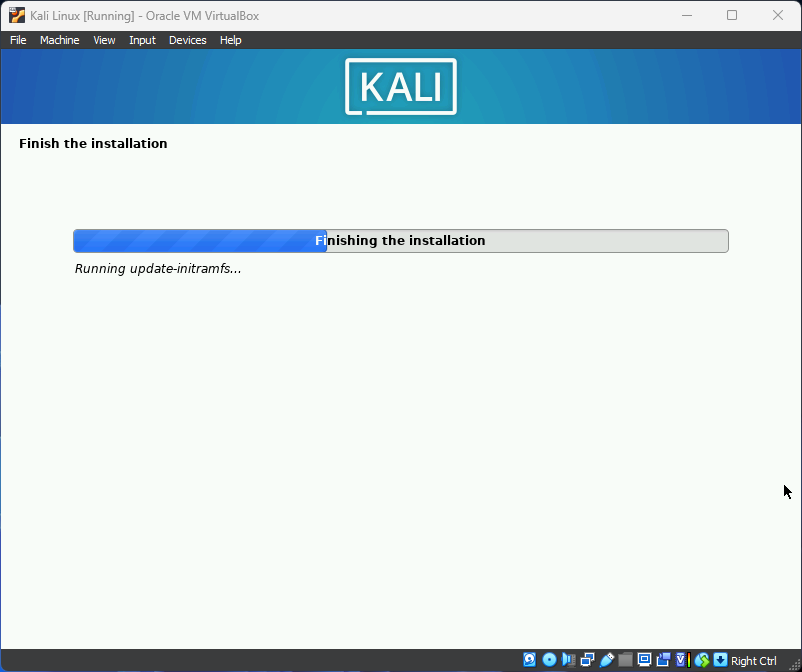
Now it’s finishing the installation, wait for it until it should complete.
Installation is complete, so it is time to boot into your new system. Make sure to remove the installation media so that you boot into the new system rather than restarting the installation. Simply, click on the continue option to reboot.

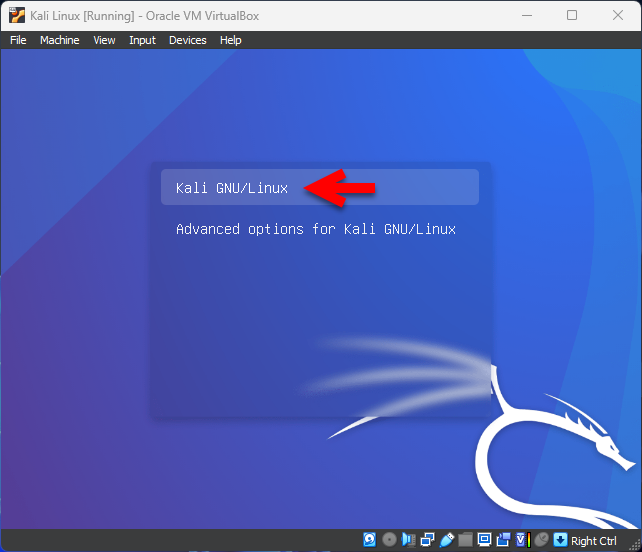
Once the virtual machine restarts the Kali Linux first welcome window will open, simply select the option (Kali GNU/Linux) and click continue.
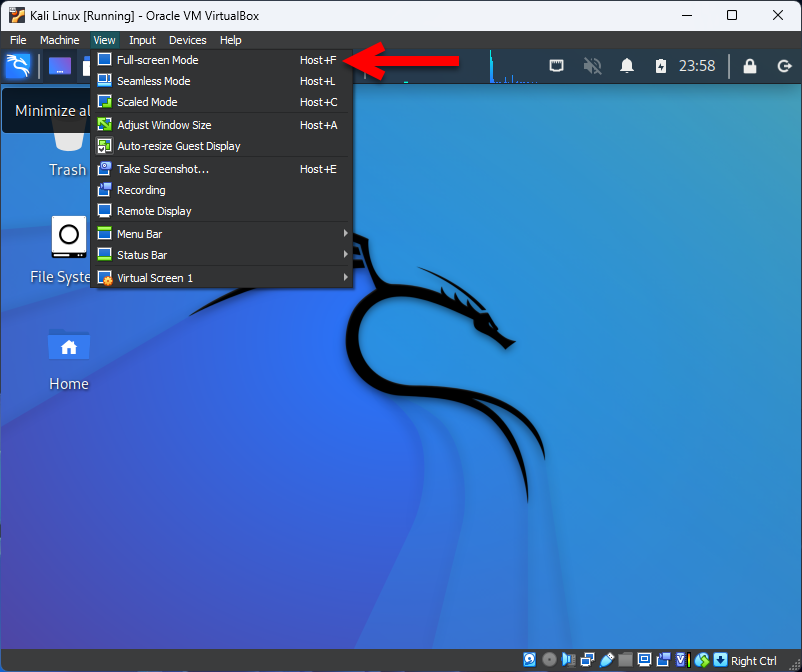
So, Kali Linux is successfully installed on VirtualBox on Windows 11 PC. Therefore, there is another thing you have to do is to enter the Kali Linux full-screen mode. To enter Kali Linux full-screen mode navigate to the top menu bar and click on View>Full-screen Mode.
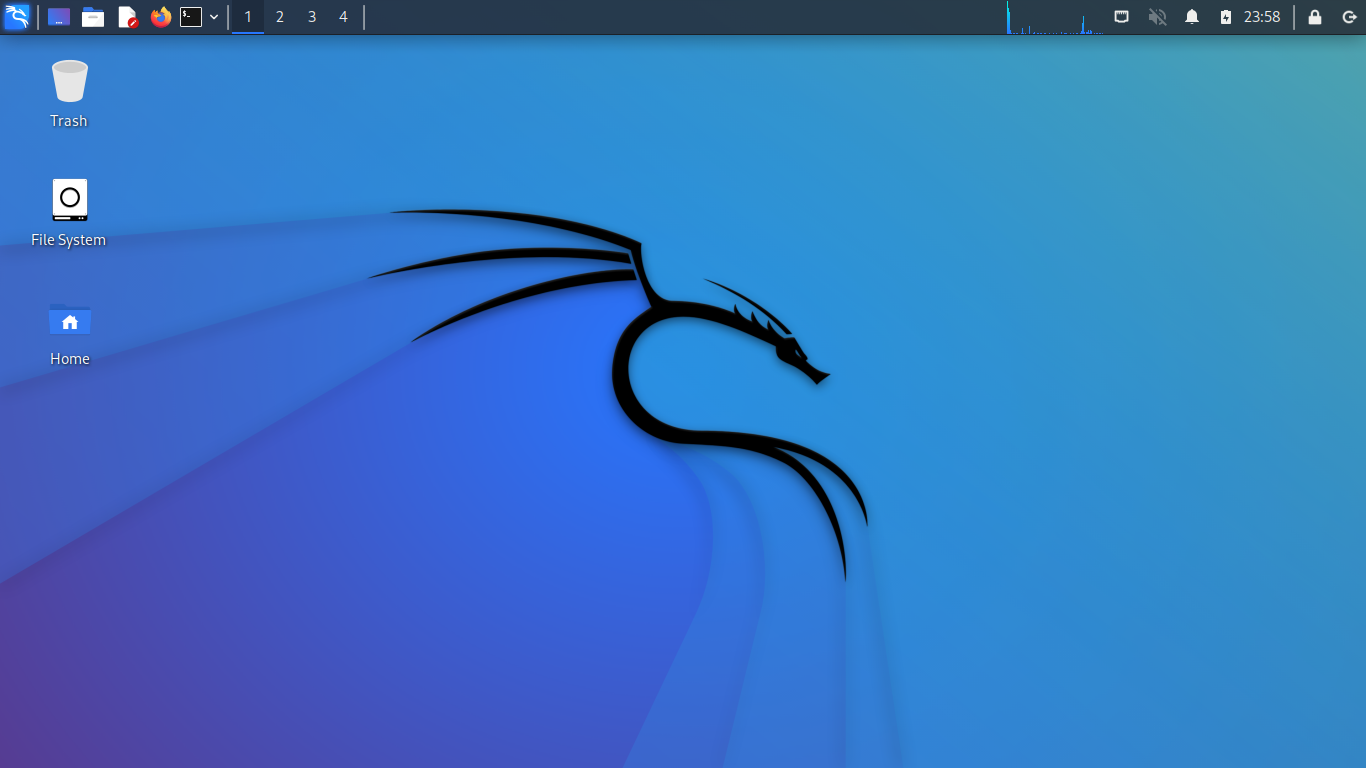
And finally, the Kali Linux beautiful screen with full-screen mode appeared on VirtualBox on Windows 11 PC. Simply, enjoy using Kali Linux on your Windows PC.
Conclusion
Using Kali Linux on VirtualBox on Windows 11 PC is interesting, you can install the Guest Tool Addition on Kali Linux to get further features. On the other hand, there are bundles of tasks that you can do on Kali Linux on VirtualBox. It’s right that you can’t do the tasks which you can do inside the actual Kali Linux but again the easy and simple task can be done on VirtualBox too.


3 Comments