macOS Monterey Won’t Start: Failed to Query SMC Value From the Host (VERR_INVALID_HANDLE)
macOS Monterey Won't Start: Failed to Query SMC Value From the Host (VERR_INVALID_HANDLE)
While installing macOS Monterey’s latest version on VirtualBox on Windows PC, during the installation I faced the following error.
VM Name: macOS Monterey VM
Faild to query SMC value from the host (VERR_INVALID_HANDLE).
Result Code: E_Fail (0X80004005)
Component: ConsoleWrap
Interface: IConsole {6a83d89-6ee7-4e3-38ae6-b257b2e81be8}
The above error is one of the critical errors for installing macOS Monterey on VirtualBox on a Windows PC. The error won’t allow you to install or proceed with a single step of the macOS Monterey installation on VirtualBox. On the other hand, this error can be fixed, in two different methods the first one is to downgrade your VirtualBox software to the older version. And the second method is to follow the below guide with a few codes to proceed to the insulation process.
Also, this error might be fixed if you use the vmdk file of macOS Monterey on VirtualBox on Windows PC. But when I used the macOS Monterey ISO image file then I faced the error. And finally, the error didn’t take much time, and I figured out the solution how to fix it and proceed to the installation of macOS Monterey on VirtualBox on a Windows PC.
macOS Monterey Won’t Start: Failed to Query SMC Value From the Host (VERR_INVALID_HANDLE)
While I was using the latest version of VirtualBox 7.0 I faced the above error, to continue the installation of macOS Monterey on VirtualBox on Windows PC.
These are the commands I’ve gleaned for setting it up on my AMD Ryzen 7 2700 Eight-Core Processor 3.20 GHz machine: If you want to continue installing macOS Monterey on any AMD machine then you have to follow the below down codes. On the other hand, if you want to continue installing macOS Monterey on any simple machine then follow the below down guide.
VBoxManage.exe modifyvm "MAC_OS_MONTEREY" --cpuidset 00000001 000106e5 00100800 0098e3fd bfebfbff
VBoxManage.exe modifyvm "MAC_OS_MONTEREY" --cpu-profile "Intel Core i7-6700K"
VBoxManage.exe setextradata "MAC_OS_MONTEREY" "VBoxInternal/Devices/efi/0/Config/DmiSystemProduct" "iMac19,1"
VBoxManage.exe setextradata "MAC_OS_MONTEREY" "VBoxInternal/Devices/efi/0/Config/DmiSystemVersion" "1.0"
VBoxManage.exe setextradata "MAC_OS_MONTEREY" "VBoxInternal/Devices/efi/0/Config/DmiBoardProduct" "Mac-AA95B1DDAB278B95"
VBoxManage.exe setextradata "MAC_OS_MONTEREY" "VBoxInternal/Devices/smc/0/Config/DeviceKey" "ourhardworkbythesewordsguardedpleasedontsteal(c)AppleComputerInc"
VBoxManage.exe setextradata "MAC_OS_MONTEREY" "VBoxInternal/Devices/smc/0/Config/GetKeyFromRealSMC" 1
VBoxManage.exe setextradata "MAC_OS_MONTEREY" "VBoxInternal2/EfiGraphicsResolution 1920x1080
VBoxManage.exe setextradata "MAC_OS_MONTEREY" "VBoxInternal/TM/TSCMode" "RealTSCOffset"
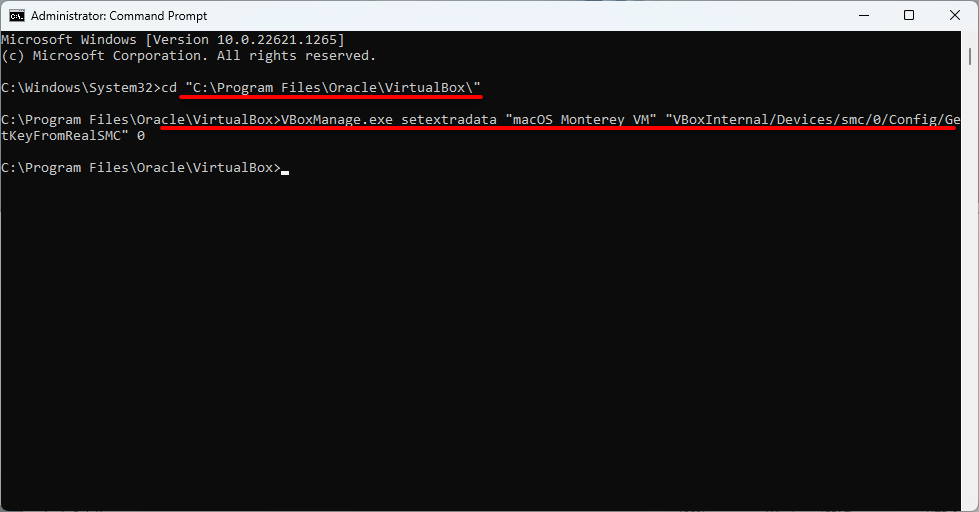
Running the following command fixed the issue for me.
VBoxManage.exe setextradata "Your macOS VM Name Here" "VBoxInternal/Devices/smc/0/Config/GetKeyFromRealSMC" 0Also, if the above commands didn’t work for you then simply run the below-down commands and restart your computer. Come back open up the VirtualBox and start installing macOS Monterey.
bcdedit /set hypervisorlaunchtype off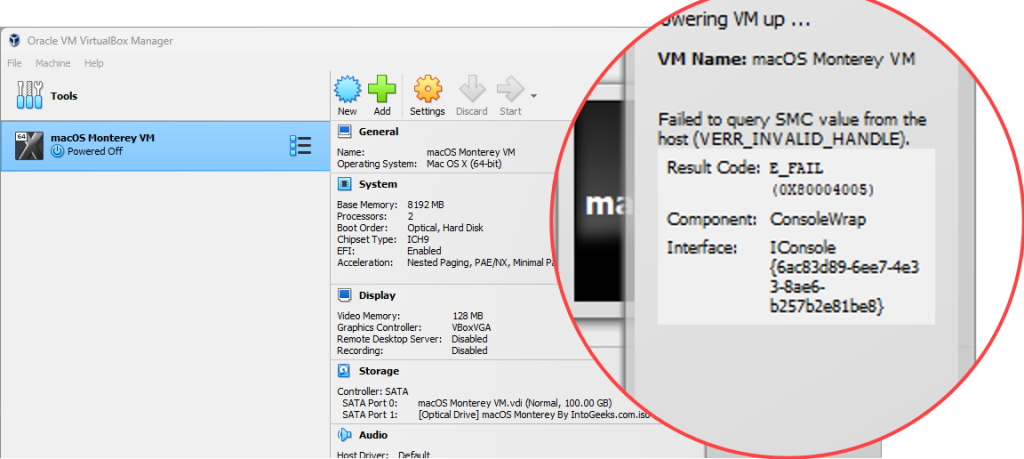
Simply replace the above code (VM Name) with the name of the macOS Monterey virtual machine, like below down screenshot.

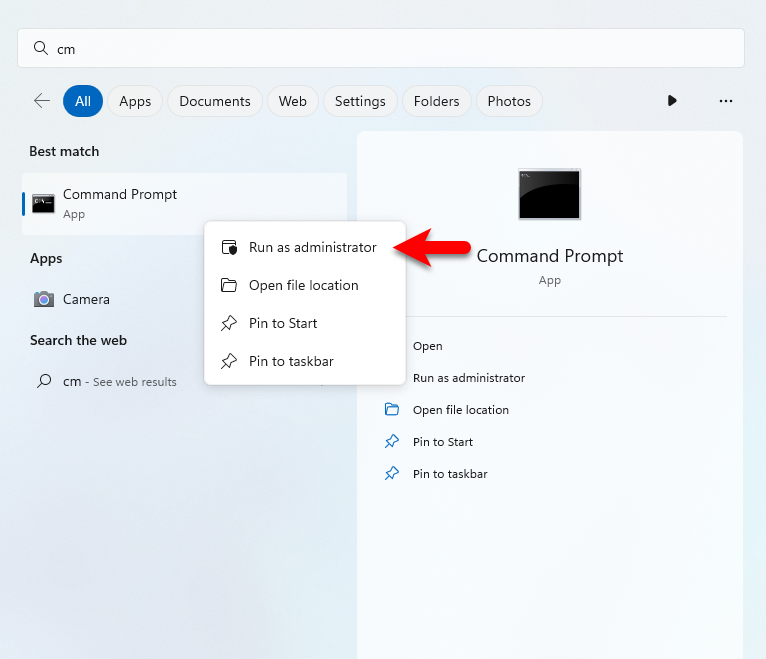
Now head over to the Windows starts menu, and open the command prompt with administrator.
Once the command prompt opened, enter the commands line by line and hit enter.
Conclusion
Once you applied the commands simply, head over to the VirtualBox and open it. Select the macOS Monterey virtual machine and click start, and you will see the installation is successfully booted. If the first command didn’t work for you then try to apply the second command.

