After installing macOS Big Sur on any other older or newer version of macOS operating systems on VMware you might notice that the drag & drop and the full-screen mode are not enabled by default. Also, the macOS on VMware is not working smoothly or responsive. In this case, you have to install the small tools called VMware Tools. This small tool helps you to use macOS Big Sur full-screen resolution and enable the drag & drop features. The VMware Tools is not an internal tool on any macOS operating system, so this tool has been developed and built by VMware Inc that helps you to fix the performance features, full-screen resolution, and drag & drop features on VMware Workstation.
- How to Install macOS Big Sur Final on VirtualBox on Windows PC?
- How to Install macOS Big Sur Final on VMware on Windows PC?
What is VMware Tool?
VMware Tools is a suite of software utilities that enhances the performance, functionality, and management of virtual machines running on the VMware platform. It provides features such as improved graphics, mouse, and keyboard synchronization, time synchronization, file sharing, and network connectivity. VMware Tools also includes drivers that enable the guest operating system to interact more efficiently with the virtual hardware provided by the host. Installing VMware Tools is a recommended step when creating new virtual machines, as it improves the overall experience of using virtualization.
There are two methods that you can install the VMware Tools on any macOS on VMware on Windows PC. The first method is you have to download the VMware Tools manually from the VMware Inc official website. And the next method is you have to go to the view tab and click on install VMware Tools.
Related:
Fix macOS Big Sur Screen Resolution on VMware on Windows PC
- To fix the macOS Big Sur screen resolution simply download the VMware Tools.
- Attach the VMware Tools to macOS Big Sur
- Install the VMware Tools
- Allow VMware Tools on the macOS security settings window.
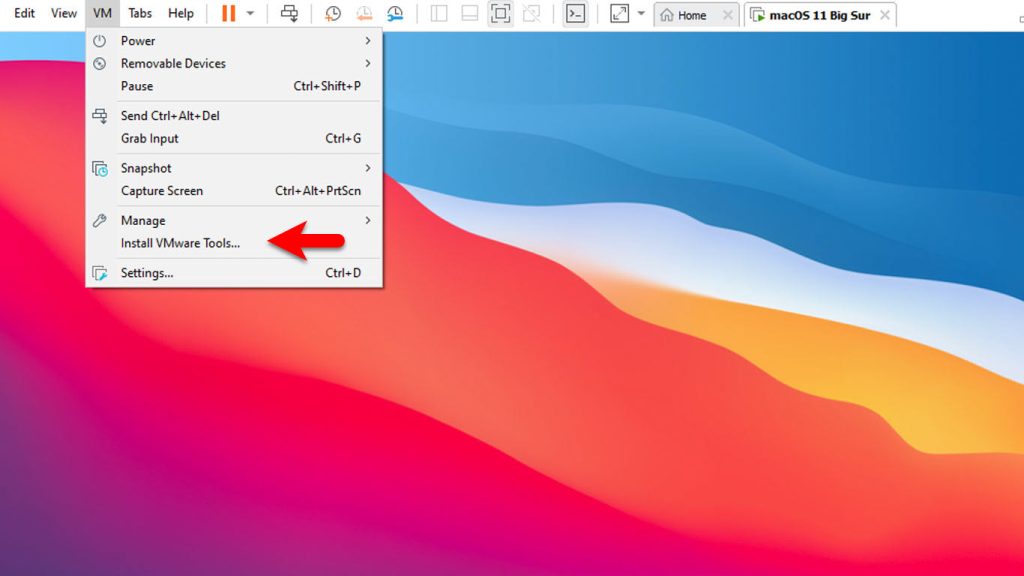
To install the VMware Tools on macOS Big Sur head over to the VM tab>click on Install VMware Tools.
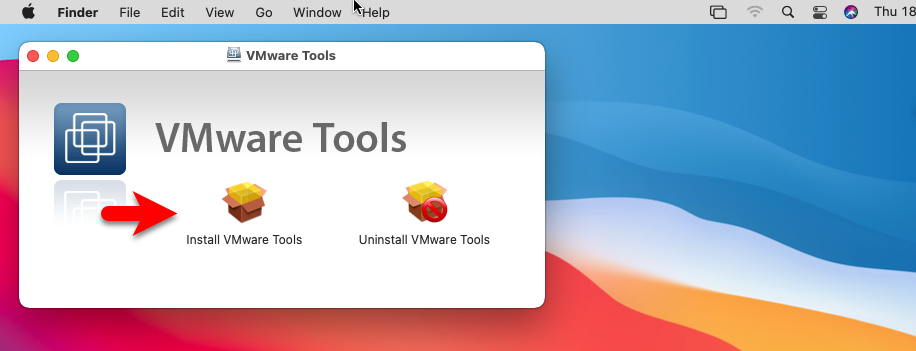
Once the VMware Tools application appeared on the desktop double-click on launch the installation. On the first installation window double-click on install VMware Tools.
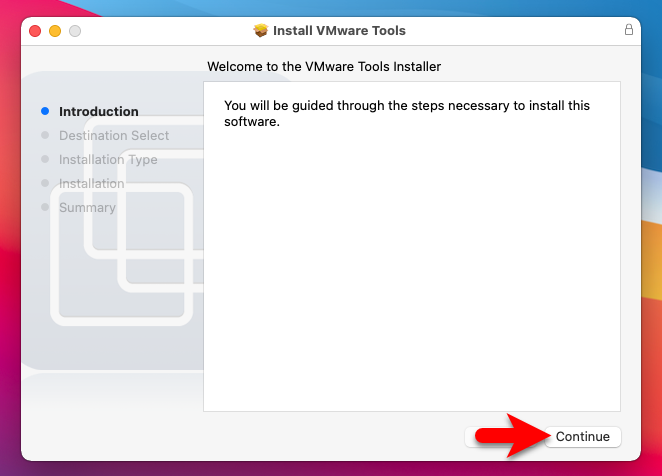
On the introduction, window click on continue.
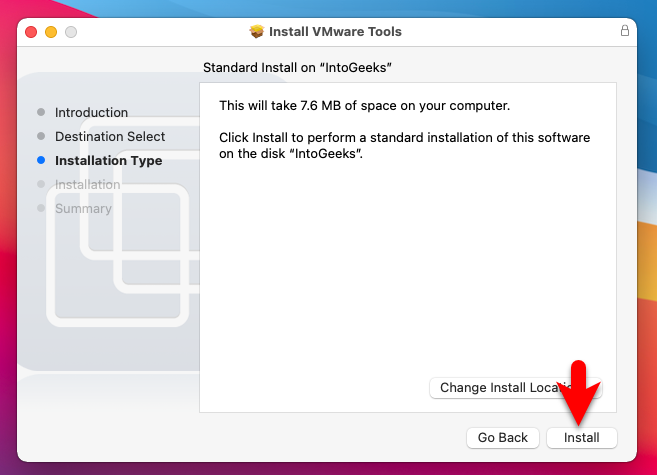
On the installation type window again and click on the install button to proceed to installation.
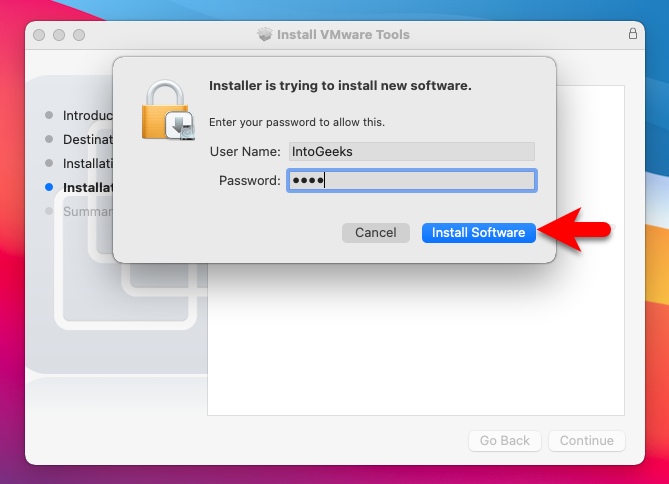
When this widow popped up type your username and password and hit on install software.
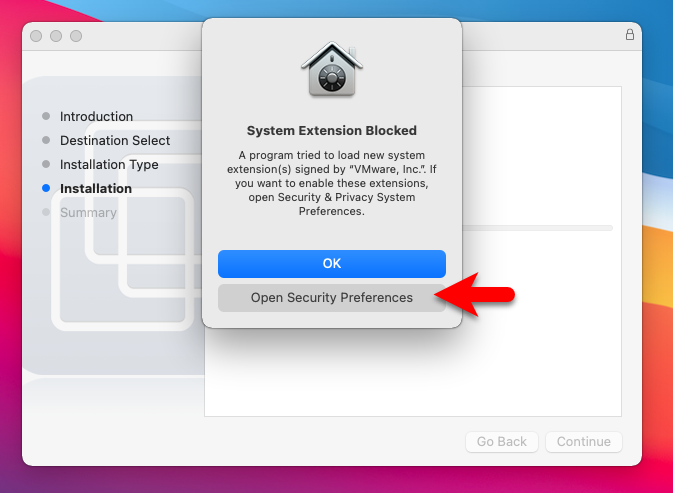
While the system extension blocked window opened, click on the open security and preferences option.
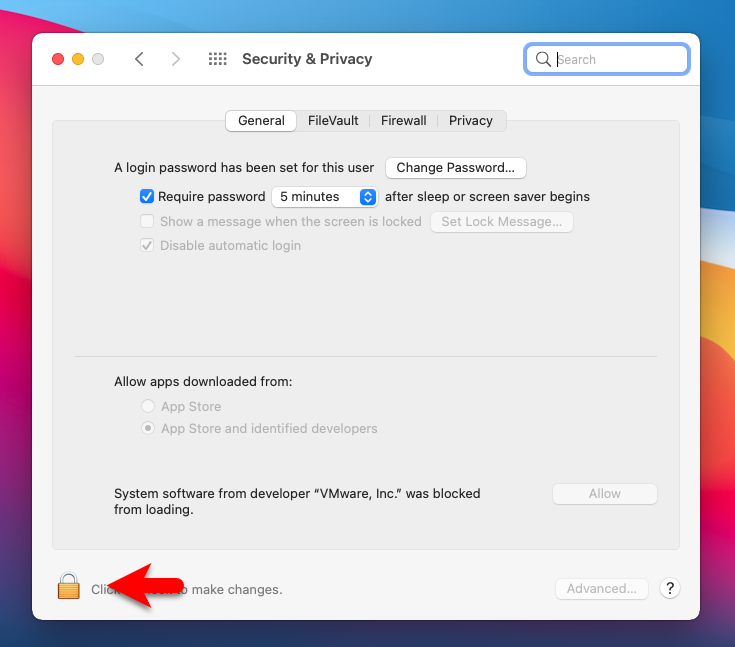
On the security and preferences window click on the lock icon option.
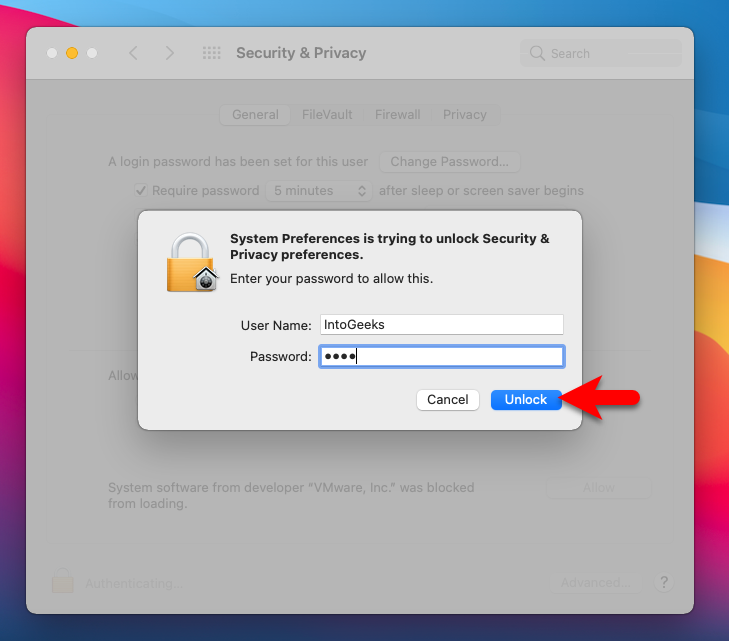
Now again enter your username and password and hit unlock.
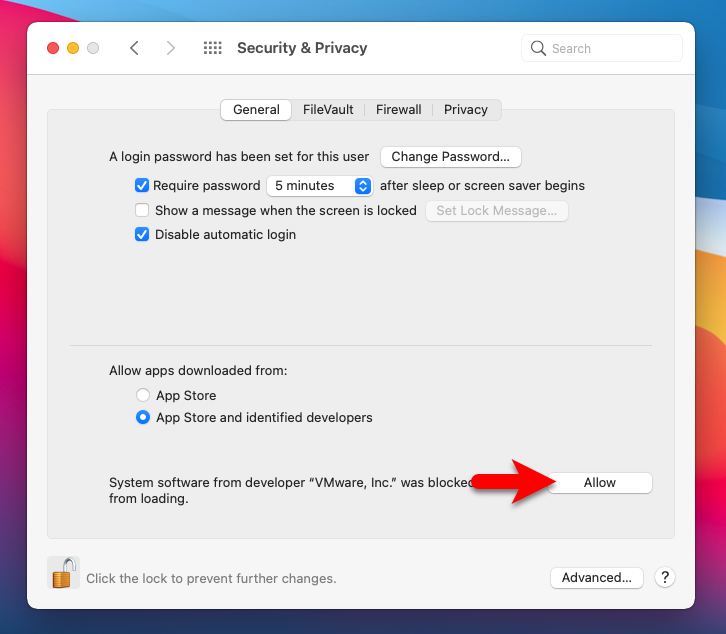
After you unlocked the preferences features, simply click on Allow option to allow the VMware Tools on macOS Big Sur on VMware.
After clicking on the Allow option, you will be required to restart the virtual machine, don’t click on the restart option simply click on the not now option.
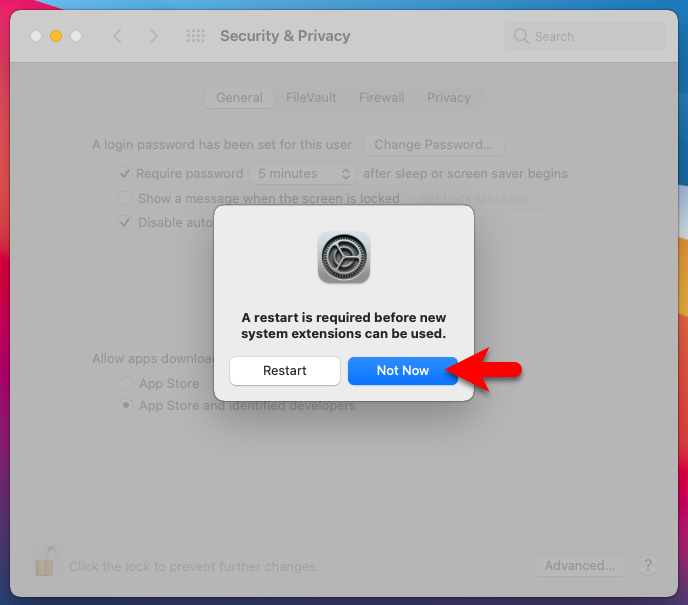
Close the security and preferences window and click on the restart option to restart the virtual machine.
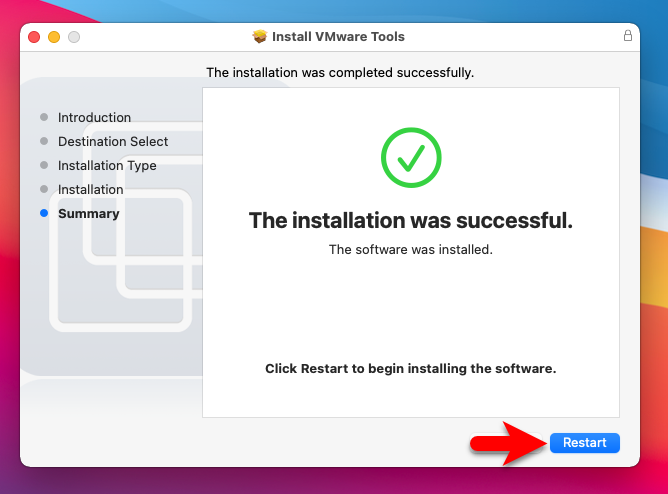
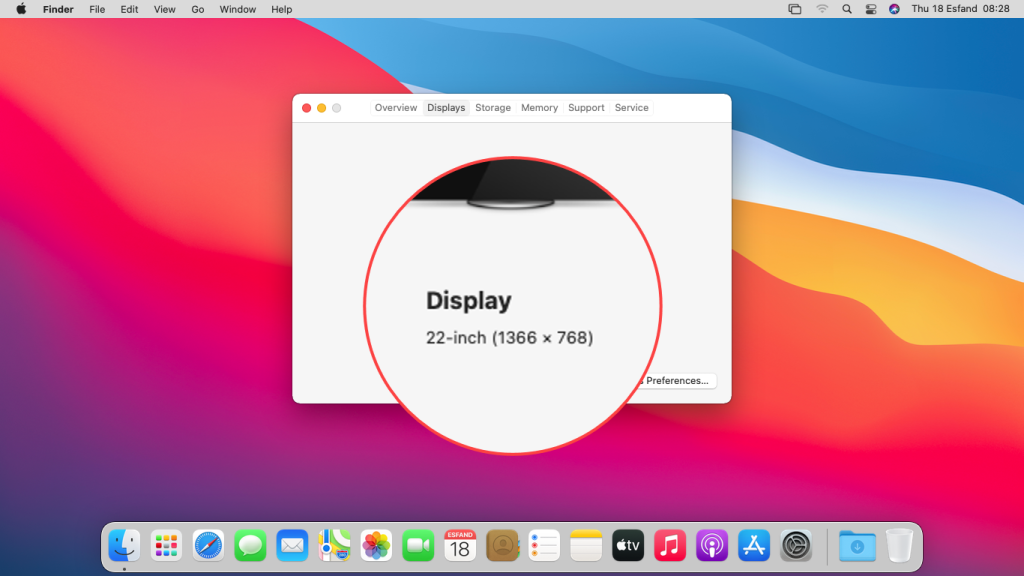
Once the virtual machine is successfully restarted simply go to the left-handed window side and click on the Apple logo. Then click on the display tab to check the full-screen resolution of macOS Big Sur.
Conclusion
Once the VMware Tools is successfully installed on macOS Big Sur on VMware on Windows PC. You will be able to use the full features of macOS Big Sur such as drag & drop, full-screen mode resolution, and the highest performance. Also, if I missed any steps feel free to comment in the below comment section.

